Table of Contents
Advertisement
Advertisement
Table of Contents

Related Manuals for Arylic H50


Summary of Contents for Arylic H50
- Page 1 User's Manual Wireless Multiroom Full Digital HiFi Amplifier Multi Room...
-
Page 3: Table Of Contents
Table of Contents 1. Introduction .................................. 1 2. What's in the box ................................1 3. Main Features ................................2 4. Specification ................................3 5. Interface ..................................4 6. Remote controller ................................ 6 7. Installation ..................................7 7.1 Passive Speakers ..............................7 7.2 Phono in ................................. -
Page 4: Introduction
1. Introduction Arylic H50 is a wireless multiroom full digital HiFi amplifier, it can connect to 2.4G and 5.8G WiFi network and supports aptX HD BT transmission and reception. H50 supports Spotify connect, Tidal connect, Airplay 2 and many famous online music services that you can stream music from. H50 also comes with a rich selection of analog and digital inputs including phono input for use with turntable which needs higher amplification, TV ARC input for use with TV. -
Page 5: Main Features
3. Main Features 50Wx2 CH@4ohm, 30Wx2 CH@8ohm 50Wx2 CH@8ohm (Boost) full digital amplifier. Streaming music via network without distance limitation or Bluetooth5.2 up to 10 meters. Bluetooth for true high resolution music. Spotify connect, Tidal connect, Airplay2, Qplay, DLNA, UPnP streaming protocols supported. Support Work with Alexa to play music with other Alexa devices in group or control by Alexa built-in device with voice. -
Page 6: Specification
4. Specification NETWORK IEEE802.11 b/g/n 2.4G/5G WiFi RJ45 Ethernet BLUETOOTH Bluetooth Standard aptX HD, aptX LL, aptX AD, AAC, SBC Codec AMPLIFIER Amplifier Power 24V 4ohm 50Wx2, 24V 8ohm 30Wx2, 24V 8ohm 50Wx2 (Boost) Speaker Impedance 4-8ohm Frequency Response 20Hz to 20kHz <0.1% @ 1W 1kHz THD+N >93db @ Max power... -
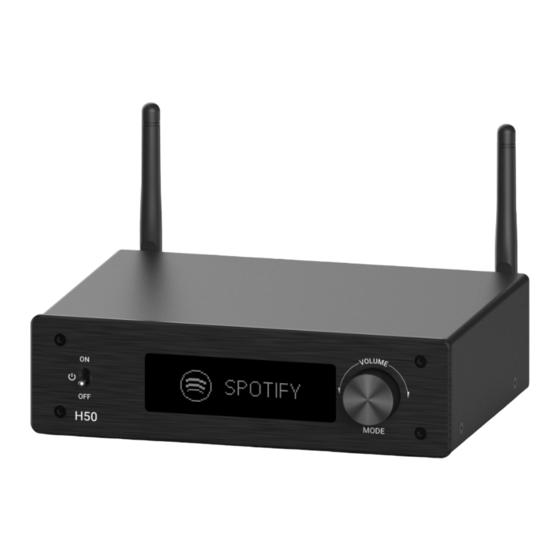
Page 7: Interface
5. Interface 1. Power Button: Turn on/off device 2. IR Receiver: For remote controller 3. Display Panel: Display the current source input and other info 4. Volume Knob + Mode Button: Turn to change volume / Press to change audio input mode... - Page 8 12 13 14 17 18 19 5. Bluetooth Antenna: For Bluetooth connection 6. DC input: Connect the 24V/4.16A power supply 7. Speaker Terminals: For connection to passive stereo speakers 8. GND: To connect to Turntable ground wire 9. Load Switch: To switch between 4/8Ω load, Turn off the power before switching 10.
-
Page 9: Remote Controller
6. Remote Controller... -
Page 10: Installation
7. Installation Install both antennas to the device and plug in the power adaptor. (Please make sure power is off before connecting.) DC input 7.1 Passive Speakers Use speaker cable to connect the device to your passive speakers. You can set the Load switch to 8ohm to have 50W power when you use 8 ohm speakers. *Do not connect 4ohm speakers when Load switch is set to 8ohm. -
Page 11: Phono In
7.2 Phono in Connect the turntable Audio out to the Phono in RCA connectors. If your turntable has GND socket, you can connect it to the GND socket on the device. This is optional, if your turntable doesn’t have GND socket, you can ignore it. *Do not connect other device Line out to Phono in, it will create very loud voice and might damage the device and connected speakers. -
Page 12: Line In
7.3 Line in Connect any playback device with Audio out/Line out/AUX out to Line in using an RCA cable. Line in 7.4 Optical in Connect any playback device with Optical out to Optical in using an optical cable. Optical in... -
Page 13: Tv Arc
7.5 TV ARC If you TV has HDMI ARC port, there should be a ARC text beside. You can use a HDMI cable to connect it to the ARC port on the device. 7.6 USB Disk Drive Plug in USB disk drive to the USB Host to play music. -
Page 14: Connect To Pc
7.7 Connect to PC Connect PC with a USB Type-C cable. Please make sure this cable is a Data link cable and not just a charging cable, or else your PC will not recognize the device. 8. How to Use 8.1 App Download Download the 4Stream application from App Store for iOS based devices and Google Play Store for Android based devices. -
Page 15: Connection
There is another way to setup Wifi if the above 8.2 Connection method has failed: 8.2.1 First time usage & BLE WiFi Setup 1. Power up the device. 1. Power up the device. 2. The LED light will start flashing quickly, wait till it 2. - Page 16 (Note: The mobile phone and the device must be in the same network) 8.2.3 Bluethooth H50 has 2 different Bluetooth Mode: TX (Transmitter) and RX (Receiver). Bluetooth TX: TX mode is used to connect to Bluetooth speaker or Bluetooth Headphone or other Bluetooth receiver device and stream music to these devices.
-
Page 17: App Features
8.3 App Features 8.3.1 Device setting Rename: Change the device name. EQ: Setup EQ values or choose preset EQ to your liking. Speaker info: Display device information like IP address, Mac address, SSID, firmware version, factory reset, etc. Alarm Clock: Setup up to 4 different alarm clocks with music of your choice. Amazon Alexa Settings: Setup Alexa language and turn on/off Amazon UHD. -
Page 18: To Play Music From Nas
8.3.4 Line in Mode You can connect any analog device with line out to H50. You will need to switch to Line in mode with the Mode button on the device, use the remote controller or in the 4Stream APP. -
Page 19: Phono In Mode
8.3.6 Optical in Mode You can connect any device with digital optical output to H50. You can press the Mode button on the device, use the remote controller or in the 4Stream APP to switch to Optical in mode. -
Page 20: Hdmi Arc Mode
If you have many music files and you want to play them, you can store them in a USB disk drive and playback from H50. Just plug in the USB disk drive with music files and H50 will auto switch to USB Mode and playback the music. -
Page 21: Streaming Services
8.4 Streaming Services To use the online streaming services, iHeartRadio, Spotify, Tidal, Qobuz and Deezer may need to register account at the service provider platform. 8.4.1 Spotify Connect Use your phone, tablet or computer as a remote control for Spotify. Go to spotify.com/connect to learn how. - Page 22 8.4.2 Tidal Connect Listen out loud with Tidal Connect 1. Connect your device to your wifi network 2. Open up the Tidal app on your phone, tablet using the same wifi network 3. Select a song and select Devices Available. 4.
-
Page 23: Multiroom And Multizone
8.4.5 Qplay Our Devices Support QQ Music using the Qplay protocol, you have to turn on the Qplay in the QQ Music player setting and then find the device in the Qplay list. 8.5 Multiroom and Multizone Users can group multiple rooms and zones on the application. For example, you can group devices 1, 2 and 3 to play the same music in sync, or group devices 1 and 2 as zone A and devices 3 and 4 as zone B, and play different music in zones A and B. -
Page 24: Left And Right Channel
8.5.1 Add / Remove Device to Multiroom In order to add device to multiroom function, click on the “+” mark of the device you want to be the master device. A list of available devices will pop out and you can select the device you want to add as slave device. -
Page 25: Change Input Source Mode
8.8 Change Input Source Mode Method 1: Change on Application Users can change play mode on the application, WiFi, Bluetooth, Phono input, Optical input, HDMI ARC, Line input and USB. To change from Bluetooth/line input/USB to WiFi, only need choose the online streaming services such as Tidal, Qobuz or Spotify or cell phone local storage music or any music via DLNA or UPnP streaming. -
Page 26: Play On Pc
9. Play on PC There are Several Tools to Play Music from the PC 9.1 To Play Music From iTunes on Mac and Windows PC Our devices can stream audio sources from local storage, media library in Mac and Windows PC and online services from iTunes. -
Page 27: Usb Audio
9.3 USB Audio Connect the device to your PC with USB cable (make sure it’s a data cable including the signal wires). The PC will automatically discover a USB sound card, and when you select it as the system main output, the PC will send the audio output to the device in digital (44.1KHz/16bits). -
Page 28: Up2Stream Acpworkbench (Sell Separately)
10. Up2Stream ACPWorkbench (Sell Separately) Connect the Up2Stream device to your PC with USB cable (make sure it’s a data cable including the signal wires). And open the program ACPWorkbench (only support Windows.), and you can tune audio effects conveniently, including Music Noise Suppressor, Virtual Bass, Stereo Widener, Exciter, 10 bands EQ, Configure output channel and PIN configs. -
Page 29: Legal Notice
Legal Notice FCC Statement: Federal Communication Commission (FCC) Radiation Exposure Statement When using the product, maintain a distance of 20cm from the body to ensure compliance with RF exposure requirements. This device complies with part 15 of the FCC rules. Operation is subject to the following two conditions: (1) this device may not cause harmful interference, and (2) this device must accept any interference received, including interference that may cause undesired operation. -
Page 30: Faq
Q: Do your devices support airplay and third-party DLNA apps? A: Yes. They support airplay and third-party apps like foobar2000, musicbee... Q: How many zones can you group in one system? A: 12 rooms is the maximum, while 8 zones are recommended. Q: What distance can your wireless audio system cover? A: Once the system is connected to your WiFi router, you can stream your music anywhere there is a WiFi signal. - Page 32 ©Copyright 2023 by Arylic. All Rights Reserved. The information contained in this guide is believed to be accurate and reliable. Arylic assumes no responsibility for any errors contained in this guide. Arylic reserves the rights to make changes in the specifications and/or design of the above mentioned product without prior notice.
Need help?
Do you have a question about the H50 and is the answer not in the manual?
Questions and answers