
Related Manuals for Nice Domi WS


Summary of Contents for Nice Domi WS
- Page 1 Domi Climatic sensor EN - Instructions and warnings for installation and use...
- Page 2 2 – English...
- Page 3 hysteresis threshold: set threshold value: e.g. positioned automatically gust of wind 60 km/h at half the set threshold km/h value instantaneous wind speed over-threshold momentary drops in speed, within the hysteresis hysteresis values drops in speed lasting under-threshold less than 10 minutes “0”...
- Page 4 Not raining presence/absence of rain Raining “0” “1” sensor dry system active automatic operation system deactivated after 10 seconds after 10 minutes system deactivated manual manual commands activated operation 4 – English...
- Page 5 sunrise daytime dusk night-time klux set threshold light value: e.g. 30 klux intensity over-threshold momentary drops in light, within the hysteresis hysteresis values drops in light, within the under-threshold under-threshold values hysteresis threshold: posi- tioned automatically at half the set threshold value “1”...
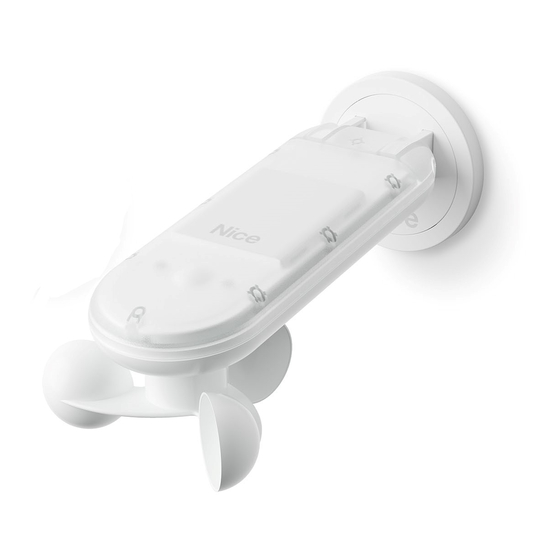
- Page 6 Quick reference Rain sensor (WSR) B button Solar cell (WSC) guide sensor Button Wind sensor Button Step 1 - Installation and connections 100–240 V AC, 50/60 Hz (WS and WSR only) 6 – English...
- Page 7 100–240 V AC 50/60 Hz (WS and WSR only) 6 m m 1 5 m WSC Activation WS / WSR Activation orange-off-green orange-off-green LEGEND LED OFF LED ON Press and hold the button Green LED LED flash Release the button Press and release Orange LED Multiple LED flashes...
- Page 8 Step 2a - Memorizing the sensor in MONO mode with a previous transmitter “B” “B” (red) (red) (red) .sec. .sec. “B” “B” .sec. .sec. Hold down (2-4s) LED Release LED Hold down LED Wait Release Wait NOTE “B”...
- Page 9 Step 3 - Confirming memorization “B” Start UP movement Press 1 time to stop Step 4 - Testing the “Sun” sensor The “Sun” feature must be activated in the motor. “LED” (green) (green) ≥ 1klux ≥ 1klux .sec. .sec. flashing Illuminate the sensor Hold Down Wait...
- Page 10 Step 5 - Testing the “Wind” sensor “LED” (red) (red) .sec. .sec. flashing Hold down Wait LED Release Actuate the blades Up Series of flashes NOTE “LED” (red-green) “B” “B” flashing Stop the blades Series of flashes Press 1 time (...
- Page 11 Step 7 - Setting "Sun" threshold “LED” (green) “LED” (orange) 1 press -> 1 flash -> 1st level 1 flash -> 1st level 2 presses -> 2 flashes -> 2nd level 2 flashes -> 2nd level ... presses -> ... flashes -> ... level ...
- Page 12 Fig F - Factory reset “LED” (orange) “LED” (red) .sec. .sec. flashing flashing Hold down Wait LED (*) Wait LED Release (*) Only WSR. “LED” (red) 10 sec. (green) 10 sec. After factory reset default protocol is BIDI. 1 flash ...
- Page 13 Addendum Programming/binding with tubular motor in BIDI method with TTPRO BD “B” “B” “LED” (red) “LED” (red- “B” “B” (orange) green-orange) “B” “B” flashing flashing Hold down (6-8s) Sequence Release LED Press 1 time LED (green) (red) (red) (orange) flashing...
- Page 14 Programming/binding with BIDI Shutter “B” “B” (red) (red) (red) (red) “B” “B” Hold down (2-4s) LED Release LED Hold down LED Release LED NOTE (red) (red) (red) “B” “B” flashing flashing flashing Hold down LED ...
- Page 15 Programming/binding with BIDI Awning “B” “B” (red) (red) “B” “B” Press the programming of the already Press the key ▼ or third channel to Hold down (2-4s) LED Release LED Wait Wait memorised transmitter enter the programming mode NOTE “B”...
-
Page 16: Product Description And Intended Use
Operations other than as specified can only cause for awnings, shutters, skylights, etc. with Nice tubular – (fig. 3) the area must ensure exposure of the wind malfunctions. The manufacturer declines all liability motors and control units. -
Page 17: Product Installation
4.1 - Memorising climatic sensor using an already 4.3 - Memorisation through the “Enable Code” solid and guarantee a stable fixture. • Make sure that the sensor is protected against ac- memorised transmitter in Monodirectional mode 1. Press and hold the B Button for 8 to 10 seconds, cidental impact. - Page 18 button. to a middle position. in real time; when it exceeds the threshold for at least 1. Illuminate the sun sensor with bright sunlight; if the • To escape the procedure at any point, press the B 2 minutes, the sensor sends the "Sun over-threshold" day is very cloudy, use a lamp.
-
Page 19: Battery Protection
8 - RESTORING FACTORY DEFAULTS (FIG. F) Table 2 - available "Wind" thresholds Time Action The reset procedure will restore default values of <1s Wind Level Thresh- 2 flashes 40 kph thresholds: (click) blink normal 3 flashes 60 kph 1. Press and hold the Button and Button for 9 2-4s... -
Page 20: Eu Declaration Of Conformity
■ Number of motors that can be combined: EU DECLARATION OF CONFORMITY MOMODIRECTIONAL motors: no limits BIDIRECTIONAL Motors: 2 motors Hereby, NICE S.p.A., declares that the radio equip- ment types Domi WS, Domi WSC and Domi WSR • “Sun” sensor compliance with Directive 2014/53/EU. - Page 24 Nice SpA Oderzo TV Italia www.niceforyou.com info@niceforyou.com...
Need help?
Do you have a question about the Domi WS and is the answer not in the manual?
Questions and answers