Table of Contents
Advertisement
Quick Links
S2 0 0 & S 2 01
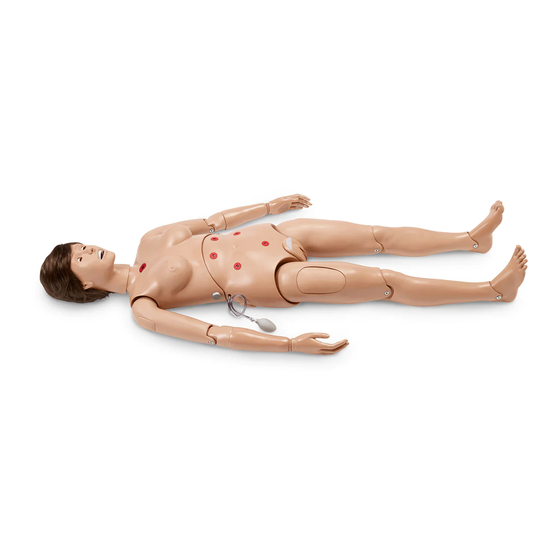
Su s ie S i m o n®
User Guide
User Guide 20.1.1
Simple Simon is an interactive educational system developed to assist a certified
©2020 Gaumard Scientific
instructor. It is not a substitute for a comprehensive understanding of the subject
All Rights Reserved
matter and not intended for clinical decision making.
www.gaumard.com
Advertisement
Table of Contents

Subscribe to Our Youtube Channel
Related Manuals for Gaumard Susie Simon S200


Summary of Contents for Gaumard Susie Simon S200
- Page 1 User Guide User Guide 20.1.1 Simple Simon is an interactive educational system developed to assist a certified ©2020 Gaumard Scientific instructor. It is not a substitute for a comprehensive understanding of the subject All Rights Reserved matter and not intended for clinical decision making.
-
Page 2: Table Of Contents
S200 & S201 | User Manual Contents 1. Introduction 1.1 Specifications 1.2 Care and Maintenance General IV Arm (Optional) Operating Conditions Storage Conditions Procedures Cleaning Stoma Care 2. Getting Started 2.1 Overview Airway Appearance General Patient Care Options 2.2 Terminology Facilitator Provider 3. - Page 3 Setup Using the Subclavian Access Replacing the Subclavian Vein 6. Appendix 6.1 Spare Parts List 6.2 Gaumard Sales terms and conditions 6.3 End User License Agreement 6.4 EXCLUSIVE ONE-YEAR LIMITED WARRANTY 7. Contact Gaumard 7.1 Contacting Technical Support 7.2 General Information...
-
Page 4: Introduction
· Replacement parts are available from Gaumard Scientific or from your Distributor IV Arm (Optional) · Only use Gaumard’s provided simulated blood. Any other simulated blood containing sugar or any additive may cause blockage and/or interruption of the vasculature system. -
Page 5: Operating Conditions
S200 & S201 | User Manual Operating Conditions · Operating temperature: 50°-95° F (10°-35° C) · Humidity: 5%-95% (non-condensing) Storage Conditions · Keep simulator stored in the bag and box provided: › Storage temperature: 32°-113° F (0°-45° C) ... -
Page 6: Stoma Care
S200 & S201 | User Manual Stoma Care · Always handle the stomas with clean hands. · Do not palpate with fingernails. · Do not clean with alcohol or aggressive solvents. · Do not pack any sharp objects with the stomas. ... -
Page 7: Getting Started
2. Getting Started 2.1 Overview Disclaimer: The section below describes all possible features in the Simple Simon simulator. The content of this information is subject to change without prior notice. Please contact Gaumard Scientific for the most current ® information. -
Page 8: Terminology
S200 & S201 | User Manual 2.2 Terminology Facilitator The person conducting the simulation; an instructor or lab staff member. Provider A person participating in the simulation as a healthcare provider. Getting Started | 5... - Page 9 S200 & S201 | User Manual FEATURES S200 S201 GENERAL PATIENT CARE • • Bathing and bandaging activity • • Full body • • Interchangeable genitalia • • Eyes open and close • • Realistic eyes for ophthalmic exercises Realistic urethral passage and bladder for catheterization •...
-
Page 10: Equipment Setup
S200 & S201 | User Manual 3. Equipment Setup 3.1 Overview The simulator is shipped partially assembled. Perform the following steps to install the legs. Leg Assembly Place simulator on a flat surface. On each leg, washers, spring, and wing nut is in place. Remove the wing nuts, washers, and springs from the bolts on the hips. - Page 11 S200 & S201 | User Manual Reach through the IM site and assemble the fasteners onto the hip bolt Assemble in this order: washer, spring, washer, and wing nut. Tighten the wing nut until the spring is compressed slightly. Place the IM pad in the leg. 8 | Equipment Setup...
-
Page 12: Working With Susie Simon
S200 & S201 | User Manual 4. Working with Susie Simon 4.1 Airway Tracheostomy Care Place a lubricated tracheostomy tube at the trachea opening. Insert the tracheostomy tube and perform the necessary care procedures. NOTE: Lift the chest skin to reveal the tracheostomy opening if the simulator has the Subclavian Access. -
Page 13: Bandaging
S200 & S201 | User Manual To remove the teeth, gently insert one finger into the upper or lower jaw and tap lightly. Dentures will immediately snap out. To reinsert, gently hold lower or upper lip and replace dentures. Bandaging The fingers and toes of the simulator are separated to permit bandaging exercises. -
Page 14: General Patient Care
S200 & S201 | User Manual 4.3 General Patient Care Ear Canal · Left ear: the interior of the ear contains a simulated ear canal with a capacity of 5 ml, to practice syringing exercises. WARNING: Always use lubricant prior to introducing an invasive device. -
Page 15: Ostomy Care
Gastrostomy 2. Ostomy 1 3. Ostomy 2 4. Rectum 5. Suprapubic Ostomies are optional for Susie Simon S200. Stoppers Use the stoppers provided to seal the reservoir bags. Gastrostomy A gastrostomy left port, located near the waist, connects directly to the stomach tank. - Page 16 S200 & S201 | User Manual Susie Simon have anatomically sculptured stomas of a transverse colostomy, ileostomy, and suprapubic cystostomy Tank Capacity Ostomies 500 ml Enema Administration The legs articulate to permit enema exercises with the simulator on its back. The enema should be introduced with an anal nozzle of small diameter.
-
Page 17: Urinary Catheterization
S200 & S201 | User Manual Suprapubic Use the suprapubic port to fill the bladder for catheterization exercises. Catheterization is standard for the S200.250 and S201.250. Tank Capacity Bladder 1800 ml Use the funnel or syringe to fill the bladder. Urinary Catheterization The simulator includes a fitted female genitalia and a male genitalia attachment. - Page 18 S200 & S201 | User Manual Catheterization Procedure Fill the bladder 2. Place the stopper in the port 3. Lubricate the size 18 Fr catheter 4. Insert the catheter 5. To increase the pressure and the urine flow, use the squeeze bulb on the right side of the simulator Procedure Device Size...
-
Page 19: Cleaning The Reservoirs
S200 & S201 | User Manual Emptying the Bladder To remove all the fluid from the bladder, insert the catheter and set the simulator over a bedpan. Clean the reservoir by inserting a solution of water and alcohol (70:30) and draining the reservoir. Cleaning the Reservoirs In order to clean out the reservoirs, follow the steps below:... -
Page 20: Options
S200 & S201 | User Manual 5. Options 5.1 Decubitus Ulcers The simulator is supplied with two anatomically accurate ulcers. Initial stage of ulceration Suppuration or pus/deeply infected stage. 5.2 Ulcerated Foot Diagnose and treat ulcers on the left foot of the simulator. -
Page 21: Features
S200 & S201 | User Manual Features OPTION Functionality Intrader- SubQ Arterial • S205.803R.IV • • • • S205.803R.MIV • • • • • S205.803R.AIV.R2 5.4 Heart and Lung Sounds The Heart and Lung Sounds teaching system is a tool used for auscultation training. The system is composed of a Virtual Stethoscope™... - Page 22 S200 & S201 | User Manual Locate the small stereo jack on the bell and attach the speakers provided. Plug the speakers into a conventional 120V/60 Hz wall outlet and turn the speakers on. The speakers provide external feedback of the auscultation sounds. If the speakers are disconnected, only the student will hear the heart and lung sounds through the ear pieces on the virtual stethoscope.
- Page 23 S200 & S201 | User Manual Patient has a normal heart with mild anemia. The heart is Apex Sound hyperdynamic and has elevated cardiac output. Patient has mitral prolapse, which produces a mid-systolic click Mid-Systolic Click heard during inspiration. Patient has a readily heard third heart sound. S3 occurs later in S3 Sound diastole than the opening snap.
-
Page 24: Subclavian Access (S201.707)
S200 & S201 | User Manual These wheezing sounds are often heard in asthma patients. During inspiration, the wheeze is slightly higher in pitch than during Wheezing Sounds expiration. Wheezing in asthmatics is often present in either one or both phases of respiration. Posterior (Four Sites) This sound originates from the friction of inflamed pleural surfaces moving against one another. -
Page 25: Setup
S200 & S201 | User Manual Setup Remove the caps from the ports on the simulator’s right side. Fill the syringe with fluid. Connect the fill syringe to one of the ports on the right side of the simulator. NOTE: It does not matter which port the fill syringe is connected to. -
Page 26: Using The Subclavian Access
S200 & S201 | User Manual Inject the fluid into the simulator and keep injecting until there are no more air bubbles in the drain hose. Close the clamp on the drain hose when the system is primed. Using the Subclavian Access With the clamp closed, push 1 - 2 mls of fluid to pressurize the vein. -
Page 27: Replacing The Subclavian Vein
S200 & S201 | User Manual 3. Open the clamp to inject fluids or perform blood draws. Replacing the Subclavian Vein Connect the drain hose and open the clamp to drain the fluid from the vein. 2. Fill the syringe with air and connect it to one of the ports on the simulator’s right side. - Page 28 S200 & S201 | User Manual 4. Remove the waist rod. 5. Separate the lower torso from the upper torso. 6. Disconnect the stomach from the lower torso. Reach into the upper torso and release the quick connectors. Options | 25...
- Page 29 S200 & S201 | User Manual 8. Lift the chest skin. 9. Remove the old vein. 10. Insert one end of the new vein. 11. Connect the new vein to the quick connector. 26 | Options...
- Page 30 S200 & S201 | User Manual 12. Insert the other end of the vein and connect it to the quick connector. 13. Replace the chest skin. 14. Connect the stomach reservoir back to the lower torso. 15. Attach the lower torso to the upper torso and replace the waist rod.
-
Page 31: Appendix
S200 & S201 | User Manual 6. Appendix 6.1 Spare Parts List Contact Gaumard Scientific for a complete list of consumables and replacement parts and their prices. Item Type Code Arm Injection Sites Consumable S200.857.1.L/M/D Buttock Injection Sites Consumable S200.857.3.L/M/D... -
Page 32: Gaumard Sales Terms And Conditions
A late charge will be due on any unpaid balance at a rate of 1.0% per month or the maximum rate otherwise permitted by law, whichever is lower. Gaumard may charge interest at the maximum rate permitted by law on all amounts not paid by the invoice due date. Gaumard retains a purchase money security interest in all Products sold to Customer to secure payment of the total purchase price thereof. -
Page 33: End User License Agreement
However, if the repairs are not covered by this limited warranty, then Customer will be liable for all repair costs in addition to costs of shipping and handling. Upon request, Gaumard must be given access to and an opportunity to inspect the Product and any working areas and storage areas. - Page 34 EULA (“End User”) and Gaumard Scientific Company, Inc., a Florida corporation (“Gaumard”), relative to the Gaumard Software (as defined below). This EULA is effective as of the date Gaumard accepts and confirms the Purchase Order (the “Effective Date”). BY USING THE GAUMARD SOFTWARE, END USER IS AGREEING TO BE BOUND BY THE TERMS OF THIS EULA.
- Page 35 Agreement sHAL®l cause Gaumard irreparable harm and Gaumard may obtain injunctive relief without the requirement to post a bond as well as seek all other remedies available to Gaumard in law and in equity in the event of breach or threatened breach of such provisions.
-
Page 36: Exclusive One-Year Limited Warranty
Gaumard; (d) any use of Gaumard Software by End User after End User learns of such allegation of infringement; or (e) any failure by End User to utilize a non-infringing version of the Gaumard Software made available by Gaumard along with notice that such update is non-infringing. The obligations set forth in this Section 5.3 are Gaumard’s sole obligations, and End User’s sole and exclusive remedy, for the Gaumard Software infringing third party... -
Page 37: Contact Gaumard
Extended Warranty In addition to the standard one year of coverage we offer a range of service plans through our Gaumard Cares program. For more information about Gaumard Cares service planes please contact customer service. -
Page 38: Contacting Technical Support
USA: 800-882-6655 INT: 01-305-971-3790 7.2 General Information Sales and Customer Service: E-mail: sales@gaumard.com USA: 800-882-6655 INT: 01-305-971-3790 Fax: 305-667-6085 Post: Gaumard Scientific 14700 SW 136 Street Miami, FL 33196-5691 Office Hours: Monday-Friday, 8:00am - 7:30pm EST Contact Gaumard | 35... - Page 39 Gaumard®, ZOE®, Michelle®, Mike®, PEDI®, Susie Simon®, Susie®, Simon® Code Blue®, SIMA Models®, SIMA GYN/AID®, Virtual Instruments®, Code- maker®, Code Blue®, NOELLE®, Simulation Made Easy™, HAL®, eCPR™, Zack™, RITA™, Chloe™, Seatbelt Susie™, Krash Kids™, Premie™, UNI™, Omni®, SmartSkin™, OMNI®, and OMNI® 2 are trademarks of Gaumard Scientific Company.
Need help?
Do you have a question about the Susie Simon S200 and is the answer not in the manual?
Questions and answers