Table of Contents
Advertisement
Quick Links
S303 / S303.250
CODE BLUE® MULTIPURPOSE
SIMULATOR WITH
INTUBATABLE AIRWAY
USER GUIDE
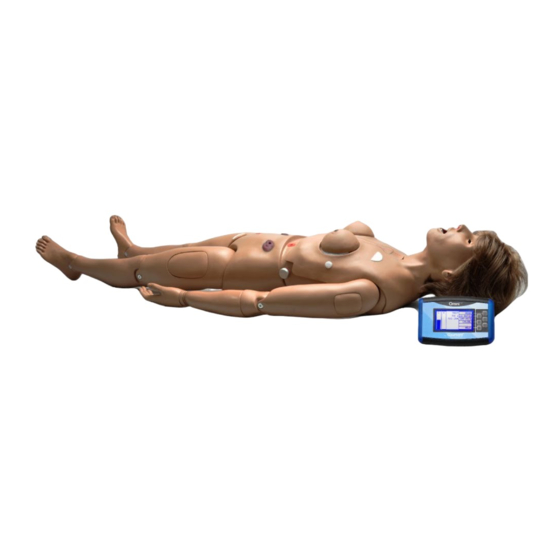
The Code Blue® Multipurpose Simulator is an interactive educational system developed
to assist a certified instructor. It is not a substitute for a comprehensive understanding
of the subject matter and not intended for clinical decision making.
User Guide 22.04.1
©Gaumard Scientific Company, 2022
All Rights Reserved
www.gaumard.com
Advertisement
Table of Contents

Related Manuals for Gaumard CODE BLUE S303


Summary of Contents for Gaumard CODE BLUE S303
- Page 1 USER GUIDE User Guide 22.04.1 The Code Blue® Multipurpose Simulator is an interactive educational system developed ©Gaumard Scientific Company, 2022 to assist a certified instructor. It is not a substitute for a comprehensive understanding All Rights Reserved of the subject matter and not intended for clinical decision making.
-
Page 2: Table Of Contents
User Guide CODE BLUE® MULTIPURPOSE | TABLE OF CONTENTS 1. INTRODUCTION 1.1 SPECIFICATIONS 1.2 TERMINOLOGY 1.3 CARE AND MAINTENANCE 2. OVERVIEW 2.1 FEATURES 2.2 PROCEDURES 2.3 OPTIONS 3. INITIAL SETUP 3.1 CARE AND CAUTIONS DURING UNBOXING 3.2 PACKAGE CONTENTS 3.3 LOWER BODY ASSEMBLY 3.4 LEG ASSEMBLY 3.5 POWERING ON 3.6 CONNECTING THE PULSE LINE... - Page 3 User Guide CODE BLUE® MULTIPURPOSE | 5. WORKING WITH THE OMNI® CONTROLLER 5.1 OMNI® CONTROLLER FEATURES 5.2 NAVIGATION SUBMENU 6. WORKING WITH THE OMNI®2 TABLET 6.1 OMNI®2 TABLET FEATURES 6.2 BATTERY USAGE 6.3 TURNING OFF THE SIMULATOR 7. OPTIONS 7.1 BLOOD PRESSURE LEFT ARM WITH OMNI® CODE BLUE PACK FOR THE S303 ONLY 7.2 BLOOD PRESSURE LEFT ARM WITH OMNI®2 TABLET FOR THE S303.250 ONLY...
- Page 4 User Guide CODE BLUE® MULTIPURPOSE | 10. APPENDIX 10.1 CONSUMABLE PARTS LIST 10.2 GAUMARD SALES TERMS AND CONDITIONS 10.3 END USER LICENSE AGREEMENT 10.4 EXCLUSIVE ONE-YEAR LIMITED WARRANTY 10.5 CONTACT GAUMARD 10.6 GENERAL INFORMATION iv | Table of Contents...
-
Page 5: Introduction
CAUTION: Damage caused by misuse may void the manufacturer’s warranty Failure to comply with the following guidelines could result in damage to the equipment. General Do not wrap this or any other Gaumard product in newsprint. • Marks made with ballpoint pens, ink or marker cannot be removed. - Page 6 User Guide CODE BLUE® MULTIPURPOSE | CAUTION: The tubing simulating veins is made of latex which may cause allergic reactions. Users allergic or sensitive to latex should avoid direct contact with the tubing. Seek medical attention if an allergic reaction occurs. Storage Store the simulator in a cool, dry place.
-
Page 7: Overview
User Guide CODE BLUE® MULTIPURPOSE | 2. OVERVIEW 2.1 FEATURES Soft, lifelike face skin and dilated left pupil • Dully articulated neck and jaw with removable upper and lower dentures • Surgical site for tracheotomy • Bilateral carotid and right radial pulse •... -
Page 8: Options
User Guide CODE BLUE® MULTIPURPOSE | 2.3 OPTIONS Blood Pressure Left Arm with OMNI® Code Blue Pack The Blood Pressure Training System consists of a full size adult left arm. This is a versatile training tool developed to assist health professionals teach the processes and skills required to perform blood pressure auscultation procedures and techniques. -
Page 9: Lower Body Assembly
User Guide CODE BLUE® MULTIPURPOSE | 3.3 LOWER BODY ASSEMBLY Remove the insert that supports the lower torso. Unscrew one knob at the end of the rod that passes through the midsection by twisting it counterclockwise. Pull the rod out and set it aside. Connect the hose from the upper torso to the lower torso Initial Setup | 9... - Page 10 User Guide CODE BLUE® MULTIPURPOSE | Place the support back into the lower torso. Carefully insert the lower torso into the upper torso. Align the holes on each side of the waist to insert the waist rod. Replace the waist knob and twist it clockwise to lock it in place.
-
Page 11: Leg Assembly
User Guide CODE BLUE® MULTIPURPOSE | 3.4 LEG ASSEMBLY To attach the legs, remove the wing nuts, washer, and springs from the bolts on the hips. Remove the IM pad from each leg and slide the lig into the hip joint by inserting the bolt through the orifice in the leg. -
Page 12: Powering On
User Guide CODE BLUE® MULTIPURPOSE | Place the IM pad back on the leg. 3.5 POWERING ON Connect the power supply to the power input located on the simulator’s left side, then connect the power supply to the wall outlet. 3.6 CONNECTING THE PULSE LINE Connect the pulse line by unscrewing the red cap and twisting on the pulse line tube... -
Page 13: Connecting The Omni® Controller To The S303
User Guide CODE BLUE® MULTIPURPOSE | 3.7 CONNECTING THE OMNI® CONTROLLER TO THE S303 WARNING: Do not connect the simulator or OMNI® to a computer, LAN network or unauthorized diagnostic equipment using the communication cable (Ethernet cable). Doing so will cause serious damage to the equipment. Connect the controller's communication cable to the port on the side of the simulator. -
Page 14: Connecting The Omni® 2 Tablet To The S303.250
User Guide CODE BLUE® MULTIPURPOSE | 3.8 CONNECTING THE OMNI® 2 TABLET TO THE S303.250 Turn on the OMNI 2 controller by pressing and holding the ON button on the right side of the tablet. Select “Allow” for turning on the tablet’s Bluetooth. - Page 15 User Guide CODE BLUE® MULTIPURPOSE | Exit the tutorial at any time by selecting “HOME.” NOTE: Completing the tutorial one time will avoid it from appearing at start-up in the future. To view the tutorial again, tap on the Menu icon and select “Show Tutorial.” After the tutorial, OMNI 2 will proceed “Favorites”...
-
Page 16: Working With The Simulator
User Guide CODE BLUE® MULTIPURPOSE | 4. WORKING WITH THE SIMULATOR 4.1 OPTHALMOLOGIC EXERCISES The head has eyes that open and close permitting the following exercises: Administration of orbital medicines • into the conjunctival sac Removal of foreign bodies • Eye irrigation •... - Page 17 User Guide CODE BLUE® MULTIPURPOSE | Tracheostomy Care The simulator is supplied with a tracheostomy opening. This allows for the trachea to be pierced during a simulation with a real device to observe chest rise. Replacing the Trachea Skin Gently lift the chest skin of the simulator to reveal the chest cavity.
- Page 18 User Guide CODE BLUE® MULTIPURPOSE | Lay the chest skin over the torso and gently press down the Velcro to secure it in place. NOTE: Air leaks in the airway will result in poor chest rise during ventilation and false intubation readings. Calibrating Ventilations with OMNI®...
- Page 19 User Guide CODE BLUE® MULTIPURPOSE | Perform a ventilation. Follow the cues on the screen to perform the remaining four ventilations. When the calibration is complete, OMNI® will display DONE. Press SAVE to complete the calibration procedure. Working with the Simulator | 19...
- Page 20 User Guide CODE BLUE® MULTIPURPOSE | Ventilations Ventilate using a BVM and obtain • realistic, dual chest rise. Use a fitted mask to limit air leakage • and to provide a visible chest rise. Ear, Nose, and Throat Left ear: the interior of the ear contains •...
-
Page 21: Internal Reservoir Capacity
User Guide CODE BLUE® MULTIPURPOSE | 4.3 INTERNAL RESERVOIR CAPACITY Reservoir Capacity Stomach 850 mL Bladder 1800 mL Rectum (Colostomy) 1800 mL Ileostomy 650 mL 4.4 CHEST COMPRESSION CALIBRATION WITH OMNI® Press CALIB. and Select C CAL. Press START to begin the calibration procedure. When OMNI®... - Page 22 User Guide CODE BLUE® MULTIPURPOSE | Perform a correct compression. Follow the text cue on the screen to perform the remaining four compressions. When the calibration is complete, OMNI® will display DONE. Press SAVE to complete the calibration procedure. NOTE: The simulator is precalibrated to the current CPR guidelines at time of manufacture.
- Page 23 User Guide CODE BLUE® MULTIPURPOSE | Tap the Menu icon in the upper right corner of the screen and select “Calibration.” Select “Compression” Press START and complete 5 chest compressions. After 5 compressions are completed, tap on "Save." Working with the Simulator | 23...
- Page 24 User Guide CODE BLUE® MULTIPURPOSE | CPR with OMNI® and OMNI® 2 Chest compressions are measured and • logged, showing the facilitator exactly how providers are performing. Mouth to mouth resuscitation without • a barrier device is not recommended as it may contaminate the airway. Pulses The simulator is equipped with bilateral •...
- Page 25 User Guide CODE BLUE® MULTIPURPOSE | Filling the IV Arm Place the blood dispensing bag on the stand. Remove the IV caps on the shoulder. Connect the fill tube and drainage tube to the shoulder. Close the clamp on the drain tube. Working with the Simulator | 25...
- Page 26 Add water or artificial blood to the blood dispensing bag using the funnel provided or the large syringe. CAUTION: Use only Gaumard’s simulated blood provided with your simulator. Any other simulated blood brand containing sugar or any additive may cause blockage and/or interruption of the vasculature.
- Page 27 User Guide CODE BLUE® MULTIPURPOSE | Close the drainage tube's clamp when there are no more air bubbles in the tube. Place the black rubber stopper on the upper port of the blood dispensing bag. Blood Pressure To vary the blood pressure in the •...
- Page 28 User Guide CODE BLUE® MULTIPURPOSE | IV Arm The right arm can be used for infusion, • blood collection, intravenous injection, intramuscular injection, TB screening, and subcutaneous injection exercises. The arm and hand contain venous grooves, fitted • with soft latex tubes to simulate the consistency of veins.
- Page 29 User Guide CODE BLUE® MULTIPURPOSE | Intravenous Injection When practicing injections, unclamp the drainage tube to ensure the veins do not overflow. Intravenous Therapy / Infusion When preparing for IV therapy or infusion, make sure to unclamp the drainage tube to allow for continuous flow. Draining the Venous System Unclamp the drainage tube.
- Page 30 User Guide CODE BLUE® MULTIPURPOSE | Squeeze the bulb to push the remaining fluid out of the venous system, Remove the squeeze bulb. Using the funnel, fill the dispensing bag with a 30:70 mix of water to Isopropyl alcohol in order to flush the fluid system. Replace the funnel with the squeeze bulb and squeeze the remaining fluid out through the drainage tube.
-
Page 31: Catheterization
User Guide CODE BLUE® MULTIPURPOSE | Make sure the drainage tube is open and push the fluid through the arm until there is no more fluid coming out of the arm. At this point, inject air through the arm to dry the vasculature and prevent mold from forming. - Page 32 User Guide CODE BLUE® MULTIPURPOSE | Simulating Continuous Urinary Output Multiple catheterization exercises may be performed with the aid of the dispensing bag on a stand. Fill the dispensing bag with fluid and place it on the stand. Remove the stoma from suprapubic opening. Connect the outflow tube from the auxiliary bag into the suprapubic opening using the red connector.
- Page 33 User Guide CODE BLUE® MULTIPURPOSE | Use an 18 Fr catheter as smaller • catheters may cause leakage. Lubricate the catheter with the mineral • oil provided before insertion. Male Catheterization To attach the male genitalia, remove the red adapter connected to the urethra passage and set it aside.
- Page 34 User Guide CODE BLUE® MULTIPURPOSE | Draining the Bladder Reservoir Catheterize the simulator and position and squeezing the squeeze bulb on the right side to push the fluid out.. Injection Site Intramuscular injection sites are to practice placement only. Do not inject fluids into the IM sites when simu- lating intramuscular and subcutaneous injections.
-
Page 35: Gynecologic
User Guide CODE BLUE® MULTIPURPOSE | The IM site is a consumable item. To replace the injection pads, lift the IM injection pad and insert the new one by gently pressing it down. 4.7 GYNECOLOGIC Breast Exam Module The simulator is provided with two breast inserts attached and additional interchangeable breast inserts. - Page 36 User Guide CODE BLUE® MULTIPURPOSE | Breast No. 2 This breast represents various stages of fibrocystic disease. The larger node may simulate a hard node or a cystic mass or swelling. It has seven discreet nodes on one side, a larger node on the other side, and a very discreet puckered area around the nipple.
- Page 37 User Guide CODE BLUE® MULTIPURPOSE | Breast No. 5 This breast shows an easily palpable tumor: a giant sarcoma (or giant mammary myxoma) where its wildly growing masses can be easily felt and seen. The largest mass is shown in ulcerated form. Breast No.
- Page 38 User Guide CODE BLUE® MULTIPURPOSE | Changing Breasts for Palpation Exercises Place the simulator in a semi-upright position and gently lift the breast and set it aside. Chose the desired breast and place it on the chest Velcro side down and gently press it in place.
-
Page 39: Gastrointestinal
User Guide CODE BLUE® MULTIPURPOSE | 4.8 GASTROINTESTINAL Gastric Feeding and Suctioning To fill the stomach reservoir for gastric feeding and suctioning, attach the funnel to the gastronomy port located at the waist and fill the reservoir with up to 850 mL of fluid. NOTE: Use a No. - Page 40 User Guide CODE BLUE® MULTIPURPOSE | Stomas To fill the ileostomy reservoir, remove • the stoma and inject up to 650 mL of fluid into the stoma port. To fill the transverse colostomy reservoir, • remove the stoma and inject up to 1800 mL of fluid into the stoma port.
-
Page 41: Nursing Procedures
User Guide CODE BLUE® MULTIPURPOSE | 4.9 NURSING PROCEDURES Vaginal Douching After performing douching exercises, drain any excess fluid remaining in the simulator by placing the simulator in the upright position. Hygiene The simulator has a wig that allows for combing, shampooing and head draping exercises. - Page 42 User Guide CODE BLUE® MULTIPURPOSE | To remove the teeth, insert one finger into the upper or lower jaw and pull it out gently. To attach the teeth, gently press the denture into the mouth Velcro side down. Decubitus Ulcers Two types of decubitus ulcers are provided with the simulator: Initial stage of ulceration...
- Page 43 User Guide CODE BLUE® MULTIPURPOSE | Amputation Stump The simulator is provided with an amputation stump for wound treatment and care. To attach the amputation stump, remove the lower leg by unscrewing the bolts at the knee joint using the hexagonal wrenches provided. Attach the amputation stump by inserting it over the knee joint.
-
Page 44: Working With The Omni® Controller
User Guide CODE BLUE® MULTIPURPOSE | 5. WORKING WITH THE OMNI® CONTROLLER 5.1 OMNI® CONTROLLER FEATURES OMNI® Code Blue is a CPR training tool designed to help teach CPR by monitoring cadence and depth of compressions as well as airway ventilations in real time. eCPR eCPR is an application that enables monitoring and logging of compressions •... -
Page 45: Navigation Submenu
User Guide CODE BLUE® MULTIPURPOSE | Navigation Menus Edit the simulator settings using • the navigation menus. Select a menu item by pressing the soft • key buttons located on the right side of the controller. Each menu has additional submenus or toggle selections. - Page 46 User Guide CODE BLUE® MULTIPURPOSE | CMR RATE This submenu is for adjusting the number of • compression and ventilations per minute. The default value for the compression • rate is 100 compressions per minute. Adjust rate using the + and - buttons. Press OK to save changes and •...
- Page 47 User Guide CODE BLUE® MULTIPURPOSE | HELP The help window provides access to global settings such as backlight time and OMNI® and Simulator serial number. BACKLIGHT The default value for OMNI®'s backlight • timer is 10 minutes. After 10 minutes the backlight will turn off.
-
Page 48: Working With The Omni®2 Tablet
User Guide CODE BLUE® MULTIPURPOSE | 6. WORKING WITH THE OMNI®2 TABLET 6.1 OMNI®2 TABLET FEATURES Operate OMNI 2 with a wireless • range of up to 30 ft. The home screen consists of the Favorites page, • Vitals page, CPR page, and Blood Pressure page. Reference the OMNI 2 user guide provided •... - Page 49 User Guide CODE BLUE® MULTIPURPOSE | VITALS PAGE The Vitals Page includes Breathing, Cardiac, and Circulation. Each change in vitals can be applied instantly or added to a queue. CPR PAGE The CPR page includes feedback for compression • rate and depth, and ventilation duration and PIP. Use the metronome on this page •...
- Page 50 User Guide CODE BLUE® MULTIPURPOSE | eCPR To begin and end a CPR session, tap on the • CPR icon and the START/STOP button. To reset a CPR session, tap the Reset icon. • To activate an audible rhythm to •...
-
Page 51: Battery Usage
User Guide CODE BLUE® MULTIPURPOSE | 6.2 BATTERY USAGE The battery life of the OMNI 2 tablet • is displayed on the top right 6.3 TURNING OFF THE SIMULATOR Disconnect the power supply from the simulator and hold the power button on the tablet. Select “Power Off”... -
Page 52: Options
User Guide CODE BLUE® MULTIPURPOSE | 7. OPTIONS 7.1 BLOOD PRESSURE LEFT ARM WITH OMNI® CODE BLUE PACK FOR THE S303 ONLY The Blood Pressure Training System consists of an adult size left arm. This is a versatile training tool developed to assist health professionals teach the process and skills required to perform blood pressure auscultation procedures and techniques. - Page 53 User Guide CODE BLUE® MULTIPURPOSE | Connect the BP cuff extension to the adapter labeled BP on the control panel. Connect the speakers to the port on the shoulder. BP Cuff Calibration Follow steps 1 and 2 in section 7.1 "BP Arm Setup." Select the CALIB menu from the main screen and press NEXT to begin the calibration procedure.
- Page 54 User Guide CODE BLUE® MULTIPURPOSE | OMNI® will display a prompt to set the BP cuff to0mmHg then press NEXT. Do not inflate the cuff until prompted. OMNI® will prompt you to set the BP cuff to 20 mmHg. Increase the BP cuff pressure when the display prompts you to inflate the cuff one value at a time.
- Page 55 User Guide CODE BLUE® MULTIPURPOSE | FEEDBACK GRAPHICS MENU The feedback graphic displays the BP cuff pressure in real time at the bottom of the screen. NAVIGATION SUBMENUS Edit BP settings using the navigation menus. Select a menu item by pressing the soft key buttons located on the right side of the controller.
- Page 56 User Guide CODE BLUE® MULTIPURPOSE | AU. Gap Enable and set an interval of pressure where Korotkoff sounds dissipate. The auscultatory gap is disabled by default. Pressing the Enable button activates the UPPER and LOWER menus. Use these menus to set the limits of the auscultatory gap. Adjust the limits of the auscultatory gap using the + And - buttons.
-
Page 57: Blood Pressure Left Arm With Omni®2 Tablet For The S303.250 Only
User Guide CODE BLUE® MULTIPURPOSE | 7.2 BLOOD PRESSURE LEFT ARM WITH OMNI®2 TABLET FOR THE S303.250 ONLY BP Cuff Calibration Follow the instructions in Section 7.1 "BP Arm Setup" and connect the OMNI® 2 tablet. Tap the Menu icon, then select “Calibration” The Calibration screen will appear. - Page 58 User Guide CODE BLUE® MULTIPURPOSE | Increase the BP cuff pressure when the display prompts you to inflate the cuff one value at a time. Continue to tap "SET" after setting each increment. The OMNI 2 will prompt you to increase the BP cuff pressure from 0 to 300 mmHG.
- Page 59 User Guide CODE BLUE® MULTIPURPOSE | Tap on “APPLY NOW." Auscultatory Gap To turn on auscultatory gap, tap on the “Vitals” page then select “Auscultatory Gap” and slide the ON/OFF button to ON. To increase or decrease the High Gap and Low Gap, slide the top and bottom bars left or right, or tap the + or –...
-
Page 60: Ulcerated Foot
User Guide CODE BLUE® MULTIPURPOSE | The auscultatory gap will appear in gray on the manometer in the “Blood Pressure” page. 7.3 ULCERATED FOOT Evaluate and practice care of ulcers on the foot which contains toes that are separated allowing for bandaging exercises. The material of the foot is resistant to water, oil, and liniments. - Page 61 User Guide CODE BLUE® MULTIPURPOSE | Attach the ulcerated foot onto the ankle socket. Screw in the bolts with the hexagonal wrenches to secure the foot. Follow these same steps to reattach the healthy foot. Options | 61...
-
Page 62: Geriatric Face Skin
User Guide CODE BLUE® MULTIPURPOSE | 7.4 GERIATRIC FACE SKIN The geriatric face skin accessory is designed to expand the breadth of the learners’ experiences and aid educators in teaching patient-centric assessment and care skills. Easily and quickly convert CODE BLUE's face and hair to that of an elderly patient for geriatric scenario-based simulations and skill training exercises. - Page 63 User Guide CODE BLUE® MULTIPURPOSE | 3. Flip the Geriatric Face Skin inside out and begin placing it over the face of the simulator. 4. Fit the Geriatric Face Skin to the whole head of the simulator and smooth the skin towards the back of the head so the zipper can be aligned.
-
Page 64: Routine Maintenance
User Guide CODE BLUE® MULTIPURPOSE | 8. ROUTINE MAINTENANCE 8.1 REPLACING THE ARM SKIN Starting at the top of the arm, gently slide the skin off. To place the new arm skin, gently slide it over the hand and up the arm. If needed, use more lubricant to ease the skin into place. -
Page 65: Checking For Vein Blockage
NOTE: Arm reveining is recommended to be done by a technician at Gaumard headquarters. If the veins needs to be replaced, please return it to Gaumard headquarters by opening a ticket through the Technical Support Department. Routine Maintenance | 65... -
Page 66: Flushing The Fluid Reservoirs
User Guide CODE BLUE® MULTIPURPOSE | 8.3 FLUSHING THE FLUID RESERVOIRS It is good practice to flush the fluid reservoirs periodically to prevent mold from forming. To reach the reservoirs, loosen the waist knobs and remove the waist rod. Disconnect the hose from the upper torso. Remove the support insert and set it aside. - Page 67 User Guide CODE BLUE® MULTIPURPOSE | Remove the foam insert from the lower abdomen. After flushing the reservoirs, replace the foam insert, connect the waist tube, and reattach the upper and lower torso as directed in section 3.3 Lower Body Assembly. Stomach Reservoir Disconnect the white port from the stomach reservoir.
- Page 68 User Guide CODE BLUE® MULTIPURPOSE | Ileostomy Reservoir Gently disconnect the ileostomy port and the ileostomy site clips to release the bag. Inject a 30:70 mix of isopropyl alcohol to water and squeeze the bag over a container or sink. Insert the clips to the ports to reattach the bag.
- Page 69 User Guide CODE BLUE® MULTIPURPOSE | Colostomy Reservoir Gently disconnect the rectal port and the transverse colostomy site clips to release the bag. Inject a 30:70 mix of isopropyl alcohol to water and squeeze the bag over a container or sink. Insert the clips to the ports to reattach the bag.
-
Page 70: Troubleshooting
User Guide CODE BLUE® MULTIPURPOSE | 9. TROUBLESHOOTING 9.1 OMNI® IS NOT TURNING ON Probable Cause Solution Power supply may not be Make sure the power supply cable is connected connected to the simulator Communication cable is not connected to OMNI® or the Connect the communication cable to the simulator and to OMNI®... -
Page 71: Omni® Or Omni®2 Is Not Detecting Any Compressions Or Ventilations
User Guide CODE BLUE® MULTIPURPOSE | 9.3 OMNI® OR OMNI®2 IS NOT DETECTING ANY COMPRESSIONS OR VENTILATIONS Probable Cause Solution System is not calibrated Calibrate compressions and ventilations using 9.4 OMNI®2 TAKES TOO LONG TO BOOT UP Probable Cause Solution 1. -
Page 72: Appendix
User Guide CODE BLUE® MULTIPURPOSE | 10. APPENDIX 10.1 CONSUMABLE PARTS LIST Product Item Number Arm Skin S303.813/ S303.250.813 Dispensing Blood Bag S303.811/ S303.250.811 Decubitus Ulcers S303.764/ S303.250.764 Artificial Blood Concentrate S303.812/ S303.250.812 Trachea Tape S303.735/ S303.250.735 Sub-Q Injection Site S303.834/ S303.250.834 IM Injection Site S303.857/ S303.250.857... -
Page 73: Gaumard Sales Terms And Conditions
A late charge will be due on any unpaid balance at a rate of 1.0% per month or the maximum rate otherwise permitted by law, whichever is lower. Gaumard may charge interest at the maximum rate permitted by law on all amounts not paid by the invoice due date. Gaumard retains a purchase money security interest in all Products sold to Customer to secure payment of the total purchase price thereof. - Page 74 However, if the repairs are not covered by this limited warranty, then Customer will be liable for all repair costs in addition to costs of shipping and handling. Upon request, Gaumard must be given access to and an opportunity to inspect the Product and any working areas and storage areas.
-
Page 75: End User License Agreement
EULA (“End User”) and Gaumard Scientific Company, Inc., a Florida corporation (“Gaumard”), relative to the Gaumard Software (as defined below). This EULA is effective as of the date Gaumard accepts and confirms the Purchase Order (the “Effective Date”). BY USING THE GAUMARD SOFTWARE, END USER IS AGREEING TO BE BOUND BY THE TERMS OF THIS EULA. - Page 76 Agreement sHAL®l cause Gaumard irreparable harm and Gaumard may obtain injunctive relief without the requirement to post a bond as well as seek all other remedies available to Gaumard in law and in equity in the event of breach or threatened breach of such provisions.
- Page 77 Gaumard; (d) any use of Gaumard Software by End User after End User learns of such allegation of infringement; or (e) any failure by End User to utilize a non-infringing version of the Gaumard Software made available by Gaumard along with notice that such update is non-infringing. The obligations set forth in this Section 5.3 are Gaumard’s sole obligations, and End User’s sole and exclusive remedy, for the Gaumard Software infringing third party...
-
Page 78: Exclusive One-Year Limited Warranty
Extended Warranty In addition to the standard one year of coverage we offer a range of service plans through our Gaumard Cares program. For more information about Gaumard Cares service planes please contact customer service. -
Page 79: Contact Gaumard
User Guide CODE BLUE® MULTIPURPOSE | 10.5 CONTACT GAUMARD Before contacting technical support, please make sure to have your simulator and user guide readily available. Email: support@gaumard.com USA: 800-882-6655 INT: 01-305-971-3790 10.6 GENERAL INFORMATION E-mail: sales@gaumard.com USA: 800-882-6655 INT: 01-305-971-3790... - Page 80 User Guide CODE BLUE® MULTIPURPOSE | 80 | Appendix...
- Page 81 Gaumard®, ZOE®, Michelle®, Mike®, PEDI®, Susie Simon®, Susie®, Simon® Code Blue®, SIMA Models®, SIMA GYN/AID®, Virtual Instruments®, Codemaker®, Code Blue®, NOELLE®, Simulation Made Easy™, HAL®, eCPR™, Zack™, RITA™, Chloe™, Seatbelt Susie™, Krash Kids™, Premie™, UNI™, Omni®, Omni® 2, SmartSkin™ are trademarks of Gaumard Scientific Company.
Need help?
Do you have a question about the CODE BLUE S303 and is the answer not in the manual?
Questions and answers