Table of Contents
Advertisement
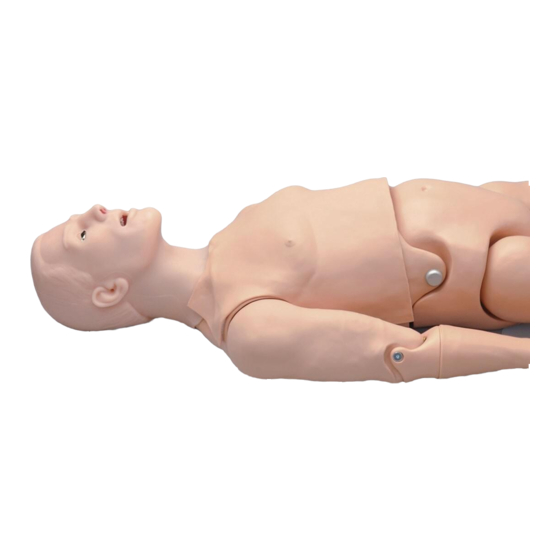
S1030 HAL® DYNAMIC AIRWAY &
LUNG COMPLIANCE
USER GUIDE
HAL Dynamic Airway and Lung Compliance Simulator is an interactive educational
system developed to assist a certified instructor. It is not a substitute for a
comprehensive understanding of the subject matter and not intended for clinical
decision making.
User Guide 20.09.01
©Gaumard Scientific Company, 2020
All Rights Reserved
www.gaumard.com
Advertisement
Table of Contents

Related Manuals for Gaumard HAL S1030


Summary of Contents for Gaumard HAL S1030
- Page 1 HAL Dynamic Airway and Lung Compliance Simulator is an interactive educational User Guide 20.09.01 system developed to assist a certified instructor. It is not a substitute for a ©Gaumard Scientific Company, 2020 comprehensive understanding of the subject matter and not intended for clinical All Rights Reserved decision making.
- Page 2 HAL® S1030 | USER GUIDE ii |...
-
Page 3: Table Of Contents
HAL® S1030 | USER GUIDE TABLE OF CONTENTS 1. INTRODUCTION 1.1 CARE AND MAINTENANCE 2. OVERVIEW 2.1 FEATURES 2.2 TERMINOLOGY 3. INITIAL SETUP 3.1 UNBOXING 3.2 PACKAGE CONTENTS 3.3 LEG ASSEMBLY 3.4 INTERNAL BATTERY SETUP 3.5 LAPTOP CONNECTION 3.6 INITIALIZING THE SIMULATOR WITH UNI™ 4. - Page 4 6.1 UNI INTERFACE 6.2 UNI LOG 6.3 UNI WINDOW & TABS 6.4 UNI VITALS 6.5 UNI LEARNING OPPORTUNITIES 7. OPTIONS 7.1 GAUMARD VITALS BEDSIDE VIRTUAL MONITOR 8. TROUBLESHOOTING 8.1 GENERAL TROUBLESHOOTING 9. APPENDIX 9.1 PARTS LIST 9.2 GAUMARD SALES TERMS AND CONDITIONS 9.3 END USER LICENSE AGREEMENT...
-
Page 5: Introduction
General Ballpoint pens, ink, and markers permanently stain the skin. • Do not wrap this or any other Gaumard product in newsprint. • Marks made with ballpoint pens, ink, or marker cannot be removed. •... - Page 6 HAL® S1030 | USER GUIDE Procedures Do not attempt to intubate without lubricating the airway adjunct with mineral oil. Failure to lubricate • the device will make intubation very difficult and is likely to result in damage to the simulator. Mouth to mouth resuscitation without a barrier device is not recommended, as it will contaminate the airway.
-
Page 7: Overview
HAL® S1030 | USER GUIDE 2. OVERVIEW 2.1 FEATURES HAL S1030 is a Dynamic Airway and Lung Compliance simulator with the following features: Appearance Articulating Adult HAL full-size body • Available in 3 skin tones: Light, Medium, or Dark •... -
Page 8: Terminology
HAL® S1030 | USER GUIDE 2.2 TERMINOLOGY Facilitator The person conducting the simulation, an instructor or lab staff member. Palette A collection of vital signs details that demonstrate a patient's progress or decline during a session. Profile A unique software configuration that includes custom palettes, scenarios, and options. Each profile acts as a separate program, so changes made to one profile do not affect the others. -
Page 9: Initial Setup
It is recommended that HAL’s head rest flat on the bed or on a • thin pillow to prevent the face skin from shifting. 3.2 PACKAGE CONTENTS HAL S1030 Hexagonal Allen Key wrenches Lower Left Leg Talcum Powder Lower Right I/O Leg with CO2 system... -
Page 10: Leg Assembly
HAL® S1030 | USER GUIDE 3.3 LEG ASSEMBLY Remove the fixed bolts from the knee joints using the hexagonal wrench included. For the right leg, first connect the white CO2 tubing of the upper and lower leg then align the Align the lower leg insert to the knee joint and secure the knee bolts using the hexagonal wrenches. -
Page 11: Internal Battery Setup
WARNING: Do not touch or move the lung bags inside the simulator Doing so will affect the lung compliance system. If the lung compliance system is affected, it may have to be returned to Gaumard Repairs or a Field Technician will have to recalibrate it. Internal components are serviced by Gaumard certified technicians ONLY. -
Page 12: Laptop Connection
HAL® S1030 | USER GUIDE 3.5 LAPTOP CONNECTION Connect the RJ45 Communications Module to the blue RJ45 Cable. Connect the other end of the blue RJ45 cable to the communications port of HAL's right side. Connect the USB port of the RJ45 Communications Module to an available port on the laptop. -
Page 13: Initializing The Simulator With Uni
HAL® S1030 | USER GUIDE 3.6 INITIALIZING THE SIMULATOR WITH UNI™ The UNI software is preloaded onto the laptop, which is used to initialize the simulator and control vital signs. Double click the UNI icon on the home screen. The simulator selection menu will appear. Select the corresponding simulator: Dynamic Airway and Lung Compliance. - Page 14 HAL® S1030 | USER GUIDE Adding a Serial Number to the Profile New products sent with their control laptop/tablet will have the serial number preset at factory. Should it be necessary to add a serial number, do the following: Select the desired profile. Click the "+"...
-
Page 15: Working With Hal
HAL® S1030 | USER GUIDE 4. WORKING WITH HAL® HAL will initialize to a healthy state. Please read through the following sections to adjust his parameters to the desired vitals. 4.1 AIRWAY Airway Complications The simulator has an anatomically correct and programmable airway to support intubation (see recommended device sizes) and airway complications such as tongue edema,... -
Page 16: Breathing
HAL® S1030 | USER GUIDE Intubation The simulator has an anatomically correct airway to support intubation (see recommended device sizes). Procedure Recommended Device Size Intubation (Blade size) Miller4 or MAC 3.5 Size 4 Nasal Intubation 7.5 mm outer diameter max Oral Intubation ETT 7.5 (cuffed) It is recommended to set the respiratory rate to... - Page 17 HAL® S1030 | USER GUIDE Pneumothorax HAL has bilateral needle decompression sites that are located between the second and third intercostal spaces. There is a latex tubing inside HAL's ribcage that builds up pressure once the pneumothorax feature is activated in the UNI software. Once the pneumothorax is treated by performing a needle decompression, a slight pleural pop may be audible.
- Page 18 Doing so will affect the lung compliance system. If the lung compliance system is affected, it may have to be returned to Gaumard repairs to be recalibrated. On the underside of the ribcage, locate the punctured pneumothorax tubing, disconnect, and save the black o-ring.
- Page 19 HAL® S1030 | USER GUIDE Artificial Ventilation It is possible to perform artificial ventilations with a Bag Valve Mask (BVM) on HAL. Before incorporating this feature into a simulation session, it is recommended to calibrate HAL's artificial ventilations. To perform the artificial ventilation calibration: Within the UNI software, click the blue gear icon in the upper right-hand corner and then click 'Setup' and 'Calibration'.
- Page 20 HAL® S1030 | USER GUIDE On the next page, select the [Never Calaibrated] option and click 'Next'. On the next page, click 'Start' to begin the calibration process. 20 | Working with HAL...
- Page 21 HAL® S1030 | USER GUIDE On the next page, begin to perform 5 correct artificial ventilations one at a time. The gray oval will light up green as each one is recorded. NOTE: Before clicking 'Finish', the performed artificial ventilations will be saved. A summary report will appear, and if the information is not satisfactory, redo the calibration.
- Page 22 HAL® S1030 | USER GUIDE Mechanical Ventilation Support HAL's theoretical weight is 75 kg (165 lbs.) which may be a dimension needed for respiratory therapy calculations. WARNING: Do not introduce liquids, humidified gases, or administer aerosol medications into the airway. Moisture in the airway will damage the simulator's internal sensors and mechanics. WARNING: HAL's operating limitations are consistent with that of a real human.
- Page 23 HAL® S1030 | USER GUIDE Lung Compliance WARNING: Do not change the mechanical ventilator setting while the simulator is adjusting its lung compliance parameters. The Lung Compliance for HAL is initially set at a level of 8 for 'normal' in the UNI software. NOTE: Each level of simulated lung compliance represents a change in increments of 5 cmH20.
- Page 24 HAL® S1030 | USER GUIDE Lung Resistance The Lung Resistance for HAL is initially set at a level of 0 for both the left and right lungs. The Lung Resistance may be adjusted independently for the left and right lungs. To simulate a restricted bronchial tube, increase the lung resistance.
- Page 25 HAL® S1030 | USER GUIDE It is recommended that the CO2 canister be plugged in just before the start of the training session to get the maximum duration of run time. If left overnight, the canister may leak some CO2. To install the CO2 cartridge: Remove the right leg skin cover.
- Page 26 HAL® S1030 | USER GUIDE WARNING: Once the seal on the CO2 canister is punctured, do not let it go until it is completely tightened into the harness adapter. Do not attempt to remove the CO2 canister unless empty. Doing so for either case may cause the canister to become a projectile. Finally, insert the adapter into the chamber and replace the tibia insert and skin.
- Page 27 HAL® S1030 | USER GUIDE Click 'Setup' and then 'Calibration'. Once the Calibration menu opens up, click the 'Factory Settings' button in the bottom left corner. On the 'Factory Settings' menu, click the 'CO2 Pressure' button to get a reading of how much pressure is left in the CO2 cartridge that is connected to the simulator.
- Page 28 HAL® S1030 | USER GUIDE The reading that appears to the right of the 'CO2 Pressure' button should read 0.0 psi when the cartridge is empty. Click 'Finish' and proceed to remove the empty CO2 cartridge from the simulator following the steps in reverse from how it was installed.
- Page 29 HAL® S1030 | USER GUIDE Patient Trigger Rate HAL is able to trigger the mechanical ventilator with shallow inhalations (gasps) as a signal for breathing assistance. The rate at which he may trigger the ventilator is programmable. To adjust this rate in the UNI software: Under the 'Breathing' section in the UNI software on the left-hand side, locate 'Patient Trigger Rate'.
- Page 30 HAL® S1030 | USER GUIDE Click on 'Respiratory Pattern' and select a pattern from the list. NOTE: When changing the Respiratory Pattern, an information box will appear to notify you that the Respiratory Rate will be changed and the Inspiration Percent will be disabled. Click on the green checkmark button to finalize your selection.
- Page 31 HAL® S1030 | USER GUIDE Inspiration Percent HAL has a programmable inspiration percent that allows you to control the inspiratory versus expiratory ratio. To change this ratio in UNI: Under the 'Breathing' section in UNI, locate 'Inspiration Percent'. Click on 'Inspiration Percent' and adjust the percentage with the slider bar or by typing in the numeric value from a range of 11%-90%.
- Page 32 HAL® S1030 | USER GUIDE Click 'Setup' then 'Calibration'. From the Calibration menu, select 'Oxygen Saturation' and click 'Next'. NOTE: A prompt will appear to ensure that the oximeter is turned off. Please either remove the oximeter from the finger of the simulator or turn it off.
- Page 33 HAL® S1030 | USER GUIDE Select the simulator's Left Index finger and click 'Next'. NOTE: A prompt will appear that indicates to turn on the oximeter. Please place the oximeter on the simulator's finger with the proper orientation or switch it on if it was already on the simulator's finger.
- Page 34 HAL® S1030 | USER GUIDE Click "OK" once the values on the oximeter monitor and the UNI calibration menu match. The grey bubble will turn green and proceed to the next value. Continue this calibration process and adjust the values for the oximeter monitor using the arrows until the process is done.
- Page 35 HAL® S1030 | USER GUIDE EtCO2 The EtCO2 vital in the UNI software is purely a virtual value. The EtCO2 can be displayed on the virtual monitor tab within UNI or on the optionally purchased Virtual Monitor. To adjust this value in UNI: Under the 'Breathing' section, locate 'EtCO2'.
- Page 36 HAL® S1030 | USER GUIDE Lung Sounds HAL has four anterior and four posterior lung sounds. Lung sounds are programmable and include the following options: Normal • None • Wheezing • Crackles • Crackles 2 • Squeaks, insp. • To change this parameter in the UNI software: Under the 'Breathing' section, locate 'Lung Sounds'.
- Page 37 HAL® S1030 | USER GUIDE If needed, adjust the volume for either the Anterior or Posterior lung speakers using the grey slider bars. NOTE: If the settings for the lung sounds and volume need to be applied for all quadrants of lung speakers, check mark the 'Sync ALL Sounds' box.
-
Page 38: Cardiac
HAL® S1030 | USER GUIDE 4.3 CARDIAC HAL has virtual cardiac vitals that can be displayed on the virtual monitor tab within UNI or on the optionally purchased Virtual Monitor. The cardiac section is located in UNI on the left-hand side of the software UNI has an EKG library with 25+ different cardiac rhythms to choose from. - Page 39 HAL® S1030 | USER GUIDE To view the effect of changing the EKG, click the 'Virtual Monitor' tab in UNI, and view the EKG waveform. Heart Rate HAL's heart rate is a virtual vital. To change this vital: Under the 'Cardiac' section, locate 'Heart Rate'. Click 'Heart Rate' and use the grey slider bar to adjust or type in the desired value.
-
Page 40: Circulation
The I/O bone may be left empty to simulate an infusion when drilling in. Likewise, the I/O may be filled with Gaumard synthetic blood to simulate a blood withdrawal. To fill the I/O with Gaumard synthetic blood: Remove the right lower leg skin cover. - Page 41 HAL® S1030 | USER GUIDE HAL has virtual circulation vitals that can be displayed on the virtual monitor tab within UNI or on the optionally purchased Virtual Monitor. The Circulation section is located in UNI on the left-hand side of the software Blood Pressure HAL's virtual blood pressure vital can be changed by: Under the 'Circulation' section,...
- Page 42 HAL® S1030 | USER GUIDE Temperature To change HAL's virtual temperature: Under the 'Circulation' section, locate 'Temperature'. Click on 'Temperature' and use the slider bar or type in the desired value. View the changes in temperature by clicking the 'Virtual Monitor' tab in UNI and viewing the numeric temperature change.
- Page 43 HAL® S1030 | USER GUIDE On the 'Options' pop up box, select the 'General' tab. Locate the 'Units' section and select the system of preferred units and press 'OK'. NOTE: View the changes in Temperature Units by clicking the 'Virtual Monitor' tab in UNI and viewing the temperature section.
- Page 44 HAL® S1030 | USER GUIDE Blood Glucose To change HAL's virtual Blood Glucose: Under the 'Circulation' section, locate 'Blood Glucose'. Click on 'Blood Glucose' and use the slider bar or type in the desired value. Capillary Refill Time To change HAL's virtual Capillary Refill Time: Under the 'Circulation' section, locate 'Capillary Refill Time'.
-
Page 45: Working With Mechanical Ventilator
HAL® S1030 | USER GUIDE 5. WORKING WITH MECHANICAL VENTILATOR 5.1 LUNG COMPLIANCE LOOPS WITH MECHANICAL VENTILATOR For this simulation exercise, configure the mechanical ventilator with the following parameters. HAL's theoretical weight is 75 Kg (165 lbs) • Ventilation Type: Volume controlled •... - Page 46 HAL® S1030 | USER GUIDE Normal Compliance Loop - Lung Compliance 7 Mid Compliance - Lung Compliance 4 46 | Working with Mechanical Ventilator...
- Page 47 HAL® S1030 | USER GUIDE Low Compliance - Lung Compliance 0 Please remember to allow each change in lung compliance time to adjust to the new level. Remember to look at the icon in the bottom right- hand corner and wait for it to transition from a yellow warning symbol to a pair of blue lungs.
-
Page 48: Simulating Respiratory Issues
HAL® S1030 | USER GUIDE 5.2 SIMULATING RESPIRATORY ISSUES Multiple respiratory conditions may be simulated using HAL and the UNI software. Within the UNI software, some pre-programmed scenarios and palettes can be accessed through the 'Quick Launch' and/or 'Palette' tab to demonstrate this. Outlined below are a few of the palettes that may simulate certain respiratory conditions with the corresponding UNI parameters... - Page 49 HAL® S1030 | USER GUIDE Select a palette from the list by clicking on it. Click on the 'Properties' button to view how this palette will change the vitals. Once finished viewing the properties of the palette exit out of the pop-up box. Working with Mechanical Ventilator | 49...
- Page 50 HAL® S1030 | USER GUIDE Click the 'Now' button to apply the vitals of the palette to the UNI software. After understanding how to locate and load a palette, proceed with the palette exercises that explore how to simulate some respiratory conditions. Normal on Vent 1 From the aforementioned palette list locate and load the palette with the name 'Normal on Vent 1'.
- Page 51 HAL® S1030 | USER GUIDE Bronchitis Severe Load the 'Bronchitis Severe' palette. Once loaded, the respiratory rate is set to 0, lung compliance set to 5, and lung resistance for both left and right at 4. Emphysema Lobular Load the 'Emphysema Lobular' palette, which will set the respiratory rate to 0, lung compliance to 8, lung resistance to 0, and lung sounds will play.
- Page 52 HAL® S1030 | USER GUIDE Fibrosis Severe Load the 'Fibrosis Severe' palette to set the respiratory rate to 0, lung compliance to 0, and lung resistance to 0. Asthma Moderate Load the 'Asthma Moderate' palette to set respiratory rate to 0, lung compliance to 6, lung resistance to 5, and lung sounds to play 52 | Working with Mechanical Ventilator...
-
Page 53: Working With Uni
6.1 UNI INTERFACE Once the UNI software is launched and is loaded, the below screenshot depicts the general interface layout. This is common throughout all Gaumard simulators that use UNI as its control software. 6.2 UNI LOG The UNI log is located towards the bottom of the UNI interface. -
Page 54: Uni Window & Tabs
Under the UNI window lies a gray bar with multiple tabs. These tabs will display different options within the UNI window when selected. The tabs available for HAL S1030 include: Quick Launch Scenario • •... - Page 55 HAL® S1030 | USER GUIDE 'Quick Launch' tab displays the • programmed scenarios that can be easily selected and loaded to play. 'Virtual Monitor' tab displays a virtual • representation of the simulator's vital signs. 'Palette' tab displays the lists of available palettes •...
- Page 56 HAL® S1030 | USER GUIDE 'Scenario' tab is the location where • the programming of a custom scenario will take place. 'Labs' provides a template of virtual labs • that can be created to provide information about the simulated patient for the session. 'Provider Actions' provides quick •...
-
Page 57: Uni Vitals
• The number of sections varies depending on your simulator model, but these sections are included for HAL S1030. The UNI vitals may be changed "On the Fly" simply by first clicking the wand in the upper left hand corner of the UNI software. After clicking this tool, it will allow the user to change the vitals almost instantly. -
Page 58: Options
HAL® S1030 | USER GUIDE 7. OPTIONS Customize HAL by purchasing options at the initial time of purchase. The available options for HAL S1030 include: Gaumard Vitals Bedside Virtual Monitor • Gaumard Vitals Portable Virtual Monitor • 7.1 GAUMARD VITALS BEDSIDE VIRTUAL MONITOR... - Page 59 HAL® S1030 | USER GUIDE Selecting WI-FI network It is important to make sure that the WI-FI network the UNI control tablet and the bedside virtual monitor is connected to are the same network. When turning on these devices, it is a good idea to check what WIFI network the device is connected to.
- Page 60 HAL® S1030 | USER GUIDE If the network WIFI connections are not the same for both devices, please click on the preferred network name to switch the device to that network. For the preferred network, click the 'Connect' button. NOTE: If the devices are connected already, the indicator will read 'Connected'..
- Page 61 HAL® S1030 | USER GUIDE Matching IP Addresses and Port Numbers The second important thing to ensure communication between the UNI control tablet and the bedside virtual monitor is to be sure that the IP addresses and port numbers in the software match! To check the information about IP addresses and port numbers, this will require both devices, the UNI control tablet, and the bedside virtual monitor.
- Page 62 At this point, go to the bedside virtual monitor and launch the Gaumard Vitals software by clicking the icon. NOTE: The Gaumard Vitals software has been preloaded on to the bedside virtual monitor. Once the Gaumard Vitals software opens, if...
-
Page 63: Troubleshooting
HAL® S1030 | USER GUIDE 8. TROUBLESHOOTING 8.1 GENERAL TROUBLESHOOTING Symptom Possible Cause Solution Verify the connection of Data cable is not connected. the Ethernet cable and USB USB Module is not connected module to the computer's USB port. Navigate to the blue gear in the Communication never gets upper right-hand corner of the established or is lost. - Page 64 HAL® S1030 | USER GUIDE Symptom Possible Cause Solution Make sure lungs are enabled, and both respiratory rate and inspiration percent are different Low chest rise (or no chest rise at all) Wrong settings or disabled lungs. than '0'. Try changing the while breathing.
- Page 65 HAL® S1030 | USER GUIDE Symptom Possible Cause Solution Make sure the CO2 canister is in place. For the S1030, the UNI software will display the "Low CO2" message when CO2 pressure is low. The pressure of CO2 can also be checked by going to the Factory Settings Empty CO2 canister.
-
Page 66: Appendix
HAL S1030® | USER GUIDE 9. APPENDIX 9.1 PARTS LIST Should you require additional parts or need to purchase consumables please look at the below table. C = Consumable R = Replacement Part Part ID Name Type Description S1030.031 I/O Bones Intraosseous Bones for HAL. -
Page 67: Gaumard Sales Terms And Conditions
Payment. Customer shall pay all invoiced amounts within twenty (20) days from the invoice date, unless otherwise agreed upon by Gaumard in writing. Gaumard may require some or all of the purchase price to be paid in advance by Customer, unless Gaumard grants credit approval as determined in Gaumard’s sole discretion on a case by case basis (taking into account factors such as credit rating, payment history, and size of order). - Page 68 F.O.B. Origin, regardless of any provisions for payments of freight, insurance, the form of shipping documents, or selection of carrier by Gaumard. F.O.B. Origin means title to the Products passes to the Customer at the shipping dock of Gaumard or Gaumard’s supplier or authorized agent. Customer is responsible for shipping charges and for the cost of insurance paid to cover any losses from Gaumard’s shipment point to Customer’s receipt.
- Page 69 However, if the repairs are not covered by this limited warranty, then Customer will be liable for all repair costs in addition to costs of shipping and handling. Upon request, Gaumard must be given access to and an opportunity to inspect the Product and any working areas and storage areas. These remedies shall comprise Gaumard’s entire liability and Customer’s exclusive remedy for breach of warranty and are in lieu of any...
- Page 70 USER GUIDE fees and expenses) by reason of any claims or actions by third parties against Gaumard for (1) bodily injury or death or damage, loss or destruction of any real or tangible personal property, which third party claims arise out of or relate to Customer’s gross negligence or willful misconduct;...
-
Page 71: End User License Agreement
EULA (“End User”) and Gaumard Scientific Company, Inc., a Florida corporation (“Gaumard”), relative to the Gaumard Software (as defined below). This EULA is effective as of the date Gaumard accepts and confirms the Purchase Order (the “Effective Date”). BY USING THE GAUMARD SOFTWARE, END USER IS AGREEING TO BE BOUND BY THE TERMS OF THIS EULA. - Page 72 Agreement sHAL®l cause Gaumard irreparable harm and Gaumard may obtain injunctive relief without the requirement to post a bond as well as seek all other remedies available to Gaumard in law and in equity in the event of breach or threatened breach of such provisions.
- Page 73 Gaumard; (d) any use of Gaumard Software by End User after End User learns of such allegation of infringement; or (e) any failure by End User to utilize a non-infringing version of the Gaumard Software made available by Gaumard along with notice that such update is non-infringing. The obligations set forth in this Section 5.3 are Gaumard’s sole obligations, and End User’s sole and exclusive remedy, for the Gaumard Software infringing third party...
-
Page 74: Exclusive One-Year Limited Warranty
Extended Warranty In addition to the standard one year of coverage we offer a range of service plans through our Gaumard Cares program. For more information about Gaumard Cares service planes please contact customer service. -
Page 75: Contact Technical Support
USER GUIDE 9.5 CONTACT TECHNICAL SUPPORT Before contacting Technical Support, please make sure to have the following: Your simulator's serial number Access to the simulator for possible troubleshooting as needed Technical Support Email: support@gaumard.com USA: 800-882-6655 INT: 01-305-971-3790 9.6 GENERAL INFORMATION Sales and Customer Service E-mail: sales@gaumard.com...
Need help?
Do you have a question about the HAL S1030 and is the answer not in the manual?
Questions and answers