Table of Contents
Advertisement
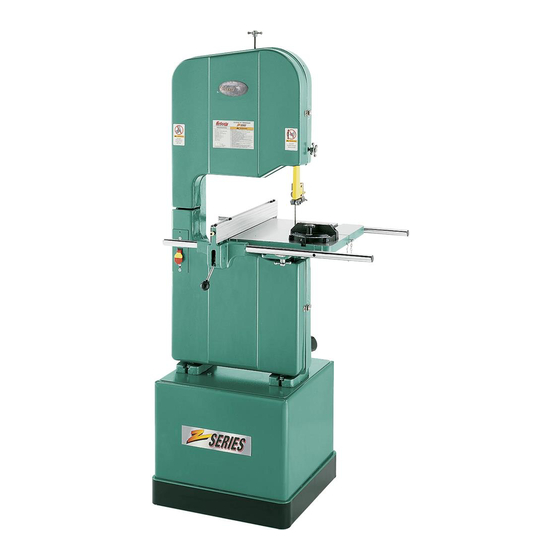
16'' BANDSAW
MODEL G1073/G1073Z
INSTRUCTION MANUAL
G1073
G1073Z
COPYRIGHT © 1993 BY GRIZZLY INDUSTRIAL, INC. REG #TX 3 562 349
WARNING: NO PORTION OF THIS MANUAL MAY BE REPRODUCED IN ANY SHAPE
OR FORM WITHOUT THE WRITTEN APPROVAL OF GRIZZLY INDUSTRIAL, INC.
REVISED OCTOBER, 2002. PRINTED IN TAIWAN
ONLINE MANUAL DISCLAIMER
THE INFORMATION IN THIS MANUAL REPRESENTS THE CONFIGURATION OF THE MACHINE AS IT IS CURRENTLY BEING SHIPPED. THE
MACHINE CONFIGURATION CAN CHANGE AS PRODUCT IMPROVEMENTS ARE INCORPORATED. IF YOU OWN AN EARLIER VERSION OF THE
MACHINE, THIS MANUAL MAY NOT EXACTLY DEPICT YOUR MACHINE. CONTACT CUSTOMER SERVICE IF YOU HAVE ANY QUESTIONS
ABOUT DIFFERENCES. PREVIOUS VERSIONS ARE NOT AVAILABLE ONLINE.
Advertisement
Table of Contents

Related Manuals for Grizzly G1073/G1073Z


Summary of Contents for Grizzly G1073/G1073Z
-
Page 1: Instruction Manual
INSTRUCTION MANUAL G1073 G1073Z COPYRIGHT © 1993 BY GRIZZLY INDUSTRIAL, INC. REG #TX 3 562 349 WARNING: NO PORTION OF THIS MANUAL MAY BE REPRODUCED IN ANY SHAPE OR FORM WITHOUT THE WRITTEN APPROVAL OF GRIZZLY INDUSTRIAL, INC. REVISED OCTOBER, 2002. PRINTED IN TAIWAN ONLINE MANUAL DISCLAIMER THE INFORMATION IN THIS MANUAL REPRESENTS THE CONFIGURATION OF THE MACHINE AS IT IS CURRENTLY BEING SHIPPED. - Page 2 WARNING Some dust created by power sanding, sawing, grind- ing, drilling, and other construction activities contains chemicals known to the State of California to cause cancer, birth defects or other reproductive harm. Some examples of these chemicals are: • Lead from lead-based paints. •...
-
Page 3: Table Of Contents
CUTTING CURVES...28 RESAWING ...28 MAINTENANCE ...29 V-BELTS ...29 MISCELLANEOUS ...29 TABLE ...29 LUBRICATION ...29 CLOSURE...30 WIRE DIAGRAM ...31 MACHINE DATA ...32 PARTS BREAKDOWN AND PARTS LISTS ...33-40 TROUBLESHOOTING GUIDE ...41 WARRANTY AND RETURNS...42 G1073/G1073Z 16'' Bandsaw Table Of Contents PAGE... -
Page 4: Section 1: Safety
G1073/G1073Z 16" Bandsaw VISITORS... -
Page 5: Safety Instructions For Power Tools
14. MAINTAIN TOOLS WITH CARE. Keep tools sharp and clean for best and safest performance. Follow instructions for lubri- cating and changing accessories. G1073/G1073Z 16'' Bandsaw 15. USE RECOMMENDED ACCESSORIES. 16. REDUCE THE RISK OF UNINTENTION- 17. MANY WOODWORKING TOOLS CAN... -
Page 6: Additional Safety Instructions For Bandsaws
CUT METAL or other material except wood. BLADE SHOULD BE RUNNING AT FULL SPEED before beginning a cut. BLADE after turning the saw off. Allow it to come to a complete stop before you leave it unattended. AND MAINTENANCE ARE TO BE DONE WITH THE POWER OFF and the plug pulled from the outlet. -
Page 7: Section 2: Circuit Requirements
If frequent circuit failures occur when using the bandsaw, contact our service department or your local electrical contractor. The Model G1073/G1073Z is not supplied with a power plug. It will be necessary to supply your own standard 110V, 30 Amp grounded plug and receptacle as shown in Figure 2. -
Page 8: Grounding
Use only 3-wire extension cords that have 3- prong grounding type plugs and 3-hole recepta- cles that accept the tool’s plug, similar to that in Figure 2. Repair or replace damaged or worn cords imme- diately. actually plug Figure 2. G1073/G1073Z 16" Bandsaw... -
Page 9: Section 3: General Information
Grizzly Industrial, Inc. is proud to offer the Model G1073 and G1073Z 16" Bandsaws. These band- saws are a part of Grizzly’s growing family of fine woodworking machinery. When used according to the guidelines stated in this manual, you can expect years of trouble-free, enjoyable operation, and proof of Grizzly’s commitment to customer... -
Page 10: Unpacking
Otherwise filing a freight claim can be difficult. When you are completely satisfied with the con- dition of your shipment, you should inventory its parts. The Model G1073/G1073Z is a heavy machine (456 lbs. ship- ping weight). DO NOT over- exert yourself while unpack- ing or moving your machine –... -
Page 11: Clean Up
G1073/G1073Z 16'' Bandsaw Site Considerations Floor Load: Your Model G1073/G1073Z 16'' Bandsaw represents a large weight load in a small footprint. Most commercial floors are suitable for the Model G1073/G1073Z. Some residential floors may require additional build up to support both machine and operator. -
Page 12: Section 4: Assembly
Position the motor so the pulley is over the rectangular hole in the stand top as shown in Figure 4. Secure with four (4) carriage bolts, ⁄ " washers, and provided. G1073/G1073Z 16" Bandsaw ⁄ " washers, ⁄ "-18 x 1" ⁄ "-18 nuts... -
Page 13: Bandsaw To Stand
The small end of the pulley should be near the motor. Flip the stand/motor assembly rightside-up on the floor, but do not tighten the stand hardware at this time. G1073/G1073Z 16'' Bandsaw Bandsaw To Stand ⁄ "-18 Motor Pulley ⁄... -
Page 14: Wiring The Motor
Wiring The Motor The Model G1073/G1073Z motor and ON/OFF switch each have a special connec- tor for ease of wiring. Plug the connectors into each other as illustrated in Figure 7. The motor is prewired for 220 volt operation. Install the appropriate 220V plug onto the power cord. -
Page 15: V-Belt
Be careful not to change the lateral position of the motor and move the pulleys out of alignment. Tighten the motor mount bolts. G1073/G1073Z 16'' Bandsaw Figure 9B. Pulley deflection w/moderate pressure. ⁄ " at its midpoint Check the pulley alignment with a plumb bob or straightedge. -
Page 16: Working Table
DO NOT use excessive force. NOTICE The tapered table pin must be in position when operating the bandsaw. G1073/G1073Z 16" Bandsaw Trunnion... -
Page 17: Fence
G1073/G1073Z 16'' Bandsaw Figure 14. Fence mounted on rails. There are two ways to remove the fence: Remove the blade so the fence slides off the rails. -
Page 18: Guard
It mounts to the lower rear casting body. This port can be connected directly to a 2 a standard 4" dust collector hose by using the Grizzly Model G3119 adapter between a 2 4" hose. To mount the dust port: Belt Guard Dust Port ⁄... -
Page 19: Section 5: Adjustments
Now, slowly increase the tension until the blade stops fluttering. Tighten the tension one quarter of a turn. G1073/G1073Z 16'' Bandsaw If the tension seems correct, turn the bandsaw OFF and make the other adjustments, and test loose clothing run. -
Page 20: Blade Tracking
Make the same adjustments described in steps 2-4 and mount the guide block assembly back to the bandsaw body. Eccentric Shaft Figure 18B. Eccentric blade support. G1073/G1073Z 16" Bandsaw... -
Page 21: Blade Guides
To adjust this positive stop so the table will return perpendicular (90°) to the blade after angle cutting: G1073/G1073Z 16'' Bandsaw Always power to the machine when ments. Failure to do this may result in serious personal injury. -
Page 22: Table Parallelism
Tighten the star knobs. NOTICE If setting table tilt to the left, first tilt the table to the right, remove the cap on the positive stop, and then tilt the table to the left. G1073/G1073Z 16" Bandsaw... -
Page 23: Blade Changes
If the teeth will not point downward in any ori- entation, the blade is inside out. Put on heavy gloves, remove the blade, and twist it inside out. G1073/G1073Z 16'' Bandsaw disconnect Figure 23. Changing blade with leather gloves. Slip the blade through the upper and lower guides, and mount it over the upper and lower wheels. -
Page 24: Guide Post
If the post is correct, the blade will remain centered in the blade guide brackets. Repeat Steps 1-3 as needed. If the guide post bracket will not adjust enough, shift the blade slightly. Bracket Bolts Figure 25A. Location of bracket bolts. G1073/G1073Z 16" Bandsaw... -
Page 25: Fence Adjustment
The end of the fence nearest to the operator should lock before the rear. G1073/G1073Z 16'' Bandsaw Use a tape measure or ruler to measure the dis- tance from the fence to the blade. To adjust the front clamping pressure: Lift the lever to the “loose”... -
Page 26: Blade Lead
While maintaining the skew, tighten the cap screws. Figure 28. Blade leading away from line of cut. ⁄ " thick x 3" wide x 17" long. On a G1073/G1073Z 16" Bandsaw... -
Page 27: Wheel Alignment
Make sure it fully extends across them as in Figure 29. G1073/G1073Z 16'' Bandsaw Figure 29. Holding a straightedge across both wheels. A perfectly coplanar set of wheels will allow the straightedge to touch the top and bottom of the outside rims on each wheel. -
Page 28: Wheel Alignment
Adjust the setscrews in or out very slightly (over-adjustment will cause the tension rod to bind). Use your straightedge from the pre- vious section to make the upper wheel paral- lel with the lower wheel. Tighten the four cap screws and check wheel alignment. G1073/G1073Z 16" Bandsaw... -
Page 29: Section 6: Operations
G1073/G1073Z 16'' Bandsaw loose clothing The Model G1073/G1073Z 16" Bandsaw accepts 113" blades. The tension adjustment will accom- modate blades up to a maximum length of 114" and down to a minimum length of 112" (approx.). -
Page 30: Cutting Curves
Use a fence to guide work. Radius Draw a reference line on the edge of the ⁄ board. ⁄ ⁄ Support ends of the board if necessary. ⁄ ⁄ Feed work slowly and evenly. ⁄ Resawing ⁄ G1073/G1073Z 16" Bandsaw... -
Page 31: Section 7: Maintenance
The table can be kept rust-free with regular appli- cations of products like SLIPIT 9. For long term storage you may want to consid- er products like Kleen Bore's Rust Guardit™. See the current Grizzly catalog for more on these products. Shielded and pre-lubricated ball bearings require ⁄... -
Page 32: Section 8: Closure
However, due to Grizzly’s policy of continuous improvement, changes may be made at any time with no obligation on the part of Grizzly. We have included some important safety mea- sures that are essential to this machine’s opera- tion. -
Page 33: Wire Diagram
G1073/G1073Z 16'' Bandsaw -31-... -
Page 34: Machine Data
Customer Service #: (570) 546-9663 • To Order Call: (800) 523-4777 • Fax #: (800) 438-5901 MODEL G1073/G1073Z 16" BANDSAW Design Type: ...2 Wheel Floor Model, 3 Speed Overall Dimensions: Table ...17" x 17" x 1 Stand...16" H x 24" W x 21" L Overall Height ...72"... -
Page 35: Parts Breakdown And Parts Lists
G1073/G1073Z 16'' Bandsaw -33-... - Page 36 -34- G1073/G1073Z 16" Bandsaw...
- Page 37 137A G1073/G1073Z 16'' Bandsaw 117Ł -35-...
- Page 38 -36- 156A G1073/G1073Z 16" Bandsaw...
- Page 39 Model 1073 60-1 60C-1 161A 163A G1073/G1073Z 16'' Bandsaw 123B 60B-1 100A -37-...
- Page 40 Model 1073Z 161A 163A -38- 123B G1073/G1073Z 16" Bandsaw...
- Page 41 SPRING P1073038 DEGREE PLATE P1073039 THUMB SCREW P1073040 FENCE HEADSTOCK P1073041 CLAMP SHOE P1073042 P1073043 P1073044 HANDLE G1073/G1073Z 16'' Bandsaw 51A PRP07M 60-1 P1073060-1 60A P1073060A 60B-1 60C-1 ⁄ "-18 x ⁄ " 77A PB22 81C PN09 83A P1073081A PART #...
- Page 42 STOP POINTER SCALE FLAT WASHER ⁄ SCREW TYPE KNOB EXT TOOTH WASHER #10 ROLL PIN 1.5 X 3MM FLAT WASHER ⁄ INT RETAINING RING 47MM G1073/G1073Z 16" Bandsaw ⁄ " " " ⁄ " " ⁄ "-18 x 1" ⁄...
-
Page 43: Troubleshooting Guide
1. Rubber pads not installed under stand. 2. Wheels not coplanar. 3. Tires incorrectly installed. 4. Worn out V-belt. 5. Bent or worn out blade. 6. Wheels out of balance. G1073/G1073Z 16'' Bandsaw connections. connections. appliances, and other motors. company facilities. restricted. -
Page 44: Warranty And Returns
WARRANTY AND RETURNS Grizzly Industrial, Inc. warrants every product it sells for a period of 1 year to the original purchaser from the date of purchase. This warranty does not apply to defects due directly or indirectly to misuse, abuse, negligence, accidents, repairs or alterations or lack of maintenance. -
Page 45: Warranty Card
Do you think your purchase represents good value? ___Yes Would you recommend Grizzly Industrial to a friend? ___Yes Would you allow us to use your name as a reference for Grizzly customers in your area? Note: We never use names more than three times. ___Yes Comments:__________________________________________________... - Page 46 FOLD ALONG DOTTED LINE FOLD ALONG DOTTED LINE Send a Grizzly Catalog to a friend: GRIZZLY INDUSTRIAL, INC. P.O. BOX 2069 BELLINGHAM, WA 98227-2069 Name_______________________________ Street_______________________________ City______________State______Zip______ TAPE ALONG EDGES--PLEASE DO NOT STAPLE Place Stamp Here...
Need help?
Do you have a question about the G1073/G1073Z and is the answer not in the manual?
Questions and answers