Advertisement
MODEL NO. PL231
®
ASSEMBLY INSTRUCTIONS
MODEL: PL 231
Before assembly, please remove all parts from carton, verifying that you have the correct quantities, and read all the instructions.
IN THE CARTON:
HARDWARE
1 1
2
3
4
5
6
Screw
M4 x 65
JCBC Screw
3.5X30MM
Klix Cam
Housing Cap (Short)
Allen-Key
Cam Lock
M6 x 35mm = 4pcs
4 Pcs
10 Pcs
10 Pcs
1 Pc
10 Pcs
1
Washer = 8pcs
4
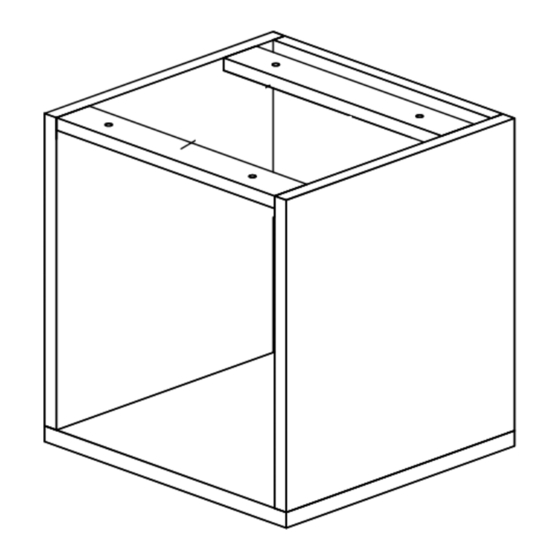
COMPONENTS
A
B
C
D
E
Side Panel-R
Side Panel-L
Hanging Rail-2Pcs
Back Panel
Bottom Panel
KLIX CAM INSTRUCTIONS
1
2
3
Insert the cam with the arrow
Insert the Cam Lock into Klix
Line up Cam Lock,
pointing towards the hole in
Cam. Turn Klix Cam to lock.
turn clockwise.
the edge.
C
D
B
A
E
1 OF 2
Last Updated: 02/2021
OFFICESOURCE.COM
Last Updated: 3/2023
Advertisement
Table of Contents

Related Manuals for OfficeSource PL231


Summary of Contents for OfficeSource PL231
- Page 1 ASSEMBLY INSTRUCTIONS MODEL NO. PL231 ® ASSEMBLY INSTRUCTIONS MODEL: PL 231 Before assembly, please remove all parts from carton, verifying that you have the correct quantities, and read all the instructions. IN THE CARTON: HARDWARE Screw M4 x 65 JCBC Screw 3.5X30MM...
- Page 2 (1) and Klix Cam (2). Attach Housing Cap(3) to each Klix Attach the PL231 to Cam(2) by pushing the neck Attach the PL231 to others PL231 by others PL231 by thought the center of the Klix Cam. using JCBC Screw & Flat Washer(1).
Need help?
Do you have a question about the PL231 and is the answer not in the manual?
Questions and answers