Table of Contents
Advertisement
Quick Links
INSTRUCTION MANUAL
PLS
・This instruction manual is for production engineers and
maintenance personnel in charge of operation of this product.
When a beginner uses this product, receive instructions from
experienced personnel, the distributor or our company.
・Before installing, operating or maintaining this equipment,
carefully read this manual and the safety labels attached to
the equipment. Failure to follow these instructions and safety
precautions could result in serious injury, death, or property
damage.
・Store this manual near equipment for future reference.
・If any questions related to safety arise about this manual,
please confirm them with the distributor or our company.
Kitagawa Corporation
77-1,Motomachi,Fuchu-shi,Hiroshima,726-8610,Japan
type
Work Gripper
Te l . +81-847-40-0561
Fax. +81-847-45-8911
Version 1.10 (2023.04.12)
Original instructions
Advertisement
Table of Contents

Related Manuals for Kitagawa PLS Series


Summary of Contents for Kitagawa PLS Series
- Page 1 ・Before installing, operating or maintaining this equipment, carefully read this manual and the safety labels attached to the equipment. Failure to follow these instructions and safety precautions could result in serious injury, death, or property damage. ・Store this manual near equipment for future reference. ・If any questions related to safety arise about this manual, please confirm them with the distributor or our company. Kitagawa Corporation 77-1,Motomachi,Fuchu-shi,Hiroshima,726-8610,Japan Te l . +81-847-40-0561 Fax. +81-847-45-8911...
- Page 2 Guarantee and Limitation of Liability The guarantee period of this product is 1 year after delivery. Use the parts delivered by Kitagawa Corporation for all the parts including consumable parts. We will not assume responsibility for injury, death, damage, or loss caused by usage of parts not manufactured by Kitagawa Corporation. Additionally, if parts other than genuine parts manufactured by Kitagawa Corporation are used, this guarantee will be completely invalid.
-
Page 3: Table Of Contents
Table of Contents 1. Structural Drawing and Parts List ……………………………………………………………… 3 1-1. Type display 1-2. Structural drawing 1-3. Scope of product 1-4. Parts list Important Safety Precautions ……………………………………………………… 8 3. Specifications …………………………………………………………………………………… 13 3-1. Specifications 3-2. Relationship between pressure and gripping force 4. Forming Soft Jaw ……………………………………………………………………………… 15 4-1. Attachment of jaw 4-2. Forming soft jaw 5. Usage …………………………………………………………………………………………… 17 5-1. Precautions during gripping work with work gripper 5-2. Precautions during gripping work in irregular shape 5-3. Precautions related to usage of jaw 5-4. Precautions related to processing 5-5. Attachment of locator and jig 5-6. Precautions related to usage of lock valve unit 6. Maintenance and Inspection ………………………………………………………………… 20 6-1. Periodic Inspection 6-2. Grease lubrication 6-3. Disassembling 6-4. Inspection of lock valve unit 7. Malfunction and Countermeasures …………………………………………………………… 23 7-1. In the case of malfunction 7-2. Where to contact in the case of malfunction For Machine Tool Manufacturers (Chapter 8) 8. Attachment ……………………………………………………………………………………… 24 8-1. Air piping 8-2. Attachment of lock valve unit 8-3. Oil piping 9. Trial Operation ... -
Page 4: Structural Drawing And Parts List
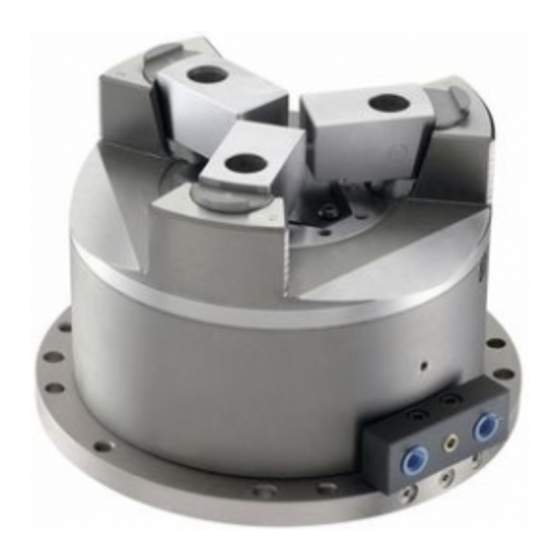
1. Structural Drawing and Parts List 1−1 Type display Type display as shown below P L S 0 4 - 9 9 9 PLS series Nominal diameter (Inch) Design No. Fig.1 1−2 Structural drawing Master jaw Top jaw Piston (Soft jaw. hard jaw. Flange special jaw included) Cover Cylinder Body Plunger Block or lock valve cover unit(Option) Fig.2... -
Page 5: Scope Of Product
1−3 Scope of product This instruction manual is for the work gripper. Other than information about the work gripper, it is mentioned about optional article (A lock valve unit). Manual switching valve or solenoid valve Air hose Lock valve unit Air pressure gauge Work gripper Water drain handle Air pressure adjusting handle Air control unit Manual switching valve (AV-02F) Lock valve unit Work gripper Fig.3 WARNING ・To prevent the work from flying, safe design, maintenance and erroneous action prevention of the pneumatic system to maintain the gripping force of the work gripper is extremely important. Thoroughly read the ... -
Page 6: Parts List
1−4 Parts list Fig.4... - Page 7 Table 1 Part name Quantity Part name Quantity Body Set screw Flange Socket head button screw Piston Grease nipple Plunger Orifice plug Cylinder cover Parallel pin Master jaw O-ring Soft jaw O-ring Cover O-ring Block O-ring Plug C O-ring Plug D O-ring Parallel Pin O-ring Retaining Ring O-ring Jaw attaching bolt O-ring Socket head cap screw O-ring Socket head cap screw 5 or 8 O-ring Socket head cap screw Table 2 Consumable parts Part name PLS04 PLS06...
- Page 8 Fig.5 Lock valve unit Table 3 Part name Quantity Part name Quantity Block Plug Seal washer O-ring JASO 1015 Cap screw O-ring JASO 1016 O-ring JASO 1017 Spring O-ring JIS B2401 P9 Ball φ8 O-ring JASO 1014 Valve seat O-ring JASO 1021 Housing Hex. key 5 Pilot spool Cap screw M6×50 Ring Air pressure gauge...
-
Page 9: Important Safety Precautions
2 . Important Safety Precautions Important safety precautions are summarized below. Please read this section before first starting to use this product. DANGER Failure to follow the safety precautions below will result in serious injury or death. Turn off main power supply before attaching, inspecting or replacing work gripper, and before adding oil. For All Users ・The machine tool may start rotation suddenly, and a part of the body or clothing may be caught. Close door before machining. For All Users ・If the door is not closed, you may touch the tools or the work gripper, or the work may ... - Page 10 DANGER Failure to follow the safety precautions below will result in serious injury or death. Always tighten the bolts at the specified torque. If the torque is insufficient or excessive, the bolt will break, which is dangerous as the work gripper or work will fly out. Use the bolts attached to For All Users the work gripper, and do not use bolts other than these. Specified torque for ・If the torque is insufficient or excessive, socket head cap screw the bolt will break, which is dangerous as Bolt size Tightening torque the work gripper or work will fly out. 7.5 N ・ m ・Fix the lathe spindle or the work gripper 13 N ・ m when ...
- Page 11 Important Safety Precautions WARNING Failure to follow the safety precautions below could result in serious injury or death. Use a lock valve (safety valve, check valve) incorporated in case of sudden pneumatic pressure drop due to blackout, malfunction, etc. Further, use a solenoid valve with a circuit that retains the gripping position when For Machine Tool Manufactures no current is carried.(Refer to page 19) ・If the pneumatic pressure suddenly drops due to blackout or malfunction, etc., this is dangerous as work will fly out. ・Lock valve retains the pneumatic pressure inside the cylinder temporarily, when the pneumatic pressure suddenly drops due to blackout or malfunction, etc. We prepare for the lock valve unit for exclusive use of the work gripper optionally. When the protrusion of the work is long, support it with the steady rest or center. For All Users ・If the protrusion is long, the tip of the work can turn and the work fly out. Do not use the work gripper on the lathe. For All Users ・Gripping force is short by centrifugal force, or the work gripper may break and the work gripper or work could fly out.
- Page 12 WARNING Failure to follow the safety precautions below could result in serious injury or death. Use neither jaw that is taller jaw than standard jaw. The air pressure must not exceed the maximum air pressure, and the oil pressure must not For All Users exceed the maximum oil pressure. (Refer to pages 13-14) ・The work gripper will break and the work gripper and work will break and fly out. Soft Work Determine the gripping force required for processing by the machine tool manufacturer or user, and check that the required gripping force For All Users is provided before processing. (Refer to pages 13-14) ・Adjust the pneumatic pressure to obtain the required gripping force. If the gripping force is insufficient, this is dangerous as the work will fly out. Adjust the steering wheel of the reducing valve, and set it to prescribed pressure. Afterwards, tighten the lock nut, and prevent the setting pressure from carelessly changing. Always fill lubricator with oil up to proper level. Periodically drain water in the filter.
- Page 13 Important Safety Precautions WARNING Failure to follow the safety precautions below could result in serious injury or death. Do not modify the work gripper in a way not permitted by the manufacturer. For All Users ・It may not only break the work gripper but the work gripper and the work may fly out, which is dangerous. ・If you attach a locator or jig on the work gripper body surface, only process work in an acceptable range (Refer to pages 18- 19). Periodically supply adequate grease (Refer to page 20). Turn off power before adding grease. For All Users ・Insufficient grease supply lowers the gripping force, causes operation failure due ...
-
Page 14: Specifications
Mass (standard soft jaw included) 0.2 〜 0.7 Nominal air pressure (2 〜 7) (kgf/cm Max air pressure (kgf/cm 0.2 〜 1.3 Nominal oil pressure (kgf/cm (2 〜 13) Max oil pressure (13) (kgf/cm Air consumption 0.22 0.54 0.93 (Plunger stroke 5mm, 0.6MPa) Storing temperature / -20 〜 +50 ℃ / -10 〜 +40 ℃ Operating temperature Reference : 1kN = 101.97kgf 1MPa = 10.197kgf/cm When storing this product, the product should be subjected to the antirust treatment and stored in a place free from wetting, condensation, or freeze. 3−2 Relationship between pressure and gripping force 1.Gripping force The work gripper has a mechanism to convert air or oil pressure from the built-in cylinder to gripping force. The gripping force specified in the specification is the value that the air pressure is 0.6 MPa, or the oil pressure is 1.3MPa. However, the gripping force is different depending on the state of grease lubrication, grease in use, height of the jaw,etc. The gripping force specified in the specification is the value under the following conditions: ・The Kitagawa standard soft jaw is used as the jaw. ・The attaching bolts of the soft jaw are tightened at the specified torque. (Refer to page 9) ・The numerical values are obtained with the Kitagawa gripping force meter . The gripping position of the gripping force meter is at a position 1/2 of the height of the soft jaw top surface (height from the chuck surface to the top surface of the jaw). ・CHUCK GREASE PRO is used. (Refer to page 20). ・ The air pressure is 0.6 MPa, or the oil pressure is 1.3MPa. - Page 15 PLS08 PLS06 PLS04 Pressure (MPa) Fig.6 WARNING ・Use neither jaw that is taller jaw than standard jaw. The moment hanging to the work gripper becomes large when you use taller jaw and this is dangerous as the work gripper and work will fly out. Cutting condition As a review method of cutting condition, the following shows a calculation example in the case where the moment load is put on the workpiece by a drilling. The final cutting condition, however, must be determined by a test cutting. × × > × Ps : Gripping force per a jaw μ : Gripping surface friction coefficient between jaw and workpiece. In general, 0.1 is used when both are smooth surfaces. Pv : Drilling thrust S : Factor of safety Fig.7...
-
Page 16: Forming Soft Jaw
4 . Forming Soft Jaw Prepare the jaw that has the shape, dimensions, accuracy, plane roughness and quenching suitable for processing the work-piece. We recommend following the following method for manufacturing the jaws. ・Forming standard soft jaw on the machine and using a raw material as is. Although it is inferior in durability on gripping face, you can manufacture product immediately. ・Forming standard soft jaw roughly and quenching their gripping face, then finishing on the machine. This is suitable for a mass production, because it excels in durability of the gripping face. ・We recommend you request KITAGAWA for manufacturing, if you manufacture a special shape jaw from scratch without using soft jaw. 4−1 Attachment of jaw DANGER ・Use the bolts attached to the work gripper, and do not use other bolts. However, if you must use other bolts not provided by Kitagawa, use bolts that have at least a strength classification of 12.9 (10.9 for M22 or more) and be sure they are long enough. ・Do not rotate the work gripper so that the jaw attaching bolt is loosened causing the jaw to fly out. ・Never use the chuck when the work-piece is clamped near the stroke end more than 75% of the stroke. When the work-piece is clamped near the stroke end, because the work-piece is not completely gripped or the gripping force is insufficient, this is dangerous as the work will fly out. ・ Always tighten the bolts at the specified torque. If the torque is insufficient or excessive, the bolt will break, which is dangerous as the work gripper or work will fly out. Table 5 Bolt size Tightening torque 7.5 N ・ m 13 N ・ m 33 N ・ m 73 N ・ m 107 N ・ m 171 N ・ m 250 N ・... - Page 17 2.Gripping of the plug for forming ・Jaw and locator are detached. attaching ・Fit the plug for forming to the work gripper and fix the jaws bolt temporarily with jaw attaching bolt. Set hydraulic pressure to low and grip the plug. Then push the plug to chuck evenly so that the plug does not tilt. ・Tighten the jaw attaching bolts by specified torque in a state as is. If the temporary jaws fixing is not tight enough, the jaw are lifted when gripping the plug. The plug will not be set correctly. ・Unclamp the chuck and set the hydraulic pressure to the working condition. Then grip the plug again. Then push the plug to chuck Plug evenly so that the plug does not tilt. 3.Forming φ D ・Process the gripping part (dimension φD) of the work in the state that the plug is kept gripped. The φD part is to be approximately the same diameter (H7) as the diameter of the gripping part of the work, and process to be surface roughness at 6s or less. ・Set the hydraulic pressure during forming the same as during processing of the work, or slightly higher. ・When the plug distorts, lower the hydraulic pressure or change the plug into a shape which does not easily distort. Plug 4.Trial cutting Work ・Remove the plug for forming and attach the locator and the jigs Forefront necessary, then grip the work to check the jaw stroke.
-
Page 18: Usage
・When replacing the top jaw, carefully clean the serration part with the master jaw, and the engagement part of the T nut. Failure to do this may cause a precision failure. ・Set the air pressure according to the shape of the work and the cutting conditions. Pipe shape work, etc., may be distorted if they are tightened at a high gripping force. 5−1 Precautions during gripping work with work gripper DANGER ・When gripping a work with the chuck, do not get fingers or hands become caught. This could cause crushed or cut fingers and hands. 5−2 Precautions during gripping work in irregular shape WARNING ・Cast metal, pitched shape or taper shape cannot be gripped. ・If the protrusion of the work is long, support it with a center or the steady rest. If the protrusion is long the tip of the work turns, and this is dangerous as the work will fly out. 5−3 Precautions related to usage of jaw WARNING ・If a soft jaw other than one made by Kitagawa Corporation is used, the engagement will be inferior, and the master jaw will be deformed, the gripping precision will worsen, and the work will fly out due to gripping failure, which is dangerous. ・Do not use the soft jaw by welding to join for extension. The jaw will break due to insufficient strength and the serration part will become distorted due to welding. As a result, the engagement will worsen, the serration crests will break, and this is dangerous as the work will fly out. -
Page 19: Precautions Related To Processing
5−4 Precautions related to processing WARNING <1> Interference, contact, impact ・Before starting work, check that the top jaw, locator, work, etc., and the tool and the tool post, etc., do not interfere at low rotation and then start processing. ・Do not allow anything to impact the work gripper, jaw, and the work. The work gripper will break and this is dangerous as the work gripper and work will fly out. - Page 20 Shaded part additional process possible range PLS04 PLS06, PLS08 Fig.8 Table 6 Type PLS04 14.5 40.5 110.1 M5-10 PLS06 165.1 M6-12 PLS08 210.1 M6-12 A: Additional process impossible dimension. B: Processible depth of tapping or drilling a hole. 5−6 Precautions related to usage of lock valve unit Lock valve unit Lock valve retains the pneumatic pressure inside the cylinder temporarily, when the pneumatic pressure suddenly drops due to blackout or malfunction, etc. We prepare for the lock valve unit for exclusive use of the work gripper optionally. The air pressure in the work gripper is sealed up by using the lock valve unit. Therefore, it is possible to machining a workpiece without piping. WARNING ・If the air supply is stopped and the workpiece is held for a long time using the lock valve unit, before start of the work, measure the pressure retention time to make sure that the internal pressure does not drop. Reduction in gripping force due to the internal pressure drop causes the workpiece to fly out. ・Use the lock valve unit only by air. The lock valve unit is damaged when the oil pressure is put, this is dangerous as the work will fly.
-
Page 21: Maintenance And Inspection
grippers. 2.Grease to use ・Use the designated grease specified in Table 7. If grease other than the designated grease is used, sufficient effect may not be obtained. Table 7 Kitagawa genuine product Genuine C H U C K G R E A S E P R O product (Kitagawa distributor of each country) K i t a g a w a c h u c k g r e a s e Conventional product... -
Page 22: Disassembling
4.Safety information about grease and anti-rust oil Applicable range ・Designated grease ・Antirust agent applied to the product at the delivery. First aid measures A f t e r i n h a l a t i o n : Remove victim to fresh air. If symptoms persist, call a physician. After contact with skin: Wash off with mild cleaners and plenty of water. If symptoms persist, call a physician. After contact with eyes: Rinse with plenty of water. If symptoms persist, call a physician. A f t e r i n g e s t i o n : If large amounts are swallowed, do not induce vomiting. Obtain medical attention. ・Please refer to each MSDS about the grease and the anti-rust oil which you prepared. -
Page 23: Inspection Of Lock Valve Unit
WARNING ・Be sure to remove the eyebolt after use. If the machining starts without removing the eyebolt, it will interfere with a tool, causing the bolt or tool to fly out. ・Disassemble and clean the work gripper at least once every 6 months or every 100,000 strokes (once every 2 months or more for cutting cast metal). If cutting powder or other substances stagnate inside the work gripper, it will lead to insufficient stroke and a drop in the gripping force, and this is dangerous as the work will fly out. Check each part carefully and replace any part that is worn or cracked. ・Before disassembling the work gripper, remove the cap screw to bleed the air. Loosen slowly the cap screw while bleeding the air gradually from the inside, and after making sure that the air is expelled completely, remove the cap screw. With internal pressure applied, disassembling the work gripper causes the parts to fly out. ・After inspection, apply sufficient grease in the designated areas and reassemble. ・After assembling, measure the gripping force according to the method on pages 13-14, and check that the specified gripping force is obtained. -
Page 24: Malfunction And Countermeasures
7 . Malfunction and Countermeasures 7−1 In the case of malfunction Check the points specified in the table below and take the appropriate countermeasure. Table 8 Defective Cause Countermeasure The work gripper inside will break. Disassemble and replace the broken part. Disassemble, correct the seized part with oilstone, etc., or replace The work The sliding surface is seized. the part. gripper Check the piping and the electric system, and if there is no does not The cylinder is not operating. abnormality, disassemble and clean the cylinder. operate. Malfunction of lock valve unit. Repair or replace the lock valve unit. Insufficient A large amount of cutting powder is inside. Disassemble and clean. stroke of the Rust might occur. jaw. Adjust so that the jaw is near the center of the stroke when The stroke of the jaw is insufficient. gripping the work. The gripping force is insufficient. Check that the correct hydraulic pressure is obtained. The forming diameter of the top jaw is not The Work Form again based on the correct forming method. consistent with the work diameter. slips. Calculate the cutting force and check that it is suitable for the The cutting force is too large. specification of the work gripper. Supply grease from the grease nipple, and open and close the jaw ... -
Page 25: Attachment
For Machine Tool Manufactures Following pages are described for machine tool manufacturers (personnel who attach a chuck to a machine). Please read following instruction carefully when you attach or detach a chuck to machine, and please sufficiently understand and follow the instructions for safe operation. 8 . Attachment 8−1 Air piping 8-1-1. Outline drawing of attachment Manual switching Work gripper valve or solenoid valve Air hose Lock valve unit Air pressure gauge Work gripper Water drain handle Air pressure adjusting handle Air control unit Manual switching valve (AV-02F) Lock valve unit Fig.9... -
Page 26: Attachment Of Lock Valve Unit
8-1-2. Piping ・Connect the pipe to the air supply port at the block or work gripper bottom. Blind the port on the side not used. (See Fig.13) ・To prevent the pressure drop and flow rate drop, use the pipe of Rc1/8 or larger size. Also, use the minimum number of elbows. ・Air control unit should be located near the work gripper as much as possible. ・Braided air hose should be used between the switching valve and the work gripper. Manual switching valve Lock valve unit or solenoid valve Work gripper Air control unit Clamp Fig.10 WARNING ・Use a solenoid valve with a circuit that retains the gripping position when no current is carried. If the pneumatic pressure suddenly drops due to blackout or malfunction, etc., this is dangerous as work will fly out. ・During the piping, remove dust completely in the piping. Presence of dust in the piping causes air leakage and then the workpiece to fly out. 8−2 Attachment of lock valve unit Use a lock valve (safety valve, check valve) incorporated in case of sudden pneumatic pressure drop due to blackout, malfunction, etc. We prepare for the lock valve unit for exclusive use of the work gripper optionally. Attaching procedures of lock valve unit Read the following attaching procedures with reference to pages 5-7. 1. Loosen the cap screw [15] and Remove the block [9]. 2. Confirm the O-ring [27] exists, and install the lock valve unit with the cap screw [59]. -
Page 27: Oil Piping
8−3 Oil piping 8-3-1. Outline drawing of attachment Pressure adjusting screw Pressure gauge Work gripper Hydraulic pump Flexible hose Air Breather Tank Solenoid valve (or manual switching valve) Line filter Fig.11 8-3-2. Piping ・Attach the manual switching valve at a position where it is easy to operate for the attaching equipment. ・Install the hydraulic unit at a position where the needle of the pressure gauge is easily read. DANGER ・When other actuators are operated by the same hydraulic pressure source as the work gripper, be sure that a pressure drop of the work gripper does not occur during use. A hydraulic pressure drop leads to a drop in the gripping force which could allow the work to fly out. -
Page 28: Trial Operation
6-M10 4-φ11 Rc1/8 Seating detection 2-φ10H7 2-Rc1/8 Supply port Close Open 15 15 23.5 23.5 2-Rc1/4 Lock valve unit Rc1/8 Seating detection Rc1/8 Fig.13 Central lubrication Table 9 Dimension PLS04 PLS06 PLS08 φA 110.1 165.1 210.1 φB 75.5 125.5 110.5 160.5 φD * C-1 show when lock valve unit is installed 9 . Trial Operation Thoroughly read the Important Safety Precautions on and after page 8 in this manual before trial operation. Air pressure ... -
Page 29: Other Information
10. Other Information 10−1 About standards and orders This product is based on the following standards or orders. ・ Machinery directive:2006/42/EC Annex I ・ EN ISO 12100:2010 ・ EN1550:1997+A1:2008 10−2 Information about markings of product P MAX :Max pressure ΣS MAX: Max gripping force Manufacturer's address MASS:Mass Specifications MFG No. Jaw No. Manufacturer's logo Type of top jaw Jaw No. KITAGAWA JAPAN Type Fig.14 10−3 About disposal Ultimate disposal of this product should be handled according to all national laws and regulations. - Page 32 Kitagawa Corporation Kitagawa Global hand Company 77-1,Motomachi,Fuchu-shi,Hiroshima,726-8610,Japan Tel.+81-847-40-0561 Fax.+81-847-45-8911 ■ JAPAN DOMESTIC 1-405-1,Kita-ku,Yosino-cho,Saitama-shi,Saitama,331-9634,Japan Tokyo office Tel.+81-48-667-3469 Fax.+81-48-663-4678 4-15-13,Yamatomachi,Wakabayashi-ku,Sendai-shi,Miyagi,984-0042,Japan Sendai office Tel.+81-22-232-6732 Fax.+81-22-232-6739 2-62,Kamitakabata,Nakagawa-ku,Nagoya-shi,Aichi,454-0873,Japan Nagoya office Tel.+81-52-363-0371 Fax.+81-52-362-0690 3-2-9,Kitakagaya,Suminoe-ku,Osaka-shi,Osaka,559-0011,Japan Osaka office Tel.+81-6-6685-9065 Fax.+81-6-6684-2025 77-1,Motomachi,Fuchu-shi,Hiroshima,726-8610,Japan Hiroshima office Tel.+81-847-40-0541 Fax.+81-847-46-1721 7-6-39,Itazuke,Hakata-ku,Fukuoka-shi,Fukuoka,812-0888,Japan Kyushu office Tel.+81-92-501-2102 Fax.+81-92-501-2103 77-1,Motomachi,Fuchu-shi,Hiroshima,726-8610,Japan Overseas office Tel.+81-847-40-0526 Fax.+81-847-45-8911 ■ OVERSEAS KITAGAWA-NORTHTECH INC.
Need help?
Do you have a question about the PLS Series and is the answer not in the manual?
Questions and answers