Table of Contents
Advertisement
Quick Links
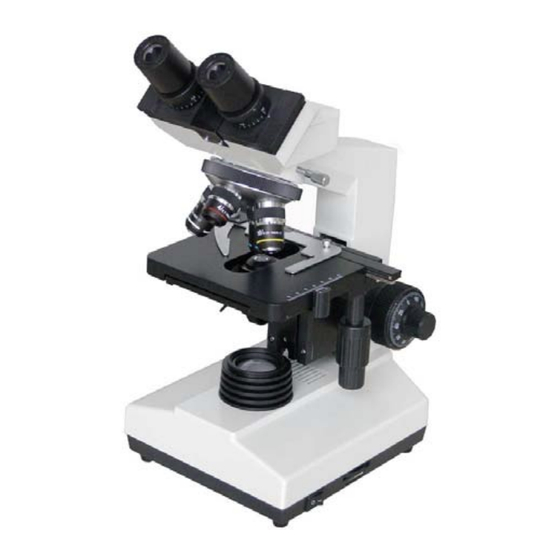
Biological Microscope
Model Number:STM-2030B/T
Introduction Manual
This instruction manual is for STM-2030B Binocular and STM-2030T Trinocular biological microscope.
To insure safety and obtain optimum performance and familiarize yourself fully with the use of this
microscope. We recommend that you read the manual thoroughly before operating the microscope,
Attain this manual instruction in an easily accessible place near the microscope for the further reference.
Advertisement
Table of Contents

Subscribe to Our Youtube Channel
Related Manuals for Stalwart STM-2030B


Summary of Contents for Stalwart STM-2030B
- Page 1 Model Number:STM-2030B/T Introduction Manual This instruction manual is for STM-2030B Binocular and STM-2030T Trinocular biological microscope. To insure safety and obtain optimum performance and familiarize yourself fully with the use of this microscope. We recommend that you read the manual thoroughly before operating the microscope,...
-
Page 2: Table Of Contents
CONTENTS ..............2 User Notice .............. 4 1.Components ..............5 2.Assembly ..........5 2.1 Assembly Diagram ............ 6 2.2 Assembly Steps ........... 10 3.Adjustment & Operation ..........10 3.1 Adjustment Sets ............11 3.2 Operation ........... 14 4. Specification Table .............. -
Page 3: User Notice
User Notice Ⅰ. Safety Notes 1. Carefully open the box, avoid the accessories, like lens, dropping to ground and being damaged. 2. Do keep the instrument out of direct sunlight, high temperature or humidity, dusty and easy shaking environment. Make sure the stage is smooth, horizontal and firm enough. 3. - Page 4 When using, if the microscope is splashed by liquid, cut off the power at once, and wipe up the moisture. Do not disassemble any parts of the microscope, which will affect the function or decline the performance of the microscope. Place the instrument in a cool, dry position.
-
Page 5: Components
1.Components Eyepiece Binocular viewing head Ruler Nosepiece Objectives Condenser Collector Stage Main body STM-2030B Biological Microscope... -
Page 6: Assembly
2.Assembly 2.1 Assembly Diagram The following figure shows the installation sequence of the components. The number in the figure shows the assembly steps. Before installing, be sure every components is clean, do not score any parts or glass surface. Keep well with hexagon wrench provided. When replacing the components, you will need it again. -
Page 7: Assembly Steps
2.2 Assembly Steps 2.2.1 Installing Binocular viewing head (Fig.1, 2) Insert the digital viewing head into the microscope head, turn into the right position, then screw down the bolt①to fix it. 2.2.2 Installing the eyepieces ( Fig.3, Fig.1 Fig.4) Insert the eyepieces into the eyepiece tube ①... - Page 8 2.2.3 Installing objectives (Fig.5& 6) 1. Adjusting the coarse focus knob until the support device of the mechanical stage reaches its low limit position. 2. Screw the lowest magnification objective into the nosepiece from the left or the right Fig.5 side, then revolve the nosepiece clockwise and mount other objectives by the sequence of low to high magnification...
- Page 9 2.2.5 Connecting the power cord (Fig.8, 9,10) ★ The cable and cords are vulnerable when bent or twisted, never subject the power cord to excessive force. Turn the main switch① to “O” (off) state ① before connecting the power cord. Insert the power plugs②...
- Page 10 2.2.7 Installing and replacing lamp(Fig.11, 12) Please use the specified halogen Lamp 6V20W. Replace the lamp as follows if necessary. ① ② Please set the main switch to “O” (off) state before replacing, and make sure the Fig.11 bulb, the lamp room and periphery are all cool enough to carry no burn.
-
Page 11: 3.Adjustment & Operation
3.Adjustment & Operation (Fig.14,Fig.15) 3.1 Adjustment Sets Diopter Ring Locking Set Left Coarse Focus Knob Interpupillar Distance Indicator Longitudinal Adjustment Knob Left Fine Focus Knob Transversal Adjustment Knob Condenser Adjustment Knob Aperture Diaphragm Adjustment Lever Fig.14 Tension Adjustment Collar Right Coarse Focus Knob Right Fine Focus Knob Brightness Adjustment Knob Main Switch... -
Page 12: Operation
3.2 Operation 3.2.1 Adjusting the brightness(Fig.16) Connect power, turn main switch①(shown in the figure)which on the bottom side of the base to “-”(on). Turning brightness adjustment knob voltage decline, ②clockwise, brightness weaken; Whereas turning at the opposite direction, the voltage raise, and the brightness strengthen. - Page 13 ● The tight tension of the coarse focus knob has already been adjusted before leaving factory. If loosen (e.g. the stage slip down by its weight), please screw the intention ③ adjustment collar to the right position by the supplied spanner. 3.3.4 Condenser Adjustment(Fig.20)...
- Page 14 ● Minify the aperture below 60% of the objective’s numerical aperture unless in a special case, for instance, observing an almost transparent specimen. ● The numerical aperture is marked on the objective. For example, the mark “ 10/0.25 ” means the magnification is 10×, and the numerical aperture is 0.25.
-
Page 15: Specification Table
4. Specification Table 4.1 Main specifications Mechanical Tube Length 160mm Sliding Binocular/Trinocular Head, 45°Inclined, Interpupillary Distance55-75 Viewing Head Eyepiece Field of view: φ18mm Nosepiece External Quadruple Nosepiece Objective Achromatic objectives 4×, 10×, 40×, 100×(immersion oil) Coaxial Coarse & Fine Adjustment, Moving Range 30mm, Fine Division Focusing 0.004mm. -
Page 16: 5.Outfit
Plan Achromatic Objectives are optional Designation Magnification Numerical Aperture Working Distance 0.10 15.8mm Plan Achromatic 0.25 12.2 mm Objective 40X(S) 0.65 0.37 mm 100X( Oil,S) 1.25 0.13 mm Eyepieces Designation Magnification Field of view(mm) Focal Length(mm) Wide Field Φ18 24.94mm Plan Field Φ11 15.58mm... -
Page 17: 6.Troubleshooting Guide
LED illumination Optional 6V20W Halogen Lamp Optional Illumination Spare lamp (6V20W Halogen lamp) Optional Spare fuse(2A) Optional Eyepieces 10×Plan Eyepieces Optional Achromatic objective 4× Optional Achromatic objective 10× Optional Objectives Achromatic objective 40× Optional Achromatic objective 100×(oil, spring) Optional Bright Field Condenser with Adjustable Condenser Optional Iris Diaphragm... - Page 18 The image is There are stains on the lens(including condenser, Clean it up defocused ( low objective, eyepiece and collector) resolution \ contrast) didn’t use oil for the oil objective Use immerse oil There was bleb in the oil Eliminate the bleb Use a unsuitable oil Change to the specified one The size of the aperture diaphragm is too big...
- Page 19 The binocular image is The interpupillary distance is not Adjust it not coincident correct No diopter adjustment Adjust the diopter correctly Eyes are too tired The brightness is not suitable Adjust the voltage of the lamp 3. Electrical system TROUBLE CAUSE SOLUTION Check the connection of the...
Need help?
Do you have a question about the STM-2030B and is the answer not in the manual?
Questions and answers