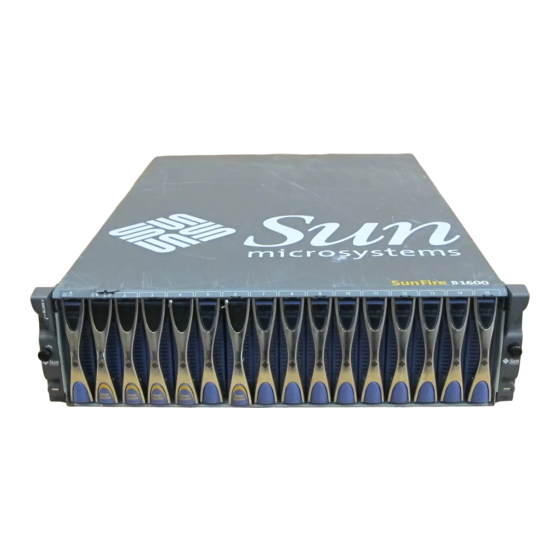
Sun Microsystems Sun Fire B1600 Administration Manual
Blade system chassis
Hide thumbs
Also See for Sun Fire B1600:
- Administration manual (402 pages) ,
- Installation manual (98 pages) ,
- Replacement manual (10 pages)
Table of Contents
Advertisement
Quick Links
Advertisement
Chapters
Table of Contents

Related Manuals for Sun Microsystems Sun Fire B1600


Summary of Contents for Sun Microsystems Sun Fire B1600
- Page 1 Sun Fire™ B1600 Blade System Chassis Administration Guide Sun Microsystems, Inc. 4150 Network Circle Santa Clara, CA 95054 U.S.A. 650-960-1300 Part No. 817-3432-12 February 2004, Revision A Send comments about this document to: docfeedback@sun.com...
- Page 2 LOOK GUIs and otherwise comply with Sun’s written license agreements. Use, duplication, or disclosure by the U.S. Government is subject to restrictions set forth in the Sun Microsystems, Inc. license agreements and as provided in DFARS 227.7202-1(a) and 227.7202-3(a) (1995), DFARS 252.227-7013(c)(1)(ii) (Oct. 1998), FAR 12.212(a) (1995), FAR 52.227-19, or FAR 52.227-14 (ALT III), as applicable.
-
Page 3: Table Of Contents
Contents Preface 7 Managing the Sun Fire B1600 Blade System Chassis 1–1 The Command-line Interface to the System Controllers 1–2 Logging Into and Configuring the Switch and System Controllers 1–2 Returning a System Controller to its Factory Default Settings 1–3 Powering On or Off and Resetting Components 2–1... - Page 4 Logging in for the First Time and Setting an admin Password 3–2 Setting Up a Named User Account for Yourself 3–3 Changing Your Own User Password 3–4 Setting up Named User Accounts for Other People 3–5 3.5.1 Creating a User Account 3–5 3.5.2 Specifying or Changing Other Users’...
- Page 5 5.1.1 Forcing Another User Off the Console 5–2 5.1.2 Logging into a Blade Console With Read-only Access 5–3 Exiting From the Switch or Blade Console to the System Controller 5–4 Viewing the Console History on a Server Blade or Switch 5–4 5.3.1 Viewing Console Information From the Last Time a Server Blade or Switch Booted 5–4...
- Page 6 Firmware Upgrade Procedures 10–1 10.1 Introduction 10–2 10.2 Setting up a TFTP Server 10–3 10.3 Installing Firmware Images Onto the TFTP Server 10–5 10.4 Upgrading the System Controller Firmware 10–6 10.4.1 Example for Upgrading the System Controller Firmware 10–9 10.5 Upgrading the Blade Support Chip Firmware on One or More Blades 10–...
- Page 7 12.2.1 Adding a Second SSC to a Chassis That Was Supplied With Only One SSC 12–11 12.2.2 Disabling an SSC You Are Going to Remove 12–15 12.2.3 Removing an SSC Enclosure 12–15 12.2.4 Inserting the New SSC 12–18 12.3 Installing a New Power Supply Unit 12–22 12.3.1 Disabling the Existing PSU Prior to Removal 12–22 12.3.2 Inserting the New PSU 12–25 12.4...
- Page 8 Index Index–1 Sun Fire™ B1600 Blade System Chassis Administration Guide • February 2004...
-
Page 9: Preface
Preface This manual tells you how to use the System Controller command-line interface (called Advanced Lights Out Management Software) to monitor and manage the Sun Fire B1600 blade system chassis. It also tells you how to upgrade firmware on the different components of the system chassis. - Page 10 How This Book Is Organized Chapter 1 introduces the System Controller software and refers you to the Sun Fire B1600 Blade System Chassis Software Setup Guide for more information. This chapter also tells you how to restore the factory default settings for the System Controller.
- Page 11 Using UNIX Commands ® This document does not contain information on basic UNIX commands and procedures. See either of the following for this information: Solaris Handbook for Sun Peripherals ™ ™ AnswerBook2 online documentation for the Solaris operating environment Typographic Conventions Typeface Meaning Examples...
- Page 12 Shell Prompt Bourne shell and Korn shell superuser System Controller shell sc> Integrated switch shell Console# 10 Sun Fire™ B1600 Blade System Chassis Administration Guide • February 2004...
- Page 13 Hardware installation Sun Fire B1600 Blade System Chassis Hardware Installation Guide Software installation Sun Fire B1600 Blade System Chassis Software Setup Quick Start (foldout poster) Chassis software and Sun Fire B1600 Blade System Chassis Software Setup Guide Solaris blade setup...
- Page 14 Sun Welcomes Your Comments Sun is interested in improving its documentation and welcomes your comments and suggestions. You can email your comments to Sun at: docfeedback@sun.com Please include the part number (817-3432-11) of your document in the subject line of your email.
-
Page 15: Managing The Sun Fire B1600 Blade System Chassis
C H A P T E R Managing the Sun Fire B1600 Blade System Chassis This chapter contains the following sections: Section 1.1, “The Command-line Interface to the System Controllers” on page 1-2 Section 1.2, “Logging Into and Configuring the Switch and System Controllers”... -
Page 16: The Command-Line Interface To The System Controllers
The Command-line Interface to the System Controllers The Sun Fire B1600 blade system chassis can be managed over a local or remote serial connection or over a 10/100Mbps network connection to the management network port (NETMGT). Both the serial connector and the management network port are on the rear panel of the Switch and System Controller unit. -
Page 17: Returning A System Controller To Its Factory Default Settings
Note – This command does not return the switch to its factory default settings. For information about how to do this, refer to the Sun Fire B1600 Blade System Chassis Software Setup Guide. Chapter 1 Managing the Sun Fire B1600 Blade System Chassis... - Page 18 Sun Fire™ B1600 Blade System Chassis Administration Guide • February 2004...
-
Page 19: Powering On Or Off And Resetting Components
C H A P T E R Powering On or Off and Resetting Components This chapter contains the following sections: Section 2.1, “Powering On All Components at Once” on page 2-2 Section 2.2, “Powering Off All Components Except the Active System Controller” on page 2-2 Section 2.3, “Powering Off All Components Including the Active System Controller”... -
Page 20: Powering On All Components At Once
(if you want to preserve the changes). For instructions about saving your switch settings, refer to the Sun Fire B1600 Blade System Chassis Software Setup Guide. Note – To use the poweron and poweroff commands, you must have r-level user permission on the System Controller. - Page 21 Where a command has options associated with it, you can specify more than one option on the command line. However, the -s and -r options for the poweroff command are logically incompatible. Therefore you cannot include them together on the same command line. Commands for Powering Off or Powering Down an SSC TABLE 2-1 Command and Option (if any)
-
Page 22: Powering Off All Components Including The Active System Controller
Commands for Powering Off or Powering Down an SSC TABLE 2-1 Command and Option (if any) Effect of the Command Powers down all components (except the active sc> standbyfru -y ch System Controller) to standby mode without displaying the confirmation prompt. Powers down all components (except the active sc>... -
Page 23: Powering On The Switch And System Controllers
3. Put the active System Controller into a ready-to-remove state. Type: sc> removefru sscn where n is either 0 or 1 depending on whether the active System Controller is the one in SSC0 or SSC1. Note – You can only use the removefru command on the active System Controller when all other components are in a ready-to-remove state. -
Page 24: Powering Off A Switch And System Controller
(if you want to preserve the changes). For instructions about saving your switch settings, refer to the Sun Fire B1600 Blade System Chassis Software Setup Guide. Note – To power off a Switch and System Controller, you must have r-level user permission on the System Controller. - Page 25 Commands for Powering Off or Powering Down an SSC TABLE 2-2 Command and Option (if any) Effect of the Command Powers off the standby System Controller (SSC0 or sc> poweroff -y sscn SSC1) without displaying the confirmation prompt. Powers the standby System Controller (SSC0 or SSC1) sc>...
-
Page 26: Powering On Server Blades
Commands for Powering Off or Powering Down an SSC TABLE 2-2 Command and Option (if any) Effect of the Command Powers the standby System Controller down to a state sc> removefru -f sscn in which it is safe for it to be removed even if an orderly shutdown of the System Controller’s operating system has failed. -
Page 27: Powering Off Server Blades
Powering Off Server Blades Note – To power off any server blades, you must have r-level user permission. (For information about the levels of user permission available on the System Controller, Chapter lists the commands for powering off or powering down a server blade. To TABLE 2-3 apply any of the commands to more than one server blade, use a space-separated list. - Page 28 Commands for Powering Off or Powering Down a Server Blade TABLE 2-3 Command and Option (if any) Effect of the Command Powers the blade in slot n down to standby mode sc> standbyfru sn (equivalent of the poweroff -s command). Powers the blade in slot n down to standby mode sc>...
-
Page 29: Turning On The Blue "Ok To Remove" Led Manually
2.7.1 Turning on the Blue “ok to remove” LED Manually If you have a server blade powered down and you want to remove it, you can apply the removefru command to it anyway. This causes the blue “ok to remove” LED come on, enabling you to identify the blade easily when you go to the chassis to remove it. - Page 30 Commands for Resetting Components of the System Chassis TABLE 2-4 Command and Option (if any) Effect of the Command Forces the specified blade to reset even if the active sc> reset -F sn System Controller has not finished executing commands (for another user) involving that blade. Performs an externally-initiated reset on the blade in sc>...
- Page 31 Commands for Resetting Components of the System Chassis TABLE 2-4 Command and Option (if any) Effect of the Command If Solaris is running (and it is configured to handle sc> break sn breaks in this way), the break command causes a Solaris blade to drop from Solaris into either kadb or OBP, depending on the mode in which Solaris was booted.
- Page 32 2-14 Sun Fire™ B1600 Blade System Chassis Administration Guide • February 2004...
-
Page 33: Setting Up System Controller Login Accounts
C H A P T E R Setting Up System Controller Login Accounts The System Controller provides management access to the system chassis. For security, we recommend you to set up named users of the System Controller and also to control the levels of access of each user. This chapter tells you how to do these things. -
Page 34: Controlling User Access To The System Controller
Controlling User Access to the System Controller The System Controller allows you to set up individual user accounts with different levels of access configured for each user. The accounts you set up all require a user name and a password. This chapter tells you how to log in for the first time, setting a password for the default user (whose login name is admin);... -
Page 35: Setting Up A Named User Account For Yourself
Note – The switch inside the Switch and System Controller (SSC) module has its own system of user login and password security. For information about how to log into the switch and how to set user names and passwords, refer to the Sun Fire B1600 Blade System Software Setup Guide. -
Page 36: Changing Your Own User Password
3. Give yourself full user permissions by typing: sc> userperm caur For information about the meanings of the letters that indicate permission levels, see Section 3.5, “Setting up Named User Accounts for Other People” on page 3-5 Changing Your Own User Password Note –... -
Page 37: Setting Up Named User Accounts For Other People
Setting up Named User Accounts for Other People Note – You must have User Administration (u-level) authorization to add a user (see Section 3.3, “Setting Up a Named User Account for Yourself” on page 3-3). If you have not added any users, you have u-level and all other levels of authorization by default. -
Page 38: Viewing Details Of User Accounts
you specify an empty string (by typing [ENTER] when prompted to specify the user’s password) then when that user logs in he or she will not be prompted for a password. Instead the sc> prompt will appear as soon as the user’s name has been entered. -
Page 39: Specifying Permissions For A Named User
Type: sc> userdel username where the username is the name of an existing SC user account. 3.5.5 Specifying Permissions for a Named User Note – You must have User Administration (u-level) authorization to specify or to alter permission levels for a user account. By default, all four levels of permission are available to each named user you set up. -
Page 40: Viewing A List Of All Users Currently Logged Into The Sc
This stands for “reset permission”. It enables the named user to reset the SCs, switches, and blades, and to power them on and off. Viewing a List of all Users Currently Logged Into the SC To see a list of users currently logged into the SC, type: sc>... -
Page 41: Monitoring The Chassis
C H A P T E R Monitoring the Chassis This chapter contains the following sections: Section 4.1, “Receiving Event Reports Passively Over the Serial Connection” on page 4-2) Section 4.2, “Viewing Events Relating to the System Controller and Server Blades” on page 4-3 Section 4.3, “Interpreting Events”... -
Page 42: Receiving Event Reports Passively Over The Serial Connection
Receiving Event Reports Passively Over the Serial Connection All events that are written to the System Controller’s log files are, by default, also transmitted onto the serial interface. Therefore if you connect a terminal to the serial port of either SSC0 or SSC1, you will see any events that are reported. 4.1.1 Turning off Event Reporting for Telnet Connections... -
Page 43: Checking Whether Event Reporting Is On Or Off
You can use the showlogs command to view events relating to specific server blades or to specific System Controllers. To view events relating to a switch, refer to the Sun Fire B1600 Blade System Chassis Switch Administration Guide. Note – Users with any of the four levels of user permission can view the event log by using the showlogs command. -
Page 44: Viewing Server Blade Events
You can also view events relating to both System Controllers. To do this, type: lom> showlogs ssc0 ssc1 4.2.2 Viewing Server Blade Events Type: sc> showlogs sn where n is the number of the slot containing the server blade whose events you want to look at. -
Page 45: Controlling The Number Of Events Displayed
MINOR: These messages concern events of no immediate severity. INFO: These events are most likely to inform you that some problem has been resolved (in other words, that it is now OK). Controlling the Number of Events Displayed The event log for the whole chassis is maintained by the System Controller in the active SSC. -
Page 46: Viewing Events In Groups Of A Specified Number
The -e option must be followed by a space and then the number of events you want to see. For example, to see the last 15 events relating to the server blade in slot 7, you would type: sc> showlogs -e 15 s7 4.4.3 Viewing Events in Groups of a Specified Number You can use the -g option to indicate that you want to see events in groups of a... - Page 47 Service Required LED on the blade’s front panel and sends a report to the chassis’s active System Controller. When Solaris is running, the BSC also sends event reports to syslogd. syslogd handles these in the way it has been configured to handle event reports.
- Page 48 Sun Fire™ B1600 Blade System Chassis Administration Guide • February 2004...
-
Page 49: Accessing The Server Blade And Switch Consoles
C H A P T E R Accessing the Server Blade and Switch Consoles This chapter contains the following sections: Section 5.1, “Accessing the Server Blade and Switch Consoles” on page 5-2 Section 5.2, “Exiting From the Switch or Blade Console to the System Controller” on page 5-4 Section 5.3, “Viewing the Console History on a Server Blade or Switch”... -
Page 50: Accessing The Server Blade And Switch Consoles
Accessing the Server Blade and Switch Consoles Note – You must have c-level user permission on the System Controller to access the console of a server blade or switch. For more information about the user permissions available, see Chapter To access the console on a server blade, type the following at the System Controller’s sc>... -
Page 51: Logging Into A Blade Console With Read-Only Access
Note – The number of users with c-level access who can log into the console on a server blade is unlimited. However, only one user at a time can have write access; the rest have read-only access. This means that the other users can observe console activity but they cannot execute any commands. -
Page 52: Exiting From The Switch Or Blade Console To The System Controller
Exiting From the Switch or Blade Console to the System Controller To exit from the switch or blade console and return to the System Controller’s sc> prompt, type the ‘#’ character followed immediately by the ‘.’ character. Wherever you are in the switch’s command-line interface or on a blade console, the ‘#.’... - Page 53 To view the information stored in the boot-time buffer of a server blade console, type: sc> consolehistory boot sn where n is the number of the slot containing the server blade whose boot-time console data you want to view. The boot-time buffer stores output from the last reset or power-on of the server blade or switch to the point where its operating system was fully initialized and running.
-
Page 54: Viewing Information From The Run-Time Console Buffer
5.3.2 Viewing Information From the Run-time Console Buffer To view the information stored in the run-time buffer of a switch console, type: sc> consolehistory run sscn/swt where n is either 0 or 1 depending on whether the switch whose run-time console information you want to view is in SSC0 or SSC1. - Page 55 To telnet directly to a server blade console, type the telnet command followed by the IP address or host name of the System Controller followed by the blade- specific IP port number. For example, to telnet into the blade in slot s0 on a chassis whose System Controller has the host name b1600_chassis_1, you would type: % telnet b1600_chassis 2300 Trying 129.156.203.139...
- Page 56 Sun Fire™ B1600 Blade System Chassis Administration Guide • February 2004...
-
Page 57: Monitoring Components
C H A P T E R Monitoring Components This chapter contains the following sections: Section 6.1, “Introduction” on page 6-2 Section 6.2, “Viewing System Controller Details” on page 6-2 Section 6.3, “Checking the Date and Time” on page 6-4 Section 6.4, “Checking the Operational Status of the Hardware Components”... -
Page 58: Introduction
Introduction This System Controller’s command-line interface includes commands that provide global information about the chassis and its components. These are the showsc, showplatform, showenvironment, and showfru commands. showsc tells you the current state of the SC’s configurable parameters. showdate shows you date and time settings for the System Controller. showplatform tells you the status (Ok, Faulty, Not Present) of each component (it can also tell you the MAC address of each component). - Page 59 sc>showsc Parameter Running Value Stored Value ------------------------------------------------------------------------- Bootable Image : 1.2.3 (Jun 11 03) Current Running Image : 1.2.3 (Jun 11 03) SC IP address: 129.156.223.39 129.156.223.39 SC IP netmask address: 255.255.255.0 255.255.255.0 SC IP gateway address: 129.156.223.1 129.156.223.1 SSC0/SC (Active) IP private address: 129.156.223.41 129.156.223.41 SSC1/SC (Standby) IP private address:...
-
Page 60: Checking The Date And Time
To view all of the above details plus the version number of the currently installed firmware on the server blades, use the -v option as follows: sc> showsc -v Software Version Software Release Date -------------------------------------------------------- v5.1.0-SUNW,Sun-Fire-B100x 5 2003 10:27:31 Not Present v0.21.21-PUMA-P1 Mar 11 2003 16:13:07 Not Present... -
Page 61: Checking The Operational Status Of The Hardware Components
To check the date and time on the SC, type: sc> showdate Wed Mar 27 11:42:40 UTC 2002 For information about setting the date and time, refer to the Sun Fire B1600 Blade System Chassis Software Setup Guide. Checking the Operational Status of the Hardware Components Note –... - Page 62 To check the operational status of a switch and System Controller, type: sc> showplatform sscn Status Type -------- ------------- ------------ SSC0 SF B1600 SSC Domain Status -------- ------------------- SSC0/SWT OS Running SSC0/SC OS Running (Active) where n is either 0 or 1. To check a switch on its own, type: sc>...
- Page 63 To check the status of a component (or of all components) without displaying information about whether the operating system is running, use the -p option on the command line. For example: sc> showplatform -p sscn/swt Status Type -------- ------------- ------------ SSC0 SF B1600 SSC To check the operational status of the Switch and System Controllers, server...
- Page 64 sc>showplatform -v Status Type Part No. Serial No. -------- ------------- ------------ -------- ---------- SF B200x 5405548 000408 SF B10n 5405593 000031 Not Present SF B100s 5405078 000000 SF B100s 5405078 000000 SF B100s 5405078 000467 Not Present SF B200x 5405526 000292 SF B200x 5405526...
-
Page 65: Checking Operating Conditions Inside The Components
Checking Operating Conditions Inside the Components You can use the showenvironment command to check the operating temperatures, the fans, and the voltage supply rails inside each blade, switch, power supply unit, and SSC inside the chassis. The command also displays the warning and shutdown thresholds. - Page 66 Alternatively, to check both SSCs, you would type: sc> showenvironment ssc0 ssc1 ============ Environmental Status ============ System Temperatures (Celsius) Current Status ---------------------------------------------------------------- /MB/C0/P0/T_CORE /MB/T_ENC /MB/C0/P0/T_CORE /MB/T_ENC /MB/C0/P0/T_CORE /MB/T_ENC System Voltages (Volts) Current Status ---------------------------------------------------------------- /MB/5V /MB/3.3V 100% /MB/2.5V 102% /MB/V_CORE 102% /MB/Vttm 102%...
-
Page 67: Checking Just The Power Supply Unit
6.5.3 Checking Just the Power Supply Unit Type: sc> showenvironment psn where n is either 0 or 1 depending on whether you want to view information about PSU0 or PSU1. For example, to check PSU0, you would type: sc> showenvironment ps1 ============ Environmental Status ============ System Temperatures (Celsius) Current... -
Page 68: Checking A Server Blade Or Server Blades
6.5.4 Checking a Server Blade or Server Blades To check a single server blade type: sc> showenvironment sn where n is the number of the slot containing the blade. For example: sc> showenvironment s0 ============ Environmental Status ============ System Temperatures (Celsius) Current Status ----------------------------------------------------------------... -
Page 69: Checking Just A Switch Or Switches
To check a number of server blades, specify them in a space-separated list. For example: sc>showenvironment s0 s1 s2 ============ Environmental Status ============ System Temperatures (Celsius) Current Status ---------------------------------------------------------------- /temp/enclosure /temp/CPU die /temp/enclosure /temp/CPU die /temp/enclosure /temp/CPU die System Voltages (Volts) Current Status ----------------------------------------------------------------... -
Page 70: Checking The Information Stored By Each Component About Itself
where n is either 0 or 1 depending on whether you want to monitor the switch in SSC-0 or SSC1. To check both switches, type: sc> showenvironment ssc0/swt ssc1/swt System Voltages (Volts) Current Status ---------------------------------------------------------------- SSC0/SWT /VSensor/VCore 1.77 SSC0/SWT /VSensor/3V3 3.28 SSC0/SWT /VSensor/1V25... - Page 71 For example, to see FRUID information about SSC0, you would type: sc> showfru ssc0 ---------------------------------------------------------------- FRUID Records for FRU SSC0 ---------------------------------------------------------------- /FRUID/ManR/UNIX_Timestamp32: Mon Oct 14 22:49:04 UTC 2002 /FRUID/ManR/Fru_Description: SUNW,Sun Fire B1600 SSC, 8x1GB NET, 1x10MB NET MGT, 1 Serial MGT /FRUID/ManR/Manufacture_Loc: Hsinchu, Taiwan /FRUID/ManR/Sun_Part_No: 5405185 /FRUID/ManR/Sun_Serial_No: SC>...
-
Page 72: Turning The Locator Led On Or Off
Turning the Locator LED On or Off If there is a problem with any of the components on your chassis and you need to locate the chassis so that you can service it, use the following command to turn on the locator LED. -
Page 73: Making The Standby System Controller Take Over As Active
C H A P T E R Making the Standby System Controller Take Over as Active This chapter contains the following sections: Section 7.1, “Causing the System Controllers to Swap Roles” on page 7-2... -
Page 74: Causing The System Controllers To Swap Roles
Causing the System Controllers to Swap Roles This chapter tells you how to make the standby System Controller take over from the active one if the active one. Note – To perform the procedure, you must have r-level permissions for the System Controller. -
Page 75: Controlling The Booting Behavior Of A Server Blade
C H A P T E R Controlling the Booting Behavior of a Server Blade This chapter contains the following sections: Section 8.1, “Introduction” on page 8-2 Section 8.2, “Boot Modes Available” on page 8-2... -
Page 76: Introduction
Introduction Note – You must have r-level user permission on the System Controller to use the bootmode command. For information about user privileges, see Chapter You can control the booting behavior of a server blade by using the bootmode command at the sc> prompt on the System Controller. The functionality of this command is similar to the functionality available on Sun keyboards via the L1 key combinations. - Page 77 The boot modes available are listed in TABLE 8-1 Boot Modes Available for the Server Blades TABLE 8-1 Mode Description If you run bootmode with this parameter, the server blade or server normal blades specified will boot using the settings that are currently configured for their OpenBoot PROM parameters or BIOS parameters.
- Page 78 Sun Fire™ B1600 Blade System Chassis Administration Guide • February 2004...
-
Page 79: What To Do If You Have Lost The Password To Your System Controller
C H A P T E R What To Do If You Have Lost The Password to Your System Controller... - Page 80 If you lose your password to the System Controller, do the following: 1. Remove and then re-insert one of the power supplies. 2. Within five minutes of re-inserting the power supply, set up a serial connection to the SSC containing the active System Controller and log in as user admin. For information about setting up a serial connection to the SSC, see the Sun Fire B1600 Blade System Chassis Hardware Installation Guide.
-
Page 81: Firmware Upgrade Procedures
C H A P T E R Firmware Upgrade Procedures This chapter contains the following sections: Section 10.1, “Introduction” on page 10-2 Section 10.2, “Setting up a TFTP Server” on page 10-3 Section 10.3, “Installing Firmware Images Onto the TFTP Server” on page 10-5 Section 10.4, “Upgrading the System Controller Firmware”... -
Page 82: Introduction
10.1 Introduction Note – To perform the update procedures in this chapter, you need to have a connection from the NETMGT port to the management network. This is because you need to transfer the new firmware from a location on your network. This chapter tells you how to upgrade the firmware on: One or both System Controllers One or more Blade Support Chips (each server blade contains a single one of... -
Page 83: Setting Up A Tftp Server
The Filenames of the Firmware TABLE 10-1 Firmware Image Filename System Controller application SunFireB1600-sc-vxxxx.flash vxxxx Integrated Switch firmware SunFireB1600-switch- .flash vxxxx Blade Support Chip firmware SunFireB100s-bsc- .flash vxxxx SunFireB100x-bsc- .flash vxxxx SunFireB200x-bsc- .flash vxxxx OpenBoot PROM firmware upgrade utility SunFireB100s-obp- 1. - Page 84 3. On the same system create a TFTP home directory by typing the following at the Solaris prompt: # mkdir /tftpboot # chown root /tftpboot # chmod 755 /tftpboot # cd /tftpboot # ln -s . tftpboot 4. Restart inetd by typing: # pkill -HUP inetd 5.
-
Page 85: Installing Firmware Images Onto The Tftp Server
Installing Firmware Images Onto the TFTP Server When you have downloaded the Sun Fire B1600 firmware patches (and unpacked the firmware images), you need to install them onto the correct directory on the TFTP server. This makes them available to the System Controller’s flashupdate command. -
Page 86: Upgrading The System Controller Firmware
To install the firmware onto the TFTP server, at that system’s # prompt, type the following: # cd /tftp-root-dir # mkdir firmware # cp SunFireB1600-sc-vxxxx.flash /tftp-root-dir/firmware # chmod 444 /tftp-root-dir/firmware/SunFireB1600-sc-vxxxx.flash # cd switch-firmware-patch-dir # cp SunFireB1600-switch-vxxxx.flash /tftp-root-dir/firmware # chmod 444 /tftp-root-dir/SunFireB1600-switch-vxxxx.flash # cd bsc-firmware-patch-dir # cp SunFireB100x-bsc-vxxxx.flash /tftp-root-dir/firmware # chmod 444 /tftp-root-dir/SunFireB100x-bsc-vxxxx.flash... - Page 87 To perform the upgrade, do the following: 1. Check the current version of the System Controller firmware. Type: sc>showsc Sun Advanced Lights Out Manager for Blade Servers 1.1 Copyright 2003 Sun Microsystems, Inc. All Rights Reserved. ALOM-B 1.1 Release: 1.1.8 Parameter Running Value...
- Page 88 4. At the sc> prompt, type: sc> flashupdate -s ipaddress -f path [-v] [-y] sscn/sc where: path specifies the path and filename of the new firmware you intend to download, ipaddress specifies the IP address of the computer on which the new firmware is stored (in other words, of the TFTP server), n is either 0 or 1 depending on whether you are downloading new firmware onto SSC0 or SSC1,...
-
Page 89: Example For Upgrading The System Controller Firmware
6. Confirm that the System Controller is now running the new firmware. Type: sc>showsc Sun Advanced Lights Out Manager for Blade Servers 1.2 Copyright 2003 Sun Microsystems, Inc. All Rights Reserved. ALOM-B 1.2 Release: 1.2.1 Parameter Running Value Stored Value... -
Page 90: Upgrading The Blade Support Chip Firmware On One Or More Blades
The current version of the firmware running on each blade is listed at the end of the output from the showsc -v command. Type: sc>showsc -v Sun Advanced Lights Out Manager for Blade Servers 1.2 Copyright 2003 Sun Microsystems, Inc. All Rights Reserved. ALOM-B 1.2 Software Version Software Release Date -------------------------------------------------------- v1.1T30-SUNW,Serverblade1... -
Page 91: Example Of Upgrading Firmware On A Single Blade
4. At the sc> prompt, type: sc> flashupdate [-v] [-y] -s ipaddress -f path sn [sn...] where: the -v (verbose) option displays detailed screen output to enable you to observe the progress of the firmware update, and the -y option causes the update command to execute without prompting you for confirmation to proceed. -
Page 92: Examples For Upgrading Firmware On A Number Of Blades
10.5.2 Examples for Upgrading Firmware on a Number of Blades To download a new image (called ) onto the SunFire100x-bsc-v5.0.0.flash blades in slots 5, 10, and 13 from a TFTP server whose IP address was 129.156.237.102, you would need to type: sc>... - Page 93 1. Check the current version of the OBP firmware on the blade. From the Solaris prompt type: # /usr/sbin/prtconf -V 4.7.3 2002/12/09 08:30 Alternatively, from the PROM monitor’s ok prompt on the blade, type: ok .version Release 4.7.3 created 2002/12/09 08:30 4.7.3 2002/12/09 08:30 Sun Serverblade1 2.
- Page 94 8. Execute the OBP upgrade utility. Type: # cd /var/tmp/patchnumber-rev # chmod +x SunFireB100s-obp-vxxxxx.sh # ./SunFireB100s-obp-vxxxxx.sh where is the firmware version information. vxxxxx A sample command is as follows: # ./SunFireB100s-obp-v4.7.3.sh Flash Update 2.4: Program and system initialization in progress... Current System Flash PROM Revision: ----------------------------------- OBP 4.7.0.stlo.v111 2002/11/01 17:44 Sun...
-
Page 95: Upgrading The Integrated Switch Firmware
10.7 Upgrading the Integrated Switch Firmware Note – To enable you to perform the instructions in this section, the switch you are downloading new firmware onto must have an IP address set. For instructions about setting the IP address, see the Sun Fire Blade System Chassis Software Setup Guide. To download new firmware onto the switch belonging to one of the SSCs: 1. - Page 96 4. Establish that the upgrade is necessary. Find out the version number of the currently installed operation code firmware. To do this, type the following: Console# show version Unit1 Serial number : Service tag : Hardware version : Number of ports :24 Main power status :up Redundant power status :not present Agent(master)
- Page 97 6. Delete any operation code files marked ‘N’. In the example in Step 5, you would type the following to delete the piece of firmware not being used: Console#delete runtime_v0005 7. Perform the download by typing the following: Console#copy tftp file 8.
- Page 98 9. Confirm that the new file has been stored in the switch’s flash memory. To do this, type: Console#dir file name file type startup size (byte) -------------------------------- -------------- ------- -------- diag_v0073 Boot-Rom image 114228 runtime_v0007 Operation Code 1018048 runtime_v10010 Operation Code 1018056 Factory_Default_Config.cfg Config File...
- Page 99 13. Repeat Step 1 through Step 12 to upgrade the operating code on the other switch in the chassis. Chapter 10 Firmware Upgrade Procedures 10-19...
- Page 100 10-20 Sun Fire™ B1600 Blade System Chassis Administration Guide • February 2004...
-
Page 101: Troubleshooting
C H A P T E R Troubleshooting This chapter documents contains the following sections: Section 11.1, “Introduction” on page 11-2 Section 11.2, “Things to Check Before You Phone Sun” on page 11-2 Section 11.3, “Assembling Information to Provide to a Sun Support Engineer” on page 11-3 11-1... -
Page 102: Introduction
All cables have the correct pin connections for the connectors they are inserted into. To check the pin-outs of the different connectors, refer to the Sun Fire B1600 Blade System Chassis Hardware Installation Guide. -
Page 103: Assembling Information To Provide To A Sun Support Engineer
Unable to access the System Controller from the management network, make sure that cable from the management network is connected to the NETMGT port on the correct Switch and System Controller. (Note that there is no network connection between the two System Controllers. Therefore, you must have network cable from the management network to the NETMGT port of the System Controller you want to reach.) Using VLANs and you have removed any blades from their slots, make sure that... -
Page 104: Gathering Information About A Switch
sc>showenvironment -v sc>showfru sn where n is the number of the slot containing the blade that is not operating properly. It will also be useful to the Sun engineer you talk to if you can tell him or her which serial port, if any, you are receiving output from the System Controller on. -
Page 105: Gathering Information About A Server Blade By Using Sun Explorer
For information about performing preliminary diagnostics on a server blade, refer to the chapter on blade setup in the Sun Fire B1600 Blade System Chassis Software Setup Guide. 1. Download a copy of Sun Explorer either to the server blade or to a location on the network that is accessible from the server blade. - Page 106 4. Extract the contents of the Explorer package. Type: #cd /var/tmp #uncompress SUNWexplo.tar.Z #tar xvf SUNWexplo.tar Alternatively, if you have gzip installed on the server blade, type: zcat SUNWexplo.tar.Z | tar xvf - 5. Add the Explorer package to the server blade. pkgadd -d .
-
Page 107: Replacing Optional Hardware Components
Replacing Optional Hardware Components This chapter provides details of how to replace existing components or install new components into the Sun Fire B1600 blade system chassis, and includes the following sections: Section 12.1, “Installing A New Blade” on page 12-2 Section 12.2, “Installing a New SSC”... -
Page 108: Installing A New Blade
12.1 Installing A New Blade This section provides the information required to install or replace a blade in the Sun Fire B1600 blade system chassis. The system chassis contains 16 slots. It can hold a combination of single-width blades, double-width blades and filler panels. Double-width blades occupy two adjacent slots in the system chassis. -
Page 109: Disabling The Existing Blade Prior To Removal
12.1.1 Disabling the Existing Blade Prior to Removal To shutdown the blade in preparation for removal, and to cause the blue “Ready to Remove” LED to be lit, type: sc> removefru sn Where is the number of the slot containing the blade you are removing. Note –... - Page 110 Disengaging the Blade Locking Mechanism FIGURE 12-2 12-4 Sun Fire™ B1600 Blade System Chassis Administration Guide • February 2004...
- Page 111 3. Pull the lever in a forward and upward motion, causing the blade lever to unlatch and eject the blade partially from the system chassis ( FIGURE 12-3 Ejecting the Blade FIGURE 12-3 Chapter 12 Replacing Optional Hardware Components 12-5...
- Page 112 4. Pull the lever to remove the filler panel from the system chassis ( FIGURE 12-4 Support the bottom of the filler panel with your free hand while lifting the filler panel clear of the system chassis. Removing the Blade or Filler Panel FIGURE 12-4 12-6 Sun Fire™...
-
Page 113: Inserting The New Blade Or Filler Panel
5. Install a blade or filler panel into the empty slot. Section 12.1.3, “Inserting the New Blade or Filler Panel” on page 12-7. Caution – Do not leave any slots empty as this can disrupt airflow through the system and compromise EMC performance. 12.1.3 Inserting the New Blade or Filler Panel The system chassis is designed to operate with a total of up to 16 blades and filler... - Page 114 2. Align the blade with the empty slot. Ensure that the blade connector is facing towards the system chassis, with the hinge point of the lever mechanism at the top. Support the bottom of the blade with your free hand while lifting the blade up to the system chassis ( FIGURE 12-6 3.
-
Page 115: Bringing Up The Blade You Have Inserted
2. Follow the instructions in the Sun Fire B1600 Blade System Chassis Software Setup Guide for powering on the blade and loading the operating environment. -
Page 116: Installing A New Ssc
12.2 Installing a New SSC This section provides the steps required to replace an SSC in the system chassis. For information about how the chassis’s midplane and the SSCs cooperate to preserve System Controller login information and server blade host ID information for the chassis as a whole, see Section 12.5, “User Login and Host ID Information for a Replacement Chassis or SSC”... -
Page 117: Adding A Second Ssc To A Chassis That Was Supplied With Only One Ssc
12.2.1 Adding a Second SSC to a Chassis That Was Supplied With Only One SSC Note – Do not install a second SSC module until you have upgraded the firmware on the existing SSC. Both SSCs must be running System Controller firmware release 1.2 (or later) before they will inter-operate to provide the failover facility. - Page 118 3. To confirm that the SSC now has the correct firmware installed (version 1.2.x), type: sc>showsc Sun Advanced Lights Out Manager for Blade Servers 1.2 Copyright 2003 Sun Microsystems, Inc. All Rights Reserved. ALOM-B 1.2 Release: 1.2.7 Parameter Running Value...
- Page 119 SSC. To confirm that the new SSC is installed and in standby mode, type showsc: sc>showsc Sun Advanced Lights Out Manager for Blade Servers 1.2 Copyright 2003 Sun Microsystems, Inc. All Rights Reserved. ALOM-B 1.2 Release: 1.2.7 Parameter Running Value...
- Page 120 SSC module. For information on how to do this if you are using Solaris server blades, refer to the Sun Fire B1600 Blade System Chassis Software Setup Guide (Chapters 5, 6, and 7). 12-14 Sun Fire™ B1600 Blade System Chassis Administration Guide • February 2004...
-
Page 121: Disabling An Ssc You Are Going To Remove
12.2.2 Disabling an SSC You Are Going to Remove 1. Make sure the SSC you are removing is the one containing the standby System Controller. To do this, type the showsc command at the sc> promt. For example: sc>showsc Parameter Running Value Stored Value ---------------------------------------------------------------------... - Page 122 The SSC Ejector Lever FIGURE 12-9 4. Check that the ejector lever is open fully and clear of the SSC module FIGURE 12-9 5. Remove the SSC from the system chassis by pulling on the vertical handles attached to the back of the SSC ( FIGURE 12-10 Support the bottom of the SSC while removing the module from the system chassis.
- Page 123 Removing the SSC from the System Chassis FIGURE 12-10 Chapter 12 Replacing Optional Hardware Components 12-17...
-
Page 124: Inserting The New Ssc
12.2.4 Inserting the New SSC 1. Align the SSC with the system chassis. SSC connectors must face towards the system chassis and be located on the lower half of the SSC. 2. Ensure that the chassis ejector lever is opened fully and does not obstruct the chassis opening ( FIGURE 12-11 Aligning the SSC Before Insertion... - Page 125 3. Slide the SSC into the empty chassis slot. Push the SSC into the slot until the ejector lever engages ( FIGURE 12-12 Inserting the SSC FIGURE 12-12 4. Complete insertion by closing the ejector lever. Check that the latch engages onto the SSC pull handle. This engages the SSC into the system chassis ( FIGURE 12-13 Chapter 12 Replacing Optional Hardware Components...
- Page 126 Closing the SSC Ejector Lever FIGURE 12-13 5. Reconnect all network and management cables to the SSC and, if necessary, place the cables in the cable management system. 6. Check that the green ‘Activity‘ LED is lit. 12-20 Sun Fire™ B1600 Blade System Chassis Administration Guide • February 2004...
- Page 127 7. Log into the active SSC and power on the new standby SSC. At the sc> prompt, type: sc> poweron sscn where n is either 0 or 1 depending on whether you have replaced SSC0 or SSC1. Chapter 12 Replacing Optional Hardware Components 12-21...
-
Page 128: Installing A New Power Supply Unit
This section provides the steps required to replace a Power Supply Unit in the Sun Fire B1600 system chassis. Caution – The Sun Fire B1600 system chassis requires two Power Supply Units (PSUs) to be installed and powered to ensure that the chassis remains within an acceptable range of operating temperatures. - Page 129 The PSU ejector lever FIGURE 12-14 4. Check that the ejector lever is open fully and clear of the PSU module. 5. Remove the PSU from the system chassis by pulling on the vertical handles attached to the rear of the PSU ( FIGURE 12-15 Support the bottom of the PSU while removing the module from the system chassis.
- Page 130 Removing the PSU from the system chassis FIGURE 12-15 Caution – When you remove a PSU, the white Locator LED on the chassis’s front and back panels starts to flash. You must insert a new PSU within 10 minutes of removing the old one, otherwise there is a danger that the server blades in the chassis will overheat.
-
Page 131: Inserting The New Psu
Inserting the New PSU Caution – To ensure that it remains within an acceptable range of operating temperatures the Sun Fire B1600 system chassis requires two PSUs. Caution – Do not install a PSU with the IEC power cord already attached. Only connect the power cord when the PSU is installed. - Page 132 Sliding a PSU Module Into the Chassis FIGURE 12-16 4. Complete the installation by closing the ejector lever fully. Check that the ejector lever engages onto the PSU pull handle. This engages the PSU into the system chassis ( FIGURE 12-17 12-26 Sun Fire™...
- Page 133 Closing the PSU Ejector Lever FIGURE 12-17 5. Connect the power cable to the PSU. 6. Check that the green ‘Activity‘ LED is lit. Chapter 12 Replacing Optional Hardware Components 12-27...
-
Page 134: Installing A New Chassis
12.4 Installing a New Chassis This section tells you how to shut down one chassis, remove its components, remove the chassis from the rack, and install the new chassis into the rack. It then tells you how to install the components from the old chassis into the new one. This section contains the following sub-sections: “Shutting Down All Components”... -
Page 135: Removing The Chassis's Components
12.4.2 Removing the Chassis’s Components Caution – The PSUs provide the only reliable connection to earth for the system chassis. Do not remove the PSUs until all other components have been removed. We recommend you note the position of the SSCs and server blades before removing them from the old chassis. -
Page 136: Removing The System Chassis From A Four Post Rack
12.4.3 Removing the System Chassis from a Four Post Rack 1. Unscrew the system chassis captive retaining screws. 2. Slide the system chassis out of the rack ( FIGURE 12-18 The system chassis will stop when the retaining catches positioned on the chassis runners meet the rack. -
Page 137: Removing The System Chassis From A Two Post Rack
12.4.4 Removing the System Chassis from a Two Post Rack 1. Remove the rear brackets from the system chassis and rack ( FIGURE 12-19 Detaching the Rear Brackets FIGURE 12-19 Chapter 12 Replacing Optional Hardware Components 12-31... - Page 138 2. Detach the front brackets from the rack ( FIGURE 12-20 Detaching the Front Brackets From the Rack FIGURE 12-20 12-32 Sun Fire™ B1600 Blade System Chassis Administration Guide • February 2004...
- Page 139 3. Remove the front rack bracket from the system chassis ( FIGURE 12-21 Removing the Front Rack Bracket From the System Chassis FIGURE 12-21 Chapter 12 Replacing Optional Hardware Components 12-33...
-
Page 140: Installing The New System Chassis Into The Rack
12.4.5 Installing the New System Chassis Into the Rack For information about installing the chassis into a rack, refer to the Sun Fire B1600 Blade System Chassis Hardware Installation Guide (Part No. 816-7614). This tells you how to install into the following racks:... - Page 141 In the reverse case, where the chassis is new (and its user login and host ID information are therefore unconfigured) but the SSC has been previously in use, the midplane takes the user login and host ID information from the System Controller. However, in the case where an SSC is introduced into a chassis and both already contain user login and host ID information but the SSC and chassis differ in respect of either or both the outcome is more complicated to predict.
- Page 142 12-36 Sun Fire™ B1600 Blade System Chassis Administration Guide • February 2004...
-
Page 143: Replacing Dimms
C H A P T E R Replacing DIMMs This chapter provides procedures for installing DIMMs in the Sun Fire B100x and B200x blades. It contains the following sections: “Replacing DIMMs for the B100x Server Blade” on page 13-2 “Replacing DIMMs for the B200x Server Blade” on page 13-10 13-1... -
Page 144: Replacing Dimms For The B100X Server Blade
Note – Do not remove the blade until this LED state is displayed. See the Sun Fire B1600 Blade System Chassis Administration Guide for details of how to shut down the blade safely. Caution – Operating the system chassis with empty blade slots might disrupt airflow through the system chassis and will compromise EMC compliance. - Page 145 To Remove the Existing DIMM Caution – Use proper ESD grounding techniques when handling components. Wear an antistatic wrist strap and use an ESD-protected mat. Store ESD-sensitive components in antistatic bags before placing them on any surface. 1. Remove the blade cover screws ( FIGURE 1 Use a Phillips No.
- Page 146 2. Lift the blade cover away from the blade ( FIGURE 2 Gently hinge open the blade cover and lift it away from the blade. Caution – Do not use excessive force in hinging open the blade cover, as this might damage the blade EMI fingers and the physical enclosure itself.
- Page 147 3. Remove the DIMMs by pressing the DIMM ejectors firmly ( FIGURE 3 Press against the back of the DIMM riser card for support. Note – You must remove the top DIMM if you require access to the bottom DIMM. Caution –...
- Page 148 To Install the New DIMM Note – The top DIMM slot must be vacant before you to install a DIMM in the bottom slot. 1. Unpack the replacement DIMM. 2. Insert the DIMM into the vacant DIMM slot. 3. Press the DIMM until the DIMM ejectors engage on the edges of the DIMM FIGURE 4 Press against the back of the DIMM riser card for support when you insert the DIMM.
- Page 149 Caution – Do not press against the metal blade enclosure when you insert the DIMM as you will place excessive strain on the DIMM riser card. Place your thumbs on the back of the DIMM riser card if you require additional leverage. DIMM Ejector DIMM Ejector DIMM Riser Card...
- Page 150 4. Lower the blade cover on to the blade ( FIGURE 5 Keep the blade cover level with the blade enclosure. Check that the front of the blade cover is flush with the metal grille at the front of the blade enclosure. Lowering the Blade Cover on to The Blade Enclosure FIGURE 5 5.
-
Page 151: Installing The Blade
13.1.3 Installing the Blade The system chassis is designed to operate with a total of up to 16 blades and filler panels installed. Caution – Operating the system chassis with empty blade slots might disrupt airflow through the system chassis and will compromise EMC compliance. Chapter 12 for details of how to install the blade into the system chassis, and how to bring the blade online. -
Page 152: Replacing Dimms For The B200X Server Blade
Note – Do not remove the blade until one of these LED states is displayed. See the Sun Fire B1600 Blade System Chassis Administration Guide for details of how to shut down the blade safely. - Page 153 1. Remove the blade cover screws ( FIGURE 1 Use a Phillips No. 2 screwdriver to remove the screws. Removing the Blade Cover Screws FIGURE 1 Chapter 13 Replacing DIMMs 13-11...
- Page 154 2. Lift the blade cover away from the blade ( FIGURE 2 Slide the cover off and then lift it away from the blade body. Caution – Lift the blade cover perpendicularly away from the blade to ensure that the integrity of the blade EMI fingers is not affected. Lifting the Blade Cover Away From the Blade FIGURE 2 13-12...
- Page 155 3. Remove the DIMMs by pressing the DIMM ejectors firmly ( FIGURE 3 Note – You must remove the front DIMMs if you require access to the back DIMMs. Caution – Do not use a screwdriver to lever the ejectors. The use of excessive force might cause damage to both the ejector and other blade components.
- Page 156 To Install the New DIMM The B200x blade has four DIMM slots. In a standard configuration, slots 2A and 2B are populated. Additional DIMM pairs should be installed in slots 1A and 1B. Note – DIMM slot 2A must always be populated. 1.
- Page 157 DIMM Ejector DIMM Ejector Engaging the DIMM Ejectors FIGURE 4 Chapter 13 Replacing DIMMs 13-15...
- Page 158 4. Place the blade cover on to the blade ( FIGURE 5 Keep the blade cover level with the blade chassis and slide the cover in position. Check that the bottom retention lugs of the chassis engage in the blade cover. Retention Lugs Lowering the DIMM Cover on to The Blade Enclosure FIGURE 5...
-
Page 159: Installing The Blade
5. Attach the blade cover to the blade enclosure with the blade cover screws. 13.2.3 Installing the Blade The system chassis is designed to operate with all blade slots populated with either blades and/or filler panels. Caution – Operating the system chassis with empty blade slots might disrupt airflow through the system chassis and will compromise EMC compliance. - Page 160 13-18 Sun Fire™ B1600 Blade System Chassis Administration Guide • February 2004...
-
Page 161: The Meaning Of The Leds
A P P E N D I X The Meaning of the LEDs This appendix describes the LEDs on the front and back of the Sun Fire B1600 blade system chassis and tells you the meanings of their different states. It contains the following section: Section A.1, “Interpreting the LEDs”... -
Page 162: Interpreting The Leds
Interpreting the LEDs Use the LEDs on the individual system components to determine if the system is operating normally. We recommend you monitor the LEDs routinely on the SSCs, Power Supply Units, and server blades The LEDs can be off, on, or in some cases blinking slowly or flashing. When the Service Required LED is on (lit), this indicates that a fault has occurred in the component. - Page 163 SSC Ready to remove SSC Ready to remove SSC Fault SSC Service required SSC Active SSC Active Chassis: Locator Service required Active PSU AC Power Active PSU DC Power Active PSU Service Required PSU Ready to Remove Rear Panel LEDs FIGURE A-2 SSC, Blade, Chassis, and Power Supply Status Codes TABLE A-1...
- Page 164 SSC, Blade, Chassis, and Power Supply Status Codes (Continued) TABLE A-1 Service Ready to Required Active Remove (blue) (amber) (green) Indication Corrective Action This combination is most likely Remove the PSU and insert the to be seen on a PSU. It replacement PSU within 10 minutes (see indicates that the PSU is the Caution box below).
- Page 165 Appendix A The Meaning of the LEDs...
- Page 166 Sun Fire™ B1600 Blade System Chassis Administration Guide • February 2004...
- Page 167 Index blade factory default settings installing a blade, 13–9, 13–17 how to restore the SC defaults, 1–3 pull recess, 12–3 fault LED, 4–7 Blade Support Chip, 4–6, 10–2 front of chassis, A–2 break, 2–13 filler panel break command (for the blades), 2–13 installing a filler panel, 13–9, 13–17 BSC, 4–6 pull recess, 12–3...
- Page 168 front of chassis, A–2 accessing the console, 5–2 accessing the console with read-only access, 5–3 boot console history, 5–4 break command, 2–13 bringing up a new blade, 12–9 MAC address, 6–7 console access, 5–1 monitoring the system chassis, 4–1 to 4–7 event reporting, 4–3 exiting the console, 5–4 forcing other users off the console, 5–2...
- Page 169 switches boot console history, 5–5 console access, 5–1 exiting the console, 5–4 forcing other users off the console, 5–3 resetting, 2–12 run-time console history, 5–6 upgrading firmware, 10–15 viewing the console history, 5–4 syslogd, 4–6 system chassis installing into a rack, 12–34 populating the new chassis, 12–34 removing from a four-post rack, 12–30 removing from a two-post rack, 12–31...
- Page 170 Index-4 Sun Fire™ B1600 Blade System Chassis Administration Guide • February 2004...
Need help?
Do you have a question about the Sun Fire B1600 and is the answer not in the manual?
Questions and answers