Table of Contents
Advertisement
Quick Links
Advertisement
Table of Contents

Related Manuals for GVA GVA22FLEDA


Summary of Contents for GVA GVA22FLEDA
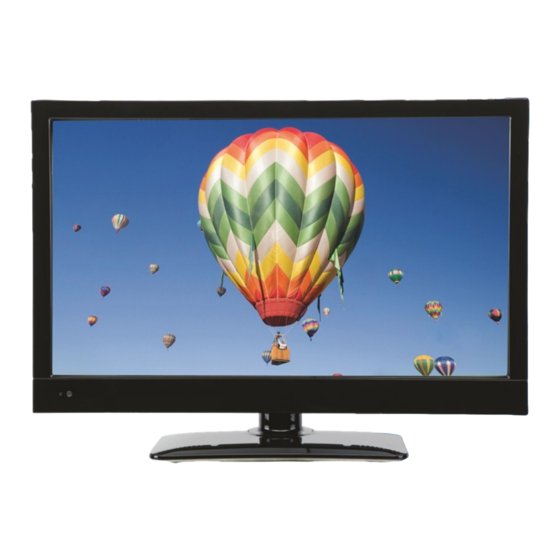
- Page 1 21.5” (54cm) FHD LED LCD TV GVA22FLEDA Instruction Manual...
-
Page 2: Table Of Contents
Contents Preface Safety Precautions In the carton Front Back Connections of LED TV Installation Drawings Power Cord Connection Antennas Connection HDMI Connection VGA Connection COAX Connection USB Connection AV Connection YPbPr Connection Remote Control Remote Control Instructions in TV/Media mode Remote Control Setup Menu Operation Installation Guide... -
Page 3: Preface
Preface 1.PREFACE Thank you for buying this TV ! Please read this manual thoroughly before operating the TV. Thank you for buying this TV ! Please read this manual thoroughly before operating the TV. Make Make sure the TV was not damaged in transit. Should the TV is damaged, do no install it and sure the TV was not damaged in transit. - Page 4 Safety Precautions Keep the TV away from heat sources. Keep the TV away from heat sources. Unplug the before cleaning it. Do not use solvent or liquid to Unplug the before cleaning it. Do not use solvent or liquid clean the TV. Only clean the TV with a soft and dry cloth. clean the TV.
-
Page 5: In The Carton
3. IN THE CARTON In the carton 3. IN THE CARTON 3. IN THE CARTON TV SET Remote Control TV SET Remote Control TV SET Remote Control TV SET Remote Control 1.5V 1.5V 1.5V Adaptor & Power Cord AAA Batteries Adapter &... -
Page 6: Front Back Connections Of Led
Front & Back Connections of LED 4. FRONT & BACK CONNECTIONS OF LED 4. FRONT & BACK CONNECTIONS OF LED Front View Front View Front View (Picture are for reference only.) (The sample is subject to the real product.) 4. FRONT & BACK CONNECTIONS OF LED Front View 1. -
Page 7: Tv Installation Drawings
5. TV INSTALLTION DRAWINGS 5. TV INSTALLTION DRAWINGS TV Installation Drawings Power Cord Connection Power Cord Connection Power Cord Connection DC12V IN DC12V IN - Connect the power cord correctly as shown. - Connect the power cord correctly as shown. - Connect the power cord correctly as shown. -
Page 8: Hdmi Connection
HDMI Connection TV Installation Drawings TV Back TV Back HDMI Connection HDMI Connection AV IN PC IN COMPONENT IN DC IN COAX VIDEO HDMI1 VGA AUDIO RF IN HDMI2 TV Back TV Back AV IN PC IN COMPONENT IN DC IN COAX VIDEO HDMI1... -
Page 9: Coax Connection
TV Installation Drawings COAX Connection COAX Connection COAX Connection AV IN COAX VIDEO HDMI2 TV Back AV IN COAX VIDEO HDMI2 TV Back COAX Cable COAX Cable COAX the audio amplifier back COAX the audio amplifier back Audio amplifier Audio amplifier Connect to Audio Amplifier device to the COAX output jack on the TV. -
Page 10: Av Connection
TV Installation Drawings AV Connection AV Connection AV Connection AV IN COAX VIDEO HDMI2 TV Back AV IN COAX VIDEO HDMI2 TV Back Video cable Video cable DVD or VCR back DVD or VCR back DVD or VCR DVD or VCR Connect the VIDEO and AUDIO output jack of the DVD or VCR to the VIDEO jacks on the TV set Connect the VIDEO and AUDIO output jack of the DVD or VCR to the VIDEO jacks on the TV Connect the VIDEO and AUDIO output jack of the DVD or VCR to the VIDEO jacks on the TV set... -
Page 11: Remote Control
7. REMOTE CONTROL Remote Control 7. REMOTE CONTROL Remote Control Instructions in TV Media mode Remote Control Instruction in TV/Media mode Remote Control Instructions in TV Media mode STANDBY: Turn the LED TV ON or OFF. STANDBY TV/RADIO: Select the TV/RADIO mode. Turn the LED TV ON or OFF. - Page 12 7. REMOTE CONTROL Remote Control Remote Control Instructions in TV Media mode Remote Control Instruction in TV/Media mode HOLD: Hold on or off for current page display. STANDBY INDEX: Request the index page(In Teletext mode). Turn the LED TV ON or OFF. TV/RADIO Enter to the recorded list(In DTV mode).
-
Page 13: Remote Control Setup
Remote Control Remote Control Setup Remote Control Setup Remote Control Setup Remote Control Setup Open the cover. 1. Open the cover. Uses three A size batteries. When inserting the batteries, make sure correct polarities “+” 1. Open the cover. 2. Uses three A size batteries.When inserting the batteries, make sure correct polarities + and - “... -
Page 14: Menu Operation
Menu Operation MENU OPERATION MENU OPERATION MENU OPERATION In ATV/DTV mode press the MENU button to enter the main menu. A window will appear, use ◄► to scroll through the following menu headings: CHANNEL, PICTURE, SOUND, TIME, OPTION In ATV/DTV mode press the MENU button to enter the main menu. A window will appear, use In ATV/DTV mode press the MENU button to enter the main menu. - Page 15 Auto Scan Auto Scan Menu Operation In the Auto Scan menu there are 2 options for you select from, Country and Tune Type. In the Auto Scan menu there are 2 options for you select from, Country and Tune Type. Press to select Country and Tune Type, press OK to start scanning.
- Page 16 Menu Operation Storage to Storage to: Press the buttons to change the numbered location of the found channel. press the ◄► buttons to change the numbered location of the found channel. System: Select the system using the buttons. System Current CH: Displays the current channel number, press the buttons to choose the Select the system using the ◄►...
-
Page 17: Picture Menu
Menu Operation Rename(Only available in ATV) Modify current channel name, only used in ATV mode. Rename (Only available in ATV): Rename(Only available in ATV) Press green button to enter RENAME mode, then use the ◄►▲▼ change name. Modify current channel name, only used in ATV mode. Press green button again or press menu button to confirm. - Page 18 Color Temperature Menu Operation Color Temperature Color Temperature Medium Color Temperature Adjust Back Quit MENU EXIT You can select from the following preset modes Cool, Medium or Warm. Only User mode allows Color Temperature Medium adjustment of Red, Green and Blue values. Adjust Red/Green/Blue Back...
-
Page 19: Sound Menu
Menu Operation SOUND Menu SOUND Menu SOUND Menu Sound Mode Standard Sound Mode Standard Treble Treble Bass Balance Bass SOUND Auto Volume Balance SOUND Surround Sound Auto Volume SPDIF MODE Auto Surround Sound SPDIF MODE Auto Move Back Select Quit MENU EXIT Move... -
Page 20: Time Menu
Menu Operation TIME Menu TIME Menu TIME Menu TIME Menu 31/May 14:25 Clock 31/May 14:25 Clock Off Time 31/May 14:25 Clock Off Time On Time Off Time On Time Sleep Timer On Time Sleep Timer TIME TIME Auto Sleep Sleep Timer Auto Sleep TIME Western Australia.. -
Page 21: Option Menu
On Time Menu Operation You can specify a time, input source, channel and volume for the TV to turn on. to select Repeat mode and use ◄► to select your preference as above. Press ▲▼ Use ▲▼ to select the other parameters and ◄► to adjust. On Time On Time You can specify a time, input source, channel and volume for the TV to turn on. -
Page 22: Lock Menu
Subtitle Language 1st/2nd Press OK to enter Subtitle Language sub menu, use to set language. ▲▼ Subtitle Menu Operation Subtitle Language 1st/2nd OSD Duration Press OK to enter Subtitle Language sub menu, use to set language. ▲▼ Subtitle Press OK to enter OSD Duration sub menu, use amount of time the OSD will remain on ▲▼... -
Page 23: Hotel Setting
Menu Operation Password Set Password Please enter old password Please enter new password Set Password Confirm new password Please enter old password Cancel Clear Please enter new password Confirm new password Press OK to enter sub menu. ss OK to enter sub menu. Cancel Clear Using the numeric keys enter the old password followed by your new password. -
Page 24: Input Source
Set Source ◄► to select the default s ource which appears on the screen after power on. Channel Number(available in DTV/ATV source only Menu Operation Use ◄► to select the default Channel Number which appears on the screen after power on. Picture Lock Set Source Use ▲▼... -
Page 25: Epg And Channel List Menu
EPG and Channel List Menu Menu Operation Program EPG EPG and Channel List Menu Use ◄► to select TIME between TIME and 31 May 2010 13:00-18:00 31 May 13 36 EPG and Channel List Menu CHANNEL modes 700 BBC Radio 1 Edith Bowman The best rock thranks including the 3 Detailed information form 1S. -
Page 26: Multimedia (Media) Menu
Channel List Menu Operation Press OK button to display a list of tuned channels. The status of the channels (Skip/Lock/Favourite) will also be displayed, see below. Channel List Channel List Channel List Press OK button to display a list of tuned channels. Press OK button to display a list of tuned channels. - Page 27 Menu Operation Inserted USB device info Displays USB version of the device that is attached, for example if a USB 2.0 device is attached, 2.0 will be displayed. When no device is attached it will display 'No Device'. Inserted USB device info Disc Displays USB version of the device that is attached, for example if a USB 2.0 device is Show the current disc.
- Page 28 Menu Operation Slide Show When in Picture List mode you can select multiple pictures to be viewed as part of a Slide Show. to scroll through the list, press OK when the desired pictures are highlighted. Use ◄► ▲▼ Slide Show If you wish to highlight all pictures, press the GREEN button.
- Page 29 Menu Operation MUSIC submenu equip description: MUSIC submenu equip description: Page Show pages. Page: Show pages. Preview window Music picture. Preview window: Music picture. Files information Files information: Show songs name and size etc. Show songs name and size etc. MUSIC playing condition and keys function: MUSIC playing conditon and keys function MUSIC playing is the menu just like playing software in PC, mainly have playlist, basic...
- Page 30 Menu Operation Fast forward and fast reverse. Fast forward and fast reverse. Repeat Repeat Repeat playing,can choose repeat 1, repeat all, and disable repeat mode. : Fast forward and fast reverse. Repeat playing,can choose repeat 1, repeat all, and disable repeat mode. Repeat: Repeat playing,can choose repeat 1, repeat all, and disable repeat mode.
- Page 31 Menu Operation Info Displays the highlighted file's information including resolution, audio track, subtitle, artist and size. Info Goto Info: Displays the highlighted file’s information including resolution, audio track, subtitle, Displays the highlighted file's information including resolution, audio track, subtitle, artist and size. artist and size.
-
Page 32: Pvr Menu
Menu Operation STOP: Stop playing and Exit to browser menu. Playlist: Show play list. Stop Info: Displays the current file’s information including file name and size. playing and Exit to Browser menu Playlist PVR Menu Show play list. Info PVR function is only available for DTV,includes Record,Time shift and Playback function. Displays the current file's information including file name and size. - Page 33 Select Disk Choose the drive for PVR, C: is the default drive. Select Disk Menu Operation Disk Select Disk Select Disk Choose the drive for PVR, C: is the default drive. Select Disk Choose the drive for PVR, C: is the default drive. Select Disk Move Select...
- Page 34 The programme name is construct by channel number and record channel number. Operation guide Show the current available operation. ▲▼ Up and down to move Focus to select programme. Menu Operation ◄►/OK/Enter Close pop out the programme instruction. Programme name: The programme name is construct by channel number and record Info/Display channel number.
- Page 35 VR functions. If the disc is formatted Select Disk eady it will display 'FAIL'. Menu Operation Move Select ed FS PVR – Recorder Schedule vice is ready for PVR functions. If the disc is formatted PVR - Recorder Schedule Menu and function , if the disc is not ready it will display 'FAIL'.
- Page 36 Menu Operation The details is as follows: The details is as follows: The details is as follows: The details is as follows: Full Mode: Full Mode: Full Mode: Full Mode: Max Recording Time Max Recording Time [0000:10:20] [0000:10:20] Recording Time Recording Time [00:00:20] [00:00:20]...
- Page 37 Menu Operation Time shift Play At Time shift Play condition, the system record DTV and play it at the same time. Timeshift Play Time shift Play is start by press ,at Time shift Play condition, it can work Pause,Fast Forward, At Timeshift Play condition, the system record DTV a d play it at the same time.
-
Page 38: Troubleshooting And Advise
Troubleshooting and Advise Please check if you can solve the troubleshooting by yourself. Troubleshooting Control Please check that all cables are correctly plugged No Signal No Colour Shades Adjust the contrast, the colour and the brightness. Maybe result from a lighting signal from car, Stain show on the screen motor, neon light and other electrical devices or appliances. -
Page 39: Specifications
Specifications This manual is only for you reference, any change to the design and specification will not be advised. Model GVA22FLEDA Display Type TFT LED Resolution (Pixel) 1920 x 1080 Aspect Ratio 16: 9 Power Supply DC 12V IN Power Consumption... - Page 40 Notes...
- Page 41 Notes...
Need help?
Do you have a question about the GVA22FLEDA and is the answer not in the manual?
Questions and answers