Table of Contents
Advertisement
Quick Links
Advertisement
Table of Contents
Troubleshooting

Related Manuals for GVA GVA18LEDC


Summary of Contents for GVA GVA18LEDC
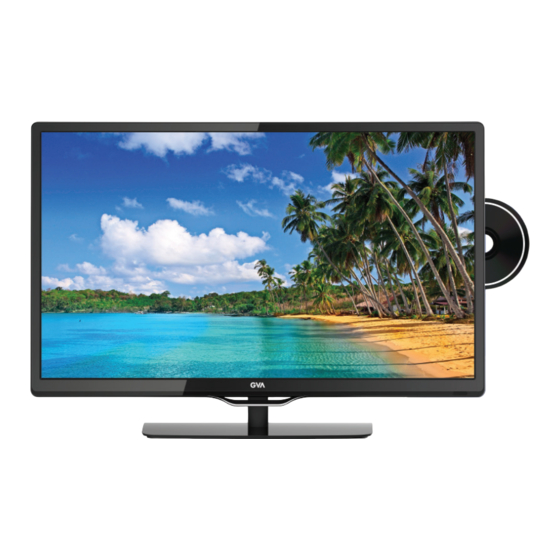
- Page 1 18.5” (47cm) HD LED LCD TV with Built-in DVD Player GVA18LEDC INSTRUCTION MANUAL...
-
Page 2: Table Of Contents
CONTENTS Important safety instructions Installation Base Stand Assembly Instruction Wall mounting installation guidelines Antenna Keyboard layout REAR AV Connections SIDE AV Connections AV EQUIPMENT connections Audio/Video PC Connections Remote Control Getting started Menu settings Channel Menu DTV Manual tuning ATV Manual tuning Program Edit Picture menu Sound menu... -
Page 3: Important Safety Instructions
IMPORTANT SAFETY INSTRUCTIONS 1) Read these instructions. 2) Keep these instructions. 3) Heed all warnings. 4) Follow all instructions. 5) Do not use this apparatus near water. 6) Clean only with a dry cloth. 7) Do not block any ventilation openings, install in accordance with the instructions. - Page 4 IMPORTANT SAFETY INSTRUCTIONS...
- Page 5 IMPORTANT SAFETY INSTRUCTIONS CAUTION Never tamper with any components inside the TV, or any other adjustment controls not mentioned in this manual. All LCD-TVs are high voltage instruments. When you clean up dust or water drops on the LCD PANEL or CABINET, the power cord should be physically removed from the mains outlet.
- Page 6 IMPORTANT SAFETY INSTRUCTIONS Important Information Regarding Use of Video Games, Computers, Captions or Other Fixed Image Displays. Do not allow a still picture to be displayed for an extended period, as this can cause a permanent after- image to remain on the screen. CAUTION: The permanent after-image on the screen resulting from fixed image use is not an operating defect.
-
Page 7: Installation
INSTALLATION Unpacking and preparing the TV Thank you for purchasing this 18.5” HD LED LCD TV with inbuilt DVD player. Before connection and operation of this product, please read through this User Manual carefully, and retain the manual for future reference. Remove the TV carefully from its packaging, taking care not to apply any pressure to the front of the LCD screen. -
Page 8: Wall Mounting Installation Guidelines
INSTALLATION If not already fitted at the factory, locate the bottom neck bracket into the gap in the bottom of the TV, and check that it is securely held in place by the 1 long screw, as per a) below. Gently slide the now fitted neck bracket at the bottom of the TV into the slot in the base stand. -
Page 9: Antenna
INSTALLATION Antenna AC Input 100-240V~ 50/60Hz 28W N.B. Unwind the mains power cord to its full length prior to initial use, and locate it away from other cables that will be connected to the TV FRONT PANEL layout 1: Remote control sensor. 2: Power indicator LED: RED = Stand-by. -
Page 10: Rear Av Connections
INSTALLATION REAR AV Connections When viewed from the rear of the TV, the following terminals/connections are visible (from left to right): • AC mains power cord • AV INPUT sockets - RCA type socket for Composite type VIDEO input, and RCA type sockets for Left and Right audio inputs. -
Page 11: Av Equipment Connections
INSTALLATION AV EQUIPMENT connections You can use the input and output terminals on the TV set as follows for basic accessory inter-connections. a) HDMI (basic) HDMI is a digital connection system that can carry both video and audio information. Using HDMI connections to this TV is recommended where accessory equipment can support higher resolution modes (such as 1080i/1080p) from products such as upscaling DVD players, Blu-ray players and high-performance gaming consoles. -
Page 12: Audio/Video
INSTALLATION c) AV (Audio/Video) This TV provides an AV input and output using line-level analogue stereo Audio and composite format Video signals for compatibility with earlier accessory devices eg. VCRs, CRT TVs, basic gaming consoles etc. Refer to page 10 regarding the specific characteristics of these AV sockets. -
Page 13: Pc Connections
INSTALLATION PC Connections This TV provides an analogue VGA input (15pin) for connection to various desktop or laptop computers. Refer to your computer’s User manual or support website to determine if your computer may be compatible, and what connection cabling will be needed. STEPS: Be sure both the TV and computer are set to Power off. -
Page 14: Remote Control
REMOTE CONTROL 33-37... -
Page 15: Getting Started
REMOTE CONTROL /GETTING STARTED TELETEXT and SUBTITLES Teletext is an information system broadcast in certain countries which can be consulted like a newspaper. It may also offer access to subtitles for viewers with hearing problems or who are not familiar with the transmission language (Refer to your local TV guides or internet program lists to determine if Teletext is used in your area.) Getting Started : Once you have connected your TV antenna and other AV playback equipment (eg. - Page 16 GETTING STARTED First Powering on the TV : When you first power up your TV, (or you reset the TV to its factory settings), it will automatically enter the TV Auto Tuning mode. This is where the TV searches for available TV stations and stores the station details it finds.
- Page 17 GETTING STARTED Firstly, on the upper-middle section of the Remote Control are the main cursor selector arrows with the OK button in the middle of them. Directly above and to the left of the cursor arrows is the Main Menu selector button, which displays the Main Menus on the TV’s screen.
-
Page 18: Menu Settings
MENU SETTINGS To access the Input Source menu, where you can select ATV or DTV reception, plus access signals from your connected Audio/Video devices (eg, via AV Composite video, HDMI, or PC VGA), press the Input Source button located at the top right-hand side of the cursor selector arrow section of the Remote Control, and once the Input Source menu appears, use the Up or Down cursor arrow keys to select the desired input, then press the OK button. -
Page 19: Dtv Manual Tuning
MENU SETTINGS 2). DTV Manual tuning: You can select a DTV channel and find out how many programs are being transmitted on this channel. Press to select the channel, then press OK to search the programs. NOTE: The Bad Normal Good bar graph on this screen shows the relative signal intensity during DTV reception only. -
Page 20: Picture Menu
MENU SETTINGS Delete Press the teletext red button on the Remote Control and the program in the cursor will be deleted from the list of stations.To restore a deleted channel, perform a complete Auto Tune. Skip Press to choose the program, press the teletext blue button on the Remote Control to skip this program from future up/down manual channel selections, and the symbol will show on the right side of the program... - Page 21 MENU SETTINGS 1. Picture Mode: Press OK Key enter Pcitrue mode Select Menu.Press adjust Picture mode.under User mode,press can adjust constrast,brightness,color,sharpness.etc. The Tint option is available in NTSC system countries only. 2. Color temperature: Press OK Key enter color temperature Select Menu. press adjust olor temperature.
-
Page 22: Sound Menu
MENU SETTINGS 3.SOUND MENU The third item of the MENU is the SOUND MENU. You can adjust sound effects here such as treble, bass, balance etc. Press move, press OK to adjust. 1. Sound mode: Press OK Key enter Sound mode Select Menu.press adjust Sound mode. -
Page 23: Option Menu
MENU SETTINGS 1.Clock: Note: The clock time is automatically set by reading the time data that is transmitted by local 1) The clock time is automatically set by reading the time data that is transmitted by Digital TV stations. local Digital TV stations. 2.On/Off Time: 2) The Off and On timers allow you to program the TV to switch On and Off at specific The Off and On timers allow you to program the TV to switch On and Off at specific... -
Page 24: Operating The Menus
OPERATING THE MENUS 3) HDMI CEC (Consumer Electronics Control) allows your TV to share control of some functions with various compatible equipment via an HDMI cable connection. The HDMI cable connecting your equipment to this TV must support both ARC and CEC functionality. - Page 25 OPERATING THE MENUS Check PVR File System Press the OK Button to start checking the file system of your USB storage or Hard Disk and check the recording speed capability of the connected device. Once SUCCESS is shown after checking, you will then be able to begin recording or use the Time Shift function.
-
Page 26: Lock Menu
OPERATING THE MENU (DTV) 6.LOCK MENU 1.Lock System: To enter the LOCK Menu, press MENU button 1.Lock System: and then press or buttons to select the LOCK Menu. The To enter the LOCK Menu, press MENU button and then press or buttons to select the LOCK Menu. -
Page 27: Epg Settings
EPG SETTINGS In the Channel mode, use the cursor keys to select the desired DTV channel, then scroll thru the available programs into the near future. If a DTV channel shows “No information”, it means that the EPG has not yet loaded the data for that channel. You can speed up this process, (just for this channel), by using the cursor keys to select the channel in the EPG list, then press OK. -
Page 28: Pvr Function
PVR OPERATION 4. Record Press the Red button to book a DTV program for future recording and add it to the Schedule List. Once the Record settings are in place, the TV will make the recording even if the TV is in Standby power mode. Move the cursor to the bottom of the Recorder screen to first select from Auto, Once, Everyday or Weekly recording options. -
Page 29: Pvr Operation
PVR OPERATION Select Disk: select which USB drive type to save the recorded file onto, then press OK to return to the PVR menu. Check PVR File System: checks if the PVR File System set up will work with your USB device or not. - Page 30 PVR OPERATION If you selected the “Hi Speed FS” format mode, you can then change the Time Shift memory size. Remember to set the Time Shift size to be smaller than the capacity of your USB storage device, or the Speed test may report an error. 2).
-
Page 31: Timeshift Function
PVR OPERATION 1. Video may become pixelated if the video bit rate is too high for your USB drive, especially during recordings of high-definition material. If this occurs, try using a faster USB drive, or re-format it using the High Speed Format option. Note:This may make the drive un-readable in other USB devices. -
Page 32: Media Player
MEDIA PLAYER 11. Digital Media Player (DMP) To play and view limited types of low data-rate USB media files (such as JPEG, MP3, or AVI formats), use the USB Source that is accessible from the Input button on the Remote Control. -
Page 33: Dvd Operation
DVD OPERATION IMPORTANT: Before you can load a CD or DVD disc into the player, you must first select the DVD option in the Input Source menu, and press the OK button on the remote control. Do NOT force the disc into the loading slot; if the disc will not load, then first check that the Input Source has been correctly selected, and then check that a disc is not already... - Page 34 DVD OPERATION MENU OPERATION SYSTEM SETUP Press the Input select button on the Remote Aspect Ratio Control, and use the Up/Down arrows to select Select the aspect ratio. DVD operation. Insert your DVD disc into the Notes: The image display ratio is related DVD drive slot, and wait for the disc to load.
- Page 35 DVD OPERATION Program view: Display program track. MP3/JPEG PLAYBACK Browser view: Display track directory. Add to program: Choose the track, press Add to program to add the track to the program playdirectory. Clear program: In the complete stop state (press the STOP button twice), then press Edit mode to enable the edit mode.
- Page 36 DVD OPERATION (with PBC off), press the 0-9 keys to select Function Buttons a track directly. 2:OPEN/CLOSE 17:AUDIO To open the disc tray, press the OPEN/CLOSE Changes the audio language or audio button on the side of the TV (above the DVD slot channel load entrance).
-
Page 37: Dvd Trouble Shooting
DVD TROUBLE SHOOTING 31:GOTO For DVD discs, press the button to choose the desired title and chapter and search the desired title time and chapter time. For Super VCD,VCD,CD discs, press this button to search the desired disc time and track time and choose the desired track. Note: During VCD playback, the PBC mode must be set to OFF. -
Page 38: Trouble Shooting
TROUBLE SHOOTING... -
Page 39: Specifications
SPECIFICATIONS 160”(H)/150”(V) - Page 40 M.E.W. (Australia) Pty Ltd 15 Vaughan St Essendon Fields VIC 3041 ACN 152 719 036 www.gvaproducts.com.au...
Need help?
Do you have a question about the GVA18LEDC and is the answer not in the manual?
Questions and answers