Table of Contents
Advertisement
Advertisement
Table of Contents

Subscribe to Our Youtube Channel
Related Manuals for GVA G42TV16


Summary of Contents for GVA G42TV16
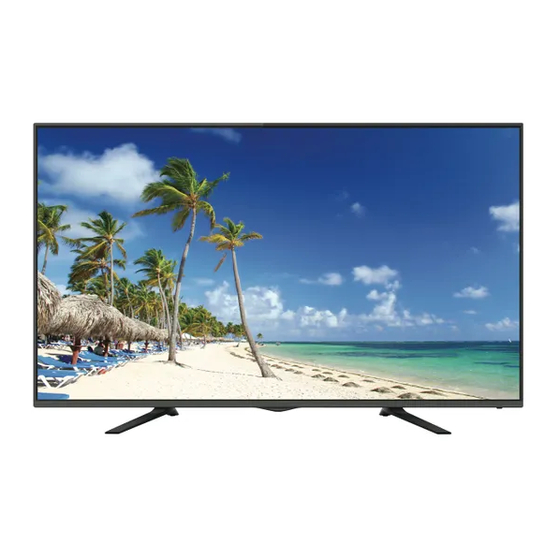
- Page 1 42" FULL HD LED LCD TV G42TV16...
- Page 2 Contents Guide to the Television Caring for the Environment...
-
Page 3: Guide To The Television
Guide to the Television SOURCE MENU V- V+ CH- CH+ Standby AUDIO OUTPUT AC-INPUT 100-240V~50/60Hz Coaxial HDMI1(ARC) AV INPUT HDMI3 HEADPHONE VIDEO HDMI2 PC AUDIO 1. SOURCE Source select AUDIO output : External Audio signal output and relevant right / left sound 2. -
Page 4: Remote Control Battery Installation
Guide to the Television 1: POWER: To set the TV to Standby or Power On modes. :In USB mode, used as fast reverse key; press repeatedly to speed up operation. : In USB mode, used as fast forward key; press repeatedly to speed up operation. -
Page 5: Getting Started
Guide to the Television TELETEXT and SUBTITLES Teletext is an information system broadcast in certain countries which can be consulted like a newspaper. It may also offer access to subtitles for viewers with hearing problems or who are not familiar with the transmission language (Refer to your local TV guides or internet program lists to determine if Teletext is used in your area.) Press : You will obtain :... -
Page 6: Caring For The Environment
Caring for the Environment Responsible disposal of the packaging television packing materials Responsible disposal of appliance television... -
Page 7: Safety Information And Warnings
Safety Information and Warnings SYMBOLS The graphic symbols used in this manual or on the back cover of the set mean the following: Read this manual in full before use The lightni n g flash symbol is intended to alert the user to the enclosures that contain hazardous voltages The exclamation symbol is intended to alert the user to the presence of important operating and maintenance (servicing) - Page 8 Safety Information and Warnings DO NOT install near any heat sources such as radiators, gas heaters, stoves or other apparatus (including amplifiers) that produce heat. Do not leave in direct sunlight. Do not expose batteries to excessive heat. WARNING. Do not place any naked flame source, such as lighted candles on any electrical apparatus.
-
Page 9: Items In The Box
Items in the Box Television Remote control TV Stands (Left & Right) Two AAA Batteries Instruction Manual Quick-start guide Screws... -
Page 10: Basic Setup
Basic Set Up To install the base please carefully follow the following assembly instruction. The base comes with the purchased of your TV set. Install with care. Step 1 Identify the 2 rectangular shaped holes in the bottom panel of the TV, located approx 27.5cm from each side of the TV. - Page 11 Basic Set Up Setting up your TV Ensure to put your TV in a firm place which can bear the weight of the TV. To avoid any danger, please do not expose or place the TV near water, fire place and / or heating apparatus.
-
Page 12: Advanced Connection Diagrams
Advanced Connection Diagrams Below diagrams show the basic connection options available. 1.AV input Video/Audio input, press the SOURCE button using either the remote control or the button Located on the side of the TV set and select the AV option. AV INPUT HDMI3 HEADPHONE... -
Page 13: Hdmi Input
Advanced Connection Diagrams 3.PC input PC(VGA)Input, press the SOURCE button on either the remote control or the button located on the side of the TV set and select the PC option. PC AUDIO OUTPUT VGA OUTPUT DVD VGA OUTPUT AV INPUT HDMI3 HEADPHONE VIDEO... -
Page 14: Audio Output
Advanced Connection Diagrams 5.AUDIO output AUDIO OUTPUT AC-INPUT 100-240V~50/60Hz HDMI1(ARC) Coaxial AUDIO AMPLIFIER (analogue input) 6.USB input Media Input, press the SOURCE button on either the remote control or the button located on the side of the TV set and select the MEDIA option. AV INPUT HDMI3 HEADPHONE... -
Page 15: Advanced Features
Advanced Features First time powering on the TV : When you first power up your TV, (or you reset the TV to its factory settings), it will automatically enter the TV Auto Tuning mode. This is where the TV searches for available TV stations and stores the station details it finds. -
Page 16: Channel Menu
Advanced Features Input Source select Main Menu select Exit select To access the Input Source menu, where you can select ATV or DTV reception, plus access signals from your connected Audio/Video devices (eg, via AV Composite video, HDMI, or PC VGA), press the Input Source button located at the top right-hand side of the cursor selector arrow section of the Remote Control, and once the Input Source menu appears, use the Up or Down cursor arrow keys to select the desired input, then press the OK button. - Page 17 Advanced Features NOTE: The Bad Normal Good bar graph on this screen shows the relative signal intensity during DTV reception only. To obtain more detail regarding the signal quality and strength of a received DTV station, refer to the Signal Information option in this Menu. DTV Manual Tuning VHF CH Press OK to search...
-
Page 18: Picture Menu
Advanced Features Delete Press the teletext red button on the Remote Control and the program in the cursor will be deleted from the list of stations.To restore a deleted channel, perform a complete Auto Tune. Skip Press to choose the program, press the teletext blue button on the Remote Control to skip this program from future up/down manual channel selections, and the symbol will show on the right side of the program name.Choose the skipped program, press the blue button again,... -
Page 19: Sound Menu
Advanced Features 1. Picture mode: Press OK Key enter Pcitrue mode Select Menu.Press adjust Picture mode.Under User mode, press can adjust constrast,brightness,color,sharpness.etc. The Tint option is available in NTSC system countries only. 2. Color temperature: Press OK Key enter color temperature Select Menu. press adjust olor temperature. -
Page 20: Sleep Timer
Advanced Features 5.SPDIF Mode: Press OK key to switch Auto or PCM. The SPDIF Mode option affects the format of the Coaxial digital audio output from the socket on the rear of the TV . Unless you need to force the output format to PCM, leave this setting in the Auto position. -
Page 21: Pvr File System
Advanced Features Note: 1) The OSD Language option allows you to select the language used in the various TV menus from a wide selection. At the initial setup stage of the TV , the default language is English, and it is recommended that this setting is not changed unless you are fluent in any new language chosen. - Page 22 Advanced Features Check PVR File System Press the OK Button to start checking the file system of your USB storage or Hard Disk and check the recording speed capability of the connected device. Once SUCCESS is shown after checking, you will then be able to begin recording or use the Time Shift function. If FAIL is shown after checking, you will need to format your USB drive or Hard Disc before being able to record or use the Time Shift feature.
-
Page 23: Usb Source
Advanced Features 6.Lock menu Lock System Set Password Block Program < Parental Guidance > LOCK 1. Lock system: To enter the LOCK Menu, press MENU button and then press or buttons to select the LOCK Menu. The default password is 0000,the super password is 4711. 2. - Page 24 Advanced Features In the Channel mode, use the cursor keys to select the desired DTV channel, then scroll through the upcoming available programs. If a DTV channel shows “No information”, it means that the EPG has not yet loaded the data for that channel. You can speed up this process, (just for this channel), by using the cursor keys to select the channel in the EPG list, then press OK.
-
Page 25: Pvr Function
Advanced Features 9. PVR function 1). Prepare to record the program Before the PVR function can be used, a suitable USB storage device (USB flash-drive or USB hard-drive) must be connected to the USB socket on the rear side panel of the TV. The USB storage device should only be connected or disconnected when the TV is switched off. -
Page 26: Recording A Dtv Program
Advanced Features Check PVR File System: checks if the PVR File System set up will work with your USB device or not. Format: Refer to the details on formatting on page 21 before using this option for the first time. Once you have selected the type of formatting of your USB storage device, your TV will show various progress screens (see below). -
Page 27: Timeshift Function
Advanced Features Index Pause Stop 1. Video may become pixelated if the video bit rate is too high for your USB drive, especially during recordings of high-definition material. If this occurs, try using a faster USB drive, or re-format it using the High Speed Format option. Note:This may make the drive un-readable in other USB devices. -
Page 28: Digital Media Player (Dmp)
Advanced Features NOTE: Please do not unplug the USB storage device when the Time Shift function is activated, as damage to the recorded file or the USB storage device may occur. Approximately 4GB of memory buffers about 30-40 minutes of DTV material. 1.Video may become pixelated during recording when the Video bit rate capability of your USB device is too low. - Page 29 Advanced Features Select the media file by pressing , then press OK and the preview frame will pop up if the file is playable. Press the play button to play the media file in full screen mode. When the media file (Photo, Music, Movie, or Text type) is playing, press the OK or Info button to display the control bar at the bottom of the screen.
-
Page 30: Troubleshooting
Troubleshooting No power Please check if the AC power cable is connected to the TV unit and switched on at the socket outlet. If the TV still does not operate check the socket outlet has power by trying another appliance in the socket. Cannot receive signal properly Double or Phantom imaging may occur in high buildings or when surrounded by mountains. - Page 31 G 4 2 T V 1 6 1 9 2 0 ( H ) x 1 0 8 0 ( V ) 2 x 1 0 W 947 x 200 x 593mm 947 x 69 x 564mm 7.8kg 7.52kg...
- Page 32 (IB-G42TV16-160623V1)
Need help?
Do you have a question about the G42TV16 and is the answer not in the manual?
Questions and answers