Table of Contents
Advertisement
Advertisement
Table of Contents

Related Manuals for GVA GVA22GLEDC


Summary of Contents for GVA GVA22GLEDC
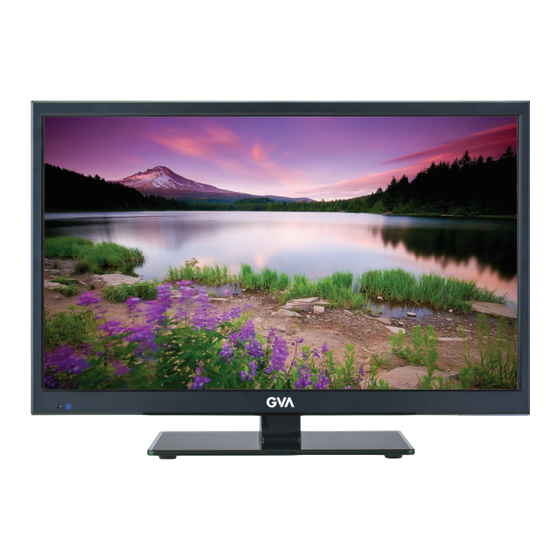
- Page 1 21.5” (54.6cm) FHD LED TV with Built-in DVD Player GVA22GLEDC INSTRUCTION MANUAL...
-
Page 2: Table Of Contents
CONTENTS Important safety instructions Safety information Battery Handling and Usage DISC Handling and Maintenance Improper disc storage Accessories Features Connections and functions Remote control Remote control preparation Basic installation Connecting to AC power source Connect external antenna to unit Composite video (cvbs) connection Component (YPbPr) connection HDMI Connection PC/VGA Connection... - Page 3 CONTENTS Main menu Dtv mode Sound Channel Lock system Setup PC mode Maintenance Wall mounting Stand installation Specifications General troubleshooting...
-
Page 4: Important Safety Instructions
IMPORTANT SAFETY INSTRUCTIONS Safety information CAUTION: Dvd/video cd/cd player is a class 1 laser product. However this Dvd/video cd/cd player uses a visible laser beam which could Cause hazardous radiation exposure if directed. Be sure to Operate the dvd/video cd/cd player correctly as instructed. When this dvd/video cd/cd player is plugged to the wall outlet, do Not place your eyes close to the opening of the disc tray and Other openings to look into the inside of this player. - Page 5 IMPORTANT SAFETY INSTRUCTIONS Read all instructions before using • Do not use this product near water. • Install the product in accordance with the operating instructions. • Connect this product to the power outlet which has protective earth connection. • Do not set the product near heat sources, such as radiators, heat registers, stoves, or other apparatus (including amplifiers) that produce heat.
-
Page 6: Battery Handling And Usage
IMPORTANT SAFETY INSTRUCTIONS Battery Handling and Usage • Keep batteries away from children and pets. Only adults should handle batteries. • Never throw batteries into a fire or expose them to fire or other heat sources. • Follow the battery safety and usage instructions. DISC Handling and Maintenance Handling precautions •... -
Page 7: Accessories
ACCESSORIES All the pictures in this manual are just for your reference, appearance and display Quick Guide Quick Guide... -
Page 8: Features
FEATURES 21.5” LED Display This unit has a built-in 21.5” LED display window to provide clear vision and low radiation. Support Digital Broadcasting Reception Support H.264 High Definition Display Support Multiple OSD Languages Support Full Function Remote Control Support HDMI, PC AUDIO, VGA, YPbPr, CVBS and AUDIO R/L Input Support Earphone and Coaxial Output Support Auto TV Scanning NOTE: For detailed operations, please refer to the guide on Page 34. -
Page 9: Connections And Functions
CONNECTIONS AND FUNCTIONS MAIN UNIT Front View Side View Back View LED display screen Power indicator- In standby mode the indicator light is red; when switching on the unit the indicator light is blue colour. Remote control sensor Stand holder Disc slot- To insert a disc according to the silk screen on the side of this slot. -
Page 10: Back View
CONNECTIONS AND FUNCTIONS Back View EARPHONE output terminal PC AUDIO input terminal VGA input terminal Y / Pb / Pr input terminals COAXIAL output terminal RF input terminal- To connect the external antenna. AUDIO R/L input terminals CVBS (Video) input terminal USB input terminal- For multimedia files playback. -
Page 11: Remote Control
REMOTE CONTROL... - Page 12 REMOTE CONTROL...
-
Page 13: Remote Control Preparation
REMOTE CONTROL PREPARATION BATTERY INSTALLATION Install the batteries as the following pictures. Be sure + and – terminals are positioned as indicated in the battery compartment (Fig1). SERVICE LIFE OF BATTERIES - The batteries normally last for one year although this depends on how often the remote control is used. -
Page 14: Basic Installation
BASIC INSTALLATION • Ensure all the cables are disconnected from the main unit before connecting to AC power source. • Read through the instructions before connecting other equipment. Connecting to AC power source Main unit To power outlet Connect external antenna to unit Install external antenna into antenna jack for best picture. -
Page 15: Composite Video (Cvbs) Connection
BASIC INSTALLATION Composite video (cvbs) connection For basic connection, use the AV cable composite Audio L/R (white/ (Not included) red) and CVBS (yellow) cable to connect the unit with other devices. Component (YPbPr) connection YPbPr cable (Not included) AUDIO cable (Not included) -
Page 16: Hdmi Connection
BASIC INSTALLATION HDMI Connection HDMI cable (Not included) Use HDMI cable to connect the unit with other devices to receive high-definition multimedia signal. PC/VGA Connection Audio cable VGA cable (Not included) (Not included) Use VGA cable and Audio cable to connect the unit with TV or PC, and use this product as a monitor. -
Page 17: Coaxial Connection
BASIC INSTALLATION Coaxial connection Use coaxial cable to connect the unit with amplifier or other audio decoding devices for coaxial audio signal output. (Coaxial cable is not included) Connect earphone to the unit EARPHONE cable (Not included) USB Connection USB device (Not included) -
Page 18: Dvd
BASIC OPERATIONS Make sure all the equipment and power plug are connected properly and the unit is set in correct mode before kinds of operations. • Press POWER button on the unit or remote control to power ON the unit (indicator will glow blue);... -
Page 19: Music Playback
BASIC OPERATIONS 4. Fast forward/Fast backward During playback, press button or button to fast forward/backward. Press button to resume normal play. 5. Pause/play During playback, press button to pause playing, press it again to resume normal playback. 6. Music playback a) Insert the disc which contains music files and after a few seconds, the screen will show all the folders on the disc. -
Page 20: Jpeg Playback
BASIC OPERATIONS d) During normal playing, press button, the player will play the next or previous file. e) Press REPEAT button to change play mode. - SINGLE: play one file only. - REPEAT ONE: repeat one file. - REPEAT FOLDER: all the files in the folder will be played repeatedly. - FOLDER: all the files in the folder will be played. -
Page 21: Repeat Play
BASIC OPERATIONS Flipping pictures - Press UP navigation button to flip the picture vertically. - Press DOWN navigation button to flip the picture horizontally. Picture Shrink/Zoom Press ZOOM button repeatedly to enlarge or shrink picture to 50%, 75%, 100%, 125%, 150% and 200%. -
Page 22: Display
BASIC OPERATIONS 12. GOTO Press GOTO button continuously to select the item you want to set and enter a time number, Chapter number, track number, etc. Accordingly, the disc will be played from the selected point. 13. DISPLAY Press DISPLAY button to display the playing status of your disc. 14. -
Page 23: General
GENERAL 1.1 TV DISPLAY - It is for selecting TV output mode. Options: a) Normal /PS: Pan & scan mode. b) Normal/ LB: Letter box mode. c) Wide: 16:9 wide screen mode. 1.2 OSD LANG - It is used to choose your desired OSD language. 1.3 SCREEN SAVER - If no operation is carried out for 5 minutes, screen saver will display on the screen when SCREEN SAVER is ON. -
Page 24: Operating The Menu (Dtv)
OPERATING THE MENU (DTV) - Press SOURCE button on the unit or remote control to switch the unit to ATV or DTV mode. SELECT DESIRED PROGRAM 1. Press CH+ button to play next channel. 2. Press CH- button to play previous channel. 3. - Page 25 OPERATING THE MENU (DTV) MULTIAUDIO SETTING - Press AUDIO button on remote control repeatedly to select desired audio language. NOTE: To enable this function, make sure that the channel you are viewing supports multi-audio languages. INFORMATION DISPLAY - Press DISPLAY button on remote control to display information of current program. TV GUIDE (FOR DTV MODE ONLY) - Press EPG button on remote control to enter EPG menu page.
- Page 26 OPERATING THE MENU (DTV) FAVOURITE LIST When viewing an available channel, press FAV button on remote control to enter Favourite List menu page. - Press UP or DOWN navigation button to select preferred channel. - Press OK button to confirm selection. - Press RED button on remote control to remove current channel from Favourite List.
- Page 27 OPERATING THE MENU (DTV) RECORDER (FOR DTV MODE ONLY) - Insert your USB memory device into USB slot first. When watching a digital program: - Press button on remote control to start recording directly. - Press button on remote control to call out a dialog box, and select Yes to stop recording;...
-
Page 28: Photo
OPERATING THE MENU (DTV) MEDIA PLAYBACK - Press SOURCE button on the unit or remote control to switch the unit to USB mode. - Insert a USB memory device into USB slot before following operations. - Press UP/DOWN/LEFT/RIGHT navigation button to move the cursor. - Press EXIT button to return to previous menu page. -
Page 29: Music
OPERATING THE MENU (DTV) Interval Time: Set the slide show interval time. Repeat: Select desired repeat mode. Slideshow Effect: Select desired slide show effect. Background Music: Turn on/off background music. 2. Music - Press LEFT/RIGHT navigation button to select Music in the main menu and press OK button to enter it. -
Page 30: Movie
OPERATING THE MENU (ATV) When playing Music files: - Press CH+/- button on remote control to switch between Player and File List. - Press BLUE button on remote control to call out Quick Menu and press it again to dismiss the menu. Repeat: Select desired repeat mode. - Page 31 OPERATING THE MENU (ATV) Repeat: Select desired repeat mode. Background Music: Turn on/off background music. Encode Type: Select desired encode type. Remote operations when playing multimedia files: - Press button on remote control to play or pause playing. - Press button on remote control to stop playing.
-
Page 32: Main Menu
MAIN MENU • The unit contains different setting menus. Once the initial programming is entered, it will be remained in the memory until change, and the unit can always be operated under the same conditions. • The settings will be remained in the memory until the settings are changed, even after setting the player to standby mode. -
Page 33: Dtv Mode
DTV MODE - Press SOURCE button on the unit or remote control to select DTV input source. 1. Picture 1.1 Picture Mode Available options: Standard, Mild, Personal, Dynamic. 1.2 Brightness The brightness value of picture can be adjusted from 0-100. 1.3 Contrast The contrast value of picture can be adjusted from 0-100. -
Page 34: Sound
SOUND 1.92 MPEG NR (MPEG Noise Reduction) This item is used to adjust the MPEG NR level. Available options: Off, Weak, Medium, Strong. 1.93 Dynamic Contrast This item is used to adjust Dynamic Contrast level. Available options: Off, Weak, Medium, Strong. 2. -
Page 35: Channel
CHANNEL 2.10 Sound Type This item is used to select desired Sound Type. Available options: Stereo, Dual I, Dual II, Mixed. 3. Channel (Figure 1) 3.1 Auto Scan (Figure 2) - Press OK or RIGHT navigation button to enter it. Country: Select your country. -
Page 36: Lock System
CHANNEL 3.3 Channel Edit - Press OK or RIGHT navigation button to enter it. - Press UP/DOWN navigation button to highlight desired channel. - Press RED button on remote control to delete highlighted channel. - Press GREEN button on remote control to skip highlighted channel. -
Page 37: Hotel Mode
LOCK SYSTEM 4.5 Hotel Mode - Press OK or RIGHT navigation button to enter it. - Press UP/DOWN navigation button to select desired item. - Press LEFT/RIGHT navigation button to adjust the value. - Press OK or RIGHT navigation button to enter submenu. - Page 38 SETUP 5. Setup 5.1 OSD Language This item is used to select desired on-screen display language. 5.2 Audio Languages - Press OK or RIGHT navigation button to enter it. - Then you can select desired Audio Primary Language and Audio Secondary Language. NOTE: Audio Languages will not be adjustable if there’s no signal.
-
Page 39: Setup
SETUP Auto Sync: Synchronize the time with your channel if Auto Sync is on. And you can adjust the Date and Time when Auto Sync is off. Power On Timer: Turn on/off auto power on timer. You can adjust the Time, Power On Source, Power On Channel when this timer is on. - Page 40 SETUP 5.81 File Manager - Press UP/DOWN navigation button to select a recorded file. - Press RED button on remote control to play highlighted file from the beginning. - Press GREEN button on remote control to delete highlighted file. - Press YELLOW button on remote control to delete all recorded files. - Press BLUE button on remote control to zoom in/out.
-
Page 41: Pc Mode
SET UP Frequency - Press LEFT/RIGHT navigation button to select desired mode: Off, Once, Daily, Weekly, Weekend. Channel - Press LEFT/RIGHT navigation button to select desired channel. Start Time - Press navigation buttons to select desired start date and time of your scheduled recording. - Page 42 SET UP 3. V Position This item is used to adjust the value of vertical position (available range: -30 to 30). 4. Phase This item is used to adjust the picture apply to the TV (available range: 0 to 31). 5.
-
Page 43: Maintenance
MAINTENANCE • Be sure to press POWER button to set the player to the standby mode and disconnect the power plug before maintaining the player. • Wipe the player with a dry, soft cloth. • If the surface is extremely dirty, wipe clean with a cloth which has been dipped in a weak soap-water solution and wrung out thoroughly, and then wipe again with a dry cloth. -
Page 44: Wall Mounting
WALL MOUNTING • Contact a professional for assistance when wall mounting your TV. We are not responsible for any damage to the product or injury to yourself, if you mount the TV on your own. • Do not wall mount the TV while TV is turned on. It may cause personal injury due to electric shock. -
Page 45: Stand Installation
STAND INSTALLATION Your TV is packaged with the Stand and the Cabinet separated. Before enjoying this TV, please carry out the Stand Installation according to the instructions below. Step 1 Place the TV faced down on a soft cloth or cushion to prevent the panel from being damaged. -
Page 46: Specifications
SPECIFICATIONS Region code setting Region coding: All DVD discs are coded by the sales territory. Please note the player is set to region 4 coding by the factory which cannot be changed. This is in compliance with the DVD patent requirements. -
Page 47: General Troubleshooting
GENERAL TROUBLESHOOTING Check the following points before assuming malfunctions of this unit:... - Page 48 GENERAL TROUBLESHOOTING...
- Page 49 M.E.W. (Australia) Pty Ltd 15 Vaughan St Essendon Fields VIC 3041 ACN 152 719 036 www.gvaproducts.com.au...
Need help?
Do you have a question about the GVA22GLEDC and is the answer not in the manual?
Questions and answers