Table of Contents
Advertisement
Quick Links
If not installed, operated and maintained in accordance
with the manufacturer's instructions, this product could
expose you to substances in fuel or from fuel combus-
tion which can cause death or serious illness.
WARNINg
fIRE OR EXpLOSION hAzARD
failure to follow safety warnings exactly
could result in serious injury, death or
property damage.
— Do not store or use gasoline or other flam-
mable vapors and liquids in the vicinity of
this or any other appliance.
— WhAT TO DO If YOU SMELL gAS
• Do not try to light any appliance.
• Do not touch any electrical switch; do
not use any phone in your building.
• Leave the building immediately.
• Immediately call your gas supplier
from a neighbor's phone. follow the
gas supplier's instructions.
• If you cannot reach your gas supplier,
call the fire department.
— Installation and service must be per-
formed by a qualified installer, service
agency or the gas supplier.
INSTALLATION INSTRUCTIONS
INSTALLER: Leave this manual with the appliance.
CONSUMER: Retain this manual for future reference.
WARNINg
AND
OWNER'S MANUAL
DIRECT vENT zERO CLEARANCE
gAS fIREpLACE hEATER
DVCX(36,42)FP30(n,P)-1
INTERMITTENT pILOT (IpI)
DVCX(36,42)FP70(n,P)-1
Mh30033
This appliance may be installed in
an aftermarket, permanently located,
manufactured home (USA only) or mobile
home, where not prohibited by state or local
codes.
This appliance is only for use with the type
of gas indicated on the rating plate. This
appliance is not convertible for use with other
gases, unless a certified kit is used.
MODEL SERIES:
MILLIvOLT (Mv)
�
GAS-FIRED
Page 1
Advertisement
Table of Contents
Troubleshooting

Subscribe to Our Youtube Channel
Related Manuals for Empire Tahoe Luxury DVCX42FP30N-1


Summary of Contents for Empire Tahoe Luxury DVCX42FP30N-1
- Page 1 INSTALLATION INSTRUCTIONS OWNER’S MANUAL INSTALLER: Leave this manual with the appliance. CONSUMER: Retain this manual for future reference. DIRECT vENT zERO CLEARANCE WARNINg gAS fIREpLACE hEATER If not installed, operated and maintained in accordance with the manufacturer’s instructions, this product could MODEL SERIES: expose you to substances in fuel or from fuel combus- tion which can cause death or serious illness.
- Page 2 BEfORE YOU START Read the safety information on Pages 64 - 65. If located in the Commonwealth of Massachusetts, please note the special requirements on Page 66. Where are you going to install the unit? See Pages 8-10 & 14. Frame the opening.
-
Page 3: Table Of Contents
TABLE Of CONTENTS SECTION pAgE All Appliances .................................... 4-48 Carton Contents ....................................4 Introduction ....................................... 5 Specifications ....................................6 Hardware Package ................................... 7 Accessories....................................... 7 Fireplace Dimensions ..................................8 Clearances ....................................9-10 Combustible Material ..................................10 Vent Termination Clearances ..............................11-12 Gas Supply ..................................... -
Page 4: All Appliances
CARTON CONTENTS DvCX(36,42)fp3 SERIES DvCX(36,42)fp7 SERIES INDEX DESCRIpTION NUMBER SUppLIED INDEX DESCRIpTION NUMBER SUppLIED Rock Wool Receptical Cover Rock Wool Receptical Receptical Cover Flue Restrictor Assembly - nAT or LP Receptical Hardware Pack Flue Restrictor Assembly - nAT or LP not Shown Log Set (see Page 33) 1 set Hardware Pack... -
Page 5: Introduction
Standard/CSA Standard AnSI Z21.88/CSA 2.33 and by Underwriters Laboratories as a Direct Vent Gas Fireplace the gas has been reduced, this general rule may not apply. Check with Empire Comfort Systems for proper orifice size Heater and shall be installed according to these instructions. identification. -
Page 6: Specifications
NOTE: The glass used in your fireplace is ceramic glass. If the glass is cracked or damaged in any way, it should be replaced only with a complete glass frame assembly from Empire. See parts list on Pages 60 - 61 for ordering. -
Page 7: Hardware Package
ACCESSORIES The following accessory parts can be obtained from your Empire Comfort Systems dealer. Contact your Empire Dealer for more acces- sory options. If you need additional information beyond what your dealer can furnish, contact Empire Comfort Systems Inc., 918 Freeburg Ave., Belleville, Illinois 62220-2623. -
Page 8: Fireplace Dimensions
fIREpLACE DIMENSIONS DIMENSIONS (in inches) INDEX DIMENSION DESCRIpTION LETTER DvCX36fp DvCX42fp The maximum height of firebox face (excluding standoffs) 41-7/8 41-7/8 The maximum width of the firebox face (excluding nailing flanges) 42-1/4 46-1/4 The maximum depth of the firebox 22-1/16 22-1/16 The height of the firebox opening 27-1/2... -
Page 9: Clearances
CLEARANCES Mantel Chart Clearance to Combustibles Back Stand-off 0" (0 mm) Side Stand-off 0" (0 mm) Floor 0" (0 mm) Top Stand-off 0" (0 mm) Top Framing Edge 6” (152 mm) TOP EDGE OF FIREPLACE OPENING DIMENSIONS (in inches) DISTANCE fROM TOp INDEX DISTANCE fROM EDgE Of fIREpLACE... -
Page 10: Combustible Material
TV manufacturers recommend against placing their products near a heat source. If you install a television above this fireplace, Empire Comfort Sys- tems accepts no responsibility for damage or injuries. Follow the television manufacturer’s installation instructions, including any recommendations regarding proximity to heat sources. -
Page 11: Vent Termination Clearances
Clearances are to heat resistant material (i.e. wood, metal). This Since it is very important that the venting system maintain its balance does not include vinyl. Empire Comfort Systems Inc. will not be held between the combustion air intake and the flue gas exhaust, certain... - Page 12 Clearances are to heat resistant material (i.e. wood, metal). This the following shall be indicated: does not include vinyl. Empire Comfort Systems Inc. will not be held A minimum clearance value determined by testing in accordance with section responsible for heat damage caused from terminating under vinyl 2.23.5, or;...
-
Page 13: Gas Supply
gAS SUppLY The gas pipeline can be brought in through the right or left side of Never use an exposed flame to check for leaks. Appliance must the appliance. Consult the current national Fuel Gas Code, AnSI be disconnected from piping at inlet of control valve and pipe capped or plugged for pressure test. Never pressure test with Z223.1 CAN/CGA-B149 (.1 or .2) installation code. -
Page 14: Locating Fireplace
LOCATINg fIREpLACE Note: Island and Room Divider installation is possible as long as the horizontal portion of the vent system does not exceed 20 feet with a minimum vertical run of 8 feet. See details in Venting Section. Note: When installing this appliance against an exterior wall, insulate to applicable insulation codes. When you install your Direct Vent Fireplace in Room divider or Flat on wall corner positions, a minimum of 6 inches clearance must be maintained from the perpendicular wall and the front edge of the appliance. -
Page 15: Electrical Considerations
ELECTRICAL CONSIDERATIONS CAUTION All wiring should be done by a qualified electrician and shall be in compliance with all local, city and state building codes. Before making the electrical connection, make sure that the main power supply is disconnected. The appliance, when installed, must be electrically grounded in accordance with local codes, or in the absence of local codes, with the national Electrical Code AnSI/ nFPA 70 (Latest Edition). -
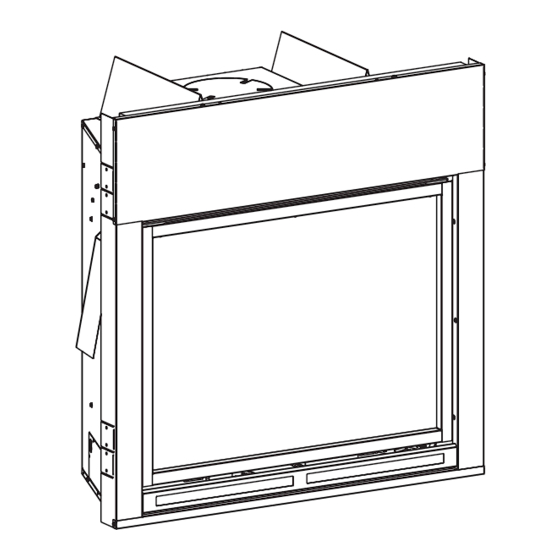
Page 16: Installation
INSTALLATION framing framing and finishing Fireplace framing can be built before or after the fireplace is set Choose unit location. in place. Framing should be positioned to accommodate wall Frame in fireplace with a header across the top. It is important covering and fireplace facing material. - Page 17 INSTALLATION (continued) vent pipe Clearance flush Wall Installation Note: Maintain two inches of clearance around vertical vent pipe on first twelve inches. See figure 18. For horizontal vent, maintain a minimum one-inch clearance to the bottom and sides of the vent, and three-inch clearance to combustibles above the vent pipe.
- Page 18 INSTALLATION (continued) Combustible Surround Installation vent Runs In planning the installation for the fireplace, it is necessary to install certain components before the appliance is completely positioned and installed. These include the direct vent system, gas piping for the appliance and the electrical wiring. (If the fan option is used.) The appliance can be mounted on any of the following surfaces: A flat, hard combustible (burnable) surface.
- Page 19 INSTALLATION (continued) CORNER INSTALLATION - vERTICAL, 90 DEgREE ELBOW vERTICAL, 90 DEgREE ELBOW TO hORIzONTAL OUT ThE TO hORIzONTAL OUT ThE WALL (12” minimum rise before WALL (12” minimum rise before elbow) elbow) DIMENSIONS (in inches) Dim. DvCX36 DvCX42 Dimensions (in inches) 49-7/8 33-1/4 35-1/4...
-
Page 20: Vent System Identification
Identify if any problems existing in the vent system. Use figure 31 on Page 23 for venting to eliminate issues after Special DV Vent Kits Available from Empire Comfort Systems, Inc. dealers. Direct-Vent Fireplace Vent Kit for Top Vent, Thru-the-wall, DVVK-5TP... -
Page 21: Venting Fireplace
vENTINg fIREpLACE The minimum hole location dimensions for through the wall CAUTION horizontal installations with a 90 degree elbow and 12 inch rise off the top of the fireplace. Use flue restrictor for vertically terminated units only. Do not use for horizontally terminated units. Incorrect usage may cause sooting. - Page 22 vENTINg fIREpLACE positioning the fireplace Below grade Installation Determine the exact position of the appliance so the direct-vent When it is not possible to meet the required vent termination termination will be centered (if possible) between two studs. This clearances of 12 inches (305 mm) above grade level, a snorkel kit is will avoid any extra framing.
- Page 23 vENTINg fIREpLACE vENTINg gRAph (Dimensions in feet) To Use the vent graph Determine the height of the center of the horizontal vent pipe. Using this dimension on the Sidewall Vent Graph, locate the point it intersects with the slanted graph line. From the point of this intersection, draw a vertical line to the bottom of the graph.
-
Page 24: Top Vent - Horizontal Termination
TOp vENT - hORIzONTAL TERMINATION One 90° Elbow Two 90° Elbows Note: Subtract 3 feet from the total horizontal measurement for INSTALLED VERTICALLY each 90° elbow installed horizontally. Subtract 1-1/2 feet from the total horizontal measurement for each 45° elbow installed hori- zontally. -
Page 25: Top Vent - Vertical Termination
TOp vENT - vERTICAL TERMINATION No Elbows Three 90° Elbows Note: Subtract 3ft (914 mm) from the total horizontal measure- ment for each 90° elbow installed horizontally. Subtract 1-1/2 ft (457 mm) from the total horizontal measurement for each 45° el- bow installed horizontally. -
Page 26: Vertical Termination
vERTICAL TERMINATION general Maintenance Locate and mark the center point of the vent pipe using a nail on Inspect venting system semi-annually as follows: the underside of the roof. Drive the nail through the center point. 1. Check for corrosion areas of the venting system exposed to Mark the outline of the roof hole around this center point. - Page 27 vERTICAL TERMINATION (continued) Installing the vent System in a Chase vertical Through the Roof Applications A chase is a vertical box-like structure built to enclose the gas Your Gas Fireplace has been approved for: appliance and/or its vent system. Vertical vent runs on the outside of a) Vertical installations up to 40 feet in height.
-
Page 28: Framing And Finishing
fRAMINg AND fINIShINg Installing Support Brackets NAILS, 4 REQUIRED Install a horizontal pipe support used for each 3 feet of horizontal run to framing members. Allow 3 inch clearance to combustibles above 8 inch diameter pipe and elbows and 1 inch clearance on both sides and bottom. - Page 29 fRAMINg AND fINIShINg (continued) vertical firestops Vertical runs of this system which pass through ceilings require the use of ONE ceiling firestop at the hole in each ceiling through which the vent passes. Position a plumb bob directly over the center of the vertical vent component and mark the ceiling to establish the center point of the vent.
-
Page 30: Dvvk-5F Flex Vent Instructions
DvvK-5f fLEX vENT INSTRUCTIONS The DvvK-5f fLEX vENT KIT includes the following compo- nents: • (1) Horizontal Termination Cap • (1) 4-foot section of Flex vent with spacers (5” flue/8” outer pipe) with flue adapter collar • (1) Wall Firestop/Thimble Assembly •... - Page 31 DvvK-5f fLEX vENT INSTRUCTIONS Prior to making the vent connections, apply high temperature sealant (1000°F min.) to the vent connections before securing with the band clamps provided. note: the flue pipe end without the adapter is to be installed to the Termination Cap. 10.
-
Page 32: Liner Placement
Apply a single layer of embers in the shaded areas below. NOTE: Replacement embers – either regular or platinum – must be purchased from Empire Comfort Systems. NOTE: Embers break down over time. Remove old embers prior to reapplication. -
Page 33: Log Identification
LOg IDENTIfICATION part Number front view Top view & Description 34204 Front Right Log (A) 34203 Center Left Log (B) 34202 Front Left Log (C) 34207 Left Log (D) 34208 Center Right Log (E) 34209 Center Log (F) 34210 Rear Log (G) 34205 Right Log (H) 34206... -
Page 34: Log Placement
LOg pLACEMENT Place Front Right Log (A) onto Burner Pins 1 and 2. note: Ember material not shown for clarity. Page 34 34009-1-0115... - Page 35 LOg pLACEMENT Place Center Left Log (B) onto Burner Pins 3 and 4. Burner pin Layout note: Ember material not shown for clarity. 34009-1-0115 Page 35...
- Page 36 LOg pLACEMENT Place Front Left Log (C) onto Right Pin on (B) Log. note: Ember material not shown for clarity. Page 36 34009-1-0115...
- Page 37 LOg pLACEMENT Place Left Log (D) onto Left Pin on (B) Log. Burner pin Layout note: Ember material not shown for clarity. 34009-1-0115 Page 37...
- Page 38 LOg pLACEMENT Place Center Right Log (E) onto Burner Pin 5 and onto (A) Log. note: Ember material not shown for clarity. Page 38 34009-1-0115...
- Page 39 LOg pLACEMENT Place Center Log (F) onto Burner Pin 6 and Pin on (E) Log. Burner pin Layout note: Ember material not shown for clarity. 34009-1-0115 Page 39...
- Page 40 LOg pLACEMENT Place Rear Log (G) onto Burner Pin 7 and Pin on (F) Log. Burner pin Layout note: Ember material not shown for clarity. Page 40 34009-1-0115...
- Page 41 LOg pLACEMENT Place Right Log (H) onto Pins on (E) Log and (F) Log. note: Ember material not shown for clarity. 34009-1-0115 Page 41...
- Page 42 LOg pLACEMENT Place Chunk Log (I) onto Burner Pin 8 as shown. Burner pin Layout note: Ember material not shown for clarity. Page 42 34009-1-0115...
- Page 43 LOg pLACEMENT Completed Logset note: Ember material not shown for clarity. 34009-1-0115 Page 43...
-
Page 44: Millivolt System Appliances
MILLIvOLT SYSTEM OpERATINg INSTRUCTIONS Millivolt System The OWnER should carefully read and follow these operating The standing pilot burns continuously even when the main burner instructions. is OFF. Initial Lighting When you ignite the pilot, the thermopile produces millivolts (electrical Lower the door assembly to view the gas controls for the fireplace. - Page 45 MILLIvOLT SYSTEM OpERATINg INSTRUCTIONS STANDINg pILOT OpERATINg INSTRUCTIONS Installation of Remote Receiver REMOTE/Off/ON Switch Place remote receiver on the floor of fireplace behind the louver as The fireplace is equipped with a REMOTE/OFF/On switch. A wire far forward as possible. harness is attached to the REMOTE/OFF/On switch.
-
Page 46: Wiring Diagram
MILLIvOLT SYSTEM WIRINg DIAgRAM REMOTE CONTROL RECEIVER (OPTIONAL) THERMOSTAT (OPTIONAL) WALL SWITCH GAS VALVE REMOTE/OFF/ON SWITCH (OPTIONAL) REMOTE CONTROL RECEIVER REMOTE/OFF/ON SWITCH (INCLUDED) REMOTE PIEZO THERMOPILE GAS VALVE THERMOCOUPLE (REAR CONNECTION) PILOT PILOT, IGNITOR figure 57 Page 46 34009-1-0115... -
Page 47: Lighting Instructions
MILLIvOLT SYSTEM LIghTINg INSTRUCTIONS FOR YOUR SAFETY READ BEFORE LIGHTInG If you do not follow these instructions exactly, a fire or explosion may result causing property damage, per- sonal injury or loss of life A. This appliance has a pilot which must be lighted by C. Use only your hand to push in or turn the gas control hand. -
Page 48: Troubleshooting
—If thermocouple is producing more than 15 millivolts, replace faulty valve. a. Flame impingement on logs. 3. pilot burning, no gas to burner, valve knob “ON”, REMOTE/ —Check and adjust log position. Contact Empire Comfort Off/ON switch “ON.” Systems, Inc. a. REMOTE/OFF/On switch, wall switch, remote control or b. - Page 49 This page intentionally left blank. 34009-1-0115 Page 49...
-
Page 50: Parts View
MILLIvOLT SYSTEM pARTS vIEW Page 50 34009-1-0115... -
Page 51: Parts List
MILLIvOLT SYSTEM pARTS LIST pART NUMBER INDEX NO. DESCRIpTION DvCX36 DvCX42 34007 34007 PILOT ASSEMBLY, nAT 34008 34008 PILOT ASSEMBLY, LPG 34003 34003 BURnER REAR WELDED ASSEMBLY 34004 34004 BURnER FROnT WELDED ASSEMBLY R10602 R10602 VEnTURI GASKET (QTY. 2) R10432 R10432 VEnTURI (QTY. -
Page 52: Intermittent Pilot Appliances
INTERMITTENT pILOT ELECTRONIC SYSTEM OpERATINg INSTRUCTIONS The electronic control valve system includes the ability to switch Note: The gas control has a manual HI/LO flame adjustment the pilot from a standing pilot mode to an intermittent pilot mode. knob. See figure 58. Rotate the HI/LO knob counter- •... -
Page 53: Wiring Diagram
INTERMITTENT pILOT ELECTRONIC SYSTEM WIRINg DIAgRAM BLUE BLUE GREEN WHITE WHITE ORANGE CPI/IPI PILOT SWITCH ON/OFF REMOTE RECEIVER SWITCH (OPTIONAL) YELLOW (INCLUDED) + ON REMOTE - OFF ORANGE WHITE GAS CONTROL VALVE (GND) WHITE GREEN BLACK AC/DC POWER ADAPTOR BLACK ELECTRONIC CONTROL MODULE BATTERY HOLDER... -
Page 54: Lighting Instructions
INTERMITTENT pILOT LIghTINg INSTRUCTIONS FOR YOUR SAFETY READ BEFORE LIGHTInG WARNINg If you do not follow these instructions exactly, a fire or explosion may result causing property damage, per- sonal injury or loss of life This appliance has a pilot which can be lighted with the C. Use only the remote control or manual remote receiver manual on/off switch, a remote control, or by switching the switch to operate the gas valve. -
Page 55: Troubleshooting
INTERMITTENT pILOT CONTROL SYSTEM TROUBLEShOOTINg Troubleshooting Components Before proceeding with the procedures in the following trouble- The gas valve is fitted with a manual HI/LO knob to allow for man- shooting table, verify that the power supply (AC/DC adapter) is ual modulation of the gas outlet pressure to the appliance burner. - Page 56 INTERMITTENT pILOT CONTROL SYSTEM TROUBLEShOOTINg Note: “DFC” is the acronym for Digital Fireplace Control. Page 56 34009-1-0115...
- Page 57 INTERMITTENT pILOT CONTROL SYSTEM TROUBLEShOOTINg Note: “DFC” is the acronym for Digital Fireplace Control. 34009-1-0115 Page 57...
-
Page 58: Parts View
pARTS vIEW INTERMITTENT pILOT Page 58 34009-1-0115... -
Page 59: Parts List
pARTS LIST INTERMITTENT pILOT pART NUMBER INDEX NO. DESCRIpTION DvCX36 DvCX42 R11585 R11585 PILOT ASSEMBLY, nAT R11586 R11586 PILOT ASSEMBLY, LPG 33633 33633 THERMOCOUPLE SHIELD 34003 34003 BURnER REAR WELDED ASSEMBLY 34004 34004 BURnER FROnT WELDED ASSEMBLY R10602 R10602 VEnTURI GASKET (QTY. 2) R10432 R10432 VEnTURI (QTY. -
Page 60: All Appliances
fIREpLACE - ALL UNITS pARTS vIEW Page 60 34009-1-0115... -
Page 61: Fireplace - All Units Parts List
fIREpLACE - ALL UNITS pARTS LIST pART NUMBER INDEX NO. DESCRIpTION DvCX36 DvCX42 R11935 R11935 InSULATIOn TOP, CEnTER 34050 34051 OUTER WRAPPER TOP ASSEMBLY 34054 34054 FLUE RESTRICTOR ASSEMBLY - nAT 34062 34062 FLUE RESTRICTOR ASSEMBLY - LPG R7567 R7567 InLET VEnT ADAPTER, 8 R7573 R7573... -
Page 62: Maintenance And Service
IMpORTANT: Turn off gas before servicing appliance. Have a damaged glass and gasket using materials specified by qualified service person perform these check-ups at the beginning Empire Comfort Systems. of each heating season. • Clean Burner and Control Compartment Do not abuse strike the glass. - Page 63 MAINTENANCE AND SERvICE glass Removal Lower the lower panel. Release two glass frame clamps at bottom of firebox. Remove glass frame. Place glass frame onto firebox. glass Replacement Place the glass frame into fireplace. Attach two glass frame clamps at bottom of firebox. Close lower panel.
-
Page 64: Important Safety Information
• Any safety screen, guard, or barrier removed for servicing an from Empire. See parts list on Pages 60 - 61 for ordering. appliance must be replaced prior to operating the appliance. •... -
Page 65: Safety Information For Users Of Lp Gas
SAfETY INfORMATION fOR USERS Of Lp gAS Propane (LP-Gas) is a flammable gas which can cause its odor intensity. fires and explosions. In its natural state, propane is odor- LP-Gas may stratify in a closed area, and the odor intensity less and colorless. You may not know all the following could vary at different levels. Since it is heavier than air, there safety precautions which can protect both you and your may be more odor at lower levels. -
Page 66: Requirements For Massachusetts
REQUIREMENTS fOR MASSAChUSETTS For all side wall horizontally vented gas fueled equipment 3. SIGNAGE. A metal or plastic identification plate shall be installed in every dwelling, building or structure used in permanently mounted to the exterior of the building at a whole or in part for residential purposes, including those minimum height of eight feet above grade directly in line owned or operated by the Commonwealth and where the... -
Page 67: Master Parts Distributor List
MASTER pARTS DISTRIBUTOR LIST To Order Parts Under Warranty, please contact your local Empire dealer. See the dealer locator at www.empirecomfort. com. To provide warranty service, your dealer will need your name and address, purchase date and serial number, and the nature of the problem with the unit. -
Page 68: Warranty
WARRANTY Empire Comfort Systems Inc. warranties this hearth product to be free from defects at the time of purchase and for the periods speci- fied below. Hearth products must be installed by a qualified technician and must be maintained and operated safely, in accordance with the instructions in the owner’s manual.
Need help?
Do you have a question about the Tahoe Luxury DVCX42FP30N-1 and is the answer not in the manual?
Questions and answers