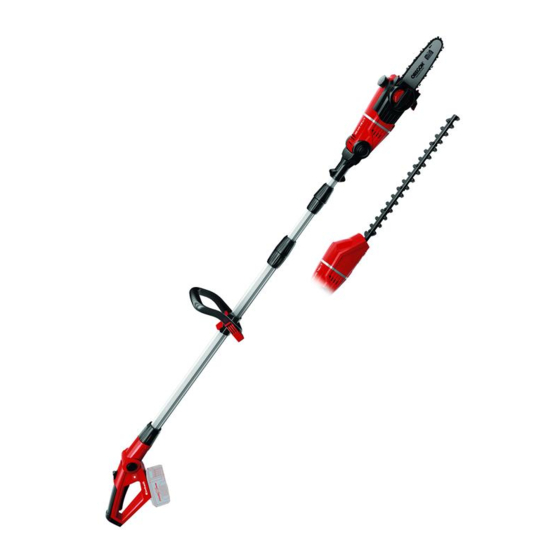
EINHELL GE-HC 18 Li T Operating Instructions Manual
Cordless telescopic pole chain saw
Hide thumbs
Also See for GE-HC 18 Li T:
- Original operating instructions (50 pages) ,
- Operating instructions manual (43 pages) ,
- Original operating instructions (204 pages)
Table of Contents
Advertisement
Available languages
Available languages
Quick Links
EN
Operating instructions
Cordless Telescopic Pole Chain
Saw
FR
Mode d'emploi
Scie à chaîne à perche télesco-
pique sans fi l
SP
Manual de instrucciones
Motosierra inalámbrica de altura
7
Art.-Nr.: 3410789
Art.-Nr.: 3410875
Anl_GE_HC_18_Li_T_Part1_USA_SPK7.indb 1
Anl_GE_HC_18_Li_T_Part1_USA_SPK7.indb 1
GE-HC 18 Li T (I)
GE-LC 18 Li T
I.-Nr.: 21022
I.-Nr.: 21022
23.11.2022 14:22:34
23.11.2022 14:22:34
Advertisement
Table of Contents

Subscribe to Our Youtube Channel
Related Manuals for EINHELL GE-HC 18 Li T


Summary of Contents for EINHELL GE-HC 18 Li T
- Page 1 GE-HC 18 Li T (I) GE-LC 18 Li T Operating instructions Cordless Telescopic Pole Chain Mode d’emploi Scie à chaîne à perche télesco- pique sans fi l Manual de instrucciones Motosierra inalámbrica de altura Art.-Nr.: 3410789 I.-Nr.: 21022 Art.-Nr.: 3410875 I.-Nr.: 21022...
- Page 2 - 2 - Anl_GE_HC_18_Li_T_Part1_USA_SPK7.indb 2 Anl_GE_HC_18_Li_T_Part1_USA_SPK7.indb 2 23.11.2022 14:22:35 23.11.2022 14:22:35...
- Page 3 - 3 - Anl_GE_HC_18_Li_T_Part1_USA_SPK7.indb 3 Anl_GE_HC_18_Li_T_Part1_USA_SPK7.indb 3 23.11.2022 14:22:36 23.11.2022 14:22:36...
- Page 4 0.08"/plg (2 mm) - 4 - Anl_GE_HC_18_Li_T_Part1_USA_SPK7.indb 4 Anl_GE_HC_18_Li_T_Part1_USA_SPK7.indb 4 23.11.2022 14:22:41 23.11.2022 14:22:41...
- Page 5 - 5 - Anl_GE_HC_18_Li_T_Part1_USA_SPK7.indb 5 Anl_GE_HC_18_Li_T_Part1_USA_SPK7.indb 5 23.11.2022 14:22:44 23.11.2022 14:22:44...
- Page 6 90° - 6 - Anl_GE_HC_18_Li_T_Part1_USA_SPK7.indb 6 Anl_GE_HC_18_Li_T_Part1_USA_SPK7.indb 6 23.11.2022 14:22:50 23.11.2022 14:22:50...
- Page 7 33 ft (10m) - 7 - Anl_GE_HC_18_Li_T_Part1_USA_SPK7.indb 7 Anl_GE_HC_18_Li_T_Part1_USA_SPK7.indb 7 23.11.2022 14:22:53 23.11.2022 14:22:53...
-
Page 8: Safety Information
• DANGER! Do not overreach - keep proper footing and When using the equipment, a number of safety balance at all times. • precautions must be observed to avoid injuries Stay alert. Use common sense. Do not and damage. Please read the complete operating operate appliance when you are tired or instructions and safety information with due care. - Page 9 • Do not charge appliance in rain, or in wet may present a risk of fire or chemical burn locations. if mishandled. Replace battery with Einhell/ • Do not use battery-operated appliances in lawn master brand only. Use of another the rain.
- Page 10 that have the switch on invites accidents. replace them immediately if possible. • Disconnect the battery pack from the 7. Storage of batteries, battery chargers appliance before making any adjustments, and cordless tools. Store the charger and changing accessories, or storing appliance. your cordless tool only in dry places with an Such preventive safety measures reduce the ambient temperature of 10-40°C.
-
Page 11: Layout And Items Supplied
can result in serious personal injury. 15. Chain saw bar 16. Saw chain This equipment is not intended to be used 17. Chain saw guard by persons (including children) with reduced 18. Handle housing physical, sensory or mental capacities or those 19. -
Page 12: Technical Data
Adjustable handle angles: ... -40°,-20°,0°,20° area. You can also explore battery + charger Weight (Tool only): ......8.8 lbs (4 kg) options at Einhell.com. Reduce noise generation and vibration to a 3. Intended use minimum! •... - Page 13 5.2 Fitting the chain saw attachment (for use 5.2.c Saw chain lubrication as a pole chain saw) Caution! Always remove the battery from the device before inspection and adjustment. Always 5.2.a Assembly of the bar and the saw chain wear protective gloves when working on the chain •...
-
Page 14: Operation
equipment before you take off the shoulder strap 5.9 Pivoting the chain saw attachment 90° on (Otherwise there is a risk of injury). the motor head (Fig. 22) 1. Hook the carabiner (Fig. 4/Item 19) into the The chain saw guard must be slipped over the strap attachment (20). - Page 15 the safety lock-off. the chain saw, never run the saw if there is no oil in the system or if the oil drops below the "min" Switching off mark. On average, a single fi lling will last around Release the On/Off switch (Fig. 3/Item 2). 20 minutes depending on the number of pauses in cutting and the loads involved.
-
Page 16: Cleaning And Maintenance
• branch (Fig. 28). Only work with a saw chain that has been • Start with the bottom branches on the tree. properly sharpened in accordance with the This will make it easier for the cut branches to instructions. • drop. -
Page 17: Disposal And Recycling
You should check the operation of the automatic and papers accompanying the products is chain lubrication system on a regular basis strictly subject to the express consent of Einhell in order to guard against overheating and the Germany AG. damage this can cause to the bar and the saw chain. -
Page 18: Troubleshooting Guide
11. Troubleshooting guide Danger! Before troubleshooting, switch off the equipment and remove the battery. The table below contains a list of problem symptoms and explains what you can do to remedy the problem if your equipment fails to work properly. If the problem still persists after working through the list, please contact your nearest service center. -
Page 19: Consignes De Sécurité
Danger ! prévention d’accidents. • Certaines mesures de sécurité doivent être res- Utilisez l’appareil approprié – n’utilisez pas pectées pendant l’utilisation des appareils pour l’appareil dans un autre but que celui pour empêcher les blessures et les dommages. Par lequel il a été conçu. •... - Page 20 Remplacez uniquement la port l’appareil de jardin. batterie de marque principale Einhell / gazon. L’utilisation d’une autre batterie peut présen- 2.) POUR TOUS LES PRODUITS SANS FIL ter un risque d’incendie ou d’explosion.
- Page 21 teurs. amovible, retirez-la de votre appareil à la fin • N’exposez pas les piles ou les batteries aux de votre travail pour des raisons de sécurité. chocs mécaniques. • Gardez les piles et les batteries dans un en- CONSIGNES DE SÉCURITÉ IMPORTANTES droit propre et sec.
- Page 22 quent la charge électrostatique et ne touchez veillées ou instruites du fonctionnement de l’ap- jamais les pôles de l’accumulateur ! pareil par la personne chargée de leur sécurité. Les enfants doivent être surveillés pour s’assurer Avertissements de sécurité pour la scie à qu’ils ne joueront pas avec l’appareil.
-
Page 23: Utilisation Conforme
2.2 Contenu d’emballage explorer les options de batterie + chargeur sur Veuillez contrôler l’intégralité de l’article au moyen Einhell.com. du contenu d’emballage décrit. En cas de pièces manquantes, veuillez contacter notre centre de service à la clientèle ou le point de vente où vous 3. -
Page 24: Caractéristiques Techniques
4. Caractéristiques techniques pour ce faire, la vis à tête hexagonale (21) dans la poignée supplémentaire et vissez-la au verrou (22). Alimentation électrique du moteur: ..18V Longueur de la barre: ......20 cm (8") 5.2 Montage de l’attachement de scie à Écartement de chaîne (utilisation en tant que scie à... - Page 25 minutes au plus la tension de chaîne et ajustez-la 5.3 Réglage de la poignée supplémentaire en cas de besoin. C’est notamment le cas des (fi g. 13-14) chaînes de scie neuves. Détendez la chaîne de a) Réglage de l’inclinaison de la poignée scie lorsque votre travail est fi...
- Page 26 6. Fonctionnement télescopique (9 + 11) en les tournant dans le sens horaire. Veuillez tenir compte des dispositions légales 5.8 Montage de l’attachement de la scie à de la réglementation de la protection sonore, qui chaîne sur la tête de moteur (fi g. 20-21) peuvent varier d’un lieu à...
- Page 27 Tous les voyants clignotent : Protection auditive et lunettes de sécurité La température de la batterie est trop basse. Portez un casque de protection avec une protec- Retirez la batterie de l’appareil, laissez-la à tem- tion auditive et faciale intégrée. Il protège contre pérature am-biante pendant une journée.
-
Page 28: Nettoyage Et Entretien
8. Nettoyage et entretien Scier des branches plus grandes et plus lon- gues (fi g. 27) : Faites une coupe de délestage sur de grosses Danger ! branches. Avant tout travail de nettoyage, retirez la batterie Sciez d’abord de bas en haut avec le côté supé- de l’appareil. -
Page 29: Élimination Et Recyclage
à chaîne fonctionner. Si, pendant cette pagnant les produits, même par extraits, ne sont procédure, vous voyez une trace d’huile crois- autorisées qu’avec accord exprès d’Einhell Ger- sante, la lubrifi cation automatique de la chaîne many AG. - Page 30 11. Plan de dépannage Danger ! Mettre à l’arrêt l’appareil et retirer la batterie avant le dépannage. Le tableau ci-dessous présente des symptômes de défauts et décrit la procédure à suivre en cas de problème avec votre appareil. Si cela ne vous aide pas à localiser et supprimer le problème, adressez-vous à...
-
Page 31: Instrucciones De Seguridad
• Peligro! No forzar el aparato: trabajará mejor y con Al usar aparatos es preciso tener en cuenta una menos probabilidad de que exista riesgo de serie de medidas de seguridad para evitar le- sufrir lesiones dentro de los parámetros para siones o daños. - Page 32 Sustituir la batería exclusivamente por otra de limpiar, reparar o transportar el aparato de la marca Einhell o la marca recomendada. El jardin. uso de cualquier otra batería puede conllevar riesgo de incendio o explosión.
- Page 33 rias en carga si no se usan. Protección contra infl uencias ambientales • Mantener las células y baterías originales. No 1. Ponerse ropa de trabajo adecuada. Ponerse utilizar un cargador que no se haya facilitado gafas de protección. específicamente para usar con el equipo. 2.
-
Page 34: Descripción Del Aparato Y Volumen De Entrega
2) Transportar la pértiga de poda por el asa con Explicación de los símbolos que aparecen la cadena de la sierra parada. A la hora de sobre el aparato (fi g. 29): transportar o almacenar la pértiga de poda, 1. ¡Aviso! poner siempre la cubierta protectora en la 2. -
Page 35: Uso Adecuado
área. Explorar las 2.2 Volumen de entrega opciones de batería y cargador en einhell.com. Sirviéndose de la descripción del volumen de en- trega, comprobar que el artículo esté completo. Si faltase alguna pieza, dirigirse a nuestro Service 3. -
Page 36: Características Técnicas
4. Características técnicas c) Fig. 5: La empuñadura adicional (8) se com- pone de tornillo hexagonal (21) y enclava- miento (22). Se monta en el soporte de la em- Alimentación de tensión de motor: ..18 V puñadura (23) según se muestra en la fi gura. Longitud de barra-guía Introducir para ello el tornillo hexagonal (21) de cadena: .......... - Page 37 Instrucciones para tensar la cadena: Tras montar el juego de montaje para motosie- La cadena de la sierra ha de estar tensada co- rras, así como en caso de no usarse, poner la rrectamente a fi n de garantizar un funcionamiento cubierta protectora (fi...
- Page 38 5.7 Ajuste de los tubos telescópicos (fi g. 19) cuanto la batería se encuentre en la posición de 1. Abrir las tuercas de enclavamiento del tubo la fi gura 24, asegurarse de que el dispositivo de telescópico (9 + 11) girando hacia la izquier- retención enclave.
- Page 39 2 o 1 LED están iluminados Ropa de protección La batería dispone de sufi ciente carga residual. Es imprescindible llevar puesta la correspondien- te indumentaria de protección ajustada al cuerpo 1 LED parpadea: como, p. ej., pantalones protectores para cortar, La batería está...
-
Page 40: Mantenimiento Y Limpieza
• No cortar con la punta de la cuchilla. Serrar madera sometida a tensión • No cortar ramificaciones gruesas. Ello impide Serrar madera que se encuentre sometida a que se curen las heridas del árbol. tensión requiere especial cuidado. La madera bajo tensión que quede liberada de dicha fuerza Cortar ramas más pequeñas (fi... -
Page 41: Eliminación Y Reciclaje
Sólo está permitido copiar la documentación y especializado. documentos anexos del producto, o extractos de los mismos, con autorización expresa de Einhell ¡Advertencia! No tocar la superfi cie durante el Germany AG. proceso. Mantener la sufi ciente distancia de se- guridad aprox. -
Page 42: Plan Para Localización De Averías
11. Plan para localización de averías ¡Peligro! Antes de la localización de averías es preciso apagar el aparato y quitar la batería. En la siguiente tabla se describen posibles fallos y se ofrecen soluciones para su eliminación. Si no se puede localizar ni subsanar el problema, será... - Page 43 - 43 - Anl_GE_HC_18_Li_T_Part1_USA_SPK7.indb 43 Anl_GE_HC_18_Li_T_Part1_USA_SPK7.indb 43 23.11.2022 14:22:55 23.11.2022 14:22:55...
- Page 44 - 44 - Anl_GE_HC_18_Li_T_Part1_USA_SPK7.indb 44 Anl_GE_HC_18_Li_T_Part1_USA_SPK7.indb 44 23.11.2022 14:22:55 23.11.2022 14:22:55...
- Page 45 - 45 - Anl_GE_HC_18_Li_T_Part1_USA_SPK7.indb 45 Anl_GE_HC_18_Li_T_Part1_USA_SPK7.indb 45 23.11.2022 14:22:55 23.11.2022 14:22:55...
- Page 46 EH 11/2022 (01) Anl_GE_HC_18_Li_T_Part1_USA_SPK7.indb 46 Anl_GE_HC_18_Li_T_Part1_USA_SPK7.indb 46 23.11.2022 14:22:56 23.11.2022 14:22:56...
Need help?
Do you have a question about the GE-HC 18 Li T and is the answer not in the manual?
Questions and answers