Advertisement
Quick Links
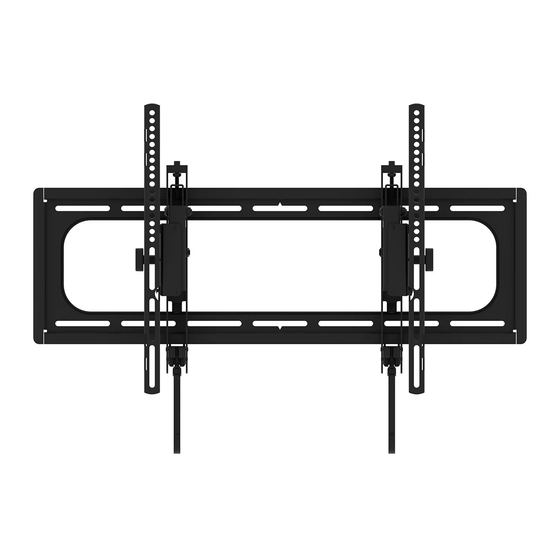
SLT4-B2
INSTRUCTION MANUAL
Your TV product sticker may be inaccessible after mounting your TV.
BEFORE MOUNTING YOUR TV
Record your TV information and
save for future reference.
Or, take a photo of your TV product
sticker and save for future reference.
Brand:
Model No.:
Serial No. (S/N):
Version/SCC/Other:
Advertisement

Related Manuals for Sanus SLT4-B2


Summary of Contents for Sanus SLT4-B2
- Page 1 Your TV product sticker may be inaccessible after mounting your TV. BEFORE MOUNTING YOUR TV Record your TV information and save for future reference. Or, take a photo of your TV product sticker and save for future reference. Brand: Model No.: Serial No. (S/N): Version/SCC/Other: SLT4-B2 INSTRUCTION MANUAL...
-
Page 2: We're Here To Help
DIY HeightFinder™ shows you by to help. project will be? where to drill. Call us at: EMEA: +31 (0) 495 580 852 Watch it now at: Check it out at: SANUS.com/2982 SANUS.com/2692 UK: 0800 056 2853 US: 1-888-333-1376... - Page 3 Yes — This mount is NOT compatible. 150 lbs. 110 lbs. Concrete or Concrete Stud Walls weigh more Visit MountFinder.Sanus.com or call +31 (0) 495 580 852 Block Walls (49.8 kg) (68.0 kg) than (UK: 0800-056-2853) to find a compatible mount.
-
Page 4: Before You Begin
Before you begin Remove the stand Install any accessories Protect the face from your TV — of your TV if attached. you may have purchased — if they require when laying it down for installation. the TV to be removed from the wall for assembly. - Page 5 STEP 1 Attach TV Bracket to TV WARNING: This product contains small items that could be a choking hazard if swallowed. Before starting assembly, verify all parts are included and undamaged. If any parts are missing or damaged, do not return the damaged item to your dealer; contact Customer Service. Never use damaged parts! NOTE: Not all hardware included will be used.
- Page 6 1.1 Select TV Screws 1.2 Determine Spacer Need TV Bracket TV Bracket Flat Back Cables Round Back Inset Holes TV Bracket TV Bracket TV Bracket Too Short Correct Too Long For rounded-back TVs, cable interference or inset For flat-back TVs, no CAUTION: spacers holes, spacers...
- Page 7 1.3 Attach TV Bracket Assembly to TV POSITION SECURELY TIGHTEN Flat-back TVs Rounded-back TVs / Extra Space CAUTION: Avoid potential personal injury or property damage! tilt tension knob TV brackets should be oriented to DO NOT use a power screwdriver for this step. Tighten the screws slightly TIP: the outside edges.
- Page 8 STEP 2 Attach Wall Plate to Wall WARNING: This product contains small items that could be a choking hazard if swallowed. Before starting assembly, verify all parts are included and undamaged. If any parts are missing or damaged, do not return the damaged item to your dealer; contact Customer Service. Never use damaged parts! NOTE: Not all hardware included will be used.
- Page 9 STEP 2A Wood Stud Installation CAUTION: Avoid potential personal Min. 1 ½ in. (3.8 cm) injury or property damage! ● Drywall covering the wall Min. 3 ½ in. (8.9 cm) Min. 16 in. (40.6 cm) must not exceed 5/8 in. (1.5 cm) ●...
- Page 10 POSITION TEMPLATE Visit 2 ¾ in. (6.9 cm) HeightFinder™ sanus.com /2692 7/32 in. (5.5 mm) To calculate your precise wall plate location, check out our CAUTION: Be sure you drill into the CENTER of the stud. TIP: HeightFinder at sanus.com [www.sanus.com/2692].
- Page 11 REMOVE TEMPLATE SECURELY TIGHTEN CAUTION: Avoid potential personal injury or property damage! Improper use could reduce the holding capacity of the lag bolts Tighten the lag bolts only until the washers are snug against the wall plate . DO NOT overtighten the lag bolts Go to STEP 3 on PAGE 18.
- Page 12 For concrete applications, TV brackets must remain centered in wall plate . Keep this in mind when selecting the wall plate location Min. 16 in. (40.6 cm) To calculate your precise wall plate location, check out our TIP: TIP: HeightFinder at sanus.com [www.sanus.com/2692].
- Page 13 DRILL REMOVE TEMPLATE 3 in. (7.6 cm) 3/8 in. (10 mm) CAUTION: CAUTION: Never drill into the mortar between blocks. Never drill into the mortar between blocks.
- Page 14 STEP 2B (continued) INSERT ANCHORS SECURELY TIGHTEN CAUTION: Avoid potential personal injury or property damage! Improper use could reduce the holding capacity of the lag bolts Be sure the anchors are seated flush with the Tighten the lag bolts only until the washers are snug against CAUTION: CAUTION:...
- Page 15 STEP 2C Steel Stud Installation Steel Stud Installation Kit (NOT INCLUDED) CAUTION: Avoid potential personal injury or property damage! Contact Customer Service at +31 (0) 495 580 852 to inquire about the additional hardware. Min. 16 in. (40.6 cm) ● Studs must be at least 2x4 / 25 ga. ●...
- Page 16 POSITION TEMPLATE 1 in. (2.54 cm) Visit HeightFinder™ www. san.us/2692 1/2 in. (13 mm) To calculate your precise wall plate location, check out our CAUTION: Be sure you drill into the CENTER of the stud. TIP: HeightFinder at sanus.com [www.san.us/2692].
- Page 17 INSTALL ANCHORS SECURELY TIGHTEN CAUTION: Avoid potential personal injury or property damage! Improper use could reduce the holding capacity of the screws . Tighten CAUTION: the screws only until the washers are snug against the wall plate Be sure cap .
-
Page 18: Attach Tv To Wall Plate
STEP 3 Attach TV to Wall Plate HANG ATTACH HEAVY! You may need assistance with this step. CAUTION: CAUTION: Avoid potential personal injury or property damage! Avoid potential personal injury or property damage! For CONCRETE APPLICATIONS: Always make sure TV brackets are in the locked position so the TV brackets MUST remain centered in wall plate... -
Page 19: Manage Cables
Manage Cables INSTALL CABLES TIP: Extend the TV outward AND tilt the TV up or down to gain better access to the back of the TV. TIP:... - Page 20 Adjustments LEVEL HEIGHT To level your TV, turn the Adjust the height level adjustment screw by turning the level on the top of either adjustment screw RAISE LOWER TV bracket on the top of both TV RAISE RAISE to raise or lower that brackets LOWER LOWER...
- Page 21 TILT EXTEND / RETRACT Your TV should adjust easily when moved, then stay in place. Adjust the tilt tension knob if your TV naturally tilts up or down. NOTE: If you do not intend to adjust the tilt for different viewing locations, you can tighten the tilt tension knobs CAUTION: Avoid potential...
- Page 22 TV LATERAL SHIFT REMOVING THE TV HEAVY ! You may need assistance with this step. HEAVY ! You may need assistance with this step. Disconnect all cables from the TV. CAUTION: Avoid potential personal To unlock the TV from the wall plate: Pull down and hold both release tabs while gently pulling the bottom of the injury or property damage!
- Page 23 Dimensions TV INTERFACE 7.87 23.62 199.8 599.8 16.93 430.0 WALL PLATE TOP VIEW - EXTENDED SIDE VIEW - EXTENDED 24.00 12.00° 609.6 23.62 600.0 16.00 9.50 1" HEIGHT ADJUST 406.4 241.3 5.84 148.5 7.00 0.33 177.8 17.72 7.00° 450.0 26.30 668.0 30.00 762.0...
- Page 24 49,8 kg Sí: Este soporte NO es compatible. hormigón macizo o con montantes pesa más de Visite MountFinder.Sanus.com o llame al +31 (0) 495 580 852 bloques de hormigón de acero (150 lbs) (110 lbs) (Reino Unido: 0800-056-2853) para buscar un soporte compatible.
-
Page 25: Antes De Comenzar
Español ESTAMOS A SU DISPOSICIÓN PARA AYUDARLE ¿Desea ver un vídeo que muestra lo fácil que será este proyecto de bricolaje? SANUS.com/2982 Puede verlo en: Acierte a la primera. HeightFinder™ indica el lugar donde debe taladrar. Descúbralo en: SANUS.com/2692 Nuestros expertos instaladores en EE. UU. están a su disposición para ayudarle. - Page 26 Español 1.1 Seleccione los tornillos para el televisor Determine qué diámetro de tornillo (M4, M6, o M8) es el adecuado para los orificios de montaje de la parte trasera de su televisor. PRECAUCIÓN: Verifique el enrosque adecuado de la combinación tornillo/arandela/espaciador Y los soportes del televisor (PASO 1.3). SI ES DEMASIADO CORTO, no sujetará...
- Page 27 Español MARCAR LOS CENTROS DE LOS MONTANTES COLOCAR LA PLANTILLA CONSEJO: Para calcular la ubicación exacta de la placa mural descubra nuestro HeightFinder en sanus.com [www.sanus.com/2692]. TALADRAR ORIFICIOS EN LOS CENTROS DE LOS MONTANTES RETIRAR LA PLANTILLA APRETAR FIRMEMENTE PRECAUCIÓN: El uso indebido podría reducir la capacidad de retención de los tornillos tirafondo...
- Page 28 VERIFICAR LOS BORDES DE LOS MONTANTES MARCAR LOS CENTROS DE LOS MONTANTES COLOCAR LA PLANTILLA CONSEJO: Para calcular la ubicación exacta de la placa mural descubra nuestro HeightFinder en sanus.com [www.sanus.com/2692]. TALADRAR ORIFICIOS EN LOS CENTROS DE LOS MONTANTES INSTALAR ANCLAJES PRECAUCIÓN: Cerciórese de que el tope...
- Page 29 Español Gestión de los cables PÁGINA 19 Mueva el televisor a varias posiciones, según necesite, para fijar los cables y luego ajuste el televisor como desee. Ajustes PÁGINA 20 NIVELACIÓN Para nivelar el televisor, gire el tornillo de ajuste en la parte superior de cualquiera de los lados del soporte del televisor si desea elevar o bajar ese lado respectivo del televisor.
- Page 30 49,8 kg Oui — Ce support n’ e st PAS compatible. béton plein ou porteurs pèse-t-il plus Visitez le site MountFinder.Sanus.com ou appelez le +31 (0) 495 580 852 (150 lb) (110 lb) en bloc de béton en acier (RU : 0800-056-2853) pour trouver un support compatible.
-
Page 31: Avant De Commencer
NOUS SOMMES LÀ POUR VOUS AIDER Souhaitez-vous voir une vidéo démontrant à quel point cette procédure est facile à effectuer ? Rendez-vous maintenant sur : SANUS.com/2982 Réussissez du premier coup ! HeightFinder™ vous indique à quel endroit percer. Renseignez-vous à l’adresse : SANUS.com/2692... - Page 32 Français 1.1 Sélection des vis du téléviseur Déterminez le diamètre des vis (M4, M6, ou M8) correspondant aux quatre trous de montage à l’arrière de votre téléviseur. ATTENTION : Assurez-vous que la longueur du filetage de la combinaison vis/rondelle/entretoise ET pattes de fixation pour téléviseur est correcte. (ÉTAPE 1.3). Si l'engagement est TROP COURT s'il est TROP LONG , le téléviseur ne tiendra pas et...
- Page 33 MARQUEZ LE CENTRE DES MONTANTS POSITIONNEZ LE GABARIT CONSEIL : Pour calculer l’ e mplacement précis de la plaque murale, renseignez-vous sur notre HeightFinder sur le site sanus.com [www.sanus.com/2692]. PERCEZ DES TROUS AU CENTRE DES MONTANTS RETIREZ LE GABARIT SERREZ CORRECTEMENT ATTENTION : Évitez les risques de blessures corporelles ou de dommages matériels ! Une mauvaise utilisation pourrait réduire la force de maintien du tire-fond...
- Page 34 MARQUEZ LE CENTRE DES MONTANTS POSITIONNEZ LE GABARIT CONSEIL : Pour calculer l’ e mplacement précis de la plaque murale, renseignez-vous sur notre HeightFinder sur le site sanus.com [www.sanus.com/2692]. PERCEZ DES TROUS AU NIVEAU DES CENTRES DE MONTANTS INSTALLEZ LES PIÈCES D’ANCRAGE...
-
Page 35: Gestion Des Câbles
Français Gestion des câbles PAGE 19 Déplacez votre téléviseur sur différentes positions, selon les besoins pour fixer vos câbles, puis ajustez le téléviseur comme souhaité. Réglages PAGE 20 NIVEAU Pour mettre votre téléviseur à niveau, desserrez la vis de mise à niveau située au-dessus de chaque patte de fixation pour téléviseur afin de soulever ou d'abaisser le côté... - Page 36 Er sjónvarpið þitt Fyrir veggi með Fyrir veggi með 68,0 kg 49,8 kg (með fylgihlutum) Já — Þessi festing hentar EKKI.Farið á simplicity.sanus.com eða hringið í US: +1 (888) 333-1376 viðarstoðum, steinveggi stálstoðum. (150 pund) (110 pund) eða veggi úr hleðslusteini.
-
Page 37: Áður En Þú Byrjar
Icelandic VIÐ ERUM HÉR TIL AÐ HJÁLPA SANUS.com/2982 Viltu horfa á myndband sem sýnir hversu auðvelt þetta DIY verkefni verður? Horfðu á það núna á: Skoðaðu það á: SANUS.com/2692 Gerðu það rétt í fyrsta skipti. HeightFinder™ sýnir þér hvar á að bora. - Page 38 Icelandic 1.3 Festið sjónvarpsfestinguna Leggðu sjónvarpsfestingar ATHUGIÐ Hallaviðnámshnapparnir T á sjónvarpsfestingum eiga að snúa út á við. Leggðu sjónvarpsfestingar yfir skrúfugötin á sjónvarpinu eins og sýnt er á myndinni - gakktu úr skugga um að festingarnar séu samsíða. Stilltu losunarflipana að...
- Page 39 Icelandic Stilltu veggplötumátinu [www.sanus.com/2692]. ™ ATHUGIÐ: Prófið HeightFinder á Sanus.com ef þörf er á aðstoð við að ákveða staðsetninguna á veggplötunni. Borið leiðarholur MIKILVÆGT: Verið viss um að bora í miðju stoðarinnar. Fjarlægðu veggplötumátinu Festið veggplötuna VARÚÐ: Forðist hugsanlega manntjón eða eignatjón! Röng notkun gæti dregið úr haldkrafti seinkunarboltans .
- Page 40 Merktu fyrir götunum í miðju stoðanna Stilltu veggplötumátinu [www.sanus.com/2692]. ™ ATHUGIÐ: Prófið HeightFinder á Sanus.com ef þörf er á aðstoð við að ákveða staðsetninguna á veggplötunni. Borið leiðarholur MIKILVÆGT: Verið viss um að bora í miðju stoðarinnar. setjið múrtappa VARÚÐ: Gætið...
- Page 41 Icelandic SKREF 3 Hengið sjónvarpið á veggplötuna Hengdu sjónvarpið ÞUNGT! Þú gætir þurft aðstoð við þetta skref. VARÚÐ: Varist möguleg slys og skemmdir á munum! Þegar varan er fest á steinvegg verður sjónvarpsfestingum að vera á miðri veggplötunni ATTACH VARÚÐ: Varist möguleg slys og skemmdir á...
- Page 42 SANUS will not be liable for any damages whatsoever arising out of the use or inability to use its products, even if SANUS has been advised of the possibility of such damages. To the maximum extent permitted by applicable law, SANUS disclaims any responsibility for incidental or consequential damages (such as the cost of repairing or replacing other property which damaged when the device does not work properly).
Need help?
Do you have a question about the SLT4-B2 and is the answer not in the manual?
Questions and answers