Table of Contents
Advertisement
Quick Links
Advertisement
Table of Contents

Related Manuals for Parsun F60


Summary of Contents for Parsun F60
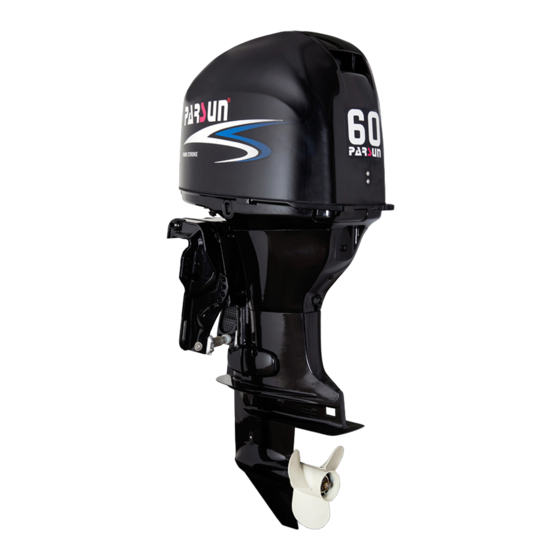
- Page 1 PARSUN OUTBOARD MOTOR SERVICE MANUAL F60/50 Suzhou Parsun Power Machine Co., Ltd.
- Page 2 Introduction This Manual is a repair instruction for F50/60 and is provided by Parsun to the dealers when maintaining or repairing Parsun outboard motors. Please read this Manual carefully before maintaining and servicing the outboard motor. Please use the repair procedures and tools recommended in this Manual when repairing and maintaining the outboard motor.
-
Page 3: Table Of Contents
Contents Overview ..................................1 Identification Marks ..............................1 Propeller Selection ............................... 1 Protective Measure at Work ............................1 Disassembling and Assembling ........................... 2 Disposable Parts ................................2 Inspection before Delivery ............................3 Special Tools and Testing Equipment .......................... 4 Decomposition Schematic Diagram and Symbolic Description .................. 5 Specifications ................................ - Page 4 Spark Plug Ignition ..............................29 Spark Plug Cap ................................29 Flywheel Maintenance ............................... 29 Check the Ignition Coil .............................. 29 Check the trigger coil ..............................29 Check the Engine Start Switch ..........................30 Check the Engine Start Switch ..........................30 Check the Starting Relay ............................
- Page 5 Decomposition Schematic Diagram ........................74 Disassembling and Check ..........................76 Upper casing unit and Brackets ..........................77 Decomposition Schematic Diagram ........................77 Disassembling and Check of Bracket ........................ 83 Disassembling and Check of Water Unit ......................83 Manual Tilting Device ............................... 85 Disassembly Schematic Diagram ........................
-
Page 6: Overview
Overview Identification Marks The serial number of the outboard motor is printed on a label, which is attached to the port side of the clamp bracket or the upper part of the rotary bracket. The serial number is shown in the whitespace of the label to help you order spare parts from the dealer or for reference when the engine is stolen. -
Page 7: Disassembling And Assembling
4. Use of lubricants and sealants When maintaining and repairing outboard motors, only products provided or recommended by Parsun can be used. Under normal circumstances, the lubricants mentioned in this Manual will not damage your skin. However, please take protective measures before use to reduce risks. -
Page 8: Inspection Before Delivery
Inspection before Delivery In order to ensure the normal use of the products by customers, please carry out the following inspections before delivery. 1. Check the fuel system. Check that the fuel hose is securely connected and that the fuel tank is full of fuel. Attention: This is a four-stroke engine and premixed fuel cannot be used. -
Page 9: Special Tools And Testing Equipment
7. Running-in operation. ① The 1 hour: Run the engine at 2000 rpm or at about half the throttle. ② The 2 hour: Run the engine at 3000 rpm or at about 3/4 of the throttle. ③ Next 8 hours: Avoid running the motor at full throttle for 5 consecutive minutes. 8. -
Page 10: Decomposition Schematic Diagram And Symbolic Description
Bearing mounting tool Oil seal mounting tool Needle bearing mounting tool Lower unit Lower unit Lower unit Shell cover tool Needle bearing tool Drive shaft bearing Lower unit Lower unit cover mounting tool shaft seat oil seal Forwarder gear bearing Drive shaft bearing Drive mounting kit... - Page 11 Decomposition schematic description ① M14x12 mm 27 Nm ② PART NO. DESCRIPTION DESCRIPTION REMARKS ③ 零件名称(中文) 零件名称(英文) F25-00000100 PLUG,OIL LEVEL 机油尺组件 RELIEF VALVE AUY F25-02010100 溢流阀组件 F25-02010006 溢流阀垫片 WASHER ,PLAIN GB/T97.1-2000 平垫圈6 HEXAGON BOLT GB/T5783-2000 六角螺栓M6x25 F25-02010200 STRAINER,OIL 粗滤器组件 HEXAGON BOLT GB/T5783-2000 六角螺栓M6X16 PIN,DOWEL...
-
Page 12: Specifications
Specifications Parameters of Outboard Motor Item Data Item Data Overall length 1383/713 mm Spark plug DPR7EA-9 (NGK)) (BE/FE) Overall width 427 mm Cooling system Water cooling Engine Through the propeller Dimension 1435 mm Exhaust system Overall height CD/CT 1476 mm Lubrication system Pressure lubrication Height of stem... -
Page 13: Repair Information
Repair Information Engine Item Data Item Data 64.950~64.965m Min. compression pressure 840 kPa Diameter of piston Drive device 5mm (from Lubricating oil pressure 100 kPa Height of measuring point bottom of piston) Bending limit 0.03mm Piston-to-cylinder clearance 0.035~0.065mm Cylinder Inside diameter of camshaft 37.00~37.02mm 15.974~15.985m Piston pin hole aperture... -
Page 14: Measurement Conditions
Clearance between pipe and Thickness 0.025~0.052mm A black 1.500~1.494 mm valve stem clearance crankshaft Valve stem roundness limit 0.03mm bearing B brown 1.494~1.488mm bush Measurement conditions: Ambient temperature 20 ℃. Lower casing Installation Data Data Item Item Pinion to spur gear 0.18~0.54mm Optional gear 0.10,0.12,0.15,0.18, 0.30,0.40,0.50... -
Page 15: General Torque
tightening 30 Nm tightening 6 Nm Bolt tightening 12 Nm tightening 6 Nm Connec Bolt ting rod tightening 17 Nm Driven pulley Bolt 38 Nm Lower casing assembly Bolt 40Nm Ring nut — — 105Nm Water inlet Screw 5 Nm Lower Oil drain bolt Bolt... -
Page 16: Dimensions
Dimensions Outline Dimension(D/T model) - Page 17 Outline Dimension (CD/CT model)
-
Page 18: Mounting Dimensions Of Clamp Bracket
Mounting dimensions of clamp bracket... -
Page 19: Basic Maintenance
Basic Maintenance Maintenance Interval Chart General Initial maintenance maintenance interval Item Content 10 hours 50 hours hours hours (1 month) (3 month) (1 year) month) Anode Check/replace ○ ○ Anode (internal) Check/replace ○ Cooling water channel Clean ○ ○ Spark plug Clean/adjust/replace ○... -
Page 20: Engine
3. Check the fuel filter. Check whether the fuel filter is cracked or damaged, and check whether there is any dirt in the fuel filter. If yes, replace the fuel filter. Attention: Wipe up the spilled fuel. Engine Engine Oil Level 1. -
Page 21: Valve Clearance
Valve Clearance 1. Remove the engine stop safety cable from the emergency stop switch assembly and remove the spark plug cap from the spark plug. 2. Remove belt cover. 3. Remove the fuel pump and cylinder head cover. 4. Check the timing band for slack, aging, or damage. Replace it if necessary. 5. -
Page 22: Control System
Control System Throttle Cable 1. Place the throttle grip in the closed position; Put the shift lever to the neutral position for the front operation model. 2. Check whether the roller on the driven pulley of the throttle actuator can be observed in the observation window on the driving pulley of the throttle actuator;... -
Page 23: Lower Casing Unit
Lower Casing Unit Gear Oil Check gear oil level Remove the oil level plug screw. If there is oil spill, the oil level is correct. If there is no oil spill, add oil to it. 1. Oil level plug screw Change gear oil 1. -
Page 24: Lubrication Point
Lubrication Point 1. Fill or apply waterproof grease to the parts shown in the figure with an oil gun. 2. Apply anti-corrosion lubricating oil to the propeller shaft. Cooling Water Channel 1. Check the inlet of the cooling water channel for blockage. Clean it if necessary. 1. -
Page 25: Propeller
2. Hang the thermostat in a container with water. 3. Heat the container. 4. Check the opening of thermostat valve at the specified water temperature; If it does not conform to the specifications, replace it. Water temperature Opening height of valve Below 60 ℃... -
Page 26: Decomposition Schematic Diagram
Decomposition Schematic Diagram M20 mm 160 Nm... -
Page 32: Wiring Diagram
Wiring Diagram... - Page 33 Back-operation electrical starting Front-operation electrical starting...
-
Page 34: Spark Plug Ignition
Spark Plug Ignition 1. Remove the spark plug cap from the spark plug. 1. Spark plug cap; 2. Spark plug 2. Connect the ignition detector to the spark plug cap. 3. Start the engine and observe the spark through the discharge window of the detector. Warning: Do not touch any joint of the detector lead. -
Page 35: Check The Engine Start Switch
2. Tri|gger coil resistance Measure coil resistance. If the specified value is not met, replace it. Resistance: 260 ~ 290 (the positive electrode of the detector is connected with red/white line and the negative electrode is connected with black line) Note: The data are for reference only. -
Page 36: How To Use The Diagnostic Scan Tool
How to Use the Diagnostic Scan Tool When the engine is running, if the fault light on the bottom cover is always on or the service light is always on/the buzzer is always ringing, it means that there is a fault in the engine. At this time, connect the scan tool with the corresponding detection port on the engine. - Page 37 Low idle speed Low system voltage System voltage failure High system voltage Failure type Failure item Code Fault light Fault indicator lamp failure Short circuit to ground in oil pressure sensor line Oil pressure failure Short circuit to high level in oil pressure sensor line Carbon canister Short circuit to ground in carbon canister solenoid...
-
Page 38: Fuel System
Fuel System Attention: Fuel is a highly flammable and volatile liquid. Fuel leakage can cause fire and explosion. Do not attempt to start the engine before determining that the components of the fuel system are connected or installed. After completing all repair steps, apply pressure to the fuel system for a short period of time to check for leaks. -
Page 39: Decomposition Schematic Diagram
Decomposition Schematic Diagram... -
Page 44: Relieve The Fuel Pressure In The Fuel Lines
Relieve the Fuel Pressure in the Fuel Lines Before carrying out maintenance and inspection of the fuel system, the fuel pressure in the fuel pipeline shall be released. Avoid accidents caused by high- pressure fuel injection during maintenance. 1. Connect the pressure gauge with the pressure relief pipe to the oil pump check valve of the electric fuel pump;... -
Page 45: Remove And Check The Fuel Pump
4. Connect the outlet of the fuel joint to the vacuum manometer. 5. Detect whether the negative pressure can be maintained for more than 10 seconds under the specified pressure. Replace it if necessary. Specified pressure: 50kPa Remove and Check the Fuel Pump 1. -
Page 46: Check The Fuel Filter
Check the Fuel Filter Check whether the filter screen of the filter is blocked or there are sundries, and check whether the filter cup is damaged or leaked. If necessary, clean with gasoline or replace the filter screen. Note: Apply lubricating oil to the O-ring before reassembling the filter cup. 1. -
Page 47: Check The Fuel Pipe And Fuel Filter
12. Loosen the fixing screw of the pressure valve pressure plate and remove the pressure regulating valve; 13. Check the O-ring of the pressure regulating valve; Replace it if necessary; 14. After the check, clean the parts and install the electric fuel pump in the reverse order. Attention: A new oil cup sealing ring is required;... -
Page 48: Decomposition Schematic Diagram
Decomposition Schematic Diagram 18 Nm M8x82 mm 40 Nm 1st 15 Nm 2nd 30 Nm M6x35 mm 1st 6 Nm 2nd 12 Nm... -
Page 60: Special Tools
Special Tools Piston slideway Flywheel gripper Valve spring compressor kit and flywheel puller Clearance gauge Oil filter spanner Check the Compression Pressure 1.Start the engine, warm it up for 5 minutes, then shut it down. 2.Remove engine stop safety line. 3.Remove the spark plug and connect the pressure gauge to the spark plug hole. -
Page 61: Disassemble The Engine
3. Check oil pressure Oil pressure (reference data): 100kpa (800±50 r/min) Disassemble the Engine 1. Open the top cover. 2. Remove the flywheel cover. 3. Remove the throttle cable. 4. Remove the carburetor. 5. Remove the flywheel with special tools. Flywheel gripper and flywheel puller 6. -
Page 62: Disassembling And Check
4. Remove the timing pulley washer, timing pulley and semicircular key. 5. Check the pulley and timing belt for cracks, damage or wear. Replace it if necessary. 6. Install the semicircular key and the driven pulley. Align "1" on the driven pulley with "▼" on the cylinder head. Then temporarily tighten the driven pulley bolts. - Page 63 1. Check the width of the valve sealing surface if it is not within the specified scope. Trim the valve seat ring. Width of sealing surface: Intake valve 1.84~2.97 mm Exhaust valve 1.98~3.11 mm Check the valve edge thickness T; If the specified value is not met, replace the valve. Valve edge thickness: Intake valve 0.6~1.0 mm...
- Page 64 3. Check camshaft journal diameter and cylinder head shaft hole inner diameter. Replace it if necessary. Camshaft journal top diameter a1 (driven pulley mounting end): 36.93~36.94 mm Camshaft journal centre and rear diametera2: 36.94~36.95 mm Cylinder head shaft hole inner diameter b: 37.00~37.02 mm 4.
- Page 65 If the contact is uneven, replace the valve guide. Width of inlet and exhaust valve sealing surface: 0.9~1.1mm Trim the valve seat ring 1. Trim the valve with a 45° valve seat ring cutter and adjust the width of the sealing surface.
-
Page 66: Crankcase
Install valve 1. Install a new valve oil seal and coat the valve guide with engine oil. 2. Install the valve, valve spring pad, valve spring and spring seat in sequence. 3. Compress the valve spring with a valve spring compressor and install the valve spring retainer. - Page 67 5. Remove the connecting rod bolt and connecting rod cover, remove the crankshaft, and then remove the connecting rod and piston assembly. 6. Remove the piston pin circlip with pliers, then remove the piston pin and the piston. 7. Remove the oil seal, locating pin and bearing bush. Piston 1.
- Page 68 4. Install the piston ring on the piston and measure the clearance between the piston ring and the piston ring groove with clearance gauge. If it does not conform to the specified value, replace it. Specified clearance: Top ring 0.02 ~ 0.06 mm ring 0.02~0.06 mm Oil ring 0.04 ~ 0.18 mm Inner diameter of connecting rod small end...
- Page 69 Locking torque: First time 6 Nm Second time 17 Nm 4. Remove the connecting rod and measure the width of the plastic clearance gauge after being compressed. If the specified value is exceeded, replace the connecting rod bearing bush. Oil clearance: 0.020~0.052mm Note: Do not turn the connecting rod until the measurement is completed.
-
Page 70: Reinstall
Reinstall Assemble Piston Connecting Rod Install the piston, connecting rod, piston pin and piston pin clip clutch. Note: When installing, make sure that the mark on the connecting rod is on the same side as that on the top of the piston. Install Piston Ring 1. - Page 71 Apply oil to the bolts before installation. 2. Install oil filter using special tools and tighten it to the specified torque. Locking torque: 18 Nm Note: Before installation, inject oil into the oil channel. 3. Install the exhaust cover, thermostat and thermostat cover. Tighten them at the specified torque twice in the order indicated on the exhaust cover plate.
-
Page 72: Upper Casing
Upper Casing Top Cowling Decomposition Schematic Diagram... -
Page 73: Disassembling And Check
Disassembling and Check 1. Remove sealing rubber strip. 2. Remove the top cover screws. 3. Remove top cover. 4. Remove the locking hook and hook. 5. Check the top cover for cracks, damage or wear. Replace it if necessary. 6. Check the sealing rubber strip for cracks or damage. Replace it if necessary. 7. -
Page 74: Bottom Cowling
Bottom Cowling Decomposition Schematic Diagram... -
Page 78: Disassembling And Check
Disassembling and Check 1. Remove the rubber plug, corrugated rubber sleeve and throttle cable sheath. Remove the ignition line assembly. 2. Remove the bolts securing the small cover plate of the bottom cover, remove the small cover plate of the bottom cover, and remove the square rubber sealing strip. Remove the opening stop plate and the rectangular rubber plug. -
Page 79: Steering Handle
Steering Handle Decomposition Schematic Diagram... -
Page 81: Disassembling And Check
Continued Disassembling and Check 1. Remove the handle bracket, remove the shift handle and remove the Steering handle. 2. Remove the throttle cable assembly. 3. Remove the cotter pin and remove the resistance adjustment knob. 4. Remove the throttle grip. 5.... -
Page 82: Upper Casing Unit And Brackets
Upper casing unit and Brackets Decomposition Schematic Diagram... -
Page 88: Disassembling And Check Of Bracket
Continued Disassembling and Check of Bracket 1. Remove the outer cover of the left and right absorbers, remove the left and right absorbers and the retaining nuts of the double-hole absorbers. 2. Remove the water unit, oil pan and outlet manifold socket completely from the bracket 3. - Page 89 6. Remove the exhaust partition and exhaust duct from the oil pan. 7. Remove the double-hole absorber, exhaust partition, round rubber ring for water pipe and the water pipe. 8. Check the water unit casing and oil pan for cracks or damage. Replace it if necessary. 9.
-
Page 90: Manual Tilting Device
Manual Tilting Device Disassembly Schematic Diagram... -
Page 91: Disassembling
Disassembling 1. Fully tilt the outboard motor upwards and lower the support frame to support the outboard motor. Remove the steel wire retaining ring for the shaft and remove the tilting pin shaft. Remove the bolt and remove the hydraulic tilting positioning shaft. Removing the manual cylinder assembly... -
Page 92: Hydraulic Tilting Device
Hydraulic Tilting Device Disassembly Schematic Diagram... -
Page 93: Disassembling
Disassembling 1. Fully tilt the outboard motor upwards and lower the support frame to support the outboard motor. Remove the steel wire retaining ring for the shaft and remove the tilting pin shaft. Remove the bolt and remove the hydraulic tilting positioning shaft. Remove the hydraulic tilting assembly. - Page 94 2. Extend the push rod completely. 3. Change the positive and negative wire connections. 4. Compress the push rod completely. 5. Repeat steps 1 to 4 to move the push rod up and down for 4 to 5 times. 6. Extend the push rod completely, remove the oil screw and observe the oil level. 7.
-
Page 95: Lower Casing Part
Lower casing Part Decomposition Schematic Diagram(D/T model) -
Page 102: Decomposition Schematic Diagram (Cd/Ct Model)
Decomposition Schematic Diagram (CD/CT model) -
Page 104: Disassembling And Check
Disassembling and Check 1. Remove the water pipe. 2. Remove the water pump casing. 3. Remove the impeller and pump inner casing. 4. Remove the semicircular key and outer baffle. 5. Check the water pump casing and outer baffle for cracks, twists or damages. Replace it if necessary. -
Page 105: Propeller Shaft And Clutch Block
8. Remove the cotter pin; Place the shift lever in neutral position. Place a piece of wood between the swirl plate and the propeller, to prevent the propeller from rotating freely. 9. Remove the slotted hexagon nut, remove the propeller, remove the cushion block. 10. -
Page 106: Lower Casing Unit Casing Cover
Lower casing Unit Casing Cover 1. Check the bearing for rust and noise when rotating. If yes, replace it. 2. Remove the bearing and oil seal with the bearing puller. Note: Do not remove the bearing unless it is replaced. 3. -
Page 107: Forward Gear Bearing
Forward Gear Bearing Check whether the bearing for rust and noise when rotating. Replace it if necessary. Note: Do not remove the bearing unless it is replaced. When installing a new bearing, adjust the shim as required. Check the Lower casing Unit Casing Check whether the Lower casing device casing is cracked or damaged, and check whether the cooling water inlet is blocked. -
Page 108: Install The Lower Casing Unit
7. Install the Lower casing unit casing cover Lower casing unit casing cover assembly mounting tool 8. Check whether the shift gear is working properly. 9. Install the water pump assembly. 10. Install the anode and water inlet. 11. Install the propeller and slotted hexagon nut, and place a piece of wood between the anti-swirl plate and the propeller to prevent the propeller from rotating freely. -
Page 109: Selection Of Shims
Selection of Shims When replacing the internal parts of the Lower casing unit or assembling a new Lower casing unit, adjust the shims as required. Deviation Value Mark The installation surface of the anode/heading adjusting piece of the Lower casing unit is engraved with deviation value marks, namely F, R and P respectively;... -
Page 110: Pinion Shim
Pinion Shim 1. Check the P value engraved on the Lower casing unit. 2. Attach the drive shaft to the special tool. Fit the pinion and lock the pinion nut according to the specified torque. Specified torque: 95 Nm 3. Measure the clearance between the special tool and the pinion with a gauge, Calculate the thickness T3 according to the formula. -
Page 111: Common Faults And Solutions
Common Faults and Solutions Fault Cause Solution Type No fuel in the fuel tank Fill up the fuel tank with clean fresh fuel Fuel is contaminated or obsolete Fuel filter is blocked Replace the fuel filter Fuel pump failure Repair or replace the fuel pump Fuel tank cap vent screw not loosened Loosen the vent screw Spark plug is contaminated or the type... - Page 112 Continued table (I) Fault type Cause Solution Spark plug is contaminated or the type is Clean the spark plug or replace with the correct type incorrect of spark plug Fuel system is clogged Check the fuel pipe for extrusion, winding or blockage Fuel filter is blocked Replace the fuel filter Fuel is contaminated or obsolete...
Need help?
Do you have a question about the F60 and is the answer not in the manual?
Questions and answers