
Related Manuals for Jensen JHD962BT


Summary of Contents for Jensen JHD962BT
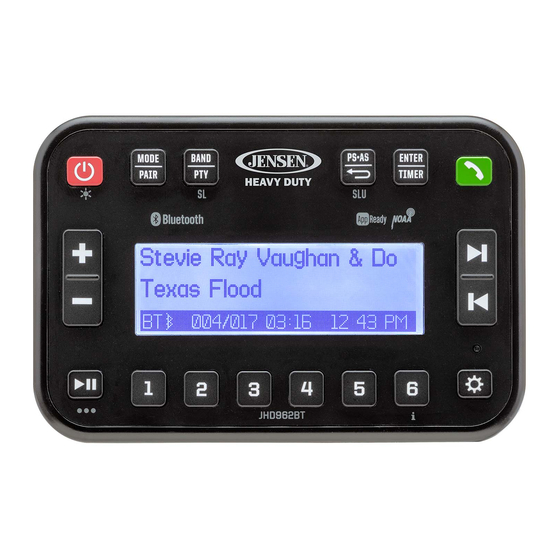
- Page 1 JHD962BT AM/FM/RBDS/WB/USB/BT/DAB+ Heavy Duty Radio Installation and Operation Manual...
-
Page 2: Table Of Contents
CONTENTS Introduction .................................3 Safety Information .............................4 Installation ................................5 Wiring ..................................6 Basic Operation ..............................7 Tuner Operation ............................... 10 Bluetooth Operation ............................13 App Operation ..............................16 Care and Maintenance ..........................16 Troubleshooting .............................. 17 Specifications ..............................18 FCC Notes ................................19... -
Page 3: Introduction
Content List • JENSEN Heavy Duty Radio System Features • Hardware Kit Features of JENSEN JHD962BT mobile audio system include: • Mounting Bracket • 50 watts max power (25W x 2); 20 watts RMS (10W x 2) • Mounting Bracket Fasteners •... -
Page 4: Safety Information
SAFETY INFORMATION When Driving Keep the volume level low enough to be aware of the road and traffic conditions. When Parked Parking in direct sunlight can produce very high temperatures inside your vehicle. Give the interior a chance to cool down before starting playback. -
Page 5: Installation
INSTALLATION Attaching the Radio Once the bracket is securely mounted, use the four included Mounting the Bracket M4 machine screws to fasten the bracket to the back of the Two options are provided for mounting the bracket (self- radio. Alternatively, the radio can be mounted directly to the tapping screws or machine screws with nuts) to ensure a instrument panel if access to the rear of the instrument panel. -
Page 6: Wiring
WIRING WARNING! Do not connect the +12VDC ACC switched wire to the battery. This wire MUST be connected to the Accessory/ Ignition wire or a +12 volts switched power source. Pin No. Color Description No Connection White/Black Left Speaker- Dark Blue Amp Remote(+12VDC 500MA) Gray Right Speaker+... -
Page 7: Basic Operation
BASIC OPERATION Play/Pause/Mute Press the button (18) on the control panel to pause or mute the audio output. Press button again to unmute or restore the audio output to the previous level. Mode Press the MODE button (2) to select a different mode of operation, as indicated on the display panel. - Page 8 SETTINGS button repeatedly or or buttons (9, 8). Once the The unit will automatically exit the system menu after 5 desired menu item appears on the display, adjust that option seconds of inactivity. The following items can be adjusted: by pressing the or buttons (20, 19) within 5 seconds. The •...
- Page 9 off power to radio when battery voltage is low. • System Info: Display firmware version. • P--O TUNE (On/Off ): Preset-Only Tune On. If ‘Preset-Only NOTE: Bluetooth Device menu options are only available while the Bluetooth feature is ON and the radio is in Bluetooth Tune’...
-
Page 10: Tuner Operation
TUNER OPERATION Setting the Clock To set the clock to display the current time, turn the vehicle ignition on and turn the radio on. Enter the system menu and adjust the clock by selecting the “Set Clock” menu item. • Press ENTER/TIMER button (6) to enter clock setting menu. - Page 11 Preset Stations NOTE: Radio stations broadcasting RBDS may not be available in your listening area. Six numbered preset buttons store and recall stations. Store a Station In FM radio mode, press & hold the BAND/PTY button (3) for Select a station, then press and hold a preset button from 1 – 2 seconds to list the following Program Type (PTY) options: 6 on the number buttons (12-17) for two seconds.
- Page 12 Weatherband Operation The above table also shows which preset button will access the frequency. Note that one frequency cannot be accessed using a preset button. The frequency can only be reached using the What is the NOAA Weather Radio/Weatheradio Canada? tuning controls.
-
Page 13: Bluetooth Operation
Select a Band Press the BAND/PTY button (3) to change between DAB+1, DAB+2 and DAB+3 band. The JHD962BT includes built-in Bluetooth technology that Service List Update allows you to connect this head unit to Bluetooth devices for Press and hold the AS•PS/RETURN (SLU) button (5) to start streaming audio playback. - Page 14 Lock/Unlock, Disconnect or Delete for this device. Device 1 Lock/Unlock • LOCK/UNLOCK: The JHD962BT can store up to 5 devices Connect/Disconnect for Bluetooth connection. The devices are stored in FIFO Delete (First in First Out) order. To prevent a device from being...
- Page 15 Before you begin, consult the owner’s manual for the Bluetooth AUDIO player. “Pause” will appear on the LCD. Press Bluetooth device you want to pair with the JHD962BT. again to resume playback. If you change to another mode, Bluetooth Quick Pair: the mobile phone audio will pause.
-
Page 16: App Operation
After downloading and installing ASA Audio Control app on Reject Incoming Call your device, pair your device to the JHD962BT as stated above To reject an incoming call, press and hold the “CALL” button. for Bluetooth pairing. Once your device is paired you can Outgoing Call open and begin using the app. -
Page 17: Troubleshooting
TROUBLESHOOTING Ignition The most common source of noise in reception is the ignition Symptom Cause Solution system. This is a result of the radio being placed close to the ignition system (engine). This type of noise can be easily No power The vehicle’s If the power supply is detected because it will vary in intensity of pitch with the... -
Page 18: Specifications
SPECIFICATIONS FM Radio Frequency Coverage (USA) ..................................87.5-107.9MHz Frequency Coverage (Europe/Russia/Japan) .................. 87.5-108MHz/87.5-108MHz/76.0-90.0MHz Sensitivity (S/N=30dB) .......................................≤14dBμV Stereo Separation ..........................................>25dB AM/MW Frequency Range (USA) ....................................530-1710kHz Frequency Range (Europe/Russia/Japan) ...................522-1620kHz/522-1620kHz/522-1629kHz Sensitivity (S/N=20dB) .......................................≤25dBμV General Frequency band(s) (for Bluetooth) ....................................2.4GHz Maximum radio-frequency power transmitted (for Bluetooth) ........................4dBm Operating Voltage. -
Page 19: Fcc Notes
FCC NOTES WARNING! Changes or modifications to this unit not expressly approved by the party responsible for compliance could void the user’s authority to operate the equipment. NOTE: This equipment has been tested and found to comply with the limits for a Class B digital device, pursuant to Part 15 of the FCC Rules. - Page 20 ASA Electronics Corporation www.asaelectronics.com www.jensenheavyduty.com ©2023 ASA Electronics Corporation...
Need help?
Do you have a question about the JHD962BT and is the answer not in the manual?
Questions and answers