Table of Contents
Advertisement
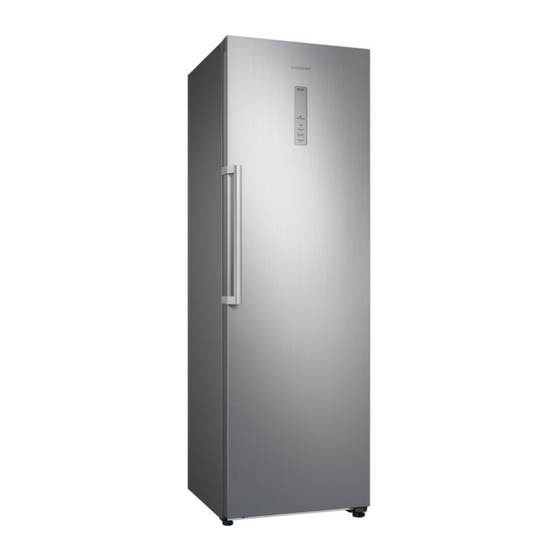
REFRIGERATOR
RR39M73*
RR39M71*
RZ11M7*
RZ32R*, RR39T7*, RZ32T7*
REFRIGERATOR
1 DOOR TYPE
MODEL NAME : RR39M7*
RR39M72*,RR39M70*
RR39T7*
RZ32R*
RZ32M7*
RZ32T7*
RZ11M7*
CONTENTS
1. PRECAUTIONS (SAFETY WARNINGS) .... 5
2. PRODUCT SPECIFICATIONS .................... 8
3. DISASSEMBLY & REASSEMBLY ............ 24
4. TROUBLESHOOTING.............................. 53
5. PCB/PBA DIAGRAM ............................... 96
6. WIRING DIAGRAM ............................... 103
7. BLOCK DIAGRAM ................................. 106
8. REFERENCES ........................................ 109
Advertisement
Table of Contents

Related Manuals for Samsung RR39M7 Series


Summary of Contents for Samsung RR39M7 Series
- Page 1 REFRIGERATOR 1 DOOR TYPE MODEL NAME : RR39M7* RR39T7* RZ32R* RZ32M7* RZ32T7* RZ11M7* REFRIGERATOR CONTENTS 1. PRECAUTIONS (SAFETY WARNINGS) ..5 2. PRODUCT SPECIFICATIONS ....8 3. DISASSEMBLY & REASSEMBLY .... 24 4. TROUBLESHOOTING......53 5. PCB/PBA DIAGRAM ....... 96 6.
- Page 2 The manufacturer or dealer cannot be responsible for the interpretation of this information. All rights reserved. This service guide may not be reproduced in whole or in part in any form without written permission from the SAMSUNG ELECTRONICS Company.
-
Page 3: Table Of Contents
CONTENTS 1. PRECAUTIONS (SAFETY WARNINGS) ......................5 2. PRODUCT SPECIFICATIONS ........................... 8 2-1) Introduction of main function ................................... 8 2-2) Electric Parts Specification ..................................11 2-3) Dimension (MM) ....................................... 13 2-4) Pair Installed Dimensions ..................................15 2-5) Buttons and Display ....................................17 3. - Page 4 CONTENTS 5. PCB/PBA DIAGRAM .............................96 5-1) Parts Layout (Main Board) ..................................96 5-2) Parts Layout (Inverter Board) ................................. 97 5-3) Parts Layout (Main Board) ..................................98 5-4) Connector Layout & Description (Main Board) ............................99 5-5) Connector Layout & Description (Inverter Board) ..........................100 5-6) Connector Layout &...
-
Page 5: Precautions (Safety Warnings)
1. PRECAUTIONS (SAFETY WARNINGS) • Upon electronic Control system repair/change, make sure the set unplugged. Be ware of electric shock. • Use rated electronic Control equipment. Make sure to check out ModeL name, Rated voltage, Rated current, Operation Temp, etc. •... - Page 6 PRECAUTIONS (SAFETY WARNINGS) Read all instructions before repairing the product and keep to the instructions in order to prevent danger or property damage. CAUTION/WARNING SYMBOLS DISPLAYED SYMBOLS means Prohibition”. Indicates that a danger Warning means Do not disassemble”. of death or serious injury exists.
- Page 7 PRECAUTIONS (SAFETY WARNINGS) ※ Please let users know following warnings & cautions in detail. Warning & Caution Do not allow users to store Do not allow users to store narrow and Do not allow users to put bottles or kinds of lengthy bottles or foods in a small multi- pharmaceutical products, scientific glass in the freezer.
-
Page 8: Product Specifications
• Multi air flow vents stop the formation of waterdrop and ice inside • Samsung Digital Inverter Compressor smartly controls its speed to deliver only as much cooling as needed whereas the conventional compressor always runs at its maximum level. - Page 9 PRODUCT SPECIFICATIONS ITEM Specification Model RR39M7* RZ11M7* Width Dimension (mm) Depth Height 1853 Capacity 386L 11.4 Cu.ft Rated Voltage / Frequency 220-240V/50Hz,60Hz 115V/60Hz C-FAN 12v, 2.2w 12v, 2.2w Motor rated consumption R-FAN 12v, 2.2w power F-FAN 12v, 2.2w Electric heater rated 200W(@120V) consumption power Kind of Refrigerator...
- Page 10 PRODUCT SPECIFICATIONS ITEM Specification Model RR39T7* RZ32T7* RQ32T7* Width Dimension (mm) Depth Height 1853 Capacity 380L 318L 319L Rated Voltage / Frequency 220-240V / 50Hz, 60Hz C-FAN DC12V, 1.15W DC12V, 1.15W Motor rated consumption R-FAN DC12V, 2.2W power F-FAN DC12V, 2.2W DC12V, 2.2W Electric heater rated 200W (@230V)
-
Page 11: 2-2) Electric Parts Specification
PRODUCT SPECIFICATIONS 2-2) Electric Parts Specification Classification/Model RR39M7**0** RR39M7**5** RZ11M7* Refrigerant R-600a, 62g R-600a, 72g R-600a, 62g Freezing Capacity E/STAR Model NC4AV80ALR/TT2 NN35J9602APTT3 NN34H9112APTT3 Compressor Starting type BLDC Components Oil Charge (cc) 200+10 Mineral 5(cc) for Freezer Evaporator Freezer Split Fin Type condenser(optional) Convection Type Dryer... - Page 12 PRODUCT SPECIFICATIONS Classification/Model RR39T7* RZ32T7* RQ32T7* Model NN35J9602APTT3 NN34H9112APTT3 NN34J9902APTT3 Compressor Starting type BLDC Oil Charge (cc) 200+10 Components Evaporator Freezer Split Fin Type for Freezer condenser convection Type Dryer molecular sieve HX-9, HX-7HP Capillary Tube OD1.8 × ID0.82 × L3500 Rated Voltage 220-240V / 50Hz, 60Hz Motor...
-
Page 13: 2-3) Dimension (Mm)
PRODUCT SPECIFICATIONS 2-3) Dimension (MM) ■ RR39M7*, RZ11M7* Depwth "A" 27 3/8" (694 mm) Width "B" 23 3/8" (595 mm) Over all Height "C" 73" (1853 mm) at least 50 mm 130° 14 7/8" (377 mm) 27 1/2" (967 mm) 22 7/8"... - Page 14 PRODUCT SPECIFICATIONS ■ RR39T7*, RZ32T7*, RQ32T7* Depth "A" 688 mm Width "B" 595 mm Over all Height "C" 1853 mm at least 50 mm 92° 62 mm 607 mm 575 mm 5.0 mm 1181 mm NOTE You can install the refrigerator as close to the wall as possible. However, the closer the refrigerator is to the wall, the larger the power consumption is.
-
Page 15: 2-4) Pair Installed Dimensions
PRODUCT SPECIFICATIONS 2-4) Pair Installed Dimensions ■ RR39M7*, RZ32M7* RZ11M7* : 1853 mm RZ32M7* : 1853mm RR39M7* : 1853mm at least 50 mm 130° 1939mm 1194mm Locker fixer Fixer Install direction NOTE You can install the refrigerator as close to the wall as possible. However, the closer the refrigerator is to the wall, the larger the power consumption is. - Page 16 PRODUCT SPECIFICATIONS ■ RR39R7*, RZ32R7*, RQ32R7* RR39R7* : 1853mm RZ32R7* : 1853mm RQ32R7* : 1853mm at least 50 mm 92° 1321mm 1194mm Locker fixer Fixer Install direction NOTE You can install the refrigerator as close to the wall as possible. However, the closer the refrigerator is to the wall, the larger the power consumption is.
-
Page 17: 2-5) Buttons And Display
• If your Internet service provider has registered the MAC address of your PC or modem for identification, your Samsung Smart Refrigerator may fail to connect to the Internet. If this happens, contact your Internet service provider for technical assistance. - Page 18 PRODUCT SPECIFICATIONS ■ Fridge ❸ Power Cool(3 sec) The Power Cool function lowers the fridge temperature and speeds up the cooling process. In the Power Cool mode, the fridge runs at full power for several hours and then returns to normal operation and the previous temperature setting. Use Power Cool to rapidly cool food that spoils quickly or to rapidly cool the refrigerator after the door has been left open for some time.
- Page 19 • To configure the wireless access point (AP) settings, see the user manual of the AP. • Samsung Smart Refrigerators featuring the Samsung Smart Home Dongle support both Wi-Fi 2.4 GHz with IEEE 802.11 b/g/n and Soft- AP protocols (IEEE 802.11 n is recommended).
- Page 20 PRODUCT SPECIFICATIONS ■ Freezer ❸ Power Freeze Power Freeze lowers the freezer temperature and speeds up the freezing process. In Power Freeze mode, the freezer runs at full power for several hours and then returns to normal operation and the previous temperature setting. •...
- Page 21 • To configure the wireless access point (AP) settings, see the user manual of the AP. • Samsung Smart Refrigerators featuring the Samsung Smart Home Dongle support both Wi-Fi 2.4 GHz with IEEE 802.11 b/g/n and Soft- AP protocols (IEEE 802.11 n is recommended).
- Page 22 PRODUCT SPECIFICATIONS ■ Freezer [Chinese] ❶ Temp. / Mode select press to set the desired temperature. • In Freezer mode, you can set the temperature between -15°C and -23°C. (Default temperature is -19°C) • In Fridge mode, you can set the temperature between 7°C and 1°C. (Default tamperature is 3°C) ❷...
- Page 23 PRODUCT SPECIFICATIONS ■ Freezer [North America] ❶ Temp. / Mode select press to set the desired temperature. • In Freezer mode, you can set the temperature between -8℉ and 5℉. (Default temperature is 0℉) • In Fridge mode, you can set the temperature between 34℉ and 44℉. (Default tamperature is 37℉) ❷...
-
Page 24: Disassembly & Reassembly
3. DISASSEMBLY & REASSEMBLY 3-1) Precaution • Unplug the refrigerator before cleaning and making repairs. • Do not dissemble or repair the refrigerator by yourself. - You run risk of causing a fire, malfunction and/or personal injury. • Remove any foreign substance or dust from the power plug pins. - Otherwise there is a risk of fire. -
Page 25: 3-2) Assy Door (Same For Freezer & Fridge Doors)
DISASSEMBLY & REASSEMBLY 3-2) Assy Door (Same For Freezer & Fridge Doors) Removing the Refrigerator Door PART NAME FIGURE DESCRIPTION 1. Open the dongle cover, and remove the space cover. 2. While holding down the lower areas (marked in the fig- ure) of the wire cover with both hands, lift up the wire cover. - Page 26 DISASSEMBLY & REASSEMBLY PART NAME FIGURE DESCRIPTION [Display type A] 4-1. Remove the top frame cover from the right side first. Then, pull out to the front. Removing the Refrigerator Door 4-2. Use a flat-head screwdriver to insert in the holes one after another on the top of the door to remove the top frame cover.
- Page 27 DISASSEMBLY & REASSEMBLY PART NAME FIGURE DESCRIPTION 5. Pull out the left side of the hinge cover to remove, and then slightly lift up the bottom to pull out. When removing the hinge cover, use caution not to damage the connectors and wires on or around the fridge door.
-
Page 28: 3-3) Door Components
DISASSEMBLY & REASSEMBLY 3-3) Door Components PART NAME FIGURE DESCRIPTION The door gasket is a molded gasket set into a channel located in the door liner. 1. Open the door. Door Gasket 2. Grasp the gasket and pull in an outward motion until the molded gasket separates from the door liner. - Page 29 DISASSEMBLY & REASSEMBLY PART NAME FIGURE DESCRIPTION 1. Remove the cover by using a flat head screwdriver. 2. Use a cross-head screwdriver to unscrew and remove the handle. Handle (Same for Freezer & Fridge Doors) Be careful to avoid damage to the door when removing the cover and handle.
-
Page 30: 3-4) Door Components
DISASSEMBLY & REASSEMBLY 3-4) Door Components PART NAME FIGURE DESCRIPTION 1. Using a cross-head screwdriver, remove two screws Water Dispenser from the inside of the dispenser. (Fridge Option Item) 2. Pull down the dispenser to remove. 1. Remove the guard above the water tank. Water Tank (Fridge 2. -
Page 31: 3-5) Freezer&Fridge Components
DISASSEMBLY & REASSEMBLY 3-5) Freezer&Fridge Components PART NAME FIGURE DESCRIPTION Plastic Drawer (Same for Freezer 1. Pull the drawer forward. & Fridge Compart- 2. Remove the drawer by tilting it. ments) Glass Shelf 1. Slightly lift up the shelf and pull it forward. (Same for Freezer &... -
Page 32: 3-6) Freezer Components
DISASSEMBLY & REASSEMBLY 3-6) Freezer Components PART NAME FIGURE DESCRIPTION 1. Remove all shelves and boxes. 2. Using a Phillips screwdriver, remove 4 screws Removing from the Evap cover. Evap-Cover 3. Pull the cover up by the lower part. 4. Remove from the connectors behind it. - Page 33 DISASSEMBLY & REASSEMBLY PART NAME FIGURE DESCRIPTION 1. Remove 1 screw from the center of the Cover Multi. 2. Pull up the lower part. Removing 3. Pull out by the upper left and right corners. Cover-Mutl 4. Hold and pull the both sides. 5.
-
Page 34: 3-7) Evaporator
DISASSEMBLY & REASSEMBLY 3-7) Evaporator PART NAME FIGURE DESCRIPTION 1. Remove the Fridge Evap-Cover. 2. Remove the wire connectors at the top (Heater, Bimetal, Thermistor) 3. After reclaiming the refrigerant gas, the pipe can Fridge Evaporator be cut to remove the evaporator. 4. -
Page 35: 3-8) Electric Components
DISASSEMBLY & REASSEMBLY 3-8) Electric Components PART NAME FIGURE DESCRIPTION Power Box (Same for Freezer 1. Using a Phillips screwdriver, remove four screws as & Fridge shown in the figure. Compart-ments) - Page 36 DISASSEMBLY & REASSEMBLY PART NAME FIGURE DESCRIPTION 1. Remove 4 screws. Fan Motor (Same for Freezer & Fridge) 2. Remove 3 screws.
- Page 37 DISASSEMBLY & REASSEMBLY PART NAME FIGURE DESCRIPTION Cover Case 1. Remove screw by turning counterclockwise, and Junction take off the Cover case junction by pulling out. 1. Remove 5 screws by turning to counterclockwise, Cover Compressor and take off the Cover Compressor by pulling out.
-
Page 38: 3-9) Machine Compartment
DISASSEMBLY & REASSEMBLY 3-9) Machine Compartment PART NAME FIGURE DESCRIPTION 1. Remove the Cover Comp. 2. Disconnect the Wire Connector. Push Push Push Push Push Push Push Push Motor Fan 3. Turn the Dryer to the left(Don't move it too much not to occur pipe fatigue failure), remove the Assy Cap Drain. - Page 39 DISASSEMBLY & REASSEMBLY PART NAME FIGURE DESCRIPTION 1. Remove Cover Relay. Relay O/L 2. Remove the relay O/L with a flat-blade screwdriver. (Refer to the picture)
-
Page 40: 3-10) Compressor
DISASSEMBLY & REASSEMBLY 3-10) Compressor PART NAME FIGURE DESCRIPTION 1. Cut off the Lokring connecting the comp and the con- denser or immersion pipe with a pipe cutter. (Red-line marking point) 2. Cut off the LOKRING connecting the CONDENSER or im- mersion pipe and the HOT PIPE with a Pipe Cutter. -
Page 41: 3-11) Pair Installation
DISASSEMBLY & REASSEMBLY 3-11) Pair Installation ■ Installation Kit PART NAME Q’ty Rear reinforced hinges Locker fixer Bottom reinforced hinge Tapping screws (A) Tapping screws (B) Fixer ■ How to install Make sure to power off both refrigerators. 01 15 mm 1. - Page 42 DISASSEMBLY & REASSEMBLY 3. Join the legs of the two refrigerators using the bottom reinforced hinge and the tapping screws. 4. Insert one end of the fixer between the two top front covers by making a gap. 5. Push the fixer all the way up.
-
Page 43: 3-12) Reversing The Door Swing
DISASSEMBLY & REASSEMBLY 3-12) Reversing the Door swing Read these instructions completely and carefully • Before reversing the door, first of all, main power should be switched off. you should take out contents and accessories like door guard from the doors. Be careful not to drop the doors during dissembling or assembling. Warning 1. - Page 44 DISASSEMBLY & REASSEMBLY PART NAME FIGURE DESCRIPTION 1. Using a flat head screwdriver, unscrew and remove the handle cover. 2. Using a Phillips screwdriver, remove 1 screw from the DOOR Reversing top / bottom of the handle. Keep the handle to assemble on the other side. 3.
- Page 45 DISASSEMBLY & REASSEMBLY PART NAME FIGURE DESCRIPTION 1. Open the dongle cover, and remove the space cover. 2. While holding down the lower areas (marked in the figure) of the wire cover with both hands, lift up the wire cover. 3.
- Page 46 DISASSEMBLY & REASSEMBLY PART NAME FIGURE DESCRIPTION [Display type A] 4-1. Remove the top frame cover from the right side first. Then, pull out to the front. DOOR Reversing 4-2. Use a flat-head screwdriver to insert in the holes one after another on the top of the door to remove the top frame cover.
- Page 47 DISASSEMBLY & REASSEMBLY PART NAME FIGURE DESCRIPTION 5. Pull out the left side of the hinge cover to remove, and then slightly lift up the bottom to pull out. When removing the hinge cover, use caution not to damage the connectors and wires on or around the fridge door.
- Page 48 DISASSEMBLY & REASSEMBLY PART NAME FIGURE DESCRIPTION 8. Unscrew the cam riser and stopper. 9. Screw them to the other side in reverse order. 10. Lay down the cabinet. DOOR Reversing 11. Using a Phillips screwdriver, unscrew the hinge low from the bottom.
- Page 49 DISASSEMBLY & REASSEMBLY PART NAME FIGURE DESCRIPTION 12-2. Using a 12mm wrench, remove the nut on the back. 12-3. Using a Phillips screwdriver, remove the shaft and assemble to the other side. 12-4. Screw the nut the bolt on the back. DOOR Reversing 13.
- Page 50 DISASSEMBLY & REASSEMBLY PART NAME FIGURE DESCRIPTION 16. Pull out the connector to the other side and reassem- ble the cover control front. DOOR Reversing 17. To assemble the door to the cabinet, mount the door to the lower hinge and then the upper hinge.
- Page 51 DISASSEMBLY & REASSEMBLY PART NAME FIGURE DESCRIPTION 18. Attach the connector and assemble the cover wire hinge. 19-1. Assemble the top frame cover by pushing the cover in toward the hinge. DOOR Reversing (Internal Display) 19-2. Assemble the top frame cover by pushing the cover in toward the hinge.
- Page 52 DISASSEMBLY & REASSEMBLY PART NAME FIGURE DESCRIPTION Rotate 90° 20-1. Arrange the wire connected to the cover usb. 20-2. Turn the cover wire door by 90 degrees to insert in the cover usb. Then turn the cover wire door back by 90 degrees.
-
Page 53: Troubleshooting
4. TROUBLESHOOTING 4-1) Test Function (Forced Operation & Defrost) 1) During the normal operation, press the Fridge Key + Power Cool buttons at the same time for 6 seconds. Then, the entire Display Panel will blink at intervals of 0.5 second for 4 seconds. 2) Before this 4-second blinking time finishes, release the Fridge + Power Cool or Freezer + Power Freezer or Temp + Power Freezer buttons and press the Power Cool or Power Freezer button. - Page 54 TROUBLESHOOTING 1) Forced Operation Function 1-1) When the Power Cool or Power Freezer button is pressed once during the Test mode, “FF” lights up on the Display Panel indicating that it is in the Forced Operation. At this time, it starts alarming with “Beep” sounds. 1-2) When the Forced Operation is selected, the compressor starts without a 7-minute delay in any operation mode.
-
Page 55: 4-2) Self-Diagnosis
TROUBLESHOOTING 4-2) Self-Diagnosis 1) Self Diagnosis with Initial Power-On 1-1) When the unit is plugged in, its MICOM checks if there are no defects in the various sensors within a few seconds. 1-2) When there is any defective sensor during the Self-Diagnosis, each error code lights up on the display every 2 seconds in sequence. - Page 56 TROUBLESHOOTING 2-4) During the Self-Diagnosis, it is not possible to control the buttons. [External Display] [Internal Display] When the Fridge 7-segment blinks, its related sensors or parts are defective. Fridge Ex) 2: Defective Fridge Sensor...
- Page 57 TROUBLESHOOTING Self-Diagnosis Check List Fridge 7-Segment Item Defect Description RZ32T7* RR39T7* RQ32T7 RZ11M7* Room Sensor Error When an open/short sensor error occurs. Defrost Sensor Error When an open/short sensor error occurs. EXT-SENSOR Error When an open/short sensor error occurs . Fan Error When a fan restriction error occurs.
-
Page 58: Board
TROUBLESHOOTING - 2 BOARD Self-Diagnosis Error Code Description Error Code Item Description Trouble Shooting Image Voltage between MAIN PCB CN30 Room Sensor #5 AND #6 should be within Error 4.5V~1.0V. Slipped out Sensor Housing, Wire-Cut, Wire-Short, When Voltage between MAIN PCB CN31 Defrost Sensor the sensor pickup temp is #7 AND #8 should be within... - Page 59 TROUBLESHOOTING Error Code Item Description Trouble Shooting Image The error code is displayed Comp Starting when the compressor has Failure Error failed to start. Check the soldering status of the inverter PCB. (Check if any parts have short-circuited). Check if the DC 16V output is less than 1 3.5V.Check the Comp and Cycle.
-
Page 60: Board
TROUBLESHOOTING - 1 BOARD Self-Diagnosis Error Code Description Error Code Item Description Troubleshooting Image RZ32R7* RR39R7* RQ32R7* RZ11M7* Voltage between MAIN Room Sensor PCB CN30 #13 AND Error #15 should be within 4.5V~1.0V. Slipped out Sensor Housing, Wire-Cut, Voltage between MAIN Wire-Short, When the Defrost Sensor PCB CN30 #9 AND... - Page 61 TROUBLESHOOTING Error Code Item Description Troubleshooting Image RZ32R7* RR39R7* RQ32R7* RZ11M7* Check the compressor wire connections. Comp The error code is Check the soldering status Abnormal displayed when the of the inverter PCB. Current compressor location (Check if any parts have Detection Error detection failed.
-
Page 62: 4-3) Load Display Function
TROUBLESHOOTING 4-3) Load Display Function 1) At the normal operation, press the Fridge + Power Cool or Freezer + Power Freezer or Temp + Power Freezer buttons for 6 seconds. Then, the entire Display Panel blinks at intervals of 0.5 second for 4 seconds. 2) At this time, release the Fridge + Power Cool or Freezer + Power Freezer or Temp + Power Freezer buttons and press the Alarm button. - Page 63 TROUBLESHOOTING 5) The following image shows load location with the 7-segment LED. [External Display] [Internal Display] Load Mode Check List Item Display LED Description COMP [7 in the ones place of Room R]-Segment “a” COMP On Fan (Cooling Fan) LED ON during the highest level of "b"...
-
Page 64: 4-4) Operation Restoration Function Upon Instant Power Outage
TROUBLESHOOTING 4-4) Operation Restoration Function upon Instant Power Outage 1) If the Display Panel is initialized by the instant power outage, it will cause customer inquiries. To prevent this, when the power is restored, the previous settings will be restored or reset based on the temperature inside the unit. 4-5) Demo Mode Function North America 1) At the normal operation, press the Power Freezer + Alarm buttons for 6 seconds. - Page 65 TROUBLESHOOTING 1) At the normal operation, press the Power Cool or Power Freezer + Alarm buttons for 6 seconds. Then, the entire Display Panel blinks at intervals of 0.5 second for 4 seconds. 2) At this time, release the Power Cool or Power Freezer + Alarm buttons and press the Fridge or Freezer button. Then, with “Ding Dong”...
-
Page 66: 4-6) Option Setting Function
TROUBLESHOOTING 4-6) Option Setting Function 1) At the normal operation, press the Fridge or Freezer + Power Cool or Power Freezer buttons for 6 seconds. Then, the entire Display Panel blinks at intervals of 0.5 second for 4 seconds. 2) At this time, release the Fridge or Freezer + Power Cool or Power Freezer buttons and press the Fridge or Freezer button. Then, with “Ding Dong”... - Page 67 TROUBLESHOOTING 3) When the Display Panel converts to the Option Setting mode, the entire Display except the Fridge as shown below Temp LED goes off. [External Display] [Internal Display] OPTION VALUE OPTION ITEM Control Lock Icon 7-SEG DISPLAY TEMP SHIFT 3-1) For example, if you want to shift the standard temp of the Fridge/Freezer compartment by -2°C, follow the steps below.
- Page 68 TROUBLESHOOTING 3-2) After changing into the Option mode, “0” lights up on the display panel. (when units being shipped out, all the data in the Option function are cleared. However, for the purpose of quality improvement during mass production, the Default values may change.) - When only “0”...
-
Page 69: 4-7) Option Table
TROUBLESHOOTING 4-7) Option Table 1) Fridge Temp Shift Table Example) When shifting the Fridge default temp by -2°C Setting Freezer Temp Shift (Option Item Value :0) ITEM Fridge Temp Shift (Option Item Value :1) RZ32R *, RZ 32T7* - Option Item Value : 0 RR39M7* - Option Item Value : 1 MODEL... - Page 70 TROUBLESHOOTING 2) Display ON/OFF Setting Table Application Example) In case you want to cancel the Display OFF mode Setting Display On/Off Control ITEM (Opion Item Value : 16) RZ32R *, RZ 32T7*, RR39M7*, MODEL RZ11M7*, RZ 32T7* Panel Icon On/Off States Child Lock : Reference Power Cool :...
-
Page 71: 4-8) Fridge Temperature Setting Function
TROUBLESHOOTING 4-8) Fridge Temperature Setting Function 1) Press Fridge and Freezer buttons for 3 seconds to activate temperature setting function with a buzzer sound. 2) How to set the ROOM temperature - Press Store Kimchi button Temperature decreases by -0.3℃ - Press Ferment Kimchi button Temperature increases by +0.3℃... -
Page 72: 4-9) When Self-Diagnosis Error Occurs
TROUBLESHOOTING 4-9) When Self-Diagnosis Error occurs - 2 BOARD - The Display Panel shows the Sensor Error and, when the unit is plugged in and there are sensor errors, the unit does not operate and LED related to the defective sensors keep blinking. - When sensor defects occur during the operation, the unit keeps working. - Page 73 TROUBLESHOOTING - 2 BOARD 2) When the EXT Sensor is defective Start ERROR CODE MAIN PCB SENSOR (CN31) is inserted properly? Connector contact defect / Reconnect DATA1. Temp Table EXT Sensor is normal? ** Sensor Resistance Reading Location ** Replace Temp Sensor Ambient : Between CN31 #3 and #4.
- Page 74 TROUBLESHOOTING - 2 BOARD 3) When the R-DEF-Sensor is defective ERROR CODE Start Fridge model MAIN PCB Connector CN31 is inserted properly? Connector contact defect / Reconnect Freezer, Kimchi model DATA1. Temp Table F-DEF Sensor is normal? ** Sensor Resistance Reading Location ** Replace Temp Sensor F-DEF : Between CN31 #7 and #8 ** 0Ω...
- Page 75 TROUBLESHOOTING - 1 BOARD - The Display Panel shows the Sensor Error and, when the unit is plugged in and there are sensor errors, the unit does not operate and LED related to the defective sensors keep blinking. - When sensor defects occur during the operation, the unit keeps working. But, it shifts to the Emergency Operation and it may not work properly.
- Page 76 TROUBLESHOOTING - 1 BOARD 2) When the EXT Sensor is defective ERROR CODE Start MAIN PCB SENSOR (CN30) is inserted properly? Connector contact defect / Reconnect DATA1. Temp Table EXT Sensor is normal? ** Sensor Resistance Reading Location ** Replace the Temp Sensor. EXT : Between CN30 #5 and #7.
- Page 77 TROUBLESHOOTING - 1 BOARD 3) When the R-DEF-Sensor is defective ERROR CODE Start Fridge model MAIN PCB Connector CN30 is inserted properly? Connector contact defect / Reconnect Freezer, Kimchi model R-DEF Sensor is normal? DATA1. Temp Table ** Sensor Resistance Reading Replace the Temp Sensor.
-
Page 78: 4-10) When The C-Fan Does Not Operate (Applies To Models With C-Fan)
TROUBLESHOOTING 4-10) When the C-Fan does not operate (Applies to Models with C-Fan) - 2 BOARD - This refrigerator uses the BLDC Fan Motor. - The BLDC Motor operates with DC 7~12V. - The C-Fan motor generally runs together with the compressor. ▶... - Page 79 TROUBLESHOOTING - 1 BOARD - This refrigerator uses the BLDC Fan Motor. - The BLDC Motor operates with DC 7~12V. - The C-Fan motor generally runs together with the compressor. ▶ When checking with the Self Diagnosis Start ERROR CODE The Compressor is Off.
-
Page 80: 4-11) When The R-Fan Does Not Operate(Applied To Models With R-Fan)
TROUBLESHOOTING 4-11) When the R-Fan does not operate(Applied to Models with R-Fan) - 2 BOARD - This refrigerator uses the BLDC Fan Motor. - The BLDC Motor operates with DC 7~12V. - The R-Fan motor generally runs together with the compressor. ▶... - Page 81 TROUBLESHOOTING - 1 BOARD - This refrigerator uses the BLDC Fan Motor. - The BLDC Motor operates with DC 7~12V. - The R-Fan motor generally runs together with the compressor. ▶ When checking with the Self Diagnosis ERROR CODE Start The Compressor is Off.
-
Page 82: 4-12) When Defrost Does Not Work (F Def Heater)
TROUBLESHOOTING 4-12) When Defrost does not work (F DEF Heater) - 2 BOARD - When there is a trouble in defrosting, select the Self-Diagnosis function before turning off the unit. And, check if there is any defect in the Defrost Heater. If not, plug out the unit and do the Trouble-Shooting. (Refer to the Self-Diagnosis function and check the details.) ▶... -
Page 83: 4-13) When The Compressor Is Not Working (Inverter Pba)
TROUBLESHOOTING 4-13) When the Compressor is not working (INVERTER PBA) - 2 BOARD Start When the inverter PBA LED is ON, it indicates that the compressor does operate normally 10 minutes have passed since COMP was off Check in 10 minutes When Forced Refer to the TEST Function in this Operation mode is activated,... - Page 84 TROUBLESHOOTING - 1 BOARD Start When the inverter PBA LED is ON, it indicates that the compressor does operate normally. 10 minutes have passed since COMP was off. Check in 10 minutes. When Forced Refer to the TEST Function Operation mode is activated, in this manual.
-
Page 85: 4-14) When The Unit Keeps Alarming (Buzzer Sound)
TROUBLESHOOTING 4-14) When the unit keeps alarming (Buzzer Sound) - 2 BOARD [Note] 1. Fridge / Freezer Door Open Alarm : It sends out an alarm sound when it passes over 2 minutes after the door is open. And, when the door remains open, it will keeps alarming every minute. - Page 86 TROUBLESHOOTING - 2 BOARD 3) No Buzzer Sound This model has a buzzer affixed on the MAIN PCB. If there is no buzzer sound upon button press, Forced Operation or Door Open, disconnect MAIN PCB and check if the buzzer is damaged or there is any defective soldering. (If it is not a soldering problem, it is recommended replacing MAIN PCB due to difficulties in repairing) ※...
- Page 87 TROUBLESHOOTING - 1 BOARD [Note] 1. Fridge / Freezer Door Open Alarm : It sends out an alarm sound when it passes over 2 minutes after the door is open. And, when the door remains open, it will keeps alarming every minute. 2.
- Page 88 TROUBLESHOOTING - 1 BOARD 3) No Buzzer Sound This model has a buzzer affixed on the MAIN PCB. If there is no buzzer sound upon button press, Forced Operation or Door Open, disconnect MAIN PCB and check if the buzzer is damaged or there is any defective soldering. (If it is not a soldering problem, it is recommended replacing MAIN PCB due to difficulties in repairing) ※...
-
Page 89: 4-15) When The Room Lamp (Led) Does Not Light Up
TROUBLESHOOTING 4-15) When the Room Lamp (LED) does not light up - 2 BOARD Start Door & MICOM State DOOR S/W MICOM(#8) Close 0V(Low) DOOR S/W works Open 5V(High) normal (Open/Close) Check & Replace REED S/W MICOM State & Magnet Ass'y F or R IC01 MICOM #62 Output DOOR... - Page 90 TROUBLESHOOTING - 1 BOARD Door & MICOM state Start DOOR S/W MIC01 #1 Close 0V(Low) DOOR S/W works normal Open 5V(High) (Open/Close). Check and Replace the Reed S/W & MICOM state Magnet Ass'y. F or R DOOR MIC01 MICOM #50, #51,#52 output voltage is normal.
-
Page 91: 4-16) When Panel Pcb Operates Abnormally
TROUBLESHOOTING 4-16) When PANEL PCB operates abnormally - 2 BOARD 1) When PANEL PCB does not light up or partially does Start Refer to Wiring Diagram attached in The connector on the Fridge this manual and check the Electrical Top Table is inserted properly. Diagrams attached on the back of Re-insert Connector, the unit. - Page 92 TROUBLESHOOTING - 1 BOARD 1) When Panel PCB does not light up or partially does Start Refer to Wiring Diagram attached in The connector on the this manual and check the Electrical Top Table is inserted properly. Diagram attached on the back of the Re-insert the connector and unit.
-
Page 93: 4-17) When There Is No Power In Main Pcb
TROUBLESHOOTING 4-17) When there is no Power in Main PCB - 2 BOARD - When checking the MAIN PCB, refer Start Caution to the Operation descriptions and the There is AC220~240V or DC310~340V "Reference" section. at the MAIN PCB Power Circuit. So, be cautious when repairing the unit or measuring values. - Page 94 TROUBLESHOOTING - 1 BOARD - When checking the MAIN PCB, refer Start Caution to the Operation descriptions and the There is AC220~240V or DC310~340V "Reference" section. at the Main PCB Power Circuit. So, be cautious when repairing the unit or measuring values. Is the unit plug inserted? Plug in the unit.
-
Page 95: 4-18) Led Blinking Frequency Depending On Protecting Functions (Inverter Pba)
TROUBLESHOOTING 4-18) LED blinking frequency depending on protecting functions (Inverter PBA) If Failure Condition is detected during compressor is operating, immediately stop Compressor operating and stand by 5 minutes. During this 5 minutes, RPM command signal is not available. It means, even if available RPM command signal is applied to the compressor, it does not work and keep standing by. -
Page 96: Pcb/Pba Diagram
12. Buzzer Alarm : It sends out periodic alarm sounds when a button is pressed or when the door is opened 13. Converting AC power source to DC power source (Noise filter and SMPS) This document can not be used without Samsung's authorization. -
Page 97: 5-2) Parts Layout (Inverter Board)
4. BOOTSTRAP Charger : It is an independent power circuit for the driving of the IPM High-Phase IGBT. 5. Current Sensing Circuit : It pickups the currents taken by the Shunt resistance and does the PWM DUTY control. 6. IPM (IGCM04G60HA) This document can not be used without Samsung's authorization. -
Page 98: 5-3) Parts Layout (Main Board)
4. Main & EEPROM : Load control and data storage 5. Relay Block: AC load control (Heater control) 6. Sensor, Switch, Fan Motor control 7. Main ↔ Display signal transmission 8. Room Lamp control This document can not be used without Samsung's authorization. -
Page 99: 5-4) Connector Layout & Description (Main Board)
PCB/PBA DIAGRAM 5-4) Connector Layout & Description (Main Board) - 2 BOARD This document can not be used without Samsung's authorization. -
Page 100: 5-5) Connector Layout & Description (Inverter Board)
PCB/PBA DIAGRAM 5-5) Connector Layout & Description (Inverter Board) - 2 BOARD This document can not be used without Samsung's authorization. -
Page 101: 5-6) Connector Layout & Description (Main Board-Freezer/Kimchi)
③ : AC HEATER ⑤ : N/A ⑦ : F/G CN10 AC INPUT CN102 COMP ① : N1 ① : COMP SIGNAL_U ② : L1 ③ : COMP SIGNAL_V ⑤ : COMP SIGNAL_W This document can not be used without Samsung's authorization. -
Page 102: 5-7) Connector Layout & Description (Main Board-Fridge)
③ : N/A ⑤ : N/A ⑦ : F/G CN10 AC INPUT CN102 COMP ① : N1 ① : COMP SIGNAL_U ② : L1 ③ : COMP SIGNAL_V ⑤ : COMP SIGNAL_W This document can not be used without Samsung's authorization. -
Page 103: Wiring Diagram
6. WIRING DIAGRAM 6-1) Wiring Diagram - 2 BOARD This document can not be used without Samsung's authorization. - Page 104 WIRING DIAGRAM - 2 BOARD (B-PJT) This document can not be used without Samsung's authorization.
- Page 105 WIRING DIAGRAM - 1 BOARD This document can not be used without Samsung's authorization.
-
Page 106: Block Diagram
7. BLOCK DIAGRAM 7-1) PBA Main - 2 BOARD This document can not be used without Samsung's authorization. -
Page 107: 7-2) Block Diagram (Pba Inverter)
BLOCK DIAGRAM 7-2) Block Diagram (PBA Inverter) - 2 BOARD This document can not be used without Samsung's authorization. -
Page 108: 7-3) Pba Main
Sensing Circuit DC12V Fan F/G Sensor Signal Motor Operation R Room Lamp FG Signal Occurrence F DEF R/C FAN Humidity BLDC FAN SENSOR * : Option AC Power DC Power Signal This document can not be used without Samsung's authorization. -
Page 109: References
8. REFERENCES REFERENCES 8-1) Model Code table ■ Freezer Feature 1 Feature 2 Feature 3 Type Basic Year Series Color BUYRE (Exterior) (Interior) (Energy) Code / W W Metal Metal HOT STAMPING Fridge Pair Kit Door Display Dispenser Handle Wi-Fi Cooling Cooling ICE MAKER... - Page 110 REFERENCES REFERENCES ■ Fridge Feature 1 Feature 2 Feature 3 Type Basic Year Series Color BUYRE (Exterior) (Interior) (Energy) Code Metal Metal Shelf HOT STAMPING Take out Foldable Bottle Humidity Variety Pair Kit Display Display Dispenser Handle Wi-Fi Cooling Cooling (Include cover (R-Box, Guard, Energy...
- Page 111 REFERENCES REFERENCES ■ Kimchi Feature 1 Feature 2 Feature 3 Type Basic Year Series Color BUYRE (Exterior) (Interior) (Energy) Code Metal Metal HOT STAMPING FLIP 김치통 김치통 Door Display Dispenser Handle Wi-Fi BOX Easy Slide Shelf Energy Cooling Duct Cooling Door (Guard,F-Box,Shelf) COVER 큰용량...
-
Page 112: 8-2) Cycle Repair Standard Working Process
REFERENCES 8-2) Cycle repair standard working process Vacuuming ※ 2 Side vacuuming → more than 20min ※ Gas Leakage case VACUUMING PRESSURE IS NOT GOING TO MORE THAN -29 PSI... - Page 113 REFERENCES GAS CHARGING AND cycle DEFEC CHECKING (10 MIN after Compressor operation ) ※ cycle blockage : under -25PSI ※ normal : R-134A → 2PSI R-600A : -10PSI~20PSI...
- Page 114 • Europe, Mid east, Africa : http://gspn1.samsungcsportal.com • Asia : http://gspn2.samsungcsportal.com • North America : http://gspn3.samsungcsportal.com - This Service Manual is a property of Samsung Electronics Co., Ltd. Any unauthorized use of Manual can be punished under applicable International or domestic law.
Need help?
Do you have a question about the RR39M7 Series and is the answer not in the manual?
Questions and answers