Pentair PENTEK INTELLIDRIVE Owner's Manual
Constant pressure controller
Hide thumbs
Also See for PENTEK INTELLIDRIVE:
- Quick start manual (2 pages) ,
- Quick start manual (2 pages) ,
- Quick start manual (2 pages)
Advertisement
Quick Links
Installation / Operation / Parts
Should you the installer or owner be unfamiliar with the correct installation or operation
of this type of equipment you should contact the distributor/manufacturer for the correct
advice before proceeding with the installation or operation of this product.
Advertisement

Related Manuals for Pentair PENTEK INTELLIDRIVE


Summary of Contents for Pentair PENTEK INTELLIDRIVE
- Page 1 Installation / Operation / Parts Should you the installer or owner be unfamiliar with the correct installation or operation of this type of equipment you should contact the distributor/manufacturer for the correct advice before proceeding with the installation or operation of this product.
- Page 2 Read the Owner’s Manual and related documentation Always hang the VFD box before connecting the wires to it. carefully before attempting to install or operate the PENTEK INTELLIDRIVE . Make sure that you have a full Risk of electrical shock if the VFD is knowledge of the equipment, safety information, and handled or serviced with wet or damp hands.
- Page 3 ..........Owner’s Information PENTEK INTELLIDRIVE Model No. _________________________ EMI/RFI Filter PENTEK INTELLIDRIVE Serial No.
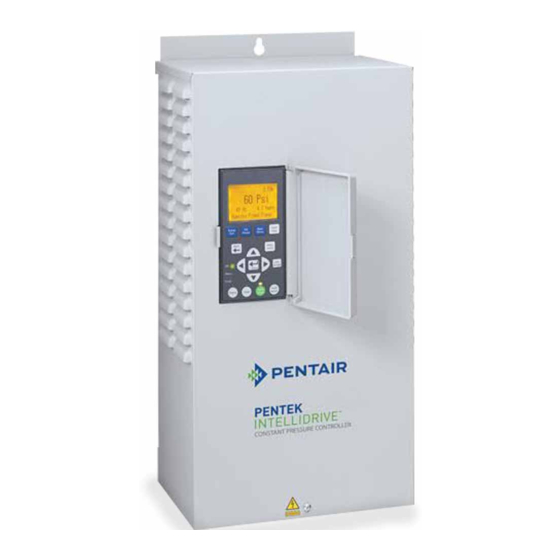
- Page 4 PID20 13.5 Product Family 3-phase PID - PENTEK INTELLIDRIVE The PENTEK INTELLIDRIVE is specifically designed to operate 4” submersible pumps and Voltage Rating: 3-phase, 220V above ground pumps in water well 1 = 190-265 Volt 1 phase input and residential booster applications. Each Drive is rated for maximum output amp rating.
- Page 5 Description Transducer Keypad The PENTEK INTELLIDRIVE uses a 4-20mA, 0-668 The keypad programs the Drive, monitors the kPa pressure transducer to control motor speed status of the pump, and displays faults if they (max is 2068 kPa transducer). occur. Each button has a unique function, as described in Figure 2.
- Page 6 Installation Table 2 - Circuit breaker and wire sizes Wire Size* Drive Circuit Generator Motor Volts Motor HP Model Breaker** (kVA)*** Input Output 25 (with RCD, 2-wire 2.5mm² 2.5mm² PID20 1-1/2 Ref page2 ) 1-1/2 25 (with RCD, PID20 2.5mm² 2.5mm²...
- Page 7 Installation Mounting the Drive Ensure the Drive’s ventilation holes are not blocked and there is enough space To mount the Drive as shown in Figure 6, follow around it to allow free air flow (minimum this procedure: 75mm clearance on top, bottom, and sides). First, remove the cover by backing out screw See Figure 6.
- Page 8 Wiring Pump Connections To allow for ease of wiring, the enclosure If the PENTEK INTELLIDRIVE is used with above wiring area is free of electronics other than ground motors not rated for Variable Frequency the terminals. Conduit holes and knockouts...
- Page 9 Table 3. NOTICE Set pressure tank’s pre-charge to 70 percent of the system operating pressure. When NOTICE The PENTEK INTELLIDRIVE only accepts using an external set point as well as an internal 230V single phase input power. If incoming power...
- Page 10 1. Program the Drive: Apply power to the performance of the pump. PENTEK INTELLIDRIVE. Setup Guide will appear • For any 1-Phase 3-Wire motor, the correct in the display. Follow keypress sequence shown Service Factor Amp rating for the Drive is Cap in Figure 10.
- Page 11 4. Verify installation: Make sure that the system has properly-sized, pressure-relief valve and Table 9 lists all available commands and pressure tank. parameters for the PENTEK INTELLIDRIVE. Make sure pressure tank’s precharge is correct. (See Table 7). Make sure pump discharge is connected to system.
- Page 12 NOTICE Default pressure setting is 414 kPa. If The password locks or unlocks the blue buttons on keypad. All PENTEK INTELLIDRIVE units are shipped this value is changed, adjust tank pressure ac- from factory with the default password 7777. It can cordingly (see Table 7).
- Page 13 Programming Table 9 lists all available commands and parameters for the PENTEK INTELLIDRIVE. Table 9 - Main Menu and Parameters Value Menu Unit of Parameter Description Settings Measure Default Min. Max. Hour Format Hours 12Hr 12Hr 24Hr Selects 12 or 24 hour time scale.
- Page 14 Programming Table 9 (continued) Value Menu Unit of Parameter Description Settings Measure Default 668 kPa Main pressure setpoint used. Sets (Max main system operational pressure. Internal Sensor This parameter is accessed here, 414 kPa 103 kPa Setpoint Value through PSI Preset button, or by minus pressing Enter button while in 30 kPa)
- Page 15 Programming Table 9 (continued) Value Menu or Unit of Parameter Description Sub Menu Measure Default Excessive Enabled Disabled Enabled Enables or disables Excessive Runtime Runtime Detection. Detection Excessive Number of hours Drive can run Runtime Hours before it faults on Excessive Runtime.
- Page 16 I/O Connections The I/O terminals are located in the center of the wiring compartment, as shown previously in Figure 9. The Digital Input connections (I1 and I2) are used to control the Drive based on the state of an external device, such as a flow switch, moisture sensor, alternator, or other device.
- Page 17 I/O Connections Table 10 - I/O Function, Connections, Ratings Label Function Connection Rating Positive connection for transducer Red transducer wire 24 Volt (supplied) Negative connection for transducer Black transducer wire Positive side of 24V external device, i.e., Positive side of 24 volt power supply. flow switch, moisture sensor, alternator, Used to power external devices.
- Page 18 VFD-SGA 300 PSI Transducer U17-2000 Flow Switch U17-1999 Retrofit Applications When retrofitting an installation with the PENTEK INTELLIDRIVE, most of the preceding text can be applied. The recommended Service Factor Amps for non-PENTEK motors please refer to the manufacturer literature.
- Page 19 Troubleshooting* Fault Possible Causes Solution Shorted output Check for any shorts in motor cables. Over Current Locked rotor Check for debris in pump. Damaged wire insulation Check motor wire insulation with a megger. With power to Drive off, measure outputs with Internal Drive short ohmmeter to detect short.
- Page 20 Troubleshooting (continued) Fault Possible Causes Solution Check all transducer wires are securely Intermittent connection connected or for damaged cable insulation. Check for proper wiring of all transducer wires Open Connection and verify cable connector securely attached to transducer. Open Transducer Check electrical system for ground loops or no Drive cannot read transducer signal ground connection.
- Page 21 Troubleshooting Drive Reset Procedure Follow the keypress sequence shown below to test the Drive. Press Password button Enter Passwword (Default is 7777) Press Enter Press Main Menu button Press up or down arrow until Reset appears Press Enter to Edit Change “No”...
- Page 22 5. Return the mounting panel and Intellidrive to the enclosure and bolt securely in place. Enclosure The Pentek Intellidrive shall be installed in an EMC shielded enclosure. The EMC enclosure shall be rated for use from 0 up to 1GHz and shall have a rated attenuation of at least 35dB at 1GHz.
- Page 23 EMC INSTALLATION (continued) Earthing Note: All earth wiring shall be installed as per the Wiring 3. Remove the cable sheathing, from the end of the Rules (AS/NZS 3000). cable, to expose the shielding. Remove a sufficient amount to ensure the shielding will be in contact Connect an earth strap between the enclosure and the with the cable gland and also to allow enough enclosure door to ensure a low resistance earth...
Need help?
Do you have a question about the PENTEK INTELLIDRIVE and is the answer not in the manual?
Questions and answers