
Related Manuals for Omnicomm LLS 30160


Summary of Contents for Omnicomm LLS 30160
- Page 1 Omnicomm LLS 30160, LLS-AF 4 Fuel Level Sensors User Manual Omnicomm Configurator 6 03.08.2018...
-
Page 2: Table Of Contents
Contents General Information Specifications Preparation Fuel Tank Preparation Sensor Preparation Setting “Empty/Full” Calibration Omnicomm LLS 30160 Sensor Setting Omnicomm LLS-AF 4 Sensor Setting Installation and Connection Calibration Appendix. List of equipment for Omnicomm LLS fuel level sensors installation Sealing... -
Page 3: General Information
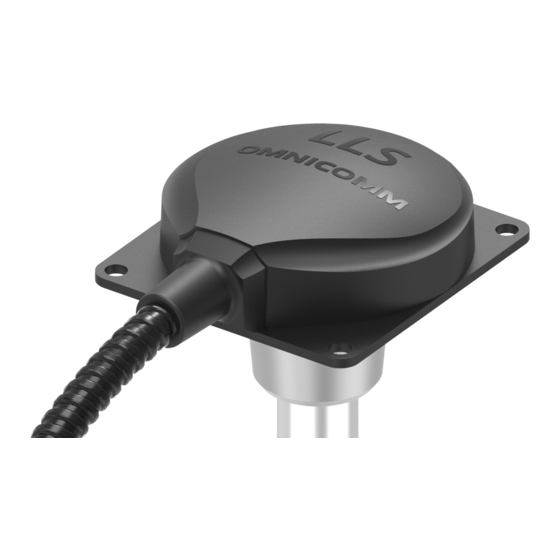
Omnicomm LLS 30160, LLS-AF 4 Fuel Level Sensors General Information This User Manual is designed for Omnicomm LLS 30160 and Omnicomm LLS-AF 4 fuel level sensors. Omnicomm LLS 30160 is a fuel level sensor with RS-232 and RS-485 interfaces. Omnicomm LLS-AF 4 is a fuel level sensor with analog and frequency interfaces. -
Page 4: Specifications
Relative humidity at 25 °С (without moisture From 5 to 95 conden-sation), % Atmospheric pressure, kPa From 84 to 107 Maximum relative humidity at 25 °С (without moisture condensation), % Ingress protection rating IP69k Omnicomm LLS 30160, LLS-AF 4 Fuel Level Sensors... - Page 5 38400, 57600, 115200 Digital reading range corresponding to the maximum level 1…4095 measurement value Digital reading range corresponding to the minimum level 0…1023 measurement value Temperature measuring range, °C From -40 to +80 Omnicomm LLS 30160, LLS-AF 4 Fuel Level Sensors...
- Page 6 Frequency pulse Output frequency range, Hz 30…2000 Maximum output signal frequency, Hz 100…2000 Minimum output signal frequency, Hz 30…1900 Maximum load current at the frequency output in the “open collector” mode, mA Omnicomm LLS 30160, LLS-AF 4 Fuel Level Sensors...
-
Page 7: Preparation
1500 Preparation Fuel Tank Preparation 1. Select the location for Omnicomm LLS sensor installation, taking into account the following requirements: The installation location should be as close to the geometric center as possible and be placed at the deepest level of the tank:... - Page 8 ø 4 mm – for metal tanks with wall thickness over 3 mm (cut M5 thread) ø 7 mm – for plastic and metal tanks with wall thickness up to 3 mm (for rivets) ø 4 mm – for plastic tanks with wall thickness over 3 mm Omnicomm LLS 30160, LLS-AF 4 Fuel Level Sensors...
-
Page 9: Sensor Preparation
1/4–1/5 of its volume. Recommended sealants: PERMATEX™ MotoSeal® Black, ABRO™ Black, ABRO™ Red 3. Put the insulation cap on the central rod of the Omnicomm LLS sensor Setting Connect the sensor to a PC or a tablet. - Page 10 Setting Connect the Omnicomm LLS-AF 4 sensors according to the diagram: Run the Omnicomm Configurator program on your PC or tablet. Omnicomm LLS 30160, LLS-AF 4 Fuel Level Sensors...
- Page 11 Setting Omnicomm Configurator (PC): The fuel level value is displayed without filtering Omnicomm LLS 30160, LLS-AF 4 Fuel Level Sensors...
-
Page 12: Empty/Full" Calibration
4. Remove the sensor from the container and allow the fuel to drain from the measuring probe for 1 minute. Press the button “Empty” to record the value corresponding to an empty tank 5. Press the “Write to Device” button Omnicomm LLS 30160, LLS-AF 4 Fuel Level Sensors... -
Page 13: Omnicomm Lls 30160 Sensor Setting
Omnicomm LLS 30160 Sensor Setting In the tab “Settings” under “Custom parameters”: “Network address” (1 to 254) – set the network address for the Omnicomm LLS fuel level sensor. When several sensors are connected to one external device, they should have unique network addresses. -
Page 14: Omnicomm Lls-Af 4 Sensor Setting
“dry contact” or “transistor NPN key”. Installation and Connection 1. Put the mounting point gasket (included in the kit) on the Omnicomm LLS sensor measuring probe 2. Put the Omnicomm LLS sensor into the tank and secure it:... - Page 15 Installation and Connection Functions of the mounting cable wires Name of signal Wire Color RS-485 A Orange-white RS-485 B Whitish-blue RS-232 Tx Pink RS-232 Rx Gray +V Power Brown Ground White Omnicomm LLS 30160, LLS-AF 4 Fuel Level Sensors...
- Page 16 5. Install the fuse in the fuse holder 6. If necessary, seal the bolt (self-tapping screw) and the connection Multiple Omnicomm LLS 30160 sensors must be connected side-by-side via the RS-485 interface. Omnicomm LLS 30160, LLS-AF 4 Fuel Level Sensors...
-
Page 17: Calibration
Calibration of the fuel tank is necessary to verify the conformity of the digital code issued by the Omnicomm LLS 4 sensor to the fuel volume in a particular fuel tank. Calibration of the fuel tank is performed by filling up the tank – from empty to full, with a certain filling interval, and recording the Omnicomm LLS sensor readings in the calibration table. - Page 18 Omnicomm Configurator (PC): If the sensor reading column is not displayed, press the “Add sensor” button. Select the type of sensor. Specify the network address set in the sensor during the setup. Omnicomm LLS 30160, LLS-AF 4 Fuel Level Sensors...
- Page 19 9. Repeat items 6, 7 and 8 according to the number of control 10. Press the “Finish calibration” button 11. Save the calibration table in the calibration file (.ctb), Omnicomm Online (.xml) file, in the Terminal or Indicator, by pressing the “Export” button When performing the calibration table export to the Omnicomm Online (.xml) file, the “Ex-...
- Page 20 Calibration 2. Export the calibration tables into an Omnicomm Online file (.xml) separately for each sensor. During the export, specify different numbers for each LLS-AF 3. Import the calibration tables into the terminal. In the terminal settings section “Fuel level sensors”, set the required number of sensors and select the “LLS-AF” sensor type 4.
-
Page 21: Appendix. List Of Equipment For Omnicomm Lls Fuel Level Sensors Installation
Appendix. List of equipment for Omnicomm LLS fuel level sensors installation Appendix. List of equipment for Omnicomm LLS fuel level sensors installation № Name Quantity Bimetal core drill ø35 mm Core drill shank Metal drill ø7 mm or ø4 mm... - Page 22 Appendix. List of equipment for Omnicomm LLS fuel level sensors installation № Name Quantity For Omnicomm LLS 30160 Rotary seal Seal wire 00.7 mm up to 0.8 m. Для Omnicomm LLS-AF 4 Seal-tie for Molex connector Omnicomm LLS 30160, LLS-AF 4 Fuel Level Sensors...
-
Page 23: Sealing
Sealing Sealing For Omnicomm LLS sensors, the bolt or the self-tapping screw and the connection may be sealed as shown below: 1. Install the bolt or the self-tapping screw through a hole in the seal 2. Close the seal cover with a snap 3. - Page 24 Sealing Install the seal-tie on Omnicomm LLS-AF 4 connector: 1. Connect Omnicomm LLS-AF 4 connector to the mounting cable until it clicks 2. Run the flexible part of the seal through the connectors 3. Run the flexible part of the seal through the hole in the seal body 4.
- Page 25 www.omnicomm-world.com...
Need help?
Do you have a question about the LLS 30160 and is the answer not in the manual?
Questions and answers