Table of Contents
Advertisement
Quick Links
This book contains many important safety messages.
Always read and obey all safety messages.
Installer: Leave these instructions with the appliance
Important: Save the installation instructions for the local electrical inspector's use.
w w w . l a c o r n u e . c o m
CornuFé 44 Dual Fuel Range
User Guide
&
Installation Instructions
U107101 - 21c
Advertisement
Table of Contents

Related Manuals for La Cornue C1LP


Summary of Contents for La Cornue C1LP
- Page 1 This book contains many important safety messages. Always read and obey all safety messages. Installer: Leave these instructions with the appliance Important: Save the installation instructions for the local electrical inspector’s use. w w w . l a c o r n u e . c o m CornuFé...
- Page 2 WARNING! If the information in these instructions is not followed exactly, a fire or explosion may result, causing property damage, personal injury or death. DO NOT store or use gasoline or other flammable vapors and liquids in the vicinity of this or any other appliance. WHAT TO DO IF YOU SMELL GAS DO NOT try to light any appliance.
- Page 3 The following symbols are related to safety and are used on the product and throughout this manual. Meaning / Description Symbol Meaning / Description Symbol HEAVY WARNING / CAUTION This product is heavy and reference An appropriate safety instruction should be made to the safety should be followed or caution taken if instructions for provisions of lifting a potential hazard exists.
-
Page 4: Table Of Contents
Contents Installation safety instructions 21 Important safety information Range overview 10. Installation Cooktop burners Positioning the range Igniting cooktop burners without electricity 6 Moving the range Cleaning Lowering the two rear rollers The griddle Installing the cooling fan cover (Optional extra) The ovens Installing the flue grille Right-hand fan oven... -
Page 5: Important Safety Information
Important safety information Read all instructions before using this appliance. Save these If the range is installed near a window, proper precautions instructions for future reference. should be taken to prevent curtains from blowing over the burners. Have your appliance properly installed and grounded by NEVER leave any items on the range cooktop. - Page 6 Teach them not to play with controls or any other part of the They might catch fire if they touch a hot surface. range. Use dry oven gloves when applicable – using damp gloves NEVER store items of interest to children in the cabinets might result in steam burns when you touch a hot surface.
- Page 7 Cooktop burners Ovens Use care when opening the door. Quality of flames Let hot air and steam escape before removing or On Natural Gas, the burners’ flames should be a blueish color replacing food. with, at most, a slightly yellowish fringe. NEVER heat unopened food containers.
- Page 8 Take care when touching the range in order to Foods for frying should be as dry as possible. Frost on frozen minimize the possibility of burns; always be certain foods or moisture on fresh foods can cause hot fat to bubble that the controls are in the OFF position and that it is up and over the sides of the pan.
-
Page 9: Range Overview
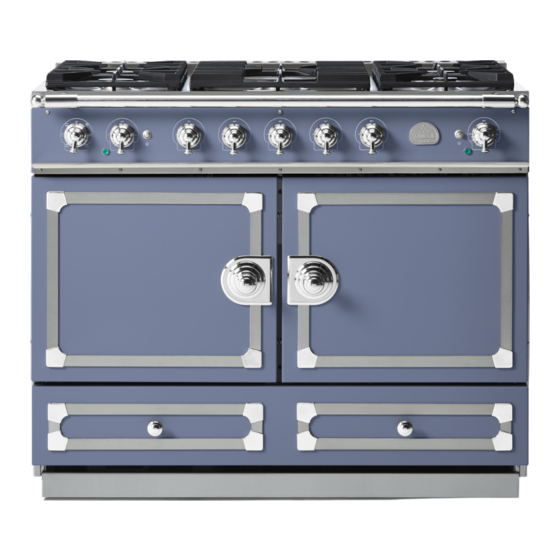
Range overview The dual fuel range cooker has the following features: Fig. 2.1 5 hotplate burners A control panel A multi-function oven A fan oven A storage drawer Cooktop burners NOTE: Before using the cooktop make sure all burners are in place and all the grates on the range are properly placed. -
Page 10: Igniting Cooktop Burners Without Electricity
Igniting cooktop burners without Fig. 2.9 electricity If there is a power failure the cooktop burners can be lit with a match. Hold a burning match ½” from the burner head, keeping your hand as far horizontally away from the burner as possible. -
Page 11: The Ovens
NEVER use two griddles side by side. Fig. 2.10 Broiling elements Broiling elements After cooking allow the griddle to cool before cleaning. The ovens References to ‘left-hand’ and ‘right-hand’ ovens apply as viewed from the front of the appliance. Convection Convection The left-hand oven is a multi-function oven, while the right-... - Page 12 Multi-function oven modes Convection assisted oven This function operates the fans, circulating air Thaw and serve heated by the elements at the top and the base of This function operates the fan to circulate cold air the oven. The combination of fan and conventional only.
-
Page 13: Right-Hand Fan Oven
Right-hand fan oven Fig. 2.11 The right-hand oven is a fan oven that circulates hot air Base heat Defrost Base heat Defrost continuously, which means faster, more even cooking (Fig. 2.12). The recommended cooking temperatures for a fan oven are Browning generally lower than a conventional oven. -
Page 14: General Oven Tips
General oven tips Fig. 2.16 IMPORTANT: Before using for the first time, to dispel manufacturing odors turn the ovens to 200 °C (395 °F) in Convection Assisted mode and run for one hour. To clear the smell, make sure the room is well ventilated to the outside air, by opening windows for example. -
Page 15: Accessories
Accessories Fig. 2.17 Fig. 2.18 Oven racks Each oven is supplied with: • 1 deluxe oven tray (Fig. 2.17) • 1 flat rack (Fig. 2.18) • 1 drop rack (Fig. 2.19) The drop rack increases the possibilities for oven rack spacing. Fig. -
Page 16: Cooking Tips
Cooking tips Cooking with a multi-function oven Fig. 3.1 REMEMBER: not all modes are suitable for all food types. The oven cooking times given are intended as a guide only. General oven tips ArtNo.050-0019 - Albertine SC - Shelf position The wire racks should always be pushed firmly to the back of the oven. -
Page 17: Cooking Table
Cooking table DocNo. 031-0004 - Cooking table - electric & fan single cavity The oven control settings and cooking times given in the table below are intended to be used as a guide only. Individual tastes may require the temperature to be altered to provide a preferred result. ArtNo.050-0019 - Albertine SC Food is cooked at lower temperature in a fan oven than in a conventional oven. -
Page 18: Cleaning Your Range
Cleaning your range Essential information Part Finish Recommended cleaning method Before thorough cleaning, turn off the circuit Burner grates & top of Porcelain enamel Mildly abrasive breaker. Allow the range to cool. burner heads cleaner such as Bon Ami® or Soft Scrub®. After cleaning remember to switch on the circuit ... -
Page 19: Control Panel And Oven Doors
Never use caustic or abrasive cleaners as these will Fig. 5.1 damage the surface. Griddle (Optional extra) Always clean the griddle after use. Allow to cool completely before removing. Immerse the griddle plate in hot soapy water. Use a soft cloth or, for stubborn stains, a nylon washing ArtNo.311-0030 - Burner head fitting up brush. -
Page 20: Troubleshooting
Troubleshooting All servicing and repairs must be carried out by a The fascia gets hot when I use the oven or broiler qualified service engineer. The range is cooled by a fan. If the fascia becomes excessively hot when the range is in use then the cooling fan may have Cooktop ignition or cooktop burners faulty failed. - Page 21 Oven light is not working 15 W – 110V / 130V Fig. 6.1 The bulb has probably burnt out. You can buy a replacement bulb (which is not covered under the warranty) from a good electrical store. Depending on the type of bulb, ask for a 15 W –...
-
Page 22: Installation Instructions
7. Installation Instructions WARNING! If the information in these instructions is not followed exactly, a fire or explosion may result, causing property damage, personal injury or death. DO NOT store or use gasoline or other flammable vapors and liquids in the vicinity of this or any other appliance. - Page 23 The following symbols are related to safety and are used on the product and throughout this manual. Meaning / Description Symbol Meaning / Description Symbol HEAVY WARNING / CAUTION This product is heavy and reference An appropriate safety instruction should be made to the safety should be followed or caution taken if instructions for provisions of lifting a potential hazard exists.
-
Page 24: Service And Parts
INSTALLATION Check the appliance is electrically safe when you have finished. Service and parts Firstly, please complete the appliance details below and keep them safe for future reference – this information will enable us to accurately identify the particular appliance and help us to help you. Filling this in now will save time and inconvenience if you later have a problem with the appliance. -
Page 25: Installation Safety Instructions
INSTALLATION Check the appliance is electrically safe when you have finished. Installation safety instructions Regulations Improper installation, adjustment, alteration, service or maintenance can cause injury or property Installation of this range must conform with local damage. Refer to this manual. For assistance or codes, or in the absence of local codes, with the additional information, consult a qualified engineer. - Page 26 INSTALLATION Check the appliance is electrically safe when you have finished. Converting to propane gas This appliance is supplied set for natural gas. A conversion kit for Propane gas is supplied with the range (A060048). The conversion must be performed by a qualified LP gas installer.
-
Page 27: Installation
INSTALLATION Check the appliance is electrically safe and gas sound when you have finished. 10. Installation You will also need the following tools and equipment to complete the range installation satisfactorily. Multimeter Electric drill Masonry drill bit & anchors (only required if installing the range on a stone or concrete floor) Steel tape measure Phillips head screwdriver... - Page 28 INSTALLATION Check the appliance is electrically safe and gas sound when you have finished. Checking the parts: 6 grates Allen key 3 mm 2. 5 mm Rear Flue Grille Hand rail and end pieces 1 deluxe oven trivet 2 deluxe oven trays 2 drop racks 2 Oven Base Trays 2 flat oven racks...
-
Page 29: Positioning The Range
INSTALLATION Check the appliance is electrically safe and gas sound when you have finished. Positioning the range Fig. 10.1 Fig. 10.1 and Fig. 10.2 show the minimum recommended distances and clearances from the range to nearby surfaces. Min 435/16” (110 cm) - 4311/16” (111 cm) Min 43 / ”... -
Page 30: Moving The Range
INSTALLATION Check the appliance is electrically safe and gas sound when you have finished. Moving the range Fig. 10.4 On no account try and move the range while it is plugged into the electricity supply. This appliance is heavy. Ensure you have the correct facilities to complete the move. -
Page 31: Leveling
INSTALLATION Check the appliance is electrically safe and gas sound when you have finished. Leveling Fig. 10.10 It is recommended that you use a spirit level on a shelf in one of the ovens to check the level. Place the range in its intended position, taking care not to twist it within the gap between the kitchen units as damage may occur to the range or the units. -
Page 32: Side Panel Extension Kit
INSTALLATION Check the appliance is electrically safe and gas sound when you have finished. Side panel extension kit Fig. 10.13 Two side extension panels are supplied with the range. These can be installed where the side of the range is exposed. The extension installation must be performed by a qualified gas installer, preferably during installation of the appliance (Fig. -
Page 33: Gas Connection
INSTALLATION Check the appliance is electrically safe and gas sound when you have finished. 11. Gas connection Installation of this range must conform with local codes or, in Fig. 11.1 the absence of local codes, with the National Fuel Gas Code, ANSI Z223.1-latest edition. - Page 34 INSTALLATION Check the appliance is electrically safe and gas sound when you have finished. Connect the range to the gas supply Fig. 11.3 Don’t forget to relight the pilot on other gas appliances when Appliance Appliance Flexible connector Adapter gas inlet you turn the gas back on.
-
Page 35: Electrical Connection
INSTALLATION Check the appliance is electrically safe when you have finished. 12. Electrical connection Have your appliance properly installed and grounded by a qualified technician. The installation must conform with local codes, or in the absence of local codes, in accordance with the National Fuel Gas Code, ANSI Z223.1/NFPA 54 or, in Canada, the Natural Gas and Propane Installation Code, CSA B149.1 and in addition the National Electrical Code NFPA 70... - Page 36 INSTALLATION Check the appliance is electrically safe when you have finished. Connecting if the supplied cord and Fig. 12.1 plug is not suitable. To access the electrical connections, undo the screws and remove the electrical cover (Fig. 12.1). DISCONNECT THE ELECTRICAL SUPPLY. Fitting a 3-Wire Power Cord Disconnect the supplied power cord from the terminal block and ground post.
-
Page 37: Final Fitting And Checks
INSTALLATION Check the appliance is electrically safe and gas sound when you have finished. 13. Final fitting and checks Assemble the range Fig. 13.1 Fig. 13.2 Installing the control knobs The range is supplied with 5 burner control knobs. These are for the gas controls to the left of the control panel (Fig. -
Page 38: Range Operational Checks
INSTALLATION Check the appliance is electrically safe and gas sound when you have finished. Range operational checks How to move the range for servicing Oven check Follow these procedures to remove appliance for servicing: Turn on the oven and check that the oven fans start to turn and that the oven starts to heat up. -
Page 39: Fitting The Drawer
INSTALLATION Check the appliance is electrically safe when you have finished. Fitting the drawer Removing the drawer... -
Page 40: Circuit Diagram
14. Circuit diagram ArtNo.080-0009 - 90DF - Cornufe circuit diagram Code Description Code Description Code Color Left-hand Multi-function oven thermostat Hotplate ignition switches Blue Code Description Code Description Code Color Left-hand Multi-function oven controller Spark generator Brown Left-hand Multi-function oven thermostat Hotplate ignition switches Blue Left-hand Multi-function oven base element... -
Page 41: Technical Data
15. Technical data INSTALLER: Please leave these instructions with the user. DATA BADGE LOCATION: Inside base drawer of cavity. COUNTRY OF DESTINATION: USA, Canada. Connections Electric 240 V 60 Hz ArtNo280-0090 Drawer Cavity & Badges ½” NPT at rear left-hand side Maximum total electric load 240 V (including oven 5.17 kW, 21 A fans, lights, etc.):... -
Page 42: Warranty
The warranty applies even if you should move. LA CORNUE DOES NOT ASSUME ANY RESPONSIBILITY FOR INCIDENTAL OR CONSEQUENTIAL DAMAGES. Some states do not allow the exclusion or limitation of incidental or consequential damages, so the above limitation or exclusion may not apply to you. - Page 43 NOTE...
- Page 44 USA & CANADA Middleby Residential 4960 Golden Parkway, Buford, GA 30518 770-932-7282 www.lacornueusa.com AGA CONSUMER PRODUCTS...
Need help?
Do you have a question about the C1LP and is the answer not in the manual?
Questions and answers