La Cornue CornuFe Service Instructions Manual
Hide thumbs
Also See for CornuFe:
- Installation & use manual (76 pages) ,
- Installation, use and maintenance manual (19 pages) ,
- Manual (16 pages)
Table of Contents
Advertisement
Advertisement
Table of Contents

Related Manuals for La Cornue CornuFe


Summary of Contents for La Cornue CornuFe
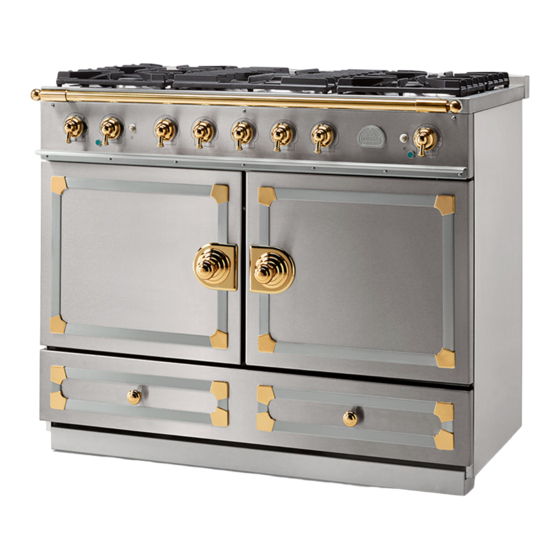
- Page 1 This book contains many important safety messages. Always read and obey all safety messages. Installer:Leave these instructions with the range Important - Save the installation instructions for the local electrical inspector’s use. CornuFé 44 Dual Fuel Range Service Instructions F107150-01...
- Page 2 WARNING If the information in this manual is not followed exactly, a fi re or explosion may result causing property damage, personal injury or death. Do not store or use gasoline or other fl ammable vapors and liquids in the vicinity of this or any other range.
-
Page 3: Technical Data
SERVICING WARNING WORK SAFELY Where necessary disconnect from electricity and gas before starting. Check range is safe when you have finished. Sections Diagnostics Servicing Section Schematic diagram of the Range Technical Data... -
Page 4: Servicing Notes
SERVICING WARNING WORK SAFELY Where necessary disconnect from electricity and gas before starting. Check range is safe when you have finished. Servicing Notes When servicing or replacing gas carrying components disconnect from gas before commencing operation and check range is gas sound after completion. When checking for gas leaks use a liquid leak detector at all joints and connections to check for leaks in the system. -
Page 5: Diagnostics
SERVICING WARNING WORK SAFELY Where necessary disconnect from electricity and gas before starting. Check range is safe when you have finished. Diagnostics Checking the Multifunction Oven Checking the Convection Oven Checking the Cooktop... -
Page 6: Checking The Multifunction Oven
Checking the Multifunction Oven Check Result Possible Cause Light bulb failed (most likely cause) No power to range Open the oven door and turn on the oven light Light does not work Fault in power supply to switch Faulty switch Action Remove the light bulb (see ‘Servicing Procedures’). - Page 7 Checking the Multifunction Oven...
-
Page 8: Checking The Convection Oven
Checking the Convection Oven Check Result Possible Cause Light bulb failed (most likely cause) No power to range Open the oven door and turn on the oven light Light does not work Fault in power supply to switch Faulty switch Action Remove the light bulb (see ‘Servicing Procedures’). - Page 9 Checking the Convection Oven...
-
Page 10: Checking The Cooktop
Checking the Cooktop Range Maintop Ignition The maintop burners have spark ignition operated by a switch on each control valve. When any burner control knob is pressed in the spark generator module produces sparks at all the burners ignition electrodes. Problem Check The ignition system... - Page 11 Checking the Cooktop Problem Check The burner lights but the Each burner gas control valve includes a thermoelectric solenoid fl ame safety valve fl ame goes out when the (FSD) that is normally closed. There is a sensor probe mounted on each burner. To light a control knob is released burner the user must push in the control knob and turn to the full on position.
-
Page 12: Table Of Contents
Servicing Section How to change an oven light bulb How To Move the Range for Servicing To Remove the Cooktop To Remove the Control Panel To Remove an Outer Side Panel To Remove an Oven Neon To Change Oven Light Switch To Remove a Thermostat To Change a Multifunction oven function switch 10 To Remove an Oven element Thermal Cut-Out. -
Page 13: How To Change An Oven Light Bulb
SERVICING WARNING WORK SAFELY Where necessary disconnect from electricity and gas before starting. Check range is safe when you have finished. How to change an oven light bulb Replacement bulb must be 15w 125-130v lamp, FOR OVENS, heat resistant to 300°C (570°F). Turn off... - Page 14 SERVICING WARNING WORK SAFELY Where necessary disconnect from electricity and gas before starting. Check range is safe when you have finished. Fit the Allen key tool to the center roller lowering mechanism (C in the fi g.). Lower the front roller by turning the Allen key clockwise until the front feet are just clear of the fl...
-
Page 15: To Remove The Cooktop
SERVICING WARNING WORK SAFELY Where necessary disconnect from electricity and gas before starting. Check range is safe when you have finished. To Remove the Cooktop Move the range away from the wall - see ‘How To Move the Range for Servicing’ . Remove cooktop grates and burner heads. -
Page 16: To Remove The Control Panel
SERVICING WARNING WORK SAFELY Where necessary disconnect from electricity and gas before starting. Check range is safe when you have finished. To Remove the Control Panel Remove all the control knobs. Open both oven doors. Remove 3 fi xings on the top front and 3 fi xings on the control panel underside. -
Page 17: To Change Oven Light Switch
SERVICING WARNING WORK SAFELY Where necessary disconnect from electricity and gas before starting. Check range is safe when you have finished. To Change Oven Light Switch Remove control panel (see 2). NB The old switch may be destroyed during removal. Remove switch button and old switch from its bezel by gripping the switch body behind the control panel and twisting sharply. -
Page 18: To Change A Multifunction Oven Function Switch
SERVICING WARNING WORK SAFELY Where necessary disconnect from electricity and gas before starting. Check range is safe when you have finished. Left Hand Multifunction oven From inside the oven remove the two screws holding the thermostat phial to the oven fan cover at the rear of the oven. -
Page 19: To Remove A Cooktop Valve
SERVICING WARNING WORK SAFELY Where necessary disconnect from electricity and gas before starting. Check range is safe when you have finished. 11 To Remove a Cooktop Valve Remove the cooktop and control panel, see 1 and 2. Unplug the FSD lead from the rear of the valve. Undo compression fi tting at the rear of the valve. Remove the fi... -
Page 20: To Change An Ignition Switch
SERVICING WARNING WORK SAFELY Where necessary disconnect from electricity and gas before starting. Check range is safe when you have finished. Remove the nut holding the nut holding FSD probe to the burner mounting cross member. Fit the new FSD probe, plug into the back of the control valve Reassemble in reverse order and check for correct burner operation. -
Page 21: To Remove A Cooktop Burner Spark Electrode
SERVICING WARNING WORK SAFELY Where necessary disconnect from electricity and gas before starting. Check range is safe when you have finished. 15 To Remove a Cooktop Burner Spark Electrode Remove the cooktop grate and burner head. Undo the large brass nut and remove the brass venturi. -
Page 22: To Adjust The Oven Door Angle
SERVICING WARNING WORK SAFELY Where necessary disconnect from electricity and gas before starting. Check range is safe when you have finished. 17 To Adjust the Oven Door Angle The oven doors are very heavy. Transit of the range can cause the oven doors to move so that they are not correctly aligned. -
Page 23: To Change The Oven Outer Door Panel Or Door Trim Parts
SERVICING WARNING WORK SAFELY Where necessary disconnect from electricity and gas before starting. Check range is safe when you have finished. 18 To Change the Oven Outer Door Panel or Door Trim Parts The door outer panel and all the trim parts are available as separate parts so that individual parts can be changed. -
Page 24: To Remove An Oven Door
SERVICING WARNING WORK SAFELY Where necessary disconnect from electricity and gas before starting. Check range is safe when you have finished. 19 To Remove an Oven Door Door is very heavy - take care. Open the oven door. Loosen the two top hinge screws. -
Page 25: To Remove The Door Latch
SERVICING WARNING WORK SAFELY Where necessary disconnect from electricity and gas before starting. Check range is safe when you have finished. 21 To Remove the Door Latch Remove the oven outer door panel as detailed in Section 18. Remove the fi... -
Page 26: To Remove The Cooktop Spark Generator
SERVICING WARNING WORK SAFELY Where necessary disconnect from electricity and gas before starting. Check range is safe when you have finished. 24 To Remove the Cooktop Spark Generator Pull the range forward to access the covers at the rear of the range; see the section ‘How To Move the Range for Servicing’... -
Page 27: To Replace An Oven Fan
SERVICING WARNING WORK SAFELY Where necessary disconnect from electricity and gas before starting. Check range is safe when you have finished. 27 To Replace an Oven Fan Pull the range forward to access the cover boxes at the rear of the range, see the section ‘How To Move the Range for Servicing’... -
Page 28: To Remove The Left Hand Multifunction Oven Bottom And Top Elements
SERVICING WARNING WORK SAFELY Where necessary disconnect from electricity and gas before starting. Check range is safe when you have finished. 29 To Remove the Left Hand Multifunction Oven Bottom and Top Elements Bottom Element Pull the range forward to access the rear of the range, see the section ‘How To Move the Range for Servicing’... -
Page 29: To Change The Cooling Fan
SERVICING WARNING WORK SAFELY Where necessary disconnect from electricity and gas before starting. Check range is safe when you have finished. 30 To change the Cooling fan Pull the range forward to access the rear of the range, see the section ‘How To Move the Range for Servicing’... - Page 30 SERVICING WARNING WORK SAFELY Where necessary disconnect from electricity and gas before starting. Check range is safe when you have finished.
-
Page 31: Schematic Diagram Of The Range
Schematic diagram of the Range Caution: Label all wires prior to disconnection when servicing controls. Wiring errors can cause improper and dangerous operation. Verify proper operation after servicing. Code Description Code Description Code Color Cooling fan motor Oven fan motor Black Ignition switches Oven light switch... -
Page 32: Technical Data
SERVICING WARNING WORK SAFELY Where necessary disconnect from electricity and gas before starting. Check range is safe when you have finished. Technical Data This range is supplied set for Natural gas. A conversion kit from Natural Gas to Propane gas is included. INSTALLER: Please leave these instructions with the User. - Page 33 SERVICING WARNING WORK SAFELY Where necessary disconnect from electricity and gas before starting. Check range is safe when you have finished. Ovens Left hand Multifunction Oven Right hand Convection Oven Fan element 2500W 2500W Top element 1200W Browning Element 1150W Bottom element 1000W...
- Page 36 060106...
Need help?
Do you have a question about the CornuFe and is the answer not in the manual?
Questions and answers
How to remove side panels for cleaning?
To remove the side panels of a La Cornue CornuFe for cleaning:
1. Move the range away from the wall.
2. Remove the control panel by:
- Removing 3 fixings on the underside of the control panel.
- Pulling the control panel forward.
- If tight, loosen the cooktop by removing cooktop grates and burner heads and slackening the brass venturi at each burner.
- Disconnecting the rear connections of the neons and light switches, and the earth lead.
3. Remove the plinth by unscrewing 3 screws.
4. If a side extension is fitted, remove it.
5. Undo the lower retaining screw below the front corner edge of the panel.
6. Remove 2 front side panel retaining screws and 2 rear side panel screws.
7. Pull the side panel away from the range.
Replace all parts in reverse order.
This answer is automatically generated