
Subscribe to Our Youtube Channel
Related Manuals for Ergomotion Element Lite


Summary of Contents for Ergomotion Element Lite
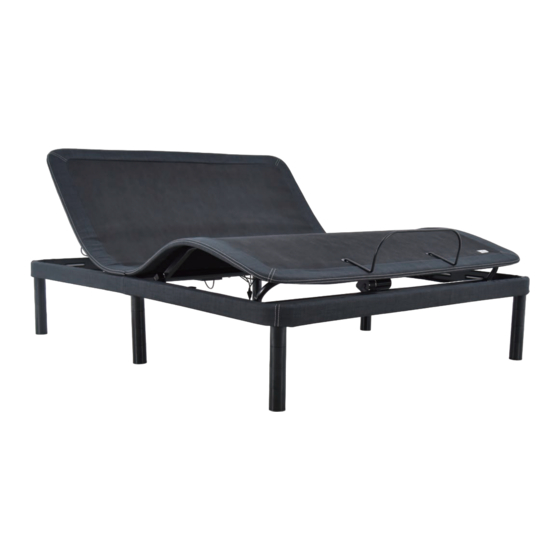
- Page 1 Element Lite OWNER’S MANUAL Actual product appearance and functionality may vary from photographs, illustrations and descriptions included in this manual.
-
Page 2: Table Of Contents
Table of Contents Safety Precautions and Usage Statements ..............1-4 Parts List . -
Page 3: Safety Precautions And Usage Statements
Safety Precautions and Usage Statements Attention: Important Safety Disclaimers Read all instructions before using your adjustable base. Save these instructions. outlet. Unauthorized modification or failure to use a wall outlet or surge protector WARNING could void the electrical portion of your warranty. WARNING Always unplug the base from the electrical outlet before servicing any part of the base. - Page 4 IN-HOME USE AND HOSPITAL STANDARDS: Ergomotion adjustable bed bases are designed solely for in-home use. This MASSAGE OPERATION AND LOCATION ENVIRONMENT base was not designed as a hospital bed and is not designed to meet hospital standards.
- Page 5 TOLERANCE colder environments. All Ergomotion adjustable foundations, depending on make and model, are designed and manufactured to perform and function within designated quality PAIRED OPERATION: control parameters. Bases are subject to meticulous and rigorous inspections When operating a “paired”...
- Page 6 Safety Precautions and Usage Statements Attempting to circumvent or exceed this rating will shorten the life expectancy of • Stand or jump on the adjustable base at any time, this can damage the the product and may void the warranty. The massage motors are not designed frame and motors.
-
Page 7: Parts List
Parts List Before discarding the packing materials, ensure all the parts are accounted for. All electronics and components that need to be installed are B)♦ located in boxes under the base or attached to the frame. (Remote varies based on model.) Wireless Remote Control and (3) AAA Batteries Legs (6) ♦... -
Page 8: Base And Remote Overview / Quick Reference Guide
Base and Remote Overview Massage Head Motor 10, 20, 30 Minute Massage Massage Timer Lights Motor Control Box Massage Timer Head Massage Intensity Foot Massage Intensity Turn on Head and Foot Massage Underbed Lighting On/ Lifts and Lowers Head Lifts and Lowers Foot Zero-G Preset Position Flat Preset Position Relax Preset Position... - Page 9 Quick Reference Guide Not to scale. For illustration purposes only. Read all instructions before beginning installation. CONTROL BOX OVERVIEW ELECTRONICS OVERVIEW Massage Amp Massage Motor Power Cord Ports Control Box Power Reset/Pairing Pairing Power Down Input Cord Power Supply LED Light Button LED Light Box Port...
-
Page 10: Installation Guide
(Refer to Fig D). To install the legs, thread the washer base. over the screw on the leg. Next, screw the leg into the nutsert on the frame. Do not over tighten. Fig A Fig B For customer support, visit www.ergomotion.com or call: 1-888-550-3746... - Page 11 Carefully flip the base over. Important: Two people are required to move the bed base. Do not drag across the floor. Do not rest frame on its side, excessive pressure may damage the legs (if used). For customer support, visit www.ergomotion.com or call: 1-888-550-3746...
-
Page 12: Remote Control
Remote Control Remote Control arrives paired to the adjustable base. Three (3) AAA batteries are required to operate the remote. MASSAGE FEATURE 10, 20, 30 Minute Massage Timer Lights The HEAD + and - buttons adjust the head massage intensities. Levels 1-3. Massage Timer Head Massage Intensity The FOOT + and - buttons... - Page 13 Remote Control ADJUST ONE TOUCH BUTTONS One touch LIGHT button The HEAD arrows lift activates and turns o the and lower the head section safety lighting feature. of the base. One touch ZERO G ® preset The FOOTarrows lift position. Zero G ®...
-
Page 14: Remote Control - Preset Programming
Remote Control - Preset Programming The programmable feature allows you to save two custom positions. Please read all the instructions below before setting your custom presets on the remote. STEP 1 Articulate the head and foot to your desired position. STEP 2 Press and hold one of the picture pre-set buttons ] The LED lights at top of remote will flash in succession 3 times. -
Page 15: Remote Control Pairing
Remote Control Pairing Remote Pairing The original remote that comes in the box is already paired to the adjustable base. No further action is required. In the event that the remote is not paired with the base, follow the steps below. STEP 1 STEP 3 Unplug the Power Cord from your power outlet. -
Page 16: Syncing Two Bases
Syncing Two Cases (Optional) A Sync Cord is included with the base. Not available on Queen, Full or Full-Long size bases. The Sync Cord connects the two control boxes to a single remote for the synchronization of two bases. STEP 1 Unplug bases from power source. -
Page 17: Connecting Straps
Slide side (a) of the connecting strap onto leg bolt. Swing the Legs are required for the installation of the headboard brackets. strap and connect side (b) to the leg bolt. Secure the strap by To purchase legs, please contact Ergomotion Customer Service shifting to the left. by calling 1-888-550-3746. -
Page 18: Emergency Battery Backup Strap
Emergency Battery Backup Strap For emergency use only, in case of a power outage. STEP 1 STEP 3 Disconnect the Power Supply from the input power cord. Connect the end of the Battery Backup Strap to the input power cord that is attached to the control box. Control Box Battery Backup Strap Input Cord... -
Page 19: Bluetooth® Remote Control Setup
Bluetooth® Remote Control Setup To operate the base from a smart device, the “ Ergomotion ” application must be downloaded to the desired smart device from the App Store (Apple) or Google Play Store(Android). STEP 1 STEP 4 Plug the bed into power supply. - Page 20 Bluetooth® Remote Control Setup STEP 5 STEP 7 You can opt to have Bluetooth auto-connect by turning Bluetooth To choose the Remote style that auto connect to the On or O position. most reflects the options on your physical handset, please cycle You can choose to turn haptic feedback on or o by turning through options A-D.
-
Page 21: Troubleshooting
Remove and replace full batteries in the remote control and re-pair the remote to the base (see page 13). If issue is not resolved by following the instructions above, locate serial number on warranty card or back of remote and call Ergomotion Customer Service: 1888-550-3746... -
Page 22: Notes
Notes... - Page 23 Notes...
- Page 24 US Customer Service 2019 Ergomotion Inc V001__12/2019 35009292 Phone US 1-888-550-3746 US 1-805-979-9399 Email info@ergomotion.com www.ergomotion.com Serial Number:...
Need help?
Do you have a question about the Element Lite and is the answer not in the manual?
Questions and answers