Panasonic SC-NS55 Operating Instructions Manual
Cd stereo system
Hide thumbs
Also See for SC-NS55:
- Operating instructions manual (16 pages) ,
- Operating instructions manual (58 pages)
Table of Contents
Advertisement
As an ENERGY STAR
Panasonic has determined that this
product meets the ENERGY STAR
guidelines for energy effi ciency.
Table of contents
Placement of speakers ............................ 3
Getting started ......................................... 4
Overview of controls ............................... 6
Discs ......................................................... 7
FM/AM Radio ............................................ 9
®
Satellite Radio .................................. 10
Using the iPod ......................................... 12
Timer ......................................................... 13
Sound adjustment ................................... 14
External unit ............................................. 14
Troubleshooting guide ............................ 15
Product Service ....................................... 16
Listening caution ..................................... 16
Specifi cations .......................................... 17
Maintenance ............................................. 17
Limited Warranty ..................................... 18
Español
Español
Preparativos iniciales .............................. 19
Colocación de los altavoces .................. 19
Controles .................................................. 20
Discos ....................................................... 21
FM/AM Radio ............................................ 22
Temporizador ........................................... 23
If you have any questions contact
In the U.S.A.: 1-800-211-PANA (7262)
P
®
Partner,
®
SUPPLIED ACCESSORIES
SUPPLIED ACCESSORIES
Please check and identify the supplied accessories.
Use numbers indicated in parentheses when asking for
replacement parts. (As of January 2007)
To order accessories, refer to "Accessory Purchases" on
page 18.
1 x Remote control
(N2QAYB000090)
1 x AC power supply cord
(K2CB2CB00018)
2 x Remote control
batteries
Before connecting, operating or adjusting this product, please
read the instructions completely.
Please keep this manual for future reference.
Operations in these instructions are described using remote
control, but you can do the operations with the main unit if the
controls are the same.
Your unit may not look exactly as illustrated.
La guía rápida en español se encuentra en la página 19 - 23.
Operating Instructions
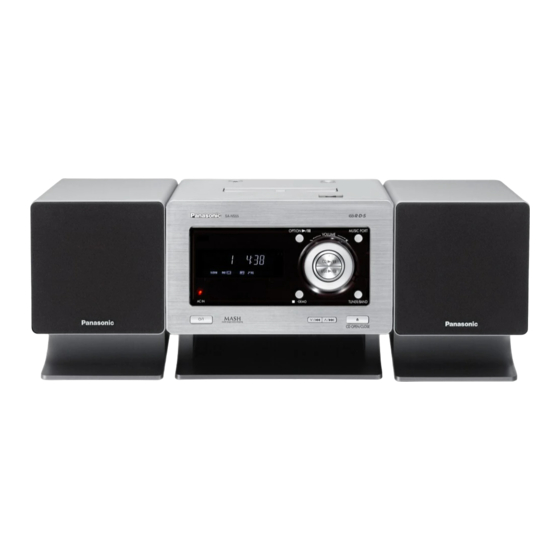
CD Stereo System
SC-NS55
Model No.
1 x AM loop antenna
(N1DAAAA00001)
1 x FM indoor antenna
(RSA0007-L1)
1 x Universal Dock for
iPod
(RFE0205)
RQTV0183-2P
Advertisement
Table of Contents

Related Manuals for Panasonic SC-NS55


Summary of Contents for Panasonic SC-NS55
-
Page 1: Table Of Contents
As an ENERGY STAR Panasonic has determined that this product meets the ENERGY STAR guidelines for energy effi ciency. Table of contents IMPORTANT SAFETY INSTRUCTIONS .. 3 Placement of speakers ... 3 Getting started ... 4 Overview of controls ... 6 Discs ... -
Page 2: Fcc Note
(1) This device may not cause harmful interference, and (2) this device must accept any interference received, including interference that may cause undesired operation. Responsible Party: Panasonic Corporation of North America One Panasonic Way Secaucus, NJ 07094 Support Contact: Panasonic Consumer Electronic Company Telephone No: 1-800-211-7262 SHOCK, DO NOT REMOVE SCREWS. -
Page 3: Important Safety Instructions
IMPORTANT SAFETY INSTRUCTIONS Read these operating instructions carefully before using the unit. Follow the safety instructions on the unit and the applicable safety instructions listed below. Keep these operating instructions handy for future reference. 1) Read these instructions. 2) Keep these instructions. 3) Heed all warnings. -
Page 4: Getting Started
Getting started Step 1 Step 1 - Making the connections - Making the connections Connect the AM loop antenna. AM loop antenna Stand the antenna up on its base. Keep the loose antenna cord away from other wires and cords. Connect the FM indoor antenna. - Page 5 Connect the XM Passport Mini-Tuner and Home Dock. (sold separately) XM Passport Mini-Tuner and Home Dock To prevent interference with wireless equipment, place the antenna away from other equipment that emits radio waves (such as radio equipment and microwave oven). Refer to page 10 for optimizing the reception.
-
Page 6: Overview Of Controls
Overview of controls Main unit Main unit Refer to the numbers in parentheses for page reference. Headphone jack (A) Avoid listening for prolonged periods of time to prevent hearing damage. Plug type: Ø3.5 mm ( (not included) 1 XM selection (10, 11) Display panel Remote control sensor AC supply indicator (AC IN) -
Page 7: Discs
Discs Basic play Basic play Press [y] to turn the unit on. Press [0 CD OPEN/CLOSE] to open the disc tray and then load the disc. Press [0 CD OPEN/CLOSE] again to close the tray. Label must face upward Disc tray Press [CD 6] to start play. -
Page 8: Advanced Play
Discs (continued) Advanced play Advanced play Repeat play Repeat play You can repeat program play or other selected play mode. Press [REPEAT] before or during play. “REPEAT ON” and “ ” are displayed. To cancel Press [REPEAT] again. “REPEAT OFF” is displayed and “ Note •... -
Page 9: Fm/Am Radio
FM/AM Radio Manual tuning Manual tuning Press [FM/AM] to select “FM” or “AM”. Press [PLAY MODE] to select “MANUAL”. Press [ /4] or [ /¢] to select the frequency of the required station. “ ST ” is displayed when a stereo FM broadcast is being received. -
Page 10: Xm ® Satellite Radio
® Satellite Radio Introducing XM Satellite Radio XM Satellite Radio is the provider of satellite radio with more than 6 million subscribers. XM offers more than 170 digital radio channels with music, talk, news, sports, comedy, traffi c and weather reports. For more information, visit XM on the Web at www.xmradio.com. -
Page 11: Selecting Xm Channels By Category
Manual tuning Manual tuning Press [XM]. Press [PLAY MODE] to select “MANUAL”. Each time you press the button: MANUAL PRESET Press [ /4] or [ /¢] to select a channel. Press and hold [ /4] or [ /¢] to scan through quickly. -
Page 12: Using The Ipod
Using the iPod You can charge and play your iPod by putting it in the Universal Dock for iPod that connected to the option port on top of this unit. Connecting and charging the iPod Connecting and charging the iPod Preparation: Connect the Universal Dock for iPod to the option port. -
Page 13: Timer
Timer Setting the clock Setting the clock This is a 12-hour clock. Press [CLOCK/TIMER] to select “CLOCK”. Each time you press the button: ˚ PLAY CLOCK Original display Within 5 seconds, press [ /4] or [ /¢] to set the time. Press [CLOCK/TIMER] again to confirm. -
Page 14: Sound Adjustment
Sound adjustment Selecting sound effects Selecting sound effects You can change the sound effect by selecting Preset EQ or adjusting the bass or treble effect. Preset EQ Preset EQ Press [PRESET EQ] repeatedly to select your desired setting. HEAVY → CLEAR → SOFT → VOCAL → EQ-OFF Setting Effect HEAVY... -
Page 15: Troubleshooting Guide
Troubleshooting guide Before requesting service, make the following checks. If you are in doubt about some of the check points, or if the remedies indicated in the chart do not solve the problem, refer to the “Customer Services Directory” on page 18. Common problems No sound. -
Page 16: Product Service
Product Service 1. Damage requiring service − The unit should be serviced by qualifi ed service personnel if: (a) The AC power supply cord or the plug has been damaged; or (b) Objects or liquids have gotten into the unit; or (c) The unit has been exposed to rain;... -
Page 17: Specifi Cations
Specifi cations AMPLIFIER SECTION FTC OUTPUT POWER both channel driven simultaneously 10 % Total harmonic distortion (THD) 12 W per channel (6 Ω) 60 Hz to 20 kHz RMS OUTPUT POWER both channel driven simultaneously 10 % Total harmonic distortion (THD) 15 W per channel (6 Ω) 1 kHz Input impedance... -
Page 18: Limited Warranty
Monday-Friday 9 am-9 pm; Saturday-Sunday 10 am-7 pm, EST. For hearing or speech impaired TTY users, TTY: 1-877-833-8855 Accessory Purchases Accessory Purchases Purchase Parts, Accessories and Instruction Books online for all Panasonic Products by visiting our Web Site at: http://www.pstc.panasonic.com or, send your request by E-mail to: npcparts@us.panasonic.com You may also contact us directly at: 1-800-332-5368 (Phone) 1-800-237-9080 (Fax Only) (Monday-Friday 9 am to 8 pm, EST.) -
Page 19: Preparativos Iniciales
Preparativos iniciales Referirse a las páginas 4 y 5 para las ilustraciones. Paso Paso 1 1 - Conexiones - Conexiones Conecte el cable de alimentación de CA sólo después de haber hecho todas las demás conexiones. Conecte el soporte universal para iPod. Conecte la antena de cuadro de AM. -
Page 20: Controles
Controles Aparato principal Aparato principal Los números entre paréntesis indican la página de referencia. Toma de auriculares (A) Procure evitar utilizarlos durante un periodo de tiempo prolongado con el fi n de evitar lesiones auditivas. Tipo de clavija: Estéreo de Ø3,5 mm ( de diámetro (no suministrada) 1 Selección de XM (10, 11) Visualizador... -
Page 21: Discos
Discos Reproducción básica Reproducción básica Pulse [y] para encender el aparato. Pulse [0 CD OPEN/CLOSE] para abrir la tapa del disco e inserte el disco. Cierre la tapa. Tapa del disco La etiqueta tiene que estar hacia arriba Pulse [CD 6] para iniciar la reproducción. Ajuste el volumen. -
Page 22: Fm/Am Radio
FM/AM Radio Sintonización manual Sintonización manual Pulse [FM/AM] para seleccionar “FM” o “AM”. Pulse [PLAY MODE] para seleccionar “MANUAL”. Pulse [ /4] o [ /¢] para seleccionar la frecuencia de la emisora requerida. Se visualizará “ ST ” cuando esté siendo recibida una emisora estéreo por FM. -
Page 23: Temporizador
Temporizador Puesta en hora Puesta en hora Éste es un reloj de sistema de 12 horas. Pulse [CLOCK/TIMER] para seleccionar “CLOCK”. Cada vez que pulse el botón: ˚ PLAY CLOCK Visulización original Entre 5 segundos, pulse [ /4] o [ /¢] para ajustar la hora. - Page 24 Panasonic Consumer Electronics Company, Division of Panasonic Corporation of North America One Panasonic Way Secaucus, New Jersey 07094 http://www.panasonic.com © 2007 Matsushita Electric Industrial Co., Ltd. Printed in Malaysia Panasonic Puerto Rico, Inc. Ave. 65 de Infantería, Km. 9.5 San Gabriel Industrial Park, Carolina,...
Need help?
Do you have a question about the SC-NS55 and is the answer not in the manual?
Questions and answers