Table of Contents
Advertisement
Advertisement
Table of Contents

Related Manuals for Gorenje NRKP61EA2XL4


Summary of Contents for Gorenje NRKP61EA2XL4
- Page 1 INSTRUCTIONS FOR USE OF AN UPRIGHT FRIDGE FREEZER...
- Page 2 Link to the EU EPREL database The QR code on the energy label supplied with the appliance provides a web link to the registration of this appliance in the EU EPREL database.
-
Page 3: Table Of Contents
Contents Important notes and precautions ..................Before using the appliance for the first time ................Important safety instructions ....................Important information on the use of appliance ................. Environment protection ......................Advice for saving power with refrigeration appliances ............Installation and connection ....................Selecting the room ........................ - Page 4 Defrosting the appliance ......................Automatic refrigerator defrosting ....................Defrosting a NoFrost freezer ..................... Manual defrosting of the NoFrost freezer ................. Cleaning the appliance ......................Troubleshooting ........................Information about appliance noise ..................
-
Page 5: Important Notes And Precautions
Important notes and precautions Before using the appliance for the first time Before connecting the appliance to the power mains, please read carefully the instructions for use which describe the appliance and its correct and safe use. The instructions apply to several appliance types/models;... - Page 6 ELECTRIC SHOCK! WARNING! If the supply cord is damaged, it must be replaced by the manufacturer, its service agent or similarly qualified persons in order to avoid a hazard. ELECTRIC SHOCK! WARNING! When positioning the appliance, ensure the supply cord is not trapped or damaged. ELECTRIC SHOCK! If LED lighting does not work, call a service technician.
- Page 7 Safety of children and vulnerable persons The appliance is not intended for use by persons (including children) with reduced physical, sensory or mental capabilities, or lack of experience and knowledge, unless they have been given supervision or instruction concerning use of the appliance by a person responsible for their safety.
-
Page 8: Important Information On The Use Of Appliance
Children aged from 3 to 8 years are allowed to load and unload refrigerating appliances. Warning regarding the refrigerant The appliance contains a small amount of an environmentally friendly yet flammable gas R600a. Make sure that no parts of the cooling system are damaged. A gas leak is not hazardous to the environment, but it could cause eye injury or fire. - Page 9 WARNING! WARNING! Keep ventilation openings, in the appliance enclosure or in the built-in structure, clear of obstruction. The appliance may not be used outdoors and it may not be exposed to rain. Do not store explosive substances such as aerosol cans with a flammable propellant in this appliance.
-
Page 10: Environment Protection
Environment protection Packaging is made of environmentally friendly materials that can be recycled, disposed of, or destroyed without any hazard to the environment. Removing an obsolete appliance To protect the environment, take the obsolete appliance to an authorized home appliance collection centre. -
Page 11: Installation And Connection
Installation and connection Selecting the room • Install the appliance in a dry and well ventilated room. The appliance will operate correctly if the environment temperature is in the interval specified in the table. The appliance class is indicated on the rating plate / label with the basic information on the appliance. Description Class Ambient temperature range °C... - Page 12 • The appliance must stand level or tilted slightly to the back. It should be stable and placed a solid base. At the front, the appliance is fi tted with two adjustable feet that can be used to level the appliance.
- Page 13 • The appliance is intended for free-standing installation. To reach the rated/minimum power consumption, always provide 50 mm of clearance between the wall and the back of the appliance, and above the appliance. Also allow adequate air circulation on either side of the appliance and above it.
-
Page 14: Connecting The Appliance
Connecting the appliance • Connect the appliance to the power mains using the power cord. The wall outlet should be fitted with a ground contact (safety socket). Nominal voltage and frequency are indicated on the rating plate/label with basic information on the appliance. •... - Page 15 Undo the screws (2) and remove the hinge (3). Run the connector (A) through the hole in the hinge. Hold the door while doing this to prevent it from falling. Remove the top door from the middle hinge by carefully lifting it straight up.
- Page 16 Remove the middle hinge cap and replace it on the opposite side. 11. Tilt the appliance backwards and remove the adjustable foot (11). Undo the three screws on the bottom hinge (14) and remove it. Remove the extra foot (12) from the bottom hinge pin (13). Unscrew the pin (13) from the bottom hinge and screw it onto the opposite side of the hinge, complete with the extra foot (12).
- Page 17 Note: If your model has a handle, then move it to the opposite side by following the instructions below. Remove the caps (1) and undo the two screws (2) as shown in the figure. Rotate the handle (3) by 180° and replace it on the opposite side. Then, fasten the screws (2) and replace the caps (1).
-
Page 18: Description Of The Appliance
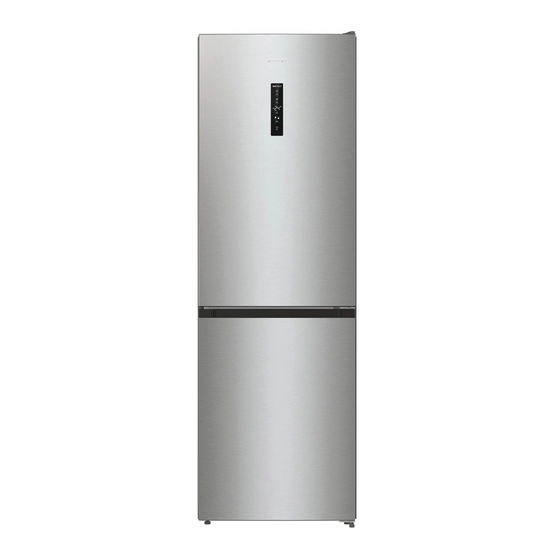
Description of the appliance Appliance interior equipment may change according to the appliance model. This product contains a light source of energy efficiency class G. A Refrigerator 1. Control panel 2. LED lighting 3. Air distribution system (MultiFlow) 4. Glass shelves 5. -
Page 19: Operating The Appliance
Operating the appliance Appliance on/off key Refrigerator/freezer compartment switch key Freezer compartment display Refrigerator compartment display Temperature setting key Set temperature display Intensive freezing (fast freeze) on/off key Intensive freezing (fast freeze) function indicator Eco function on/off key Eco function indicator Switching the appliance on/off When you connect the appliance to the power mains for the first time, the appliance will be in standby mode (switched off, but powered). -
Page 20: Adjusting The Temperature In The Appliance
Adjusting the temperature in the appliance INFORMATION! • Appliance temperature is preset at the factory to the recommended setting, i.e. 4°C for the refrigerator compartment and -18°C for the freezer compartment. • After the appliance is switched on, it may take several hours for the set temperature to be reached. -
Page 21: Control Unit/Display Standby Mode
Control unit/display standby mode INFORMATION! 30 second after you have pressed the most recent key, the control unit switches to standby mode. All indicators on the control unit will be switched off. There are exceptions when some indicators remain lit although the control unit is in standby mode. Such exceptions include the following: •... -
Page 22: Eco Function
Extreme freezing (upper drawer of the freezer compartment): This feature only works in the upper drawer of the freezer compartment. It relies on intensive supply/blowing of cool air. Faster freezing will retain more vitamins, minerals, and nutrients in the food for a longer period of time. •... -
Page 23: Child Lock
Child Lock Switching on: To activate the child lock, press the E key and hold it for a while (3 seconds). CL will briefly appear on the C1 display unit. The function will lock all keys except the E key. To deactivate: to deactivate the function, press the E key again. -
Page 24: Power Outage/Power Supply Failure Alarm
INFORMATION! If you switch off the alarm by pressing any key, the alarm will be reactivated in 4 minutes if the door is still open. INFORMATION! If you leave the door open for more than 10 minutes, the alarm will no longer be sounded. Appliance operation will switch to safe mode in order to provide sufficient cooling and prevent food spoilage despite the open door. -
Page 25: Appliance Interior Equipment
Appliance interior equipment ( * Equipment depends on the model) Shelf You can lay out the empty shelves to your liking across the guides in the refrigerator interior without having to remove them from the refrigerator. To move the shelf or take it out from the refrigerator, slightly lift it at the back, pull it towards you, and then either move it or take it out of the appliance. -
Page 26: Freshzone/Zerozone Drawer
• Pulling out the bin: Pull out the bin as far as it will go. Then, lift the front part and pull it out completely. FreshZone/ZeroZone drawer * (Only in some models) The FreshZone/ZeroZone compartment allows storing a wide variety of fresh food for up to three times longer than in a conventional refrigerator. -
Page 27: Door Racks
• To do this, use the slider as follows: To use the drawer as a FreshZone/ZeroZone: push the slider to the right. To use the drawer as a fruit and vegetables drawer (CrispZone): move the slider to the left. Door racks Interior side of the refrigerator door is fitted with shelves intended for storing cheese, butter, eggs, yoghurt, and other smaller packages, tubes, cans etc. -
Page 28: Air Distribution System With Air Ionizer (Multiflow/Ionair)
Air distribution system with air ionizer (MultiFlow/IonAir) * • The advanced MultiFlow fan system evenly distributes the ionized air and equalizes the temperature throughout the entire refrigerator. Air enriched with extra negative ions mimics the natural microclimate that keeps the food fresh for longer. This system also allows placing any type of food on any shelf in the fridge, as there are not temperature differences between them. -
Page 29: Recommended Distribution Of Food In The Appliance
Recommended distribution of food in the appliance Sections in the refrigerator compartment: • upper part: canned food, bread, wine, pastry ... • middle part: dairy products, ready-made meals, desserts, soft drinks, beer, cooked food, etc. • FreshZone/ZeroZone bin: meat, meat produce, delicatessen,... •... -
Page 30: Storing Food In The Refrigerator
Storing food in the refrigerator Important warnings regarding food storage INFORMATION! Correct use of the appliance, appropriate packaging, maintaining the right temperature, and observing the food hygiene standards have a decisive impact on the quality of food storage. Observe the expiry dates for the food, indicated on the packaging. Food stored in the refrigerator should be kept in closed containers or in appropriate packaging to prevent it from emitting or receiving odours and humidity. -
Page 31: Important Warnings On Freezing
To make sure the food freezes as quickly as possible, lay out the packages as described below: Divide fresh food into smaller packages (1 kg). Place two packages against the back wall along the left and right edge of the upper drawer, one package in the middle in front of them (also in the upper drawer), and one package in the middle drawer, against the middle of the back wall. -
Page 32: Thawing Frozen Food
Thawing frozen food • Thawing is an important step in storing food preserved by freezing. Food must be thawed in the correct way. • Suitable methods of thawing food are: in the refrigerator; in cold water; in a microwave or conventional oven with a suitable thaw program. •... -
Page 33: Cleaning The Appliance
• Simultaneously press and hold the D and E keys. Cd will appear on the display unit C1. • When the defrosting process is completed, the function will be deactivated automatically. The temperature set for the refrigerator compartment will be displayed on the C1 display unit. INFORMATION! When using this function, you do not have to empty the freezer beforehand. -
Page 34: Troubleshooting
Troubleshooting Problem: Cause or remedy: Appliance is connected to • Make sure there is voltage in the power outlet and that the the power mains but it does appliance is switched on. not work. Cooling system operates • Too high environment temperature. continuously for a long •... - Page 35 Table continued from last page Problem: Cause or remedy: Door is difficult to open: • If you are trying to open the freezer door after just having closed it, this could be difficult to do. As you open the door, some cool air escapes from the appliance and it is replaced by warm air from the environment.
-
Page 36: Information About Appliance Noise
Table continued from last page Problem: Cause or remedy: E9 appears on the display • Door was open for too long. Close the door. unit: • If the door is not open, or if E9 is still displayed 10 minutes after you have closed the door, then there is a door sensor failure. - Page 37 GORENJE gospodinjski aparati, d.o.o. Address: Partizanska 12, 3320 Velenje, Slovenia Phone: +386 (0)3 899 10 00 Fax: +386 (0)3 899 28 00 www.gorenje.com 881681-a4 We reserve the right to changes that do not affect the appliance functionality.
Need help?
Do you have a question about the NRKP61EA2XL4 and is the answer not in the manual?
Questions and answers
Как откроешь дверь морозильной камеры холодильника в самом низу на холодильнике посредине находится мини заглушка. Что это и что там находится?