Table of Contents
Advertisement
Quick Links
Advertisement
Table of Contents

Related Manuals for Concord Camera 3047


Summary of Contents for Concord Camera 3047
- Page 1 3047 User’s Guide...
- Page 2 ENGLISH CONGRATULATIONS Congratulations on the purchase of your new camera. Your camera has been carefully engineered and manufactured to give you dependable operation. Read this manual before operating the camera to become more familiar with it. This manual has been written and formatted with depth and detail so that you can easily follow the instructions to maximize the features of your camera.
-
Page 3: Table Of Contents
GETTING STARTED ...4 Package Contents ... 4 System Requirements ... 5 Camera Overview..6 Loading the Batteries ... 9 Inserting an SD Card (Optional) ... 9 Turning the Camera On and Off ... 10 Setting the Date, Time and Date Stamp ... 10 TAKING PICTURES AND VIDEO CLIPS ...11 Taking Pictures ... - Page 4 DOWNLOADING PICTURES AND VIDEO CLIPS ONTO YOUR COMPUTER ...34 Preparing to Download Files to Your Computer ... 34 Downloading Files to The Computer ... 34 USING CONCORD 3047 AS A WEB CAMERA ...36 UNPLUGGING YOUR CAMERA FROM THE COMPUTER ...39 CONNECTING THE CAMERA TO TV ...40 Setting TV Mode ...
-
Page 5: Getting Started
GETTING STARTED PACKAGE CONTENTS Check that all of the items shown below are included with your camera. • Digital Camera • Camera Case • Wrist Strap • CD-ROM(Includes Camera Driver, Photo editing software, multi-lingual User’s Guide etc.) • TV Cable •... -
Page 6: System Requirements
GETTING STARTED SYSTEM REQUIREMENTS Windows: • PC with processor better than MMX Pentium 300 MHz • Windows XP/2000/ME/98SE • Minimum 128 MB RAM • USB port • CD-ROM driver • 1024 x 768 monitor, 24-bit color (true color) Macintosh: • Mac OS 10 or later Specifications are subject to change without prior notice. -
Page 7: Camera Overview
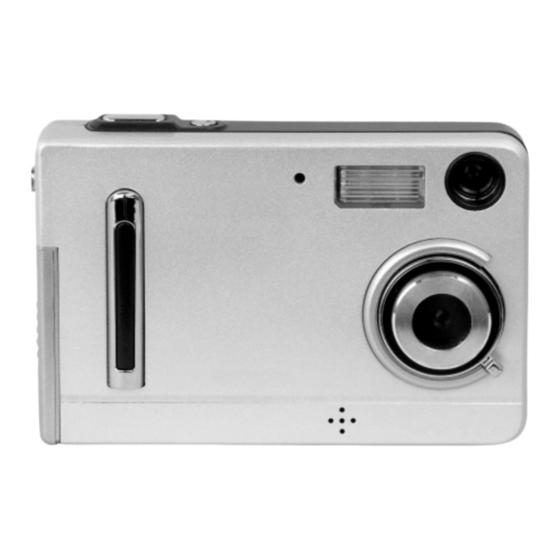
CAMERA OVERVIEW Camera The following illustrations show the names of each component, button and switch on the camera. Front View Back View Power Lamp Viewfinder Indicator Lamp LCD Monitor Self-Timer/Red-eye Reduction Lamp Flash Speaker Function Switch Enter Botton GETTING STARTED Viewfinder Lens Macro Switch... - Page 8 GETTING STARTED Top View Power Button Shutter Button Bottom View Tripod Socket Side View Strap Eyelet TV OUT Terminal Battery Door USB Port Terminal SD Card Slot...
- Page 9 LCD indications Shooting Mode EV Value White Balance Indicator Capture Mode Indicator Review Mode File Type Indicator Turning the LCD On or Off: In Capture mode, the LCD can be turned on or off: 1. Press the ENTER button to turn off the icons on the LCD. 2.
-
Page 10: Loading The Batteries
GETTING STARTED LOADING THE BATTERIES The camera uses 2x AAA alkaline or rechargeable batteries. 1. Slide the battery door and lift it open. 2. Insert the batteries according to the polarity indication engraved on the battery contact as shown. 3. Close the battery door. Checking the Battery Level The battery level indicates the power of the batteries. -
Page 11: Turning The Camera On And Off
To remove the SD card: Press the memory card into the slot then release. When the card is partially ejected, pull it out. Note:If the “Memory Full! ” warning message appears on the LCD, it means the SD card or internal memory is full. -
Page 12: Taking Pictures And Video Clips
TAKING PICTURES AND VIDEOS CLIPS TAKING PICTURES AND VIDEOS CLIPS TAKING PICTURES 1. Power on the camera. 2. Slide the Function switch to Note: In picture taking mode, the lower left side of the LCD. If this icon is not shown, press the button repeatedly until the 3. -
Page 13: Taking Video Clips
TAKING VIDEO CLIPS The camera can capture video clips with sound( Sound playback only on TV&PC). 1. Turn on the camera. 2. Slide the Function switch to 3. Press the button repeatedly until the Video Mode icon appears on the LCD. 4. -
Page 14: Using The Digital Zoom
TAKING PICTURES AND VIDEOS CLIPS USING THE DIGITAL ZOOM The camera provides up to 4x digital zoom. 1. Press the to zoom in. The digital zoom bar will be shown on the LCD. 2. Press the to zoom out or return to the normal mode. Important: 1. -
Page 15: Setting White Balance
SETTING WHITE BALANCE When the white balance is set to match the light source, the camera can take picture more accurately. 1. Slide the Function switch to 2. Press the MENU button, the LCD will show White Bal (White Balance) in highlight. 3. -
Page 16: Setting Size/Resolution
TAKING PICTURES AND VIDEOS CLIPS SETTING SIZE / RESOLUTION 1. Slide the Function switch to 2. press the MENU button. 3. Press the to select PS (Pict Size) and then press the Enter button. 4. Press the button to select the desired size/resolution. 5. - Page 17 Setup menu and features Beeper( OFF (Default) Auto Power Off( When Auto Power Off is activated, after one minute of inactivity, the LCD will automatically power off. Then the camera will automatically power off after being idled for around 3 minutes. The camera will not power off automatically in this setting.
- Page 18 TAKING PICTURES AND VIDEOS CLIPS Language( English (Default) Setting the language to English. Français Setting the language to French. Deutsch Setting the language to German. Español Setting the language to Spanish. Italiano Setting the language to Italian. Nederlands Setting the language to Dutch. Português Setting the language to Portuguese.
-
Page 19: Reviewing Your Files
REVIEWING YOUR FILES VIEWING FILES 1. Slide the Function switch to the LCD. The file type will be shown on the lower left corner of the LCD: = Picture, = Video Clip 2. Press the button to skip to the previous file, press the 3. -
Page 20: Running Slide Show
REVIEWING YOUR FILES shows options as below: Single Thumbnails Slide Show 4. Press the button to select • Up to six thumbnail view files appears on the LCD. For video clips, only the first frame can be seen. 5. Press the button to select specific picture/video that is shown in the current screen. -
Page 21: Deleting Stored Files
DELETING STORED FILES Note: Once file is deleted, it cannot be recovered. DELETING ONE FILE 1. Slide the Function switch to 2. Press the button to select the picture or video you want to delete, and then press the MENU button. 3. -
Page 22: Formatting The Internal Memory Or Sd Card
DELETING STORED FILES FORMATTING THE INTERNAL MEMORY OR SD CARD Caution: 1. Formatting will delete all pictures and video clips from the memory. 2. During the formatting process, never remove the memory card or batteries, as it will damage the card and/or the camera. 3. -
Page 23: Printing Stored Pictures
PRINTING STORED PICTURES SELECTING PICTURES FOR PRINTING You can select pictures for direct printing by a photo developing service center or on a direct print compatible printer. 1. Insert the SD card. 2. Slide the Function switch to 3. Press the button to select the picture you want to print. -
Page 24: Printing Pictures Directly
PRINTING STORED PICTURES PRINTING PICTURES DIRECTLY 1. Select the desired pictures (see ‘Selecting Pictures for Printing’ section). 2. Take the SD card out of the camera. 3. Insert the SD card into the SD card slot of a direct printing compatible printer. 4. -
Page 25: Software Installation
SOFTWARE INSTALLATION (FOR WINDOWS USERS) Option Camera Drivers Microsoft DirectX 9 Arcsoft Software Adobe Acrobat Reader User’s Guide Concord Support Website USING THE INSTALLER SPLASH SCREEN The installer will automatically detect which software applications need to be installed or if they are not necessary. -
Page 26: Installing Your Camera Driver
SOFTWARE INSTALLATION (FOR WINDOWS USERS) INSTALLING YOUR CAMERA DRIVER Note: To avoid compatibility issues, we recommend users of Win98SE and Windows ME to upgrade their OS through microsoft’s website before installing the camera driver. Step 1 Make sure that your camera is not connected to the computer. Step 2 Make sure the computer is powered on and Windows 98SE/ME/2000/XP is running. - Page 27 Click [Next]. Step 8 Click [Finish]. Step 9 To ensure the complete installation and enable the camera to function well, please do select “ restart your computer”. Step 10 SOFTWARE INSTALLATION (FOR WINDOWS USERS)
-
Page 28: Installing Direct X 9
SOFTWARE INSTALLATION (FOR WINDOWS USERS) INSTALLING DIRECTX 9 Step 1 Make sure your camera is powered off and not connected to the computer. Step 2 Make sure the computer is powered on and Windows 2000 is running. Step 3 Close any other applications or software you may be running. Insert the supplied CD-ROM into your computer’s CD-ROM Drive. -
Page 29: Installing Arcsoft Software
Click [Next >]. Step 8 Click [Finish]. Your computer will automatically restart. Step 9 INSTALLING ARCSOFT SOFWARE Step 1 Make sure your camera is powered off and not connected to the computer. Step2 Make sure the computer is powered on and Windows is running. Step 3 Close any other applications or software you may be running. - Page 30 SOFTWARE INSTALLATION (FOR WINDOWS USERS) The installation screen will appear, Click on Install ArcSoft Software. Step 6 Click [Next >]. Step 7 Click [Yes]. Step 8 Click [Next >]. Step 9...
- Page 31 Make sure the two applications are checked and then click [Next >]. Step 10 Click [Next]. Step 11 The screen will show the status of the installation. Step 12 Click [Finish]. Win98SE will request for restart. Step 13 Win 98SE SOFTWARE INSTALLATION (FOR WINDOWS USERS) Win2000/ME/XP...
-
Page 32: Installing Adobe Acrobat Reader (Optional)
SOFTWARE INSTALLATION (FOR WINDOWS USERS) INSATLLING ADOBE ACROBAT READER (OPTIONAL) Step 1 Make sure your camera is powered off and not connected to the computer. Step 2 Make sure the computer is powered on and Windows is running. Step 3 Close any other applications or software you may be running. - Page 33 “Recomposing data ...” status bar appear. Note for Win 98 SE users: As Adobe Reader 6 requires Internet Explorer 5.01 or greater, you may see below information: Note for Win 2000 users: As Adobe Reader 6 need the support of Win 2000 SP2, you may see below information: Step 7 In this case, please click [OK] to close the message screen, and then click [Finish] to...
- Page 34 SOFTWARE INSTALLATION (FOR WINDOWS USERS) Click [Next >]. Step 9 Click [Next >]. The files will be saved into C:\Program Files\Adobe\Acrobat 6.0 automatically. You may change the default folder by clicking [Change Destination Folder...] and selecting a different folder in your computer. Step 10 Click [Install] to start install the Adobe Reader 6.
-
Page 35: Downloading Pictures And Video Clips Onto Your Computer
DOWNLOADING PICTURES AND VIDEO CLIPS ONTO YOUR COMPUTER PREPARING TO DOWNLOAD FILES TO YOUR COMPUTER Note: For Win 98SE, you must install the driver before downloading files. 1. Slide the Function switch to 2. Turn on the camera. 3. Connect the camera to the computer with the Mini-USB cable included with the camera by plugging the larger end of the Mini-USB cable into your PC’s USB port first and then plug the small end of the Mini-USB cable into the USB port of the camera. - Page 36 DOWNLOADING PICTURES AND VIDEO CLIPS ONTO YOUR COMPUTER FOR MACINTOSH USERS 1. Connect the camera to the computer. • After a few moments, the external hard drive will appear on the desktop. 2. Double-click the “Removable Disk” removable drive that is on your desktop. 3.
-
Page 37: Using Concord 3047 As A Web Camera
2. The following message will pop up to ask for insertion of Windows 98SE CD-ROM. Insert the Windows 98SE CD- ROM into the CD-ROM drive, then click “OK”. 3. Click “Browse” to find the driver. USING CONCORD 3047 AS A WEB CAMERA (FOR WINDOWS ONLY) (Capture mode). - Page 38 USING CONCORD 3047 AS A WEB CAMERA (FOR WINDOWS ONLY) 4. Make sure the drive option is CD-ROM drive, then locate and double click Win98 folder, then click “OK” . 5. Click “OK” to continue and complete the installation. For Win 2000 1.
- Page 39 2. The “ Hardware Installation” warning will appear, click “Continue Anyway” to proceed. Note: The message of “Hardware Installation” will occur 2 times successively, just click “Continue Anyway” to proceed. 3. Click “Finish” to complete the installation. USING CONCORD 3047 AS A WEB CAMERA (FOR WINDOWS ONLY)
-
Page 40: Unplugging Your Camera From The Computer
UNPLUGGING YOUR CAMERA FROM THE COMPUTER UNPLUGGING YOUR CAMERA FROM THE COMPUTER Windows 98SE: Unplug the Mini-USB from the camera directly. Windows ME/2000/XP: 1. Turn the camera off. 2. Click once on the “Unplug or Eject Hardware” icon on the right hand side of your task bar. -
Page 41: Connecting The Camera To Tv
CONNECTING THE CAMERA TO TV SETTING TV MODE The camera allows you to view individual files and to take pictures or record clips on the television. To begin, check your television documentation to determine the suitable type of TV broadcast standard: NTSC or PAL. -
Page 42: Troubleshooting
TROUBLE SHOOTING TROUBLE SHOOTING Problem The power is not on. The batteries were not loaded properly. The camera is not running. Batteries are depleted. The battery cover is not closed properly. The camera is in the Playback Function mode. The flash is charging. The camera is not taking pictures. - Page 43 Cannot take a picture or a video clip when The SD card is locked or using an SD memory write protected. card. Something was blocking the lens when taking the picture. Part of the picture/ video clip is missing. The picture was not centered correctly in the viewfinder.
-
Page 44: Specifications
SPECIFICATION SPECIFICATION Image Sensor Lens Specification Focus Range Operating System Flash Strobe White Balance Exposure Control Video Mode Storage Capacity (for 16 MB Built-In Memory) (approx.) Compression Zoom Display RTC(Real-Time Clock) PC Interface Video Output Storage Type Power Bundled Software CMOS Sensor (2048 x 1536 pixel), Sensor area 1 / 2 “... -
Page 45: Getting Help
GETTING HELP You can get help from the troubleshooting section, FAQ or Customer Support on our website. Troubleshooting Section in this User’s Guide Please refer to the Troubleshooting section first, as it contains some of the most common problems that users encounter. Website FAQ Please visit our website at www.concord-camera.com to view the Frequently Asked Questions (FAQ). -
Page 46: Safety Tips And Maintenance
SAFETY TIPS AND MAINTENANCE SAFETY TIPS AND MAINTENANCE Cleaning the camera body Please use a soft dry cloth to clean the camera. Cleaning the lens and LCD 1. Blow off dirt or dust with a blower or canned air. 2. Gently wipe the lens and/or LCD with a micro-fiber cloth. 3. - Page 47 Batteries may not work normally under 32°F(0°C). Precautions for SD Memory Cards • In the event of malfunction or damage, it is possible that data may be lost. Concord Camera is not responsible in any way for such data loss. •...
- Page 48 SAFETY TIPS AND MAINTENANCE • Avoid heat, liquid and direct sunlight when using and for when storing. • Do not open the battery/card cover or remove the SD Memory Card while data is being read or written. • Do not dismantle or modify. •...
-
Page 49: Regulatory Information
- This product is in conformity with Directive 89/336/EEC. Concord and the Concord logo are registered trademarks or trademarks of Concord Camera Corp., in the United States and/or other countries. Microsoft and Windows are either registered trademarks or trademarks of Microsoft Corporation in the United States and/or other countries. - Page 50 Visit Concord on the Internet www.concord-camera.com Version 1.0 Concord 3047 User’s Guide 584690-00 Copyright 2005 Concord Camera Corp.
Need help?
Do you have a question about the 3047 and is the answer not in the manual?
Questions and answers