Table of Contents
Advertisement
Available languages
Available languages
Quick Links
Advertisement
Table of Contents

Subscribe to Our Youtube Channel
Related Manuals for Ultenic U10 PRO


Summary of Contents for Ultenic U10 PRO
- Page 1 User Manual Stick Vacuum U�� PRO...
-
Page 3: Safety Precautions And Warnings
Safety Precautions & Warnings IMPORTANT! Always switch off the appliance before cleaning, when not in use or before attempting any maintenance task. The charger must only be connected to an AC power supply at the voltage shown on the rating label. This cleaner should only be used for its intended purpose as described in this instruction manual. - Page 4 • Keep openings away from your face and body. • Do not use the vacuum cleaner if it is damaged or broken. If connection cables are damaged, have them replaced immediately. • Never clean the vacuum cleaner or any of the electrical parts, especially the electrical connec- tions, with water or liquid cleaners.
-
Page 5: About Your Product
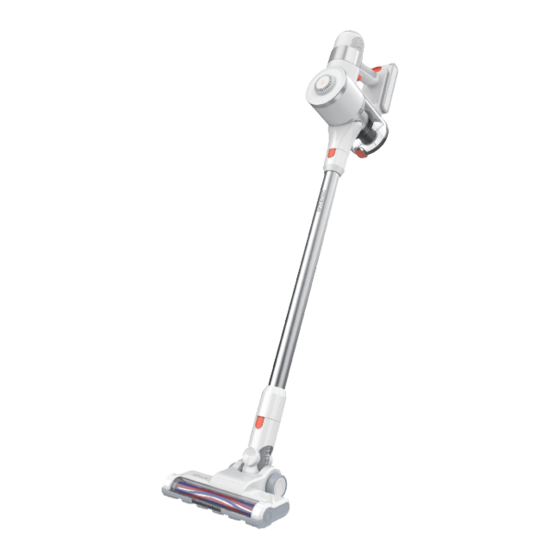
About Your Product Congratulations on the purchase of your new Ultenic Stick Vacuum. There are many useful features built into your cleaner and we recommend that you carefully read this instruction manual to take the best advantage of these features. -
Page 6: Before You Begin
Before You Begin This cleaner must be operated in accordance with these instructions and used only for domestic household cleaning to remove DRY dirt and dust from household carpets, flooring, walls and fabrics. This cleaner is not fit to be used as an industrial cleaner and will void the manufacturer’s warranty if used inappropriately. -
Page 7: Product Use
Product Use Assembly IMPORTANT! Always remove the battery from the appliance before fitting or removing accessories. 2. To install the rod, insert the plug end of the rod into the air inlet of the cleaner. Once it is securely in place, you will hear a "click"... -
Page 8: Charging Indicator Light
Instructions for Use Turning on the vacuum Press the on/off button to turn on the vacuum. Switch to boost mode To switch between low power and high power, press the boost button. Charging the vacuum cleaner NOTE: When the charging indicator light flashes during use, the vacuum cleaner battery is running low and requires charging. -
Page 9: Dusting Brush
Accessories Dusting brush The dusting brush can be used as a soft dusting brush for cleaning a variety of surfaces or as an upholstery tool for cleaning furniture. Crevice tool The crevice tool can be used to clean hard-to-reach places or in tight crevices. Power head Ideal for daily cleaning on carpets and hard floors. -
Page 10: Product Maintenance
Product Maintenance IMPORTANT! Turn off the cleaner and remove the battery before conducting any maintenance tasks. It is recommended to clean the dust bin after each use or when dust reaches the max fill line. Storage 1. Install the wall storage bracket onto the wall using wall mounting screws (not included). - Page 11 3. Lift the cyclone filter and release it from the cleaner. 4. To remove the exhaust filter, turn the filter cap anti-clock- wise. Then, pull the exhaust filter from the filter cap. NOTE: It is recommended to replace the filters every six months or when they become visibly dirty.
-
Page 12: Troubleshooting
Troubleshooting Problem Possible cause Solution Cleaner doesn't start Flat battery Charge the vacuum cleaner The dust bin is full of dust Empty the dust bin Filter is blocked Clean or replace the filter Reduced suction The airway is blocked Clear the airway Reinsert the charger into the The charging indicator The charger is not fully... - Page 13 Precauzioni E Avvertenze Di Sicurezza IMPORTANTE! Spegnere sempre l'apparecchio prima della pulizia, quando non in uso o prima di tentare qualsiasi attività di manutenzione. Il caricabatterie deve essere collegato solo a un alimentatore CA alla tensione indicata sull'etichetta nominale. Questo detergente deve essere utilizzato solo per lo scopo previsto come descritto in questo manuale di istruzioni.
- Page 14 • Se la presa d'aria o la spazzola di terra per pavimenti è bloccata, chiudere immediatamente l'aspirapolvere. Rimuovere gli oggetti estranei bloccati prima di provare di riavviare l'aspirapolvere. • Assicurati di spegnere l'aspirapolvere prima di pulire l'aspirapolvere o il filtro. •...
- Page 15 Informazioni sul tuo prodotto Porta di ricarica Pulsante per rimuovere la batteria Filtro di scarico Batteria Strumento per fessure Acceso/Spento Regolare il Rimuovere il pulsante di aspirazione pulsante del secchio della polvere Rimuovere il pulsante Secchio della polvere del tubo Rimuovere il Spazzola per spolverare pulsante del filtro...
-
Page 16: Prima Di Iniziare
Prima Di Iniziare Quest'apparecchio deve essere utilizzato secondo queste istruzioni e deve essere utilizzato solo per la pulizia della casa per rimuovere lo sporco secco e la polvere da tappeti domestici, pavimenti, pareti e tessuti. Quest'apparecchio non è adatto per l'uso come detergente industriale e, se utilizzato in modo improprio, invaliderà... -
Page 17: Uso Del Prodotto
Uso del prodotto Assemblare Importante! Rimuovere la batteria prima di installare o rimuovere gli accessori. 2. Inserire l'estremità della spina del tubo nell'ingresso dell'aria del pulitore. Quando è saldamente seduto, sentirai un suono "click". Inserire della batteria 1. Collegare la batteria all'unità principale dell'aspirapol- vere. -
Page 18: Istruzioni Per L'uso
Istruzioni Per L'uso Accendi l'aspirapolvere Premere il pulsante di Acceso/Spento per accendere l'aspirapolvere. Passare alla modalità di accelerazione Questo pulsante per cambiare l'aspirazione grande/piccola. Caricare l'aspirapolvere NOTA: quando la spia luminosa di carica lampeggia durante l'uso, la batteria dell'aspirapolvere si sta esaurendo e richiede la ricarica. - Page 19 Accessori Spazzola per spolvere La spazzola per spolverare può essere utilizzata come spazzola per spolverare morbida per la pulizia di una varietà di superfici o come strumento di tappezzeria per la pulizia dei mobili. Strumento per fessure Lo strumento per fessura può essere utilizzato per pulire luoghi difficili da raggiungere o in fessure strette.
-
Page 20: Manutenzione
Manutenzione Importante! Spegnere l'aspirapolvere e rimuovere la batteria prima di eseguire qualsiasi manutenzione. Si consiglia di pulire la lettiera dopo ogni utilizzo o quando la polvere raggiunge la sua capacità massima. Stoccare 1. Fissare Staffa portaoggetti a parete con le viti di fissaggio a parete. - Page 21 3. Sollevare e rimuovere il filtro. 4. Se è necessario rimuovere il filtro di scarico, ruotare il coperchio del filtro in senso antiorario. Quindi, estrarre il filtro di scarico dal coperchio del filtro. NOTA: Si consiglia di cambiare i filtri ogni sei mesi o quando diventano visibilmente sporchi.
-
Page 22: Risoluzione Dei Problemi
Risoluzione dei problemi Problemi e soluzioni Se riscontri un problema, utilizza l'elenco di controllo dei suggerimenti per la risoluzione dei problemi prima di contattare l'Assistenza clienti Godfreys. Colpa Causa Soluzione L'aspirapolvere non Batteria scarica Carica l'aspirapolvere si avvia Il secchio della polvere è Svuotare il secchio della polvere pieno di polvere Ridurre l'aspirazione... -
Page 23: Customer Service
United Kingdom service-uk@ultenic.com service-it@ultenic.com Italia service-jp@ultenic.com 日本 Others support@ultenic.com Shenzhen Ultenic Technology Co.,Ltd 2110, Block B, Building 2, Zhongliangxiangyun, Ailian Community, Longcheng Street, Longgang District, support@ultenic.com Shenzhen, Guangdong Province, P.R. China ULTENIC FRANCE 320 rue Saint-Honoré 75001 Paris E-mail: support@ultenic.com...
Need help?
Do you have a question about the U10 PRO and is the answer not in the manual?
Questions and answers