Table of Contents
Advertisement
Available languages
Available languages
Quick Links
Advertisement
Table of Contents

Subscribe to Our Youtube Channel
Related Manuals for Ultenic U10 PRO


Summary of Contents for Ultenic U10 PRO
- Page 1 User Manual Stick Vacuum U�� PRO...
-
Page 3: Safety Precautions And Warnings
Safety Precautions & Warnings IMPORTANT! Always switch off the appliance before cleaning, when not in use or before attempting any maintenance task. The charger must only be connected to an AC power supply at the voltage shown on the rating label. This cleaner should only be used for its intended purpose as described in this instruction manual. - Page 4 • Keep openings away from your face and body. • Do not use the vacuum cleaner if it is damaged or broken. If connection cables are damaged, have them replaced immediately. • Never clean the vacuum cleaner or any of the electrical parts, especially the electrical connec- tions, with water or liquid cleaners.
-
Page 5: About Your Product
About Your Product Congratulations on the purchase of your new Ultenic Stick Vacuum. There are many useful features built into your cleaner and we recommend that you carefully read this instruction manual to take the best advantage of these features. -
Page 6: Before You Begin
Before You Begin This cleaner must be operated in accordance with these instructions and used only for domestic household cleaning to remove DRY dirt and dust from household carpets, flooring, walls and fabrics. This cleaner is not fit to be used as an industrial cleaner and will void the manufacturer’s warranty if used inappropriately. -
Page 7: Product Use
Product Use Assembly IMPORTANT! Always remove the battery from the appliance before fitting or removing accessories. 2. To install the rod, insert the plug end of the rod into the air inlet of the cleaner. Once it is securely in place, you will hear a "click"... -
Page 8: Charging Indicator Light
Instructions for Use Turning on the vacuum Press the on/off button to turn on the vacuum. Switch to boost mode To switch between low power and high power, press the boost button. Charging the vacuum cleaner NOTE: When the charging indicator light flashes during use, the vacuum cleaner battery is running low and requires charging. -
Page 9: Dusting Brush
Accessories Dusting brush The dusting brush can be used as a soft dusting brush for cleaning a variety of surfaces or as an upholstery tool for cleaning furniture. Crevice tool The crevice tool can be used to clean hard-to-reach places or in tight crevices. Power head Ideal for daily cleaning on carpets and hard floors. -
Page 10: Product Maintenance
Product Maintenance IMPORTANT! Turn off the cleaner and remove the battery before conducting any maintenance tasks. It is recommended to clean the dust bin after each use or when dust reaches the max fill line. Storage 1. Install the wall storage bracket onto the wall using wall mounting screws (not included). - Page 11 3. Lift the cyclone filter and release it from the cleaner. 4. To remove the exhaust filter, turn the filter cap anti-clock- wise. Then, pull the exhaust filter from the filter cap. NOTE: It is recommended to replace the filters every six months or when they become visibly dirty.
-
Page 12: Troubleshooting
Troubleshooting Problem Possible cause Solution Cleaner doesn't start Flat battery Charge the vacuum cleaner The dust bin is full of dust Empty the dust bin Filter is blocked Clean or replace the filter Reduced suction The airway is blocked Clear the airway Reinsert the charger into the The charging indicator The charger is not fully... - Page 13 Precauciones de seguridad & Advertencias IMPORTANTE! Apague siempre el aparato antes de limpiarlo, cuando no esté en uso o antes de intentar cualquier tarea de mantenimiento. El cargador solo debe estar conectado a una fuente de alimentación de CA a la tensión que se muestra en la etiqueta de clasificación. Este limpiador solo debe usarse para el aparato previsto como se describe en este manual de instrucciones.
- Page 14 • Antes de realizar cualquier servicio de mantenimiento o limpieza de los filtros, apaga siempre la aspiradora. • Mantenga las aberturas lejos de su cara y cuerpo. • No use la aspiradora si está dañada o rota. Si los cables de conexión están dañados, reemplácelos inmediatamente.
-
Page 15: Acerca De Su Producto
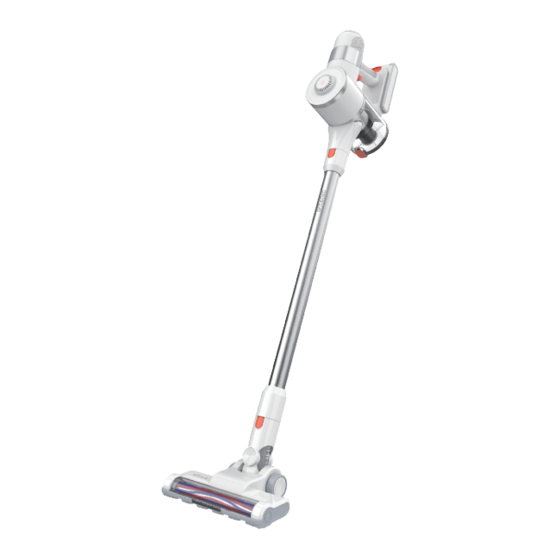
Acerca de su producto Puerto de carga Botón de liberación de la batería Filtro de escape Batería Herramienta para Disparador de hendiduras Botón boost encendido / apagado Botón de liberación de la cubo de polvo Cubo de polvo Botón de liberación de varilla Botón de liberación de la tapa del cubo... -
Page 16: Antes De Empezar
Antes de empezar Este limpiador debe operar de acuerdo con estas instrucciones y usarse solo para la limpieza del hogar para eliminar la suciedad seca y el polvo de alfombras, pisos, paredes y telas . Este limpiador no es adecuado para su uso como limpiador industrial y, si se usa incorrectamente, anulará la garantía del fabricante. -
Page 17: Uso Del Producto
Uso del producto Ensamblar IMPORTANTE! Retire siempre la batería del aparato antes de instalar o quitar los accesorios. 2. Para instalar la varilla, inserte el extremo del tapón de la varilla en la entrada de aire del limpiador. Una vez que esté... -
Page 18: Instrucciones De Uso
Instrucciones de uso Encender la aspiradora Pulse el botón de encendido/apagado para encender la aspiradora. Cambiar al modo boost Para cambiar entre baja potencia y alta potencia, presione el botón de impulso. Carga de la aspiradora NOTA: Cuando la luz indicadora de carga parpadea durante el uso, la batería de la aspiradora se está... -
Page 19: Herramienta Para Hendiduras
Accesorios Cepillo de polvo El Cepillo de polvo se puede utilizar como un cepillo de polvo suave para limpiar una variedad de superficies o como una herramienta de tapicería para limpiar muebles. Herramienta para hendiduras Herramienta para hendiduras se puede utilizar para limpiar lugares difíciles de alcanzar o en grietas estrechas. -
Page 20: Mantenimiento
Mantenimiento IMPORTANTE! Apague el limpiador y retire la batería antes de realizar cualquier tarea de mantenimiento. Se recomienda limpiar el cubo de polvo después de cada uso o cuando el polvo alcanza la línea de llenado máximo. Almacenamiento 1. Instale el soporte de almacenamiento en la pared con tornillos de montaje en la pared (no incluidos) . - Page 21 3. Levante el filtro ciclónico y suéltelo del limpiador. 4. Para quitar el filtro de escape, gire la tapa del filtro en sentido contrario a las agujas del reloj. Luego, extraiga el filtro de escape de la tapa del filtro. NOTA: Se recomienda reemplazar los filtros cada seis meses o cuando se ensucien visiblemente.
-
Page 22: Solución De Problemas
Solución de problemas Problemas y soluciones Si se encuentra con un problema, utilice la lista de verificación de consejos para la solución de problemas antes de ponerse en contacto con el servicio de atención al cliente de Godfreys. Avería Causa Solución El limpiador no se inicia Batería descargada... -
Page 23: Customer Service
United Kingdom service-uk@ultenic.com service-it@ultenic.com Italia service-jp@ultenic.com 日本 Others support@ultenic.com Shenzhen Ultenic Technology Co.,Ltd 2110, Block B, Building 2, Zhongliangxiangyun, Ailian Community, Longcheng Street, Longgang District, support@ultenic.com Shenzhen, Guangdong Province, P.R. China ULTENIC FRANCE 320 rue Saint-Honoré 75001 Paris E-mail: support@ultenic.com...
Need help?
Do you have a question about the U10 PRO and is the answer not in the manual?
Questions and answers