
Related Manuals for Weco Discovery 300


Summary of Contents for Weco Discovery 300
- Page 1 Cod. 006.0001.1920 11/02/2021 V.2.2 Discovery 300 Instruction manual Translation of original instructions...
- Page 2 Cod. 006.0001.1920 Discovery 300 11/02/2021 V.2.2 ENGLISH WELD THE WORLD...
-
Page 3: Table Of Contents
Discovery 300 Cod. 006.0001.1920 11/02/2021 V.2.2 ENGLISH WELD THE WORLD INDEX INTRODUCTION ............................4 INTRODUCTION ............................5 INSTALLATION ............................5 CONNECTIONS TO THE ELECTRICAL MAINS NETWORK ..............5 FRONT PANEL ............................. 6 REAR PANEL ............................... 6 PREPARING FOR MMA WELDING ......................7 PREPARING FOR TIG WELDING ....................... -
Page 4: Introduction
Cod. 006.0001.1920 Discovery 300 11/02/2021 V.2.2 ENGLISH WELD THE WORLD INTRODUCTION IMPORTANT! This handbook must be consigned to the user prior to installation and commissioning of the unit. Read the "General prescriptions for use" handbook supplied separately from this handbook before installing and commissioning the unit. -
Page 5: Introduction
Discovery 300 Cod. 006.0001.1920 11/02/2021 V.2.2 ENGLISH WELD THE WORLD 1.1 INTRODUCTION This professional and rugged welding power source for DC MMA and TIG welding with exceptional arc characteristics is designed to operate in harsh environmental conditions in the fields of professional maintenance, shipyards and offshore, building construction and heavy fabrication. The combination of digital control and excellent welding with cellulosic electrodes is ideal for hydraulic applications and welding work on oil pipelines and in the petrochemical industry. Up to 4 mm diameter electrode welding is possible in MMA. In MMA welding the Hot Start and Arc Force functions are adjustable and they allow improved arc strik- ing, a flatter bead and more uniform weld. The Anti Sticking function makes it possible to detach the electrode rapidly from the workpiece in the event of accidental sticking. The fan is turned on only during welding, at the end of the welding process it remains on for a fixed period of time according to welding conditions. The fan is nonetheless controlled by specific thermal sensors that guarantee a correct cooling of the machine. Accessories/ancillary devices that can be connected to the unit: Manual remote controller for remote adjustment of the welding current. -
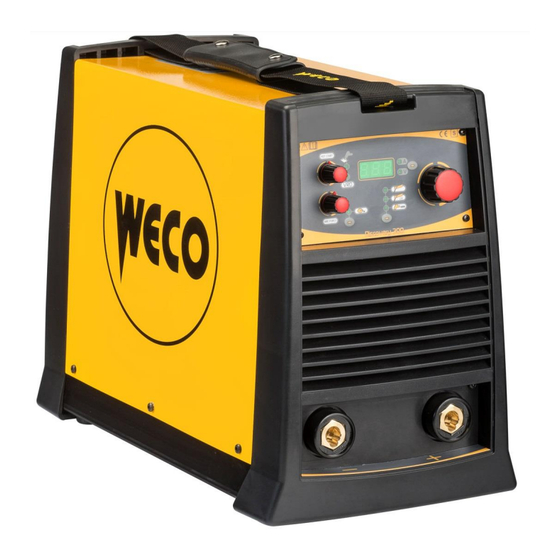
Page 6: Front Panel
Cod. 006.0001.1920 Discovery 300 11/02/2021 V.2.2 ENGLISH WELD THE WORLD 2.2 FRONT PANEL ○ Negative pole welding socket [Item 1]. ○ Positive pole welding socket [Item 2]. 2.3 REAR PANEL ○ Remote controller connector [Item 1]. ○ Power cable [Item 2]. • Total length (including internal part): 5,0 m • Number and cross section of wires: 4 x 2.5 mm • Power plug type: not supplied ○ Mains protection ON LED [Item 3]. This LED illuminates if an incorrect operating condition occurs: • absence of a phase in the power supply line. ○ Welding power source ON/OFF switch. Item 4]. -
Page 7: Preparing For Mma Welding
Discovery 300 Cod. 006.0001.1920 11/02/2021 V.2.2 ENGLISH WELD THE WORLD 2.4 PREPARING FOR MMA WELDING 1. Set the welding power source ON/OFF switch to “O” (unit switched off). 2. Plug the power cable plug into a mains socket outlet. 3. Choose the electrode based on the type of material and thickness of the workpiece to be welded. 4. Insert the electrode in the electrode holder. 5. Connect the electrode holder cable to the welding socket based on the polarity requested by the type of electrode used. 6. Connect the plug of the ground clamp to the welding socket on the basis of the polarity required. 7. Connect the earth clamp to the workpiece being processed. DANGER! Electric shock hazard! Read the warnings highlighted by the following symbols in the “General prescriptions for use”. -
Page 8: Preparing For Tig Welding
Cod. 006.0001.1920 Discovery 300 11/02/2021 V.2.2 ENGLISH WELD THE WORLD 2.5 PREPARING FOR TIG WELDING 1. Set the welding power source ON/OFF switch to “O” (unit de-energized). 2. Plug the power cable plug into a mains socket outlet. 3. Choose the electrode based on the type of material and thickness of the workpiece to be welded. 4. Insert the electrode in the TIG torch. 5. Connect the torch plug to the welding socket on the basis of the polarity required by the type of electrode in question. 6. Connect the plug of the ground clamp to the welding socket on the basis of the polarity required. 7. Connect the earth clamp to the workpiece being processed. 8. Set the welding power source ON/OFF switch to “I” (unit powered). -
Page 9: User Interface
Discovery 300 Cod. 006.0001.1920 11/02/2021 V.2.2 ENGLISH WELD THE WORLD USER INTERFACE POT1 POT2 CODE SYMBOL DESCRIPTION This LED illuminates to confirm the presence of power on the output sockets. Illumination shows that the following function has been activated: VRD (reduced output volt- age). The no-load voltage between the welding sockets is switched from U0 to Ur (see technical data). Illuminates to indicate a value in the following unit of measurement: AMPERES (A) Illuminates to indicate a value in the following unit of measurement: VOLTS (V) This LED indicates that the current reference setting is imposed by the remote controller. -
Page 10: Unit Power-Up
Cod. 006.0001.1920 Discovery 300 11/02/2021 V.2.2 ENGLISH WELD THE WORLD CODE SYMBOL DESCRIPTION This button selects the welding mode. POT1 MMA: The potentiometer sets the value of the following parameter: HOT START POT2 MMA: The potentiometer sets the value of the following parameter: ARC FORCE Data setting: The encoder sets the value of the selected parameter. Welding: The encoder sets the value of the following parameter: WELDING CURRENT UNIT POWER-UP Set the welding power source ON/OFF switch to “I” to switch on the unit. AL.H. The message appears on the following display: D1. First power-up or power-ups following a RESET procedure The welding power source sets up for welding with the factory pre-sets. Subsequent power-ups The welding power source sets up for welding in the latest stable welding configuration that was active at the time of power-off. RESET (LOAD FACTORY SETTINGS) POT1 POT2 ACTIVATION The reset procedure involves complete restoration of the default values, parameters and memory set- tings set in the factory. -
Page 11: Set-Up (Initial Set-Up Of The Welding Power Source)
Discovery 300 Cod. 006.0001.1920 11/02/2021 V.2.2 ENGLISH WELD THE WORLD ○ Set the welding power source ON/OFF switch to “O” to switch the unit off. ○ Keeping both the S2 and S3 buttons pressed, set the generator power source SIMULTANEOUS ACTIONS] switch to “I” to turn on the equipment [ - rEC : The message appears on the following displays: D1. - Wait for the memory clear procedure to terminate. - Page 12 Cod. 006.0001.1920 Discovery 300 11/02/2021 V.2.2 ENGLISH WELD THE WORLD Tab. 1 - Parameters of the 2nd level menu: MMA mode SETTING DEFAULT NOTES OUTPUT VOLTAGE REDUCTION LONG ARC VOLTAGE *SYN Only MMA *SYN: This code indicates that parameter control is synergic. The optimal value of this parameter is set automatically by the microprocessor on the basis of the pre-set welding current value. • W hen SYN is installed, to display the synergic value press the following button: S1. • T his value can be displayed but it is not user-adjustable. - OUTPUT VOLTAGE REDUCTION (VRD) ○...
-
Page 13: Alarm Management
Discovery 300 Cod. 006.0001.1920 11/02/2021 V.2.2 ENGLISH WELD THE WORLD ALARM MANAGEMENT An alarm message appears on the following display: D1. Tab. 2 - Alarm messages MESSAGE MEANING EVENT CHECKS In start-up phase Appears for 2-3 seconds • Make sure that the power re- Overheating alarm quired by the welding process is Indicates tripping of the welding lower than the maximum rated power source thermal protection. -
Page 14: Welding
Cod. 006.0001.1920 Discovery 300 11/02/2021 V.2.2 ENGLISH WELD THE WORLD WELDING 8.1 MMA WELDING/MMA CEL POT1 POT2 ACTIVATION ○ Press the S3 button to activate the MMA or MMA CEL mode. MMA CEL Tab. 3 - Parameters of the 1st level menu: MMA/MMA CEL mode SETTING DEFAULT NOTES... - Page 15 Discovery 300 Cod. 006.0001.1920 11/02/2021 V.2.2 ENGLISH WELD THE WORLD - WELDING CURRENT ○ This parameter regulates the primary welding current value. - MAXIMUM CURRENT WITH REMOTE CONTROLLER ○ The maximum output current value that can be achieved with foot pedal controller external refer- ence. - HOT-START ○ This parameter aids electrode melting at the time of arc striking. It is set as a percentage referred to the value of the following parameter: WELDING CURRENT.
-
Page 16: Tig Dc Welding
Cod. 006.0001.1920 Discovery 300 11/02/2021 V.2.2 ENGLISH WELD THE WORLD 8.2 TIG DC WELDING POT1 POT2 ACTIVATION ○ Press the S3 button to activate the CONTINUOUS DC TIG mode. L 9 CONTINUOUS DC TIG Tab. 4 - Parameters of the 1st level menu: CONTINUOUS DC TIG mode... -
Page 17: Torch Trigger Procedure
Discovery 300 Cod. 006.0001.1920 11/02/2021 V.2.2 ENGLISH WELD THE WORLD 8.3 TORCH TRIGGER PROCEDURE - 2 STROKE LIFT: ○ Touch the workpiece with the torch electrode. ○ Press (1T) and keep the torch trigger pressed. ○ Slowly lift the torch to strike the arc. ○ The welding current reaches the pre-set value, by way of an up slope time, if programmed. ○ Release (2T) the trigger to start the weld completion procedure. ○ The current reaches the end current value in the time set in the down slope time parameter. ○ The arc is extinguished. ○ Gas delivery continues for the time set in the post gas parameter. -
Page 18: Technical Data
Cod. 006.0001.1920 Discovery 300 11/02/2021 V.2.2 ENGLISH WELD THE WORLD TECHNICAL DATA Waste electrical and electronic equipment (WEEE) Electromagnetic compatibility (EMC) Directives applied Low voltage (LVD) Restriction of the use of certain hazardous substances (RoHS) Construction standards EN 60974-1; EN 60974-10 Class A Equipment compliant with European directives in force Equipment suitable in an environment with increased hazard of electric shock Conformity markings Equipment compliant with WEEE directive Equipment compliant with RoHS directive Supply voltage 3 x 400 Va.c. ± 15 % / 50-60 Hz Mains protection 20 A 500 V Delayed This equipment complies with IEC 61000-3-12 provided that the maximum permis- sible system impedance is less than or equal to 38 mΩ at the interface point between... - Page 19 Discovery 300 Cod. 006.0001.1920 11/02/2021 V.2.2 ENGLISH WELD THE WORLD 40% (40° C) 12.1 A 50% (40° C) 10.5 A Maximum Effective Supply Current 60% (40° C) 11.1 A 9.5 A 100 % (40° C) 12.3 A 9.4 A No-load voltage (U0) 76 V Reduced no-load voltage (Ur) Efficiency (300A / 32,0V): 85% Power source efficiency No-Load condition power consumption (U1= 400 Va.c.): 21,6 W...
-
Page 20: Electrical Diagram
Cod. 006.0001.1920 Discovery 300 11/02/2021 V.2.2 ENGLISH WELD THE WORLD 10 ELECTRICAL DIAGRAM... - Page 21 Discovery 300 Cod. 006.0001.1920 11/02/2021 V.2.2 ENGLISH WELD THE WORLD...
-
Page 22: Remote Control Connector (Back Panel)
Cod. 006.0001.1920 Discovery 300 11/02/2021 V.2.2 ENGLISH WELD THE WORLD 10.1 REMOTE CONTROL CONNECTOR (back panel) cod. 021.0004.0602 REMOTE CONTROLLER Pot= 2Kohm - 10Kohm... -
Page 23: Spare Parts
Discovery 300 Cod. 006.0001.1920 11/02/2021 V.2.2 ENGLISH WELD THE WORLD 11 SPARE PARTS... - Page 24 Cod. 006.0001.1920 Discovery 300 11/02/2021 V.2.2 ENGLISH WELD THE WORLD N° CODE DESCRIPTION 014.0002.0012 KNOB WITH CAP + INDICATOR 014.0002.0010 KNOB WITH CAP + INDICATOR 050.5046.0000 FRONT PANEL 010.0006.0038 FRONT PLASTIC PANEL 021.0001.0259 FIXED SOCKET 050.0002.0119 PRIMARY CAPACITOR BOARD 011.0008.0029 LATERAL PLATE 040.0003.0061...
- Page 25 Discovery 300 Cod. 006.0001.1920 11/02/2021 V.2.2 ENGLISH WELD THE WORLD...
- Page 26 Cod. 006.0001.1920 11/02/2021 V.2.2 www.weco.it...
Need help?
Do you have a question about the Discovery 300 and is the answer not in the manual?
Questions and answers