Celexon Expert Operating Instructions Manual
Electric ceiling recessed projection screen
Hide thumbs
Also See for Expert:
- Operating instructions manual (65 pages) ,
- Installation manual (2 pages) ,
- Operating instructions manual (9 pages)
Advertisement
Quick Links
Operating instructions
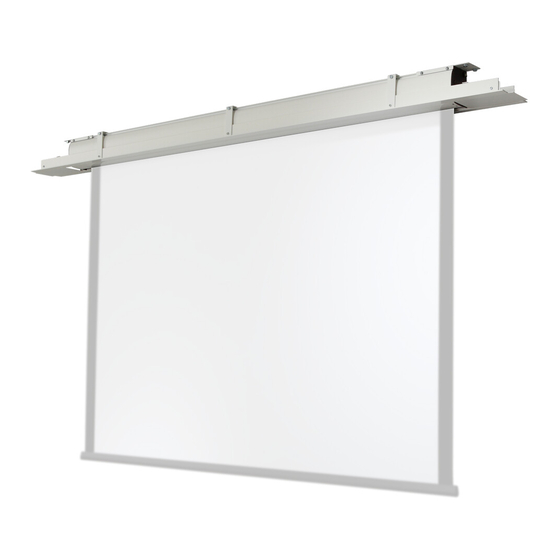
celexon Electric ceiling recessed
projection screen Expert | Expert XL
Thank you for purchasing this product. For optimum performance and safety, please
read these instructions carefully before connecting or operating the product. Please
retain these instructions for future reference.
Version: 32422_051
Electric Expert
Electric Expert XL
Advertisement

Subscribe to Our Youtube Channel
Related Manuals for Celexon Expert


Summary of Contents for Celexon Expert
- Page 1 Operating instructions celexon Electric ceiling recessed projection screen Expert | Expert XL Electric Expert Electric Expert XL Thank you for purchasing this product. For optimum performance and safety, please read these instructions carefully before connecting or operating the product. Please retain these instructions for future reference.
- Page 2 If you notice any external damage to the unit or any unexpected or unusual functioning, do not use the product any further. Contact the retailer where you purchased the product immediately, or celexon directly (Web: www.celexon.co.uk, Mail: info@celexon.co.uk) for further information.
- Page 3 Incorrect installation or use may also invalidate the warranty. • If you are unsure about the use of the product, please contact your specialist personnel, your dealer or celexon directly (Web: www.celexon.co.uk, Mail: info@celexon.co.uk). • Technical changes and errors excepted.
- Page 4 DISCLAIMER The information in this document is subject to change without notice by the manufacturer. Changes will be added to subsequent versions of this manual. Errors excepted. TECHNICAL DATA Voltage: 220 V~240 V, 50 Hz Consumption: 156 W (MAX) 0.4 W (standby)
- Page 5 IN THE BOX - ELECTRIC EXPERT RECESSED CEILING SCREEN When you open the packaging, please check that ALL the components listed below are included. If one or more components are missing, please contact the dealer from whom you purchased the product.
- Page 6 DIMENSIONS - ELECTRIC EXPERT RECESSED CEILING SCREEN Front view: Side view: Top view of the ceiling mounting plate: All dimensions are in mm.
- Page 7 DIMENSIONS - ELECTRIC EXPERT RECESSED CEILING SCREEN Cut-out dimensions for false ceiling and fixing points Dimensions of the mounting points of the ceiling mounting plates Dimensions of the mounting points of the ceiling mounting plates Model A (mm) B (mm)
- Page 8 IN THE BOX - ELECTRIC EXPERT XL RECESSED CEILING SCREEN When you open the packaging, please check that ALL the components listed below are included. If one or more components are missing, please contact the dealer from whom you purchased the product...
- Page 9 DIMENSIONS - ELECTRIC EXPERT XL RECESSED CEILING SCREEN Front view: Side view: Top view of the ceiling mounting plate: All dimensions are in mm.
- Page 10 DIMENSIONS - ELECTRIC EXPERT XL RECESSED CEILING SCREEN Cut-out dimensions for false ceiling and fixing points Dimensions of the mounting points of the ceiling mounting plates Model A (mm) B (mm) Electric Expert XL Viewing area width + 230 (standard incl. 50 mm...
- Page 11 INSTALLATION INSTRUCTIONS EXPERT & EXPERT XL Make sure that parts B and C are assembled at right angles to part A. Make sure that the screw connection between N and L is loose enough that the access panel D remains movable.
- Page 12 MOUNTING ON CEILING EXPERT & EXPERT XL The installer must use suitable dowels for the supporting structure (not included in the box) for fastening the ceiling mounting panels to the upper ceiling. The threaded rods must be shortened to the desired length on site.
- Page 13 To fix the threaded rod l to the ceiling mounting plate G, turn nut H at least 20 mm onto the upper part of the threaded rod. Screw the threaded rods into the ceiling mounting plates as far as they will go (at least 10 mm!).
- Page 14 MOUNTING ON THE EXPERT & EXPERT XL MOUNTING FRAME Before continuing with the installation of the screen, attach the mounting plates E and F as shown in the drawing. It is IMPORTANT to mount the right plate on the right side.
- Page 15 Now open the two inspection flaps to the vertical position.
- Page 16 Lift the screen into the installation frame Lift the screen into the installation frame and guide the threaded rods through the and guide the threaded rods through the holes in the mounting plates holes in the mounting plates E E and and F F .
- Page 17 Attach the mounting plates to the threaded rods with the collar nuts J. Before tightening the nuts, make sure that the enclosure is centred in the ceiling mounting frame. Now tighten the collar nuts. Now the electrical connection of the screen can be made by a specialist and the inspection flaps can be closed.
- Page 18 Now the electrical connection of the screen can be made by a specialist and the inspection flaps can be closed. This completes the installation.
- Page 19 Address: Gutenbergstraße 2, 48282 Emsdetten, DE Product name: celexon ceiling recessed screen Electric Expert | Expert XL Products that are marked with the CE mark meet all requirements of the relevant EU directives. The EU declaration of conformity can be downloaded from the following address: www.celexon.de/zertifikate...
- Page 20 Address: Gutenbergstraße 2, 48282 Emsdetten, DE Product name: celexon ceiling recessed screen Electric Expert | Expert XL Products that are marked with the UKCA mark meet all requirements of the re- levant UK directives. The UK declaration of conformity can be downloaded from the following address: www.celexon.de/zertifikate...
Need help?
Do you have a question about the Expert and is the answer not in the manual?
Questions and answers