Advertisement
I
f you want to paint parts of the kit, it is advisable to do so
before removing the parts from the sprues.
As the number identifications are on the runners in
many instances, do not remove the parts until needed in
the construction sequence.
Use a sharp hobby knife or a pair of side cutters to
remove the parts from the sprue, and smooth the edge of
the part carefully.
Before gluing the parts in place, try assembling them
without glue. If the fit is not right, check that the part has
the right number and that it is right way up. (Glue not
included).
Glue the parts using either a viscous plastic cement or
a plastic solvent applied with a fine paintbrush. Use glue
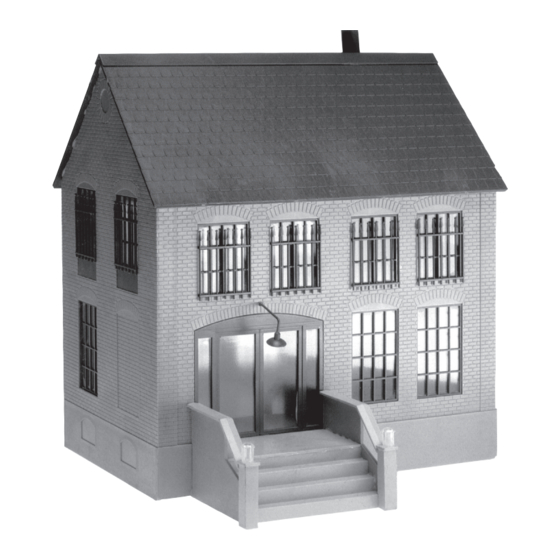
MUNICIPAL BUILDING KIT
sparingly, but if you do get glue on a visible surface, wait
until the affected part is entirely dry, then smooth the sur-
face with a file, and finally polish with brass polish- this
should help reduce the damage.
The mortar effect between the bricks
lighted by flooding the brick parts on a level surface with
a water paint mixture. This is made using water color
from a tube, water and a few drops of liquid detergent.
Once the mixture has the right consistency, it will flow
from a loaded paintbrush along the furrows on the sur-
face. When dry, any paint on the surface can be wiped off.
We hope that you enjoy making this kit - should you
have any problems or comments, please let us know.
72-2915-250
1/98
can be high-
Advertisement
Table of Contents

Subscribe to Our Youtube Channel
Related Manuals for Lionel MUNICIPAL BUILDING KIT


Summary of Contents for Lionel MUNICIPAL BUILDING KIT
- Page 1 72-2915-250 1/98 MUNICIPAL BUILDING KIT f you want to paint parts of the kit, it is advisable to do so sparingly, but if you do get glue on a visible surface, wait before removing the parts from the sprues. until the affected part is entirely dry, then smooth the sur- face with a file, and finally polish with brass polish- this As the number identifications are on the runners in should help reduce the damage.
- Page 2 Start construction of this kit by gluing the window frames into the wall into the wall openings from behind, then add the glaz- ing. Note: Door #7 is glued into the wall #2 from the front. Glue plates #14 onto the second floor windows on walls #3 &...
- Page 3 Assemble walls #2, #3, & #5 around floor #18, then add floor #17 and the stair parts #19 thru #21. When this is done, wall #1 can be glued in place, making sure that the floors rest on the location bars on wall #1. Glue roof parts in place as shown in number sequence.
- Page 4 This is a parts labeling diagram. This will help locate parts you need and help in identifying parts that may be loose or removed from the trees. © 1998 L LLC, C Mi 48051-2493 ioneL hesterfieLd nited tates of MeriCa...
Need help?
Do you have a question about the MUNICIPAL BUILDING KIT and is the answer not in the manual?
Questions and answers