Table of Contents
Advertisement
Quick Links
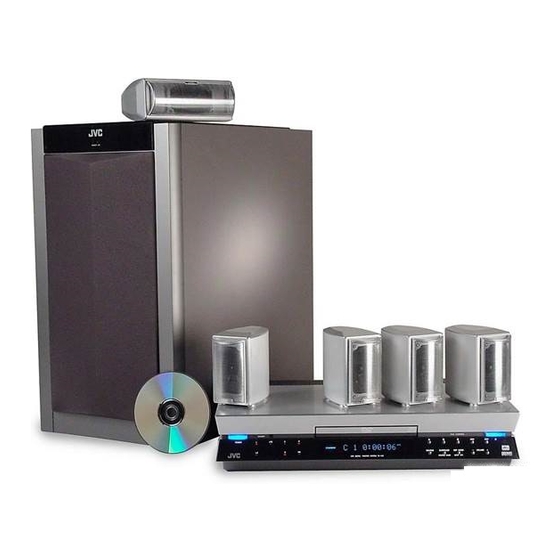
DVD DIGITAL CINEMA SYSTEM
SYSTEMA DVD DIGITAL CINEMA
TH-A10
Consists of XV-THA10, SP-PWA10, SP-XCA10, and SP-XSA10.
Consta de XV-THA10, SP-PWA10, SP-XCA10, y SP-XSA10.
SP-PWA10
SP-XSA10
SP-XCA10
XV-THA10
INSTRUCTIONS
INSTRUCCIONES
SP-XSA10
VIDEO CD
For Customer Use:
Enter below the Model No. and Serial
No. which are located either on the rear,
bottom or side of the cabinet. Retain this
information for future reference.
Model No.
Serial No.
LVT0516-006A
[ 4U ]
Advertisement
Table of Contents

Related Manuals for JVC XV-THA10


Summary of Contents for JVC XV-THA10
- Page 1 DVD DIGITAL CINEMA SYSTEM SYSTEMA DVD DIGITAL CINEMA TH-A10 Consists of XV-THA10, SP-PWA10, SP-XCA10, and SP-XSA10. Consta de XV-THA10, SP-PWA10, SP-XCA10, y SP-XSA10. SP-XSA10 SP-XCA10 SP-XSA10 SP-PWA10 XV-THA10 VIDEO CD INSTRUCTIONS For Customer Use: INSTRUCCIONES Enter below the Model No. and Serial No.
- Page 2 Warnings, Cautions and Others/Avisos, Precauciones y Varios Caution –– button! CAUTION Disconnect the XV-THA10 and SP-PWA10 main plugs to shut To reduce the risk of electrical shocks, fire, etc.: the power off completely. The button on the XV-THA10 in 1. Do not remove screws, covers or cabinet.
-
Page 3: Table Of Contents
To specify the time for playback [TIME SEARCH] ....26 COMPU LINK Remote Control System ..........54 To select the screen for playback from the digest screen Operating JVC’s Audio/Video Components ......... 55 [DIGEST] ................27 Operating Other Manufacturers’ Video Equipment ......57 To advance the picture one frame at a time ........ -
Page 4: Getting Started
Getting Started Important cautions Checking the supplied accessories Installation of the unit Check to be sure you have all of the following items, which are supplied with the unit. • Select a place which is level, dry and neither too hot nor too cold The number in the parentheses indicates quantity of the pieces between 5°C and 35°C (41°F and 95°F). -
Page 5: System Outline
It may also be used to operate JVC TVs, VCRs, MD recorders, and cassette decks, as well as TVs and VCRs from other manufacturers. Note that the remote control unit must be programmed with the correct settings when using products from other manufacturers. -
Page 6: Installation
Installation To attach non-slip rubbers to the center To hang satellite speakers from the wall speaker Use the supplied bracket to fix satellite speakers to the wall. Attach the supplied non-slip rubbers at three points on the bottom of the center speaker. CAUTION: ATTACHING THE BRACKETS ON THE WALL When attaching the brackets on the wall, have them attached to the wall by a qualified person. -
Page 7: About Discs
About discs Playable disc types Disc structure Playable and non-playable disc types are as follows: A DVD disc is comprised of “titles”, while an Audio CD, Video CD or SVCD is comprised of “tracks”. Each title may be divided into Playable discs ———————————————... -
Page 8: Connections
Connecting the FM and AM antennas To connect the powered sub woofer FM antenna connections ——————————— Use the supplied system cable to connect the powered sub woofer (SP-PWA10). Center unit (XV-THA10) Ensure that the £ mark on the plug faces upwards. -
Page 9: Video Out Select
Connections VIDEO OUT SELECT This unit is compatible with the PAL and NTSC color systems. Set the VIDEO OUT SELECT on the rear panel to match the color system of your TV in standby mode. Make sure that the color system of DVD/Video CD/SVCD disc labeled on the package matches your TV. To connect speakers Connect the satellite speakers and center speaker to the terminals on the powered sub-woofer using the speaker cords supplied. -
Page 10: Connecting Audio/Video Components
Connections Connecting Audio/Video Components Video component connections ————————— Use the cable with RCA pin plugs (not supplied). Connect the white plug to the audio left jack, the red plug to the You can connect the following audio/video components to this audio right jack, and the yellow plug to the composite video jack. - Page 11 Connections TV audio or DBS tuner TV sound DBS tuner To audio output To S-video output To audio To composite output DBS tuner video output Note: • When connecting the DBS tuner to the TV SOUND/DBS jacks, change the source name, which will be shown on the display when selected as the source, to “DBS”.
-
Page 12: Connecting The Power Cord
Connections Connecting the power cord Putting batteries in the remote control Before plugging the center unit and powered sub-woofer into an AC Before using the remote control, put two supplied batteries first. outlets, make sure that all connections have been made. When using the remote control, aim the remote control directly at the remote sensor on the center unit. -
Page 13: Parts Identification
Parts Identification Become familiar with the buttons and controls on the unit before use. Refer to the pages in parentheses for details. Center unit ——————————————————————————————————————— Front panel button and STANDBY lamp (16) 2 Remote sensor (10) 3 Disc tray (22) 4 DVD CONTROL buttons (22~24) 5 VOLUME +/ –... - Page 14 Parts Identification Remote controls ——————————————————————————————————————— Primary remote control Secondary remote control 1 SLEEP button (20) 1 SLEEP button (20) 2 ANALOG/DIGITAL INPUT button (18) 2 Source selecting buttons (17) 3 TITLE button (24) 3 MENU button (24) 4 SUBTITLE button (29) 4 Cursor and ENTER buttons 5 MAIN ON SCREEN button (39) 5 THEATER POSITION button (31)
-
Page 15: Principles Of Operation
Principles of operation The system may be operated via the remote control or the buttons on the center unit, or via the menu on the screen. Operation with the remote control Select the appropriate mode for the remote control when using the primary or secondary remote control is used for operation. The remote control mode is selected by pressing the source selecting buttons. -
Page 16: To Operate Via The On-Screen Menu
Principles of operation To operate via the on-screen menu When using the on-screen menu, first display it and then use the primary or secondary remote control unit cursor buttons (2/3/5/∞), the number buttons, and the ENTER button. Displaying the on-screen menu ————————————————————————————————— The method and conditions for display differ with the on-screen menu. -
Page 17: Preventing Screen Burn-Out With The Screen Saver [Screen Saver]
Principles of operation On-screen menus —————————————— On-screen menus for using discs ———————— This system supports the following on-screen menus. The disc status and items are displayed as follows on the on-screen menus for using the disc. Opening screens VCD CONTROL display for DVD (No disc inserted) DVD CONTROL display... -
Page 18: Basic Operations
The basic operations for this system are as follows. To turn the system power supply JVC TVs may be used as is with the primary and secondary remote controls. TVs from other manufacturers require changes to the ON and OFF (standby) transmittable signals before they can be used with the primary and secondary remote controls. -
Page 19: Muting The Sound
Basic operations Muting the sound On the front panel: From primary remote control only: MUTING SOURCE Press SOURCE until the source name you want appears on the display. Press MUTING to mute the sound through all speakers The source changes as shown below each time the button is pressed. connected. -
Page 20: Selecting The Analog Or Digital Input Mode
Basic operations Selecting the analog or digital input To return to analog audio 1. Select a digital source to return to analog audio. mode Select from “MD DIGITAL”, “AUX DIGITAL”, or “DBS DIGITAL”. When you have connected some components such as MD recorder, the DBS tuner and so on, using digital terminals (see page 9), you need to 2. -
Page 21: Adjusting The Input Signal Level
Basic operations When a decode mode which differs from the type of Sub woofer volume control and disc being played is selected phase setting Insert a DVD disc in the center unit to display the type of audio being played in the Decode mode indicator in the display window. Use the VOLUME knob and PHASE button at the rear of the Audio cannot be played if a decode mode which differs from the powered sub woofer. -
Page 22: Using The Sleep Timer
Basic operations Using the DSP Modes The lamp display indicates the type of disc (DVD or CD) currently playing as follows. The built-in Surround Processor provides two types of the DSP Example: (Digital Signal Processor) mode — Surround mode and DAP With Dolby digital 5.1 ch, DTS digital 5.1 ch, or MPEG Multichannel (Digital Acoustic Processor) mode. - Page 23 Basic operations DAP modes ————————————————— Press DSP MODE. The sound heard in a concert hall or club consists of direct sound The currently selected DSP mode appears on the display when the and indirect sound — early reflections and reflections from behind. button is pressed, and changes as follows each time the button is Direct sounds reach the listener directly without any reflection.
-
Page 24: Using The Dvd Player
Using the DVD player Notes: represent disc types. • The unit can playback DVD VIDEO, Audio CD, Video CD, and To play a disc SVCD discs only. Do not load other disc types. For details about playable disc types, see page 5. •... -
Page 25: Pausing
Using the DVD player On-screen guide icons ———————————— Fast forward and rewind During DVD playback, you may see icons displayed over the picture. These have the following meanings. 7 During playback Displayed at the beginning of a scene recorded from From the remote controls: multiple angles (see page 31). -
Page 26: Resuming Playback
Using the DVD player On the front panel: Selecting playback from the DVD menu 4, ¢ DVD discs generally have their own menus which show the disc contents. These menus contain various items such as titles of a movie, names or songs, or artist information, and display them on the TV screen. -
Page 27: Selecting The Location To View From The Video Cd Menu
Using the DVD player Selecting the location to view from the To specify the title or track number for video CD menu playback When playing back Video CDs or SVCDs recorded Use the number buttons to specify the with PBC (playback control), a list of the recorded title (DVDs) or track number (CDs) contents may appear on the TV screen as a menu. -
Page 28: To Play From The Beginning Of A Title, Chapter, Or Track
Using the DVD player To play from the beginning of a title, Use the 5/∞ cursors to move the pointer to chapter, or track [CHAP. SEARCH], then press ENTER. The color of [CHAP. SEARCH] changes and “GO TO CHAPTER:” The beginning of previous or later appears in the message area. -
Page 29: To Select The Screen For Playback From The Digest Screen [Digest]
Using the DVD player To select the screen for playback from Press DVD ON SCREEN. the digest screen [DIGEST] The on-screen display appears on the TV screen. Use the 5/∞ cursors to move the pointer to The unit can display the opening scene of each title or chapter on a DVD or each track [TIME SEARCH], then press ENTER. -
Page 30: To Advance The Picture One Frame At A Time
Using the DVD player ¢ Press ENTER. Hold down FF/ /REW for more than 2 seconds. The unit starts playback from the selected title, chapter or track. ¢ Hold down FF/ will playback your selection in slow To return to the regular display: motion, starting from the pause frame. -
Page 31: Zooming A Scene [Zoom]
Using the DVD player Zooming a scene [ZOOM] Changing the Subtitle Language [SUB TITILE] 7 During playback or while paused. Some DVD and SVCD discs contain subtitles. With From primary remote control only: such discs, you can choose which kind of subtitles to display (or turn off subtitles entirely). -
Page 32: Changing The Audio Language Or Sound [Audio]
Using the DVD player Use the 5/∞ cursors to move the pointer Use the 2/3 cursors to select the desired audio [SUBUTITLE]. language or sound. Each time you press the 2/3 cursors, the audio language or sound changes. Use the 2/3 cursors to select the desired subtitle. Total number Each time you press the 2/3 cursors, the subtitle changes. -
Page 33: Viewing From Multiple Angles [Angle]
Using the DVD player Notes: Press and hold ANGLE for more than 1 seconds. • An SVCD disc has a pair of stereo channels; Sound 1 and Sound 2. Up to nine camera angle In the above options, “1” indicates “Sound 1”, while “2” indicates recorded on a disc appear on “Sound 2”. -
Page 34: Selecting The Picture Character [Theater Position]
Using the DVD player Selecting the Picture Character Press DVD ON SCREEN. [THEATER POSITION] The on-screen display appears on the TV screen. Use the 5/∞ cursors to move the pointer to You can select the quality of the image from among four options (OFF, 1, 2, and 3) [REPEAT], then press ENTER. -
Page 35: Repeating A Desired Part [A-B Repeat]
Using the DVD player To quit repeat playback To quit A-B repeat playback Move the pointer to [REPEAT] and press ENTER repeatedly until Press STOP. The unit stops playback and quits A-B repeat mode. the [REPEAT] display turns off. Quitting A-B repeat mode without stopping playback Tu turn off the on-screen display Move the pointer to [A-B REPEAT] and press ENTER. -
Page 36: Checking The Disc Time [Time Select]
Using the DVD player Checking the Disc Time [TIME SELECT] Programming the Playing Order of the Tracks [PROGRAM] You can choose the displayed time mode for an Audio CD, Video CD or SVCD disc in the You can play tracks on an Audio CD, Video display on the front panel and in the on-screen display. -
Page 37: Random Play [Random]
Using the DVD player Press PLAY to start program play. When all of the programmed tracks have finished playback, the unit stops but the program remains. To turn off the on-screen display Press DVD ON SCREEN. Quitting programmed playback Move the pointer to [PROGRAM] and press ENTER. [PROGRAM] will turn to its original color, and the program contents will be deleted. -
Page 38: Receiving Radio Broadcasts
Receiving radio broadcasts You can browse through all the stations or use the preset function to go immediately to a particular station. Setting the AM tuner interval spacing Using preset tuning Some countries space AM stations 9 kHz apart, and other countries Once a station is asssigne to a channel number, the station can be use 10 kHz spacing. -
Page 39: Selecting The Fm Reception Mode
Receiving radio broadcasts To erases a stored preset station Selecting the FM reception mode Storing a new station on a used number erases the previously stored one. When an FM stereo broadcast is hard to receive or noisy To tune in a preset station ——————————— You can change the FM reception mode while receiving an FM broadcast. -
Page 40: Performing Miscellaneous Settings
Performing miscellaneous settings It is possible to perform a variety of settings from the on-screen display. The two on-screen displays used for settings are the AV amplifier settings on-screen display and the DVD settings on-screen display. Only the primary remote control can be used on the MAIN MENU, SOUND MENU, and SPEAKER MENU found on AV amplifier settings screen. -
Page 41: Main Menu Settings
MAIN MENU Settings ON SCREEN LANGUAGE Use the primary remote control to perform MAIN MENU settings. Buttons used ———————————————— The on-screen language is the language used in the display for the MAIN ON SCREEN and the 5/∞/2/3 cursors. MAIN MENU, SOUND MENU, SPEAKER MENU, and DVD MENU. -
Page 42: Changing The Decode Mode
MAIN MENU Settings Changing the DECODE MODE Use the 2/3 cursors to set the DSP MODE. (See page 18) When the source is DVD: This option is used to change the digital audio decode mode. You may choose between “SURROUND” j “OFF” The default setting of [AUTO/PCM] is recommended for regular use. -
Page 43: Sound Menu Settings
SOUND MENU Settings Adjusting the balance Use the primary remote control to perform SOUND MENU settings. Buttons used ———————————————— Adjusting the front speaker balance. MAIN ON SCREEN and the 2/3/5/∞ cursors. Open the SOUND MENU. See “Opening the SOUND MENU”. Move the pointer to BALANCE using the 5/∞... -
Page 44: Adjusting Input Signal
SOUND MENU Settings Adjusting input signal Adjusting the dynamic range (See page 19) It is possible to compress the dynamic range (the difference between When using the DSP mode effect during playback from an analog the loudest and quietest audio signals). device, the sound will occasionally be distorted due to a overly- This is useful when enjoying surround sound at nighttime. -
Page 45: Speaker Menu Settings
SPEAKER MENU Settings Opening the SPEAKER MENU Use the primary remote control to perform speaker settings with the on-screen SPEAKER MENU. Buttons used ———————————————— Stop DVD image playback on the TV screen. MAIN ON SCREEN, the 2/3/5/∞ cursors, and ENTER. Select a playback source other than the tuner. -
Page 46: Playing A Test Tone
SPEAKER MENU Settings Playing a test tone Use the 2/3 cursors to select SPEAKER SIZE. Pressing the 2/3 cursors toggles between the following When you wish to play a test tone, make sure the sound mode is set settings. to “SURROUND ON” or “THEATER.” The test tone will not play jSPEAKER SIZEjSPEAKER LEVELjDELAYj in other modes. -
Page 47: Setting Speaker Level
SPEAKER MENU Settings Setting speaker level Adjusting delay time The delay time for the center speaker and rear speakers is calculated Open the SPEAKER MENU. by comparing the distance between the rear/center speakers and the See page 43, “Opening the SPEAKER MENU”. listening point with the distance between the front speakers and the listening point. -
Page 48: Dvd Menu Settings
DVD MENU Settings Opening the DVD MENU Use the primary or secondary remote control to perform DVD settings with the on-screen DVD MENU. Change source to DVD, and stop playback. Buttons used ———————————————— When a Video CD or Audio CD is inserted, press 0 on the DVD ON SCREEN, and the 2/3/5/∞... -
Page 49: Choosing Audio Language
DVD MENU Settings Choosing audio language Choosing subtitle language Some DVD discs feature audio playback in multiple languages. Some DVD discs feature subtitle display in multiple languages. With these discs, it is possible to set the default language for audio With these discs, it is possible to set the default language for subtitle playback. -
Page 50: Select Monitor Type
DVD MENU Settings Select monitor type Screen saver settings Most movie DVD discs are recorded for wide-screen TVs with a Set the screen saver to prevent screen burn. height/width ratio of 16:9. It is possible to optimize playback of these wide-screen TV images for viewing on a regular TV with a Open the DVD MENU. -
Page 51: Limiting Playback By Children
Limiting playback by children This function restricts playback of DVD discs which contain violent Use the 5/∞ cursors to move the pointer to (and other) scenes according to the level set by the user. “Set Level”, then use the 2/3 cursors to select the For example, if a movie which includes violent scenes supports the parental lock level. -
Page 52: To Temporarily Release The Parental Lock
Limiting playback by children To temporarily release the Parental lock To change the settings ———————————— 7 While a DVD disc is stopped or no disc is inserted When you set the parental level strictly, some discs may not be played back at all. When you insert such a disc and try to play it, the 1. -
Page 53: Care And Handling Of Discs
Care and handling of discs How to handle discs When handling a disc, do not touch the surface of the disc. Since discs are made of plastic, they are easily damaged. If a disc gets dirty, dusty, scratched or warped, the imagesand sound will not be picked up correctly, and such a discmay cause the player to malfunction. -
Page 54: Av Compu Link Remote Control System
AV COMPU LINK Remote Control System The AV COMPU LINK remote control system allows you to operate JVC video components (TV and VCR) through the center unit. To use this remote control system, you need to connect the video components you want to operate, follow the diagrams below and the procedure on the next page. - Page 55 AV COMPU LINK Remote Control System Automatic Selection of TV’s Input Mode ————— If you have already plugged your VCR, TV, and • When you select “TV SOUND” as the source to play on the center unit into the AC outlets, unplug their AC center unit, the TV automatically changes the input mode to the power cords first.
-
Page 56: Compu Link Remote Control System
————————————————— You can control the connected audio components through the remote To use this remote control system, you need to connect JVC audio sensor on the center unit using this remote control. Aim the remote components through the COMPU LINK-3 (SYNCHRO) jacks (see control directly at the remote sensor on the center unit. -
Page 57: Operating Jvc's Audio/Video Components
RCA pin plugs (see pages 8 and 9). • Some JVC VCRs can accept two types of the control signals — remote code “A” and “B.” Before using this remote control, make sure that the remote control code of the VCR is set to code “A.”... - Page 58 Operating JVC’s Audio/Video Components Cassette deck ———————————————— TV ———————————————————— After pressing TAPE/MD or TAPE/MD CONTROL (with the You can always perform the following operations (with the remote remote control mode selector set to “AUDIO/TV/VCR”), you can control mode selector set to “AUDIO/TV/VCR”): perform the following operations on a cassette deck: TV/CATV/DBS : Turns on or off the TV.
-
Page 59: Operating Other Manufacturers' Video Equipment
Enter manufacturer’s code (two digits) using buttons 1 ~ 9, and 0. See the list on below to find the code. Examples: For a JVC product, press 0 then 1. For a Hitachi product, press 1 then 0. Release TV/CATV/DBS. - Page 60 See the list on below to find the code. Examples: For a Echostar product, press 2 then 1. Examples: For a JVC product, press 0 then 1. For a Pioneer product, press 1 then 3. For a Funai product, press 1 then 0.
-
Page 61: Troubleshooting
Troubleshooting Use this chart to help you solvi daily operational problems. If there is anyproblem you cannot solve, conect your JVC service center. PROBLEM POSSIBLE CAUSE SOLUTION Power does not come on. The power cord. Insert the plug into the socket. -
Page 62: Specifications
Specifications Center unit (XV-THA10) Audio section Dynamic Range 97 dB Total Harmonic Distortion 0.007% Output Level 2.0 V RMS Video section Horizontal Resolution 500 lines Signal-to-Noise Ratio 60 dB Output Level S-video-Y: 1.0 V (p-p)/75 Ω S-video-C: 0.286 V (p-p)/75 Ω... -
Page 63: Appendix A: Table Of Languages And Their Abbreviations
Appendix A: Table of languages and their abbreviations When you select the subtitle language or sound, the languages shown below are displayed as abbreviations. To select the desired language, select the abbreviation corresponding the language you want to. Kirundi Afar Inupiak Rumanian Abkhazian... -
Page 64: Appendix B: Country Code List For Parental Lock
Appendix B: Country code list for parental lock This list is used for the parental Lock operation. For details, see page 49. Andorra Cameroon Greece United Arab Emirates China South Georgia and the Afghanistan Colombia South Sandwich Islands Antigua and Barbuda Costa Rica Guatemala Anguilla... - Page 65 Liechtenstein Peru Tajikistan Sri Lanka French Polynesia Tokelau Liberia Papua New Guinea Turkmenistan Lesotho Philippines Tunisia Lithuania Pakistan Tonga Luxembourg Poland East Timor Latvia Saint Pierre and Turkey Libyan Arab Jamahiriya Miquelon Trinidad and Tobago Morocco Pitcairn Tuvalu Monaco Puerto Rico Taiwan, Province of Moldova, Republic of Portugal...
- Page 66 VICTOR COMPANY OF JAPAN, LIMITED EN. SP 0900TNMNATJSC...
- Page 67 FM and AM antenna terminals (6) Center unit S-video cable and right at the front of the (not supplied) speaker, and one in the XV-THA10 Digital input and S-video output and Connect to the TV if middle at the rear. (Center unit)
- Page 68 Terminales de antena FM y AM (6) Unidad central Coloque dos gomas a la (no se suministra) izquierda y a la derecha en Conecte a la TV si dis- XV-THA10 Terminales digitales Terminales S-video de pone de una entrada la parte delantera del altavoz (Unidad central)
- Page 69 This file has been downloaded from: www.UsersManualGuide.com User Manual and User Guide for many equipments like mobile phones, photo cameras, monther board, monitors, software, tv, dvd, and othes.. Manual users, user manuals, user guide manual, owners manual, instruction manual, manual owner, manual owner's, manual guide, manual operation, operating manual, user's manual, operating instructions, manual operators, manual operator, manual product, documentation manual, user maintenance, brochure, user reference, pdf manual Downloaded from:...
Need help?
Do you have a question about the XV-THA10 and is the answer not in the manual?
Questions and answers