Table of Contents
Advertisement
Quick Links
Page
Contents
2
1.
3
2.
3
3
3
4
5
5
6
7
4.
7
4.1 Fuses replacing
8
9
10
5.
10
6.
TAMBORA LINEAR 60
INSTRUCTION MANUAL
INDEX
Congratulations on choosing a Claypaky product!
We thank you for your custom.
Please note that this product, as all the others in the
rich Claypaky range, has been designed and made with
total quality to ensure excellent performance and best
meet your expectations and requirements.
CL2021
Advertisement
Table of Contents

Related Manuals for ARRI CLAYPAKY TAMBORA LINEAR 60


Summary of Contents for ARRI CLAYPAKY TAMBORA LINEAR 60
-
Page 1: Table Of Contents
TAMBORA LINEAR 60 CL2021 INSTRUCTION MANUAL INDEX Congratulations on choosing a Claypaky product! Page Contents We thank you for your custom. Safety information Please note that this product, as all the others in the rich Claypaky range, has been designed and made with Unpacking and preparation total quality to ensure excellent performance and best Installation and start-up... -
Page 2: Safety Information
1. SAFETY INFORMATION SAFETY INFORMATION IMPORTANT: Claypaky recommends you carefully read and keep the safety information on this product, also available in digital format at the following link: www.claypaky.com Ref: FIS02J – Safety Information Tambora Linear 60 INFORMAZIONI DI SICUREZZA IMPORTANTE: Claypaky raccomanda di leggere accuratamente e conservare le informazioni di sicurezza relative a questo prodotto, sempre reperibili in versione digitale al seguente link: www.claypaky.com... -
Page 3: Unpacking And Preparation
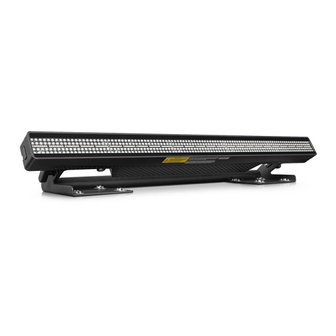
2. UNPACKING AND PREPARATION Packing contents - Fig. 1 3. INSTALLATION AND START-UP 3.1 Fixture overview Handle Neutrik PowerCON TRUE1 (IN/OUT) Safety loop Ethernet 5pin DMX IN/THRU LCD Display User buttons Fuse Continue TAMBORA LINEAR 60... -
Page 4: Installing The Fixture
3.2 Installing the fixture Projector installation - Fig. 3 The projector can be installed on the floor resting on specific rubber feet, on a truss, on the ceiling or wall. WARNING: the safety chain must be installed except when the projector rests on the floor. (Code 105041-003 available upon request). This must be secured to the projector support structure and then hooked to the fastening point at the centre of the fixture. -
Page 5: Connecting To Mains Supply
3.3 Connecting to mains supply Connecting and disconnecting the power cord - Fig. 4 Power Supply Connections to the power mains - Fig. 5 3.4 Connecting the control signal line: DMX / Art-Net DMX 512 DMX 512 Ethernet 5 PIN SCREEN SIGNAL SIGNAL... -
Page 6: Switching On The Fixture And Basic Setup
3.5 Switching on the fixture and basic SetUp Dmx Address Warning Message Switching on the projector - Fig. 7 Switch-on the fixture. The projector starts resetting the effects. At the same time, the following information scrolls on the display: Model Firmware Dmx Address xxx System errors... -
Page 7: Maintenance
USING THE MENU: 1) Press LEFT once – “Main Menu” appears on the display. 2) Use the UP and DOWN keys to select the menu to be used: • Setup (Setup Menu): To set the setting options. • Option (Option Menu): To set the operating options •... -
Page 8: Periodical Cleaning & Caution
4.2 Periodical cleaning & Caution WARNING: no alcohol Light collimation system This product contains internal light collimation system. Avoid intense light from any angle. Parts requiring frequent cleaning. CAUTION: • To ensure optimal operation and performance for a long time it is essential to periodically clean the parts subject to dust and grease deposits. The frequency with which the following operations are to be carried out depends on various factors, such as the amount of the effects and the quality of the working environment (air humidity, presence of dust, salinity, etc.). -
Page 9: Battery Removal
4.3 Battery removal This product contains a rechargeable battery. To preserve the environment, please dispose the battery at the end of its life according to the regulation in force. TAMBORA LINEAR 60... -
Page 10: Dimensions
5. DIMENSIONS (2.91") (23.62") (6.77") 180° Rotating angle 6. CAUSE AND SOLUTION OF PROBLEMS THE PROJECTOR WILL NOT SWITCH ON ELECTRONICS NON-OPERATIONAL TROUBLE DEFECTIVE PROJECTION REDUCED LUMINOSITY POSSIBLE CAUSES CHECKS AND REMEDIES No power supply. Check the power supply voltage. LED burnt out or defective. - Page 11 TAMBORA LINEAR 60...
- Page 12 www.claypaky.com – Service support & Helpdesk: https://e-assist.tech...
Need help?
Do you have a question about the CLAYPAKY TAMBORA LINEAR 60 and is the answer not in the manual?
Questions and answers