Table of Contents
Advertisement
Available languages
Available languages
Quick Links
Advertisement
Table of Contents

Subscribe to Our Youtube Channel
Related Manuals for Rocky Mountain Solo Carbon


Summary of Contents for Rocky Mountain Solo Carbon
- Page 1 SOLO CARBON — PLATFORM MANUAL...
- Page 2 REGISTER / ENREGISTRER / REGISTRA / REGISTRIERE Registering your bike is the official way for us to welcome you into the Rocky Mountain family. It’s also an important step in activating your bike’s warranty. If you ever have an issue, we’ll be able to handle your case efficiently and get you back riding as soon as possible. It’s easy and only takes a few minutes.
-
Page 3: Table Of Contents
Solo Platform Manual TABLE OF CONTENTS Introduction Introduction Shrediquette Étiquette de montage Getting to know your bike Survol de votre vélo Cable routing how-to Passage des câbles Critical dimensions Guide des dimanesions Exploded view Vue explosée Full list of parts Listes complète des pièces Small parts kit Trousses de petites pièces... -
Page 4: Introduction
The Solo is the perfect tool to escape, log some miles, and make multi-day adventures a blast. A perfect blend of fast and light to hit the gravel road or light singletrack. With its increased vertical compliance and incredible stability, the Solo carbon will provide the confidence that you need to go faster through the rough stuff. -
Page 5: Getting To Know Your Bike
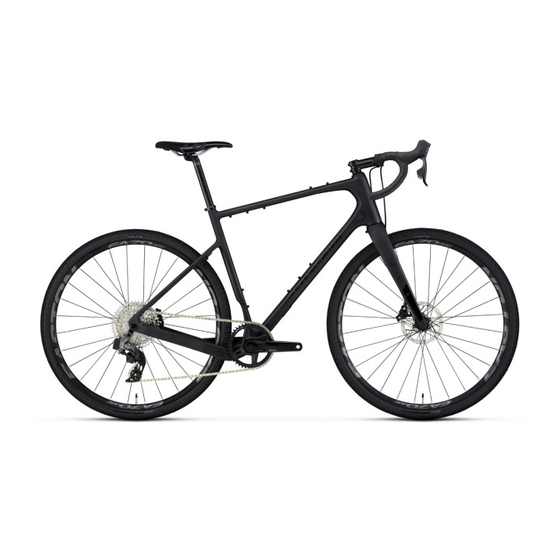
Solo Platform Manual GETTING TO KNOW YOUR BIKE T E C H N I C A L D E TA I L S • Now off ered in Carbon the Solo is designed for long distance. • Multiple mounts and contact points for bottles, racks, tools, Perfect blend of fast and light, it is incredibly stable in fast and anything else comes standard on all Solo frames. -
Page 6: Cable Routing How-To
Solo Platform Manual CABLE ROUTING HOW-TO Removing the rear wheel will give better access to the chain stay housing. The tube-in-tube channels in the chainstay can be a tight fit, especially with the curves they have to navigate to get around the chainstay bridge and bottom bracket. - Page 7 Solo Platform Manual REPLACING/INSTALLING REAR DERAILLEUR CABLE HOUSING 1. Remove non-drive side head tube port cover. 2. If replacing the old housing, cut a new piece to the same length. If you do not have the old piece, approximate the length required and cut a slightly longer portion.
- Page 8 Solo Platform Manual REPLACING/INSTALLING DROPPER POST HOUSING 1. Remove drive side head tube port cover and down tube panel. 2. If replacing the old housing, cut a new piece to the same length. If you don’t have the old piece, approximate the length required and cut a slightly longer portion.
- Page 9 Solo Platform Manual REPLACING/INSTALLING REAR HYDRAULIC BRAKE HOSE Removing the rear wheel will give better access to the chain stay housing . 1. Remove non-drive side head tube port cover and down tube panel 2. Starting from the rear of the bike, begin feeding the housing into the cable opening on the non drive side chain stay.
- Page 10 Solo Platform Manual REPLACING/INSTALLING FRONT DERAILLEUR HOUSING 1. Remove drive side head tube port cover and the down tube panel. 2. Starting from the drive side head tube port, begin feeding the housing. The use of a 5mm ID foam is recommended to prevent rattling noise.
-
Page 11: Critical Dimensions
BB386 FULL LIST OF PARTS & EXPLODED VIEW Click HERE to visit the complete list of parts including part numbers, descriptions, and assembly instructions for the Solo Carbon. SMALL PARTS KITS Click HERE to visit the complete list of parts including part numbers, descriptions, and assembly instructions for the Solo Carbon. -
Page 12: Pro Tips & Tricks
Solo Platform Manual PRO TIPS & TRICKS • Use a 4 mm plastic housing ferrule to plug any unused cable ports at the head tube. • When removing your rear wheel, you can rest the chain on the driveside seatstay protector to prevent it from ROCKSHOX REVERB TOOL dangling awkwardly. -
Page 13: Warranty Information
Registering your bike is the official way for us to welcome you into the Rocky Mountain family. It’s also an important step in activating your bike’s warranty. If you ever have an issue, we’ll be able to handle your case efficiently and get you back riding as soon as possible. It’s easy and only takes a few minutes. - Page 14 • Extreme or improper use of your Rocky Mountain bicycle and forfeit the warranty as outlined in the Warranty Table.
-
Page 15: Introduction
Le présent guide contient de l’information importante sur la sécurité, l’entretien et l’utilisation. Lisez-le attentivement et assurez-vous de bien le comprendre avant d’utiliser votre nouveau vélo Rocky Mountain. Comme il porte uniquement sur la plateforme Solo, le présent guide sert de complément au manuel d’utilisation inclus avec votre vélo Rocky Mountain. -
Page 16: Survol De Votre Vélo
Guide de plateforme Solo SURVOL DE VOTRE VÉLO C A R A C T É R I S T I Q U E S T E C H N I Q U E S • T ous les cadres Solo sont munis de plusieurs fi xations et •... -
Page 17: Passage Des Câbles
Guide de plateforme Solo PASSAGE DES CÂBLES En retirant la roue arrière, vous pourrez accéder plus facilement aux câbles de la base. Avec le passage interne «tube in tube», les conduits de la base peuvent être serrés, particulièrement les courbures de la jonction et le jeu de pédalier. - Page 18 Guide de plateforme Solo REMPLACEMENT OU INSTALLATION DU CÂBLE DU DÉRAILLEUR ARRIÈRE 1. Retirez le protecteur de port du tube de direction du côté opposé à la transmission. 2. Si vous remplacez un ancien câble, coupez le nouveau câble de la même longueur. Si vous n’avez pas l’ancien câble, évaluez la longueur requise et coupez un segment légèrement plus long.
- Page 19 Guide de plateforme Solo REMPLACEMENT OU INSTALLATION DU CÂBLE DE LA TIGE DE SELLE TÉLESCOPIQUE 1. Retirez le protecteur de port du tube de direction du côté de la transmission et le panneau du tube diagonal. 2. Si vous remplacez un ancien câble, coupez le nouveau câble de la même longueur.
- Page 20 Guide de plateforme Solo REMPLACEMENT OU INSTALLATION DU CÂBLE DE FREIN HYDRAULIQUE ARRIÈRE En retirant la roue arrière, vous pourrez accéder plus facilement aux câbles de la base. 1. Retirez le protecteur de port du tube de direction du côté opposé...
- Page 21 Guide de plateforme Solo REMPLACEMENT OU INSTALLATION DU CÂBLE DE DÉRAILLEUR AVANT 1. Retirez le protecteur de port du tube de direction du côté de la transmission et le panneau du tube diagonal. 2. Introduisez le câble dans le port du tube de direction du côté...
-
Page 22: Guide Des Dimanesions
Guide de plateforme Solo GUIDE DES DIMENSIONS Profondeur d'alésage (CARBON): XS: 205 mm S : 240 mm M: 285 mm L: 300 mm XL: 300 mm Norme pour le jeu de direction: ZS44 haut Diamètre extérieur de la tige de selle: 27.2 mm ZS56 bas Diamètre intérieur de la déclenche rapide de selle:... -
Page 23: Trucs Et Astuces De Pros
Guide de plateforme Solo TRUCS ET ASTUCES DE PROS • Bouchez les ports inutilisés sur le tube de direction avec un embout en plastique de 4 mm. • Lorsque vous retirez la roue arrière, vous pouvez déposer la chaîne sur le protecteur de hauban côté transmission ROCKSHOX REVERB TOOL TROUSSES DE PETITES PIÈCES pour éviter qu’elle pendouille. -
Page 24: Garantie
Selon la garantie du fabricant. C’est au détaillant autorisé ayant vendu le vélo ou le cadre de gérer tout service après-vente ou lié à la garantie. Rocky Mountain garantit le cadre contre les défauts de matériaux et de fabrication selon sa composition et le type d’utilisation du vélo à partir de la date d’achat. - Page 25 • Rayure et écaillage de la peinture causés par la poussière, les pierres, les débris sur la route, le transport sur un • Rocky Mountain Bicycles se réserve le droit de réparer ou support de toit de voiture, etc. de remplacer, à sa discrétion, toute pièce couverte par la garantie.
-
Page 26: Einleitung
Mischung aus schnell und leicht für Schotterpisten oder einfache Singletrails. Mit seiner erhöhten vertikalen Nachgiebigkeit und unglaublichen Stabilität bietet das Solo Carbon das nötige Selbstvertrauen für Tempo in rauem Gelände. Wählen Sie Ihr Abenteuer – von Rennen bis Bikepacking ist alles drin! Diese Bedienungsanleitung enthält wichtige Sicherheits-, Wartungs- und Benutzerinformationen. -
Page 27: Lerne Dein Bike Kennen
Bedienungsanleitung Solo LERNEN SIE IHR BIKE KENNEN T E C H N I S C H E D E TA I L S • Das für Langstrecken konzipierte Solo ist jetzt auch in • Mehrere Befestigungs- und Kontaktpunkte für Flaschen, Carbon erhältlich. -
Page 28: Kabelführung
Bedienungsanleitung Solo KABELFÜHRUNG – ANLEITUNG Wenn Sie das Hinterrad ausbauen, haben Sie besseren Zugang zur Kettenstreben-Kabelhülle. Die Kanäle in den Rohren in der Kettenstrebe können eng sein, insbesondere durch die Kurven im Bereich der Kettenstrebenbrücke und des Tretlagers. Sprühen Sie Seifenwasser oder Isopropylalkohol als Schmiermittel in die Öffnung, um das Einziehen der Kabelhülle von einem Ende zum anderen zu erleichtern. - Page 29 Bedienungsanleitung Solo AUSTAUSCH/EINBAU KABELHÜLLE SCHALTWERK 1. Entfernen Sie die Abdeckung der Öffnung am Oberrohr auf der Nichtantriebsseite. 2. Schneiden Sie beim Austausch der alten Kabelhülle ein neues Stück gleicher Länge ab. Wenn Sie das alte Stück nicht haben, schätzen Sie die erforderliche Länge und schneiden Sie ein etwas längeres Stück ab.
-
Page 30: Wichtige Abmessungen
Bedienungsanleitung Solo AUSTAUSCH/EINBAU KABELHÜLLE VARIO-SATTELSTÜTZE 1. Entfernen Sie auf der Antriebsseite die Abdeckung der Oberrohröffnung und den Kabelhalter am Unterrohr 2. Schneiden Sie beim Austausch der alten Kabelhülle ein neues Stück gleicher Länge ab. Wenn Sie das alte Stück nicht haben, schätzen Sie die erforderliche Länge und schneiden Sie ein etwas längeres Stück ab. - Page 31 Bedienungsanleitung Solo AUSTAUSCH/EINBAU HYDRAULISCHE BREMSLEITUNG HINTEN Wenn Sie das Hinterrad ausbauen, haben Sie besseren Zugang zur Kettenstreben-Kabelhülle. 1. Entfernen Sie auf der Nicht-Antriebsseite die Abdeckung der Oberrohröffnung und den Kabelhalter am Unterrohr 2. Beginnen Sie am hinteren Teil des Fahrrads mit dem Einführen der Kabelhülle in die Kabelöffnung an der nicht- antriebsseitigen Kettenstrebe.
- Page 32 Bedienungsanleitung Solo AUSTAUSCH/EINBAU KABELHÜLLE UMWERFER 1. Entfernen Sie auf der Antriebsseite die Abdeckung der Oberrohröffnung und den Kabelhalter am Unterrohr 2. Beginnen Sie an der Oberrohröffnung auf der Antriebsseite mit dem Einführen der Kabelhülle. Wir empfehlen, ein Schaumstoffrohr mit Innendurchmesser von 5 mm zu verwenden, um Klappergeräusche zu vermeiden.
-
Page 33: Explosionsdarstellung
Bedienungsanleitung Solo WICHTIGE ABMESSUNGEN Frästiefe (CARBON): XS: 205 mm S : 240 mm M: 285 mm L: 300 mm XL: 300 mm Standard-Steuer- satz: ZS44 top ZS56 Durchmesser Sattelstütze 27.2 mm bottom Innendurchmesser Sattelklemme: Mindest-Einschubtiefe: 100 mm Gabel: Standard-Bremse: Axle to Crown = 160 mm fl at mount 405mm Max rotor:... -
Page 34: Tipps & Tricks Vom Profi
Bedienungsanleitung Solo PROFI-TIPPS & TRICKS • Verwenden Sie 4-mm-Kunststoff -Endkappen, um nicht benötigte Kabelanschlüsse am Oberrohr zu verschließen. • Wenn Sie Ihr Hinterrad ausbauen, können Sie die Kette auf dem antriebsseitigen Sattelstrebenschutz ablegen, damit sie ROCKSHOX REVERB TOOL nicht im Weg ist. •... -
Page 35: Garantieinformationen
Kaufdatum deines neuen Rocky Mountain Fahrrades entsprechend dem Rahmenmaterial und der Art der Nutzung. Wenn du dein Bike registrierst, können wir dich offiziell in der Rocky Mountain Familie willkommen heißen. Es ist auch ein wichtiger Schritt für die Aktivierung der Garantie deines Bikes. Solltest du irgendwann ein Problem haben, können wir deinen Fall effizient bearbeiten und dich schnellstmöglich wieder auf dein Bike bringen. - Page 36 • Ausbleichen der Lackierung aufgrund von ultraviolettem Teilen sind nicht eingeschlossen. Licht (UV) oder Außenbewitterung • Rocky Mountain Bicycles behält sich das Recht vor, Teile • Kratzer und/oder Steinschläge durch Schmutz, Steine, nach seinem Ermessen zu reparieren oder auszutauschen, Fremdkörper, Transport auf Dachträger etc.
-
Page 37: Introduzione
Questo manuale contiene importanti informazioni sulla sicurezza, la manutenzione e l'uso. Leggilo attentamente e comprendilo a fondo prima di usare la tua nuova bicicletta Rocky Mountain per la prima volta. Questo materiale si applicano solo alla piattaforma specifica che hai scelto e deve essere utilizzato insieme al tuo Manuale del proprietario di Rocky Mountain, incluso con la tua bicicletta. -
Page 38: Conoscere La Tua Bicicletta
Manuale della CARATTERISTICHE DELLA BICICLETTA D E T TA G L I T E C N I C I • Ora disponibile in carbonio, la Solo è progettata per le lunghe • Tutti i telai delle Solo hanno di serie diversi attacchi e punti di distanze. -
Page 39: Come Configurare I Cavi
Manuale della ISTRUZIONI PER IL PASSAGGIO DEI CAVI Rimuovi la ruota posteriore per accedere più agevolmente alla guaina del fodero orizzontale. I canali per l'inserimento dei tubi nel fodero orizzontale possono risultare stretti, specialmente considerando le curve che si devono superare per girare intorno al ponte del fodero e al movimento centrale. - Page 40 Manuale della SOSTITUZIONE/INSTALLAZIONE DELL'ALLOGGIAMENTO DEL CAVO DEL DERAGLIATORE POSTERIORE 1. Rimuovi il coperchio dell'apertura del cannotto di sterzo dal lato opposto alla trasmissione. 2. Se sostituisci il vecchio alloggiamento, taglia un nuovo pezzo della stessa lunghezza. Se non hai il pezzo vecchio, taglia una porzione leggermente più...
- Page 41 Manuale della SOSTITUZIONE/INSTALLAZIONE DELL'ALLOGGIAMENTO DEL REGGISELLA TELESCOPICO 1. Rimuovi il coperchio dell'apertura del cannotto di sterzo dal lato trasmissione e il pannello del tubo obliquo. 2. Se sostituisci il vecchio alloggiamento, taglia un nuovo pezzo della stessa lunghezza. Se non hai il pezzo vecchio, taglia una porzione leggermente più...
- Page 42 Manuale della SOSTITUZIONE/INSTALLAZIONE DEL TUBO FRENO IDRAULICO POSTERIORE Rimuovi la ruota posteriore per accedere più agevolmente alla guaina del fodero orizzontale. 1. Rimuovi il coperchio dell'apertura del cannotto di sterzo dal lato trasmissione e il pannello del tubo obliquo. 2. Cominciando dalla parte posteriore della bicicletta, inizia a inserire la guaina nell'apertura per il cavo sul fodero orizzontale lato trasmissione.
- Page 43 Manuale della SOSTITUZIONE/INSTALLAZIONE DELLA GUAINA DEL DERAGLIATORE ANTERIORE 1. Rimuovi il coperchio dell'apertura del cannotto di sterzo dal lato trasmissione e il pannello del tubo obliquo. 2. Partendo dall'apertura del cannotto di sterzo sul lato trasmissione, inizia a inserire la guaina. Si raccomanda l'uso di un tubo in schiuma con diametro interno di 5 mm per prevenire rumori.
-
Page 44: Guia Alle Dimensioni
Manuale della GUIDA ALLE DIMENSIONI Profondità alesatura (CARBONIO): XS: 205 mm S : 240 mm M: 285 mm L: 300 mm XL: 300 mm Standard serie sterzo: ZS44 superiore Diametro reggisella:: 27.2 mm ZS56 inferiore Diametro interno morsetto a rilascio rapido sella:: 31.8 mm Inserimento minimo: 100 mm... -
Page 45: Trucchi E Consigli
Manuale della CONSIGLI E TRUCCHI DEI PROFESSIONISTI • Usa una ghiera di plastica da 4 mm per chiudere le aperture dei cavi inutilizzate sul cannotto di sterzo. • Quando rimuovi la ruota posteriore, puoi appoggiare la catena sulla protezione del fodero verticale sul lato ROCKSHOX REVERB TOOL ATTREZZO ROCKSHOX REVERB trasmissione per evitare che intralci. -
Page 46: Informazioni Sulla Garanzia
Tutti i servizi in garanzia e postvendita devono essere gestiti dal rivenditore autorizzato che ha venduto il telaio o la bicicletta completa. Il telaio Rocky Mountain è coperto da garanzia per i difetti dei materiali e di lavorazione a partire dalla data di acquisto originale della bicicletta Rocky Mountain nuova, in base al materiale del telaio e al tipo di utilizzo. - Page 47 (UV) o dall'esposizione all'esterno componenti. • I graffi e/o le scheggiature sulla vernice causati da • Rocky Mountain Bicycles si riserva il diritto di riparare o sporcizia, sassi, detriti stradali, trasporto portapacchi, ecc. sostituire a propria discrezione qualsiasi parte che viene ritenuta coperta da una garanzia valida.
- Page 48 Some technologies on Rocky Mountain products are patented or patent pending. Rocky Mountain, son logo et ses autres noms commerciaux sont des marques déposées. Les produits Rocky Mountain sont munis de technologies brevetées ou en instance de brevet. Rocky Mountain, unser Logo und andere Handelsnamen sind eingetragene Warenzeichen. Einige Technologien der Rocky Mountain Produkte sind patentiert oder zum Patent angemeldet.
Need help?
Do you have a question about the Solo Carbon and is the answer not in the manual?
Questions and answers