
Related Manuals for Besam SW 100


Summary of Contents for Besam SW 100
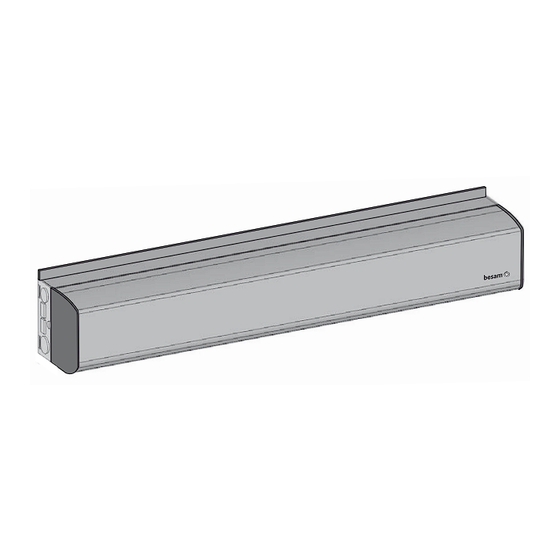
- Page 1 2006-12-14 Besam Low Energy Swing Door Operator SW 100 Installation and Service Manual 1003680-US-0.1 – Issue 2006-12-14 An ASSA ABLOY Group company...
- Page 2 © All rights in and to this material are the sole property of ASSA ABLOY Entrance Systems AB. Copying, scanning, alter- ations or modifications are expressly forbidden without the prior written consent of applicable company within ASSA ABLOY Entrance Systems AB. Rights reserved for changes without prior notice. Issue 2006-12-14 1003680-US-0.1...
-
Page 3: Table Of Contents
How the SW 100 works ........ -
Page 4: Revision
Revision Revision Following pages have been revised: Page Revision – This is the first version of Installation and Service Manual for Low Energy Swing Door Operator SW 100, No. 1003680-US-0.1, Issue 2006-12-14 Issue 2006-12-14 1003680-US-0.1... -
Page 5: Important Information
To avoid bodily injury, material damage and malfunction of the product, the instruc- tions contained in this manual must be strictly observed during installation, adjust- ment, repairs and service etc. Only Besam-trained experts should be allowed to carry out these operations. -
Page 6: Introduction
The SW 100 can be mounted on either side of the door header for pull or push action, and is suitable for single or double doors fitted with butt hinges, offset or center pivots. -
Page 7: Technical Specification
Technical specification Technical specification Power supply: 100-240 V AC +10/-15%, 50/60 Hz Power consumption: max. 75 W Auxiliary voltage: 24 V DC, max. 400 mA Internal control fuse: 2 x T 6.3 AH 250 V Door width: 36-48” (914-1219 mm) Door weight: 100-200 lb. -
Page 8: How The Sw 100 Works
How the SW 100 works How the SW 100 works The Low Energy Swing Door Operator SW 100 uses a DC motor and a gear-reduc- tion system to drive an arm system, which opens the door. Closing power is provided by a motor and a clock spring. - Page 9 How the SW 100 works Functions on the basic control unit CU-ESD (see also page 32) 5.3.1 Power failure During power failure the operator acts as a door closer with controlled closing speed. 5.3.2 Spring force The operator is delivered with spring pre-tension factory set to 210°. If necessary, the spring tension can be electronically adjusted with a potentiometer to required closing force.
- Page 10 How the SW 100 works 5.3.7 Mat safety means that: • a closed door will not open, if someone steps on the mat • an open door will not close, if someone steps on the mat • during opening, the door will continue to open, even if someone steps on the mat •...
- Page 11 How the SW 100 works 5.4.5 Power failure mode • In case of power failure, normal operation can be carried out with impulses from the “Key switch” • Two contacts are available for connection of 2 x 12 V batteries (NiMH) •...
- Page 12 How the SW 100 works 5.5.3 Monitored safety sensors Both presence impulse and presence detection can be monitored. If a sensor becomes defective, the operator will not accept any impulses and will then work as a manual door closer. 5.5.4 Open door indication A relay output is used to indicate an opening cycle or a specific position of the door.
-
Page 13: Models
Models Models Two main models of the Low Energy Swing Door Operator SW 100 are available: • Single operator • Double operator The operators are non-handed and not dependent on the hinges. The operators suit both pushing and pulling arm systems. -
Page 14: Part Identification
Part identification Part identification Back plate End plate fixing screws End plate Control and extension units Cover Mains contact Drive shaft 10. Knockouts for cable inlet Belt tension device 11. Knockouts for 2-position power switch ON/OFF Drive unit with motor (enclosed) and/or ON/OFF/Hold open switch 12. -
Page 15: Options
Options Options Arm systems 8.1.1 Arm system, PUSH P/N: 1003576 This arm system is delivered with drive arm, telescopic part and door fitting. It is used if the operator is installed on the wall on the opposite side of the door swing, and approved for fire door application. - Page 16 Options 8.1.3 Arm system, PULL P/N: 1003559 This arm system is delivered with drive arm, guide shoe and door fitting. PULL 8.1.4 Reveal spacer, PULL P/N: 173804BK 40 mm (1-9/16") 40 (1-9/16") 60 (2-3/8") 8.1.5 Drive shaft extension kits 70 mm (2-3/4") 50 mm (2")
- Page 17 Options Push plates For disable use, mount push plate 31” above floor level. 8.2.1 Push plates PRESS TO OPEN P/N: 75-02-101 P/N: 75-02-102 PRESS TO OPEN P/N: 75-02-107 P/N: 75-02-108 P/N: 75-02-280 8.2.2 Remote transmitter push plates PUSH PUSH PUSH TO OPEN OPEN PUSH...
- Page 18 Options Position switches 8.3.1 2-position power switch (enclosed with the operator) White Brown P/N: 1003581 8.3.2 3-position program switch White Brown Green P/N: 1003582 Function Program Impulses from activation units connected to XIMP are forwarded into inner impulse. Impulses from activation units connected to XIMP are not forwarded into inner impulse.
- Page 19 Options Sync cable for double doors (synchronising of 2 operators) Note! The connection/marking of the sync cable MASTER SLAVE determines which of the operators is the master and slave. P/N: 1003583 How to cut the strapping for double doors Function Door design Cut the strapping with colour Opening...
- Page 20 Options Extension units (installation see page 33) EXU-SI (kit) EXU-SA (kit) P/N: 1003554 P/N: 1003557 Battery backup unit P/N: 1003567 Labels P/N: 75-20-100 Dual Side “Automatic Door / Do Not Enter” – (Out) AUTOMATIC DOOR P/N: 75-20-101 DO NOT Dual Side “Automatic Door / Do Not Enter” – (In) ENTER P/N: 75-20-102 AUTOMATIC...
-
Page 21: Pre-Installation
Pre-installation Pre-installation General tips/Safety concerns • For enhanced security and vandalism protection, always mount the operator access in the interior of a building. • Make sure that the power is off before installing. • Make sure that the door leaf and the wall are properly reinforced at the installation points. - Page 22 Pre-installation Installation examples 1. Aluminum profile system A Steel reinforcement or rivnut 2. Plasterboard wall B Steel reinforcement 3. Reinforced concrete wall and brick wall C Expansion-shell bolt (for brick wall min. M6x85, UPAT PSEA B10/25) 4. Plasterboard wall D Wood reinforcement 5.
- Page 23 Expansion-shell bolt, min. M6x85, UPAT PSEA B10/25, min. 2" (50 mm) from the underside * Besam minimum recommended requirements. Building Codes may give different specifications. Refer to AHJ (Authority Having Jurisdiction). ** Thinner wall profiles must be reinforced with rivnuts.
-
Page 24: Mechanical Installation
Mechanical installation Mechanical installation Note! Consider all power wire entry locations and signaling wires before preparing back plate. 10.1 Operator with PUSH arm system PUSH 0" – " " " 0" – 1 " " 2" 0" – 2 " "... - Page 25 Mechanical installation Cont. “Operator with PUSH arm system” Left hand Operator should be attached using the top/ centered bolt first, then follow pattern 1003680-US-0.1 Issue 2006-12-14...
- Page 26 Mechanical installation Cont.”Operator with PUSH arm system” Right hand C L 1 C L 2 C L 1 C L 2 Operator should be attached using the top/centered bolt first, then follow pattern Issue 2006-12-14 1003680-US-0.1...
- Page 27 Mechanical installation Cont.”Operator with PUSH arm system” (2x) 90° Note! Important measurement for correct opening and closing force 3 / 8" 19 lbf·ft (25 Nm) 1003680-US-0.1 Issue 2006-12-14...
- Page 28 Mechanical installation 10.2 Operator with PULL arm system PULL " " " 2" " " " ≤ 5 " " x 2 " Issue 2006-12-14 1003680-US-0.1...
- Page 29 Mechanical installation Cont. “Operator with PULL arm system” Right hand C L 1 C L 2 Operator should be attached C L 2 using the top/centered bolt C L 1 first, then follow pattern 1003680-US-0.1 Issue 2006-12-14...
- Page 30 Mechanical installation Cont. “Operator with PULL arm system” Left hand C L 1 C L 2 C L 1 C L 2 Operator should be attached using the top/centered bolt first, then follow pattern. Issue 2006-12-14 1003680-US-0.1...
- Page 31 Mechanical installation Cont. “Operator with PULL arm system” Click 19 lbf·ft (25 Nm) Click Right hand Left hand 1003680-US-0.1 Issue 2006-12-14...
-
Page 32: Electrical Connection
Electrical connection Electrical connection • During any work with the electrical connections the main power must be discon- nected. • If the supply cord is damaged, it must be replaced by the manufacturer, its service agent or similarly qualified persons in order to avoid a hazard. 11.1 Control units 11.1.1... - Page 33 Electrical connection 11.1.2 Extension units EXU-SI / EXU-SA Installation To extend the functions, the extension units can be mounted on top of the control unit CU-ESD, separately or combined. EXU-SA EXU-SI Mains contact Tag strip long 2 pcs EXU short 1 pc EXU CU-ESD 1003680-US-0.1 Issue 2006-12-14...
- Page 34 Electrical connection 11.1.3 Extension unit EXU-SI Functions This extension unit has inputs for electro-mechanical lock, program selector, batter- ies, kill function, open/close, key opening and outer impulse. Battery +24 V DC OPEN Program selector EXIT Unlocked signal from lock Kill reset (see jumper below) KRST Kill impulse KILL...
- Page 35 Electrical connection 11.1.4 Extension unit EXU-SA This extension unit has inputs for door mounted sensors, which can give presence impulse and/or presence detection. Relay output for error indication or door indica- tion is also integrated. Functions Monitoring of presence detection Monitoring of presence impulse No monitoring (both jumpers on) Monitoring of presence detection and presence impulse...
-
Page 36: Start-Up
Start-up Start-up The spring pre-tension is factory set to 210° and is normally not necessary to adjust. If adjustment has to be carried out (see page 40). 12.1 Adjusting the door stop 1. Close the door. 2. Turn the potentiometer SPTE to 0° (if not already on 0°). SPTE CU-ESD 0°... - Page 37 Start-up 6. Mount the door stop arm on the splines a), as close as possible to the stop block b). Fine-adjust if necessary with the screw on the stop block c). 7. Close the door by turning the potentiometer SPTE to 0° and let the door close. SPTE 0°...
- Page 38 Start-up 12.2 Learn with auto-setting of—back and latch-check—(recommended) This learning is performed by pushing the Learn button (LRN). Note! • Before the learning procedure starts, make sure that the door has been prop- erly closed, i.e. not by force. • If any of the parameters “Spring pre-tension”, “Closing torque” (CLTQ) and “Lock release”...
- Page 39 Start-up 12.3 Learn with advanced setting of “back- and latch-check” See the prerequisites for performing a “learn” under the heading “Learn with auto- setting of—back and latch-check—(recommended)” on page 38. 1. Push the button once or twice as for auto-setting. 2.
- Page 40 Start-up 12.6 Reducing / Increasing the “Spring pre-tension” (SPTE) The spring pre-tension is factory set to 210° and is normally not necessary to adjust. If adjustment has to be carried out see below. 1. Loosen the door stop arm. Remove if, if it is fitted on the topside, slid down if fit- ted on the underside.
- Page 41 Start-up 12.7 Connection of activation units and accessories AK / ES-P R1/R2 BodyGuard PB… QuadScan 1 2 3 4 5 6 7 SuperScan 1 2 3 1 2 3 4 5 6 7 8 CU-ESD 6 1 2 CU-ESD 6 1 3 EXU-SI 13 3 4 EXU-SI...
-
Page 42: Changing Group Of Parameters
Changing group of parameters Changing group of parameters 1. Disconnect batteries if any. 2. Disconnect the mains contact. 3. Press the “Learn button (LRN)” and keep it depressed. 4. Connect the mains contact. 5. Watch the “Error LED”. 6. Release the “Learn Button” after the 5 s flash. The “Error LED”... -
Page 43: Cover
Drive shaft, center line 14.2 Fitting and removing the cover The cover is slid over flanges in the back plate so that the ridges fit in the grooves. Stick the Besam logotype to the cover – see below. " 1003680-US-0.1 Issue 2006-12-14... -
Page 44: Ansi / Bhma A156.19
ANSI / BHMA A156.19 ANSI / BHMA A156.19 REQUIREMENTS FOR LOW ENERGY POWER OPERATED DOORS The following texts are excerpts from American National Standard for low energy power-operated doors. Please refer to the full standard if necessary. 1. Activation The operator shall be activated by a knowing act. 2. - Page 45 ANSI / BHMA A156.19 Table I Minimum Opening Time to Back Check or 80 degrees, which ever occurs first, and the Minimum Closing Time from 90 degrees to Latch Check or 10 degrees. “D” Door Leaf “W” Door Weight in Pounds (kg) Width - Inches (mm) 100 (45.4) 125 (56.7)
- Page 46 ANSI / BHMA A156.19 6. Signage Doors shall be equipped with signage visible from either side, instructing the user as to the operation and function of the door. The signs shall be mounted 50" +/- 12" (1270mm +/- 305mm) from the floor to the center line of the sign. The letters shall be 5/8 inch (16 mm) high minimum.
-
Page 47: Troubleshooting
Troubleshooting Troubleshooting Fault Possible reasons why Remedies/Explanations The door does not open Position switch is set to OFF Change the setting of the position switch - The motor does not start Mains power is missing Check the mains switch Activation unit does not function Strap impulse inputs Presence detection is activated Check that there are no objects in the detection zone... - Page 48 Troubleshooting 16.1 Error indication • During normal operation the “Error LED” on the control unit is illuminated. • An extinguished LED indicates that there is no mains power. • A flashing light on the LED indicates that the operator is out of function (see table below).
-
Page 49: Planned Maintenance Checklist
Planned maintenance checklist Planned maintenance checklist • Measure / Adjust Speeds – Measure to ANSI/BHMA A156.19 and local codes; adjust if necessary. • Measure / Adjust Forces – Measure to ANSI/BHMA A156.19 and local codes; adjust if necessary. • Measure / Adjust Time Delays – Measure to ANSI/BHMA A156.19 and adjust if necessary. - Page 50 Besam US Inc., 1900 Airport Road, US-Monroe, NC 28110 Tel: +1 704 290 5520 Fax: +1 704 290 5555 marketing@besam-usa.com ASSA ABLOY is the world's leading manufacturer and supplier of locking solutions, meeting tough end-user demands for safety, security and user friendliness.
Need help?
Do you have a question about the SW 100 and is the answer not in the manual?
Questions and answers