Advertisement
Quick Links
Advertisement

Related Manuals for NCR RealPOS XR8


Summary of Contents for NCR RealPOS XR8
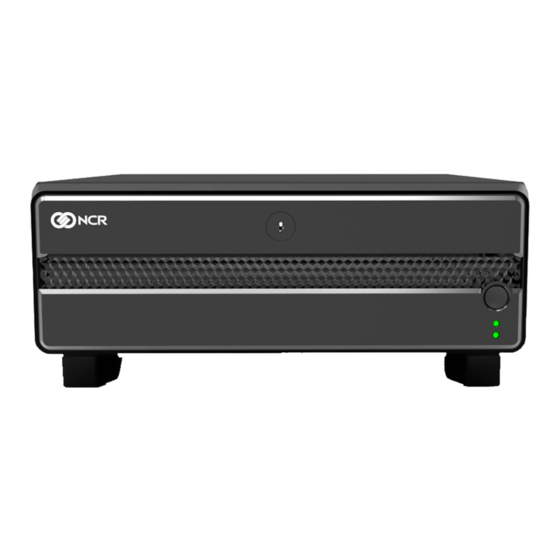
- Page 1 KIT INSTRUCTIONS NCR RealPOS XR8 Integration Tray Release 1.0 7607-K507 Issue A...
- Page 2 NCR, therefore, reserves the right to change specifications without prior notice. All features, functions, and operations described herein may not be marketed by NCR in all parts of the world. In some instances, photographs are of equipment prototypes. Therefore, before using this document, consult with your NCR representative or NCR office for information that is applicable and current.
-
Page 3: Revision Record
Revision Record Issue Date Remarks Sept 2016 First Issue... -
Page 4: Kit Contents
RealPOS XR8 Integration Tray Kit Instructions Introduction The Integration Tray kit provides the necessary components for integrating the displays, printers, and cash drawer with the RealPOS XR8 terminal. Kit Contents... -
Page 5: Installation Procedures
Installation Procedures Constructing the Integration Tray 1. Unpack all piece parts for the Integration Tray and verify all parts are present. 2. Place the Integration Chassis on a flat surface or secure to final lane position. a. If needed install the provided rubberized feet with the adhesive back to the six raised points on the bottom of the Integration Chassis. - Page 6 b. If being secured in place, follow the correct steps for the final installation location. Note: Orient the tray so the garage opening is at the front and cable management door opening is at the back.
- Page 7 3. Place the Tray Support Bracket onto the Integration Chassis so that the side with the most Display Pole support holes is on the side of the cable management door (back). 4. line up the four corners of the Tray Support Bracket and secure to the Integration Chassis with four #8 Phillips screws.
- Page 8 5. Slide the Cable Management cover onto the hinges in the back of the Integration Chassis and rotate up until the clasps engage.
- Page 9 6. Place the Integration Tray Top onto the Integration Chassis at the front and Tray Support Bracket at the back. 7. line up the screw holes and secure the Integration Tray Top to Chassis and Support Bracket with six #8 Phillips screws. Note: To insure proper alignment of the Integration Tray Top, do not fully tighten the screws until all of them are in place.
- Page 10 8. Install the Customer Display Post. a. Place at the front of the Tray Support Bracket (the side with less Display Pole holes). b. Secure with four Phillips screws.
- Page 11 Preparing the XR8 Terminal Remove the Bezel 1. Remove the Bezel. a. Turn the Keylock to the unlocked position. b. Pull the Bezel away from the terminal and remove.
- Page 12 Mount the XR8 on the Integration Tray Bracket 1. Remove the feet from the terminal if present.
- Page 13 2. Slide the XR8 Terminal into the Integration Tray Bracket hooks and secure in place with the provided screw.
- Page 14 Install the Faceplate Extension 1. Attach the Faceplate Extension onto the terminal over the power actuator and LED board with the provided screw. a. Place the bottom hook of the Faceplate Extension into the terminal's Bezel Plate slot. b. Rotate up and attach with a #6 Phillips screw in the upper left corner of the Faceplate Extension and terminal.
- Page 15 Insert the XR8 Terminal into the Integration Tray slide the terminal into the integration tray garage and secure with the two thumb screws attached to the Integration Tray Bracket.
- Page 16 Install the Integration Tray Bezel place the bezel plate hooks into the Integration Tray's slots at an angle and rotate into place. Place the Bezel key into the locked position.
- Page 17 Keyboard installation varies, depending on which keyboard you are using. See the following options. • NCR 5932-5xxx USB Alphanumeric Big Ticket Keyboard a. Install the keyboard in the Integration Tray. b. Route the cable as shown.
- Page 18 • NCR 5932-6xxx Compact Alpha-Numeric Keyboard a. Install the keyboard in the Integration Tray. b. Route the cable as shown. c. Install the Keyboard Tray Insert, if applicable. Note: There are two Keyboard Tray Inserts in the kit. The narrow tray is used in all cases except when using the 5932-65xx PS/2 model without an MSR.
- Page 19 1. The SpacePole arm is attached to the integration tray by four 1/4-20 x 0.5 inch steel pan head screws included in the kit. Attach to the integration tray as shown above.
- Page 20 2. Attach the head to the SpacePole arm by sliding the bracket hooks into the head slots. Secure the head to the bracket with the two thumb screws at the bottom of the bracket. Repeat this step with the secondary facing display.
- Page 21 3. Route the corresponding cables from the main display to the secondary display.
- Page 22 4. Route the rest of the cables down the SpacePole and into the integration tray. Route the cables into the routing slot to the terminal if applicable or to the respective integrated peripheral.
- Page 23 5. Use the included C clip to attach the cables and wires to the SpacePole.
- Page 24 6. A LED customer display can be attached to the SpacePole by two M4 x 8mm steel pan head screws and the customer display bracket. 7. Route the customer display cables to the correct connections.
- Page 25 8. Add the integration tray covers after routing the proper cables into the integration tray.
- Page 26 Printer Installing the Transaction Printer The NCR 7167, 7168, 7197, or 7198 printer can be located on either side of the Integration Tray. Note: The Printer Cable Strain Relief is different on the Release 1.0 and the Series II printers. The Cable Strain Relief on Release 1.0 printers prevents the printer from sitting properly in the Integration Tray and must be removed from the printer and installed in the Integration Tray.
- Page 27 Cable Strain Relief 7167/68 Release 1.0 Printer 7167/68 Series II Printer Do not remove the Cable Strain Relief on Series II printers. 26318a 3. Connect the Printer Cable to the USB and Power connectors.
- Page 28 4. Series II Printers Only: Route the cable through the Cable Strain Relief on the printer as shown. 33279a...
- Page 29 5. Route the printer cable out the back of the terminal and set the printer in the tray opening. NCR 7197/7198 Only: First install the 7459-K316 Printer Skirt, route the cable out the back of the terminal, and then set the printer in the cabinet.
-
Page 30: Installing A Cash Drawer
Cash Drawer connector on the terminal or to the transaction printer Cash Drawer Kickout. Note: The NCR 2181 Cash Drawer, with its smaller footprint, is required for the integrated configuration. Cash Drawer Cable Connections The Cash Drawer can be connected to the Cash Drawer connector or to the transaction printer.
Need help?
Do you have a question about the RealPOS XR8 and is the answer not in the manual?
Questions and answers