Epson SureColor SC-P8500DM Series User Manual
Hide thumbs
Also See for SureColor SC-P8500DM Series:
- Setup manual (19 pages) ,
- Setup manual (24 pages) ,
- General information manual (19 pages)
Table of Contents
Advertisement
Quick Links
Advertisement
Table of Contents

Related Manuals for Epson SureColor SC-P8500DM Series


Summary of Contents for Epson SureColor SC-P8500DM Series
- Page 1 User's Guide CMP0316-04 EN...
-
Page 2: Copyrights And Trademarks
Epson printer. Epson is not responsible for any use of this information as applied to other printers. Neither Seiko Epson Corporation nor its affiliates shall be liable to the purchaser of this product or third parties for damages, losses, costs, or expenses incurred by the purchaser or third parties as a result of accident, misuse, or abuse of this product or unauthorized modifications, repairs, or alterations to this product, or (excluding the U.S.) failure to strictly comply with Seiko Epson Corporation’s operating and maintenance instructions. -
Page 3: Table Of Contents
Removing Cut Sheets/Poster Board..56 Using Epson Media Installer....28 Setting Loaded Paper..... . . 56 Starting Procedure. - Page 4 Storage (Mac)......81 Saving Data from a Memory Device to Storage. . 81 Using Epson Smart Panel (Except for Models that do not Support Wireless LAN)... 111 Using Data Saved to Storage.
- Page 5 Memory Device......167 Using Epson Printer Utility 4....127 Network Folder.
- Page 6 Options and Consumable Products... 214 Epson Special Media....214 Ink Cartridges (Except for the SC-P8500DL Series/SC-T7700DL Series).
-
Page 7: Notes On Manuals
Viewing Video Manuals Indicates related reference content. The video manuals have been uploaded to YouTube. You can view them by clicking Epson Video Manuals Illustrations (video) from the top page of the Online Manual, or by clicking the following blue text. -
Page 8: Viewing Pdf Manuals
SC-P8500DM/SC-P8500D/SC-P6500D/SC-P6500DE/SC-P6500E/SC-T7700DM/SC-T5700DM/SC-T7700D/SC-T5700D/SC-3700D/SC-T3700DE/SC-T3700E/SC-P8500DL/SC-T7700DL Series User's Guide Introduction Click the title to open the relevant page. If the subtitles are not displayed when you play the video, click the subtitles icon shown in the image Click [+] to open the titles lower in the hierarchy. below. -
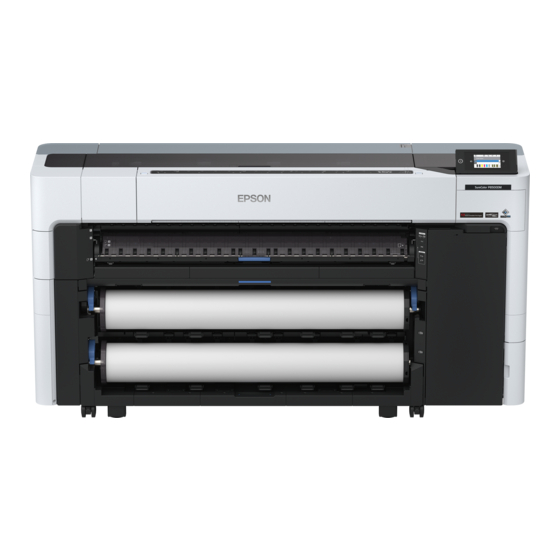
Page 9: Printer Parts
SC-P8500DM/SC-P8500D/SC-P6500D/SC-P6500DE/SC-P6500E/SC-T7700DM/SC-T5700DM/SC-T7700D/SC-T5700D/SC-3700D/SC-T3700DE/SC-T3700E/SC-P8500DL/SC-T7700DL Series User's Guide Introduction Printer Parts Front Section Maintenance cover Open when replacing the auto cutter blade. “Replacing the auto cutter blade” on page 184 Paper support Change the position for feeding roll paper, cut sheets, and poster board. Also, when replacing the Borderless Maintenance Box, set it to the top position. -
Page 10: Around The Roll Paper
SC-P8500DM/SC-P8500D/SC-P6500D/SC-P6500DE/SC-P6500E/SC-T7700DM/SC-T5700DM/SC-T7700D/SC-T5700D/SC-3700D/SC-T3700DE/SC-T3700E/SC-P8500DL/SC-T7700DL Series User's Guide Introduction Control panel The printer is equipped with a 4.3-inch touch panel. Printer cover Open this cover when cleaning the inside of the printer or clearing jams. Paper support lock lever The paper support lock lever. Around the Roll Paper Spindle lock lever The spindle lock lever. - Page 11 SC-P8500DM/SC-P8500D/SC-P6500D/SC-P6500DE/SC-P6500E/SC-T7700DM/SC-T5700DM/SC-T7700D/SC-T5700D/SC-3700D/SC-T3700DE/SC-T3700E/SC-P8500DL/SC-T7700DL Series User's Guide Introduction Core adapter Attach or remove the core adapter according to the size of the roll paper core. “Loading and Removing the Roll Paper” on page 42 Roll2 unit lock lever (Not available on the SC-P6500E Series/SC-T3700E Series.) The roll2 unit lock lever.
-
Page 12: Around The Ink Cartridges (Except For The Sc-P8500Dl Series/Sc-T7700Dl Series)
SC-P8500DM/SC-P8500D/SC-P6500D/SC-P6500DE/SC-P6500E/SC-T7700DM/SC-T5700DM/SC-T7700D/SC-T5700D/SC-3700D/SC-T3700DE/SC-T3700E/SC-P8500DL/SC-T7700DL Series User's Guide Introduction Around the Ink Cartridges (Except for the SC-P8500DL Series/ SC-T7700DL Series) Ink cartridge cover Open when replacing ink cartridges. “Replacing Ink Cartridges (Except for the SC-P8500DL Series/SC-T7700DL Series)” on page 177 Maintenance box cover Open when replacing the maintenance box . “Replacing the Maintenance Box”... -
Page 13: Around The Ink Supply Unit (Sc-P8500Dl Series/Sc-T7700Dl Series)
SC-P8500DM/SC-P8500D/SC-P6500D/SC-P6500DE/SC-P6500E/SC-T7700DM/SC-T5700DM/SC-T7700D/SC-T5700D/SC-3700D/SC-T3700DE/SC-T3700E/SC-P8500DL/SC-T7700DL Series User's Guide Introduction Around the Ink Supply Unit (SC-P8500DL Series/SC-T7700DL Series) Accessory case Maintenance box cover Open when replacing the maintenance box . “Replacing the Maintenance Box” on page 181 Maintenance box Ink Supply Unit “Replacing Ink Supply Units (SC-P8500DL Series/SC-T7700DL Series Only)” on page 179 Lock switch... -
Page 14: Back
SC-P8500DM/SC-P8500D/SC-P6500D/SC-P6500DE/SC-P6500E/SC-T7700DM/SC-T5700DM/SC-T7700D/SC-T5700D/SC-3700D/SC-T3700DE/SC-T3700E/SC-P8500DL/SC-T7700DL Series User's Guide Introduction Back Port cover LAN port Connects the LAN cable. USB port Connect to your computer with a USB cable. Optional storage unit slot The SC-P8500DM Series/SC-T7700DM Series/SC-T5700DM Series come with an SSD Unit installed. Models other than the SC-P8500DM Series/SC-T7700DM Series/SC-T5700DM Series can be equipped with the op‐... -
Page 15: Inside
SC-P8500DM/SC-P8500D/SC-P6500D/SC-P6500DE/SC-P6500E/SC-T7700DM/SC-T5700DM/SC-T7700D/SC-T5700D/SC-3700D/SC-T3700DE/SC-T3700E/SC-P8500DL/SC-T7700DL Series User's Guide Introduction Inside Auto cutter blade If the paper is not cut neatly, replace the auto cutter blade. “Replacing the auto cutter blade” on page 184 Print head Try cleaning it when automatic cleaning does not clear clogging in the print head. “Cleaning around the print head and caps”... -
Page 16: Scanner (Sc-P8500Dm Series/Sc-T7700Dm Series/Sc-T5700Dm Series Only)
SC-P8500DM/SC-P8500D/SC-P6500D/SC-P6500DE/SC-P6500E/SC-T7700DM/SC-T5700DM/SC-T7700D/SC-T5700D/SC-3700D/SC-T3700DE/SC-T3700E/SC-P8500DL/SC-T7700DL Series User's Guide Introduction Scanner (SC-P8500DM Series/SC-T7700DM Series/SC-T5700DM Series only) Scanner cover Open this cover when a paper jam occurs and so on. Scanner slot Insert originals to be scanned. Scanner edge guide Store the scanner edge guide when you open the scanner cover. This guide allows you to feed originals straight into the printer. -
Page 17: Control Panel
SC-P8500DM/SC-P8500D/SC-P6500D/SC-P6500DE/SC-P6500E/SC-T7700DM/SC-T5700DM/SC-T7700D/SC-T5700D/SC-3700D/SC-T3700DE/SC-T3700E/SC-P8500DL/SC-T7700DL Series User's Guide Introduction Control panel Note: SC-P8500DM Series/SC-T7700DM Series/ SC-T5700DM Series Only Press the Information button, and then press operate the scanner. Press to open the scanner cover or to remove scanned originals. Authentication system logout button Lit when an authentication system is connected. Press to log out of the authentication system. -
Page 18: Home Screen Operations
SC-P8500DM/SC-P8500D/SC-P6500D/SC-P6500DE/SC-P6500E/SC-T7700DM/SC-T5700DM/SC-T7700D/SC-T5700D/SC-3700D/SC-T3700DE/SC-T3700E/SC-P8500DL/SC-T7700DL Series User's Guide Introduction Allows you to make paper settings, printer settings, Home screen operations and perform printer maintenance. See the following for a list of the menus. The home screen varies depending on the printer model. You can also switch the home screen using the “Menu List”... - Page 19 SC-P8500DM/SC-P8500D/SC-P6500D/SC-P6500DE/SC-P6500E/SC-T7700DM/SC-T5700DM/SC-T7700D/SC-T5700D/SC-3700D/SC-T3700DE/SC-T3700E/SC-P8500DL/SC-T7700DL Series User's Guide Introduction Displays the approximate amount of available Wi-Fi Direct (simple AP) connection is space in the Borderless Maintenance Box for enabled. borderless printing. When is displayed, the amount of empty space in the Borderless Maintenance Maintenance Box is low. Press the display area to You can check and clean the print head nozzles, check the Borderless Maintenance Box model replace consumables, and clean parts.
-
Page 20: Features
SC-P8500DM/SC-P8500D/SC-P6500D/SC-P6500DE/SC-P6500E/SC-T7700DM/SC-T5700DM/SC-T7700D/SC-T5700D/SC-3700D/SC-T3700DE/SC-T3700E/SC-P8500DL/SC-T7700DL Series User's Guide Introduction Features Notes on Usage and Storage The main features of this printer are described below. Installation space Realizing High Resolution Make sure that you secure the following space, clear of The newly developed ink technology provides high any other objects, so that paper ejection and definition for photo, fine art, and proofing paper. -
Page 21: Notes When Using The Printer
SC-P8500DM/SC-P8500D/SC-P6500D/SC-P6500DE/SC-P6500E/SC-T7700DM/SC-T5700DM/SC-T7700D/SC-T5700D/SC-3700D/SC-T3700DE/SC-T3700E/SC-P8500DL/SC-T7700DL Series User's Guide Introduction SC-P6500D Series/SC-T6500DE Series/SC-T3700D paper's requirements are met. For more details, Series/SC-T3700DE Series see the documentation supplied with the paper. Also, when operating in dry areas, air conditioned environment, or under direct sunlight, maintain the appropriate humidity. 1505 mm 1129 mm Secure up to 1600 mm... -
Page 22: Notes When Using The Control Panel
SC-P8500DM/SC-P8500D/SC-P6500D/SC-P6500DE/SC-P6500E/SC-T7700DM/SC-T5700DM/SC-T7700D/SC-T5700D/SC-3700D/SC-T3700DE/SC-T3700E/SC-P8500DL/SC-T7700DL Series User's Guide Introduction ❏ Store the printer after confirming that the print ❏ Do not use in an environment that is subject to head has been capped (the print head is sudden changes in temperature or humidity. positioned at the far right). If the print head is left Condensation may form inside the panel, causing uncapped for a long time, the print quality may a decline in performance. -
Page 23: Notes On Handling The Ink Supply Units (Only For Models With Ink Supply Units)
SC-P8500DM/SC-P8500D/SC-P6500D/SC-P6500DE/SC-P6500E/SC-T7700DM/SC-T5700DM/SC-T7700D/SC-T5700D/SC-3700D/SC-T3700DE/SC-T3700E/SC-P8500DL/SC-T7700DL Series User's Guide Introduction ❏ To avoid getting dirt on the ink supply port, store ❏ To avoid getting dirt on the ink supply port, store the removed ink cartridge properly. The ink the removed ink supply unit properly. The ink supply port has a valve in it so it does not need to supply port has a valve in it so it does not need to be capped. -
Page 24: Saving Power
❏ Load the paper just before printing. distortion) due to the effects of light and various constituents in the air. This also applies to Epson special ❏ Do not use wavy or curled paper. media. However, with the correct storage method, the For roll paper, cut off the wavy or curled parts degree of color distortion can be minimized. - Page 25 SC-P8500DM/SC-P8500D/SC-P6500D/SC-P6500DE/SC-P6500E/SC-T7700DM/SC-T5700DM/SC-T7700D/SC-T5700D/SC-3700D/SC-T3700DE/SC-T3700E/SC-P8500DL/SC-T7700DL Series User's Guide Introduction Sleep mode is cleared if a print job is received or a button on the control panel is pressed. You can set the time before entering sleep mode from 1 to 120 minutes. At default settings, the printer enters sleep mode if no operations are performed for 15 minutes.
-
Page 26: Introducing The Software
For details on the various software, see the online help of each software or the Administrator's Guide (online manual). Note: Convenient software compatible with this printer is introduced on the Epson website. Please check the information from the following link. https://www.epson.com... -
Page 27: Pre-Installed Software
For Windows, you can install the software from the following folder on the supplied software disc. \\Network\EpsonNetConfig U Administrator's Guide Scanner Driver (Epson Scan 2) Epson Scan 2 is the driver that controls the scanner. Make sure you install this if you (SC-P8500DM Series/ want to use the scanner. SC-T7700DM Series/SC-T5700DM Series Only) -
Page 28: Using Epson Media Installer
Start Epson Media Installer. Installer /Applications/Epson Software/Epson Utilities/Epson Media Installer.app This section provides a summary of the Epson Media Printer driver (Windows) Installer features and basic operations. Epson Media Installer allows you to add paper information from the Internet. You can also edit the paper information you have added. -
Page 29: Configuration Of Main Screen
SC-P8500DM/SC-P8500D/SC-P6500D/SC-P6500DE/SC-P6500E/SC-T7700DM/SC-T5700DM/SC-T7700D/SC-T5700D/SC-3700D/SC-T3700DE/SC-T3700E/SC-P8500DL/SC-T7700DL Series User's Guide Introducing the Software Configuration of main screen One of the following screens is displayed when you start Epson Media Installer. Click the screen name at the top of the screen to switch screens. ❏ Media Management screen ❏... - Page 30 Not Acquired: Paper information that has not been downloaded to Epson Media Installer, but has been saved to the printer or the printer driver. You can print on Epson Special Media even if the status is Not Acquired. ❏ Editable is displayed for paper information with settings that can be changed.
- Page 31 ❏ Status Registered: Paper information that has been downloaded to Epson Media Installer, and saved to the printer or the printer driver. Update Available: Paper information on the server has been updated. When you download the paper information again, the latest paper information is saved to the printer or the printer driver.
-
Page 32: Edit Media Settings Screen Configuration
SC-P8500DM/SC-P8500D/SC-P6500D/SC-P6500DE/SC-P6500E/SC-T7700DM/SC-T5700DM/SC-T7700D/SC-T5700D/SC-3700D/SC-T3700DE/SC-T3700E/SC-P8500DL/SC-T7700DL Series User's Guide Introducing the Software Edit Media Settings Screen Configuration Change the paper information settings on the Edit Media Settings screen. The following are the main setting items. Item Function Media Setting Name You can change the media name to any name you want. Media Type You can change the type of paper information. - Page 33 SC-P8500DM/SC-P8500D/SC-P6500D/SC-P6500DE/SC-P6500E/SC-T7700DM/SC-T5700DM/SC-T7700D/SC-T5700D/SC-3700D/SC-T3700DE/SC-T3700E/SC-P8500DL/SC-T7700DL Series User's Guide Introducing the Software Item Function ICC Profile Click Browse to change the ICC profile. You can set RGB Profile and CMYK Profile. ❏ When printing using the printer driver, set RGB Profile. ❏ When printing using a software RIP, set the color mode profile that is supported by your RIP to either RGB Profile or CMYK Profile.
-
Page 34: Adding Paper Information
Epson Media Installer on computer [A]. In this case, the added/edited paper information is displayed in the Epson Media Installer on computer [B], but the added/edited paper information is not displayed in the printer driver on [B]. To display the added/edited paper information in the printer driver Select the save location, and then save the file. -
Page 35: Using Web Config
SC-P8500DM/SC-P8500D/SC-P6500D/SC-P6500DE/SC-P6500E/SC-T7700DM/SC-T5700DM/SC-T7700D/SC-T5700D/SC-3700D/SC-T3700DE/SC-T3700E/SC-P8500DL/SC-T7700DL Series User's Guide Introducing the Software Click (Import). Check the IP address of the printer. The Open screen is displayed. Press on the Home screen, select the connected network, and check the IP address. Note: The IP address can also be checked by printing a network connection check report. -
Page 36: Function Summary
For details, see the Epson Edge Dashboard help. Closing Procedure Close the web browser and close the Epson Edge Dashboard screen display. Since Epson Edge Dashboard is a resident software, it does not stop... -
Page 37: Using Epson Software Updater
Enter the software name in the search charm, and select the icon displayed. When you install the software during setup as described in the Setup Guide, Epson Software Updater Windows 10/Windows 11 is installed. Epson Software Updater allows you to... -
Page 38: Receiving Update Notifications
Taskbar of the desktop and then selecting Software Update. Windows ❏ Mac Important: Click Go - Applications - Epson Software - EPSON Software Updater. ❏ You must log in as an Administrator. ❏ Enter the administrator password when Update the software and manuals. -
Page 39: Mac
Printer Driver Use the Uninstaller. Downloading the Uninstaller Download the “Uninstaller” from the Epson website. https://www.epson.com Procedure After downloading the “Uninstaller”, follow the instructions on the Epson website. -
Page 40: Changing The Network Connection Methods
SC-P8500DM/SC-P8500D/SC-P6500D/SC-P6500DE/SC-P6500E/SC-T7700DM/SC-T5700DM/SC-T7700D/SC-T5700D/SC-3700D/SC-T3700DE/SC-T3700E/SC-P8500DL/SC-T7700DL Series User's Guide Changing the Network Connection Methods Connect your router and the printer with a Changing the LAN cable. Network Connection See the following for the location of the printer's LAN port. “Back” on page 14 Methods Switching to Wireless The printer can connect to a wired LAN or a wireless LAN. -
Page 41: Directly Connecting Wirelessly (Wi-Fi Direct)
SC-P8500DM/SC-P8500D/SC-P6500D/SC-P6500DE/SC-P6500E/SC-T7700DM/SC-T5700DM/SC-T7700D/SC-T5700D/SC-3700D/SC-T3700DE/SC-T3700E/SC-P8500DL/SC-T7700DL Series User's Guide Changing the Network Connection Methods Press Enter Password and enter the password. Press Wi-Fi Direct. When Wi-Fi Direct is already enabled, the Note: network (SSID), password, number of ❏ Differentiate between uppercase and connected devices, and so on are displayed. Go to step 5. -
Page 42: Basic Operations
Doing so may cause paper jams or soiled prints. See the following for paper supported by the printer. “Epson Special Media Table” on page 220 “Supported Commercially Available Paper” on page 229... - Page 43 SC-P8500DM/SC-P8500D/SC-P6500D/SC-P6500DE/SC-P6500E/SC-T7700DM/SC-T5700DM/SC-T7700D/SC-T5700D/SC-3700D/SC-T3700DE/SC-T3700E/SC-P8500DL/SC-T7700DL Series User's Guide Basic Operations Raise the spindle lock lever. Attach or remove the core adapter according to the core size of the roll paper to be loaded. 2-inch core Remove the core adapters from the media edge guides on both sides. Remove the spindle.
-
Page 44: Removing Roll 1/Roll Paper
SC-P8500DM/SC-P8500D/SC-P6500D/SC-P6500DE/SC-P6500E/SC-T7700DM/SC-T5700DM/SC-T7700D/SC-T5700D/SC-3700D/SC-T3700DE/SC-T3700E/SC-P8500DL/SC-T7700DL Series User's Guide Basic Operations Insert the spindle with the roll paper facing the Lower the spindle lock lever. direction shown in the illustration. Pull out the paper basket. Attach the transparent media edge guide to the You can stack one sheet at a time in the paper spindle. - Page 45 SC-P8500DM/SC-P8500D/SC-P6500D/SC-P6500DE/SC-P6500E/SC-T7700DM/SC-T5700DM/SC-T7700D/SC-T5700D/SC-3700D/SC-T3700DE/SC-T3700E/SC-P8500DL/SC-T7700DL Series User's Guide Basic Operations Select Paper Setting - Roll 1 or Roll - Remove. Remove the roll paper from the spindle. Note: You can also eject the roll paper by pressing the Roll1 removal button. Attach the transparent media edge guide to the spindle.
-
Page 46: Loading Roll 2 (Except For The Sc-P6500E Series/Sc-T3700E Series)
SC-P8500DM/SC-P8500D/SC-P6500D/SC-P6500DE/SC-P6500E/SC-T7700DM/SC-T5700DM/SC-T7700D/SC-T5700D/SC-3700D/SC-T3700DE/SC-T3700E/SC-P8500DL/SC-T7700DL Series User's Guide Basic Operations Raise the spindle lock lever. Loading Roll 2 (Except for the SC-P6500E Series/SC-T3700E Series) Turn on the printer. Set the paper support to the position shown in the illustration. Pull out the roll2 unit. Remove the spindle. - Page 47 SC-P8500DM/SC-P8500D/SC-P6500D/SC-P6500DE/SC-P6500E/SC-T7700DM/SC-T5700DM/SC-T7700D/SC-T5700D/SC-3700D/SC-T3700DE/SC-T3700E/SC-P8500DL/SC-T7700DL Series User's Guide Basic Operations Attach or remove the core adapter according to Insert the spindle with the roll paper facing the the core size of the roll paper to be loaded. direction shown in the illustration. 2-inch core Remove the core adapters from the media edge guides on both sides.
-
Page 48: Removing Roll 2 (Except For The Sc-P6500E Series/Sc-T3700E Series)
SC-P8500DM/SC-P8500D/SC-P6500D/SC-P6500DE/SC-P6500E/SC-T7700DM/SC-T5700DM/SC-T7700D/SC-T5700D/SC-3700D/SC-T3700DE/SC-T3700E/SC-P8500DL/SC-T7700DL Series User's Guide Basic Operations Return the roll2 unit. Important: Do not pull out the roll2 unit while the paper is loaded. Otherwise, the paper may wrinkle when you return the roll2 unit after it has been pulled out. When returning the unit, slowly return the roll2 unit while taking-up the paper. - Page 49 SC-P8500DM/SC-P8500D/SC-P6500D/SC-P6500DE/SC-P6500E/SC-T7700DM/SC-T5700DM/SC-T7700D/SC-T5700D/SC-3700D/SC-T3700DE/SC-T3700E/SC-P8500DL/SC-T7700DL Series User's Guide Basic Operations Raise the spindle lock lever. Remove the roll paper from the spindle. Pull out the roll2 unit. Attach the transparent media edge guide to the spindle. Remove the spindle. Place the spindle into the grooves with the black media edge guide on the right.
-
Page 50: Loading And Removing Cut Sheets/Poster Board
SC-P8500DM/SC-P8500D/SC-P6500D/SC-P6500DE/SC-P6500E/SC-T7700DM/SC-T5700DM/SC-T7700D/SC-T5700D/SC-3700D/SC-T3700DE/SC-T3700E/SC-P8500DL/SC-T7700DL Series User's Guide Basic Operations Lower the spindle lock lever. Set the paper support to the position shown in the illustration. Loading and Removing Cut Sheets/Poster Board Loading Cut Sheets You can feed the paper from the front or the back. In both cases, the paper is ejected from the front after printing. - Page 51 SC-P8500DM/SC-P8500D/SC-P6500D/SC-P6500DE/SC-P6500E/SC-T7700DM/SC-T5700DM/SC-T7700D/SC-T5700D/SC-3700D/SC-T3700DE/SC-T3700E/SC-P8500DL/SC-T7700DL Series User's Guide Basic Operations Go to the rear of the printer, align the paper Pull out the paper basket. with the alignment position on the left side with the side to be printed facing up. Feeding paper from the front of the printer Important: If paper with a firm curl is fed from the front, the...
- Page 52 SC-P8500DM/SC-P8500D/SC-P6500D/SC-P6500DE/SC-P6500E/SC-T7700DM/SC-T5700DM/SC-T7700D/SC-T5700D/SC-3700D/SC-T3700DE/SC-T3700E/SC-P8500DL/SC-T7700DL Series User's Guide Basic Operations Insert the paper. Note: Close the flap if it is open. When using cut sheets with a paper length of 297 mm or longer: Insert the paper straight into the printer to the position shown in the illustration. Align the paper with the alignment position on the right side with the side to be printed facing Make sure that it passes under the internal...
-
Page 53: Loading Poster Board
SC-P8500DM/SC-P8500D/SC-P6500D/SC-P6500DE/SC-P6500E/SC-T7700DM/SC-T5700DM/SC-T7700D/SC-T5700D/SC-3700D/SC-T3700DE/SC-T3700E/SC-P8500DL/SC-T7700DL Series User's Guide Basic Operations When using cut sheets with a paper length Loading Poster Board shorter than 297 mm: You can feed the paper from the front or the back. In Insert the paper past the alignment mark, both cases, the paper is ejected from the front after making sure that it passes under the internal printing. - Page 54 SC-P8500DM/SC-P8500D/SC-P6500D/SC-P6500DE/SC-P6500E/SC-T7700DM/SC-T5700DM/SC-T7700D/SC-T5700D/SC-3700D/SC-T3700DE/SC-T3700E/SC-P8500DL/SC-T7700DL Series User's Guide Basic Operations Insert the paper straight into the printer to the Note: position shown in the illustration. Close the flap if it is open. Go to the rear of the printer, align the paper with the alignment position on the left side with the side to be printed facing up.
- Page 55 SC-P8500DM/SC-P8500D/SC-P6500D/SC-P6500DE/SC-P6500E/SC-T7700DM/SC-T5700DM/SC-T7700D/SC-T5700D/SC-3700D/SC-T3700DE/SC-T3700E/SC-P8500DL/SC-T7700DL Series User's Guide Basic Operations Feeding paper from the front of the Align the paper with the alignment position on the right side with the side to be printed facing printer Important: If paper with a firm curl is fed from the front, the paper may get jammed and cannot be inserted.
-
Page 56: Removing Cut Sheets/Poster Board
SC-P8500DM/SC-P8500D/SC-P6500D/SC-P6500DE/SC-P6500E/SC-T7700DM/SC-T5700DM/SC-T7700D/SC-T5700D/SC-3700D/SC-T3700DE/SC-T3700E/SC-P8500DL/SC-T7700DL Series User's Guide Basic Operations While printing Important: Insert the poster board making sure that it passes under the internal rollers. Removing Cut Sheets/Poster Board Select Menu - Paper Setting - Cut Sheet or Poster Board - Remove. While supporting the paper so that it does not fall, press OK. -
Page 57: How To Set
SC-P8500DM/SC-P8500D/SC-P6500D/SC-P6500DE/SC-P6500E/SC-T7700DM/SC-T5700DM/SC-T7700D/SC-T5700D/SC-3700D/SC-T3700DE/SC-T3700E/SC-P8500DL/SC-T7700DL Series User's Guide Basic Operations If the paper type displayed does not match the Note: paper type that you have loaded, press Paper ❏ Set the same settings in the printer driver as the Type to set the paper type. paper type you have set. -
Page 58: When The Paper Type Is Not Displayed On The Control Panel Or In The Driver
Home screen, you can start ❏ Use Epson Edge Print printing. (For details on how to use Epson Edge Print, see the Epson Edge Print manual.) Use Epson Media Installer This allows you to add paper information from the Internet. - Page 59 SC-P8500DM/SC-P8500D/SC-P6500D/SC-P6500DE/SC-P6500E/SC-T7700DM/SC-T5700DM/SC-T7700D/SC-T5700D/SC-3700D/SC-T3700DE/SC-T3700E/SC-P8500DL/SC-T7700DL Series User's Guide Basic Operations Adding Paper Information Use one of the following methods to start Epson Media Installer starts and displays a list Epson Media Installer. of paper information that you can add. For Windows Start Epson Media Installer.
- Page 60 Media Installer may not be displayed in the printer driver. Re-registering Paper Information A copy of the paper information is created. The Start Epson Media Installer, and then click Media copy has the word "(Copy)" displayed at the end Management - Refresh. of the media name.
-
Page 61: Optimizing Media Settings (Automatic Adjustment)
When paper information has been added using the Select General Settings - Printer Settings - Epson Media Installer, optimize the media settings to Custom Paper Setting on the control panel. correct individual differences in your media and printer so that you can perform optimal printing using your combination of media and printer. -
Page 62: Automatic Adjustment Procedure
SC-P8500DM/SC-P8500D/SC-P6500D/SC-P6500DE/SC-P6500E/SC-T7700DM/SC-T5700DM/SC-T7700D/SC-T5700D/SC-3700D/SC-T3700DE/SC-T3700E/SC-P8500DL/SC-T7700DL Series User's Guide Basic Operations ❏ Make sure you select the name set when you Check that the printer is ready, and load the added the media setting value or set in Custom media according to the actual usage conditions. Paper Setting from the printer's menu as the Paper Type. -
Page 63: Feeding Roll Paper Manually
SC-P8500DM/SC-P8500D/SC-P6500D/SC-P6500DE/SC-P6500E/SC-T7700DM/SC-T5700DM/SC-T7700D/SC-T5700D/SC-3700D/SC-T3700DE/SC-T3700E/SC-P8500DL/SC-T7700DL Series User's Guide Basic Operations Ruled Line Alignment Insert the leading edge of the roll paper into the paper feed slot, and continue to feed until you This menu is also used when graininess is detected in hear a sound. printing results. -
Page 64: Loading Method For Auto Take-Up
SC-P8500DM/SC-P8500D/SC-P6500D/SC-P6500DE/SC-P6500E/SC-T7700DM/SC-T5700DM/SC-T7700D/SC-T5700D/SC-3700D/SC-T3700DE/SC-T3700E/SC-P8500DL/SC-T7700DL Series User's Guide Basic Operations Raise the spindle lock lever for roll1. Taking-up with printed side out places the printed surface on the outside of the roll. Taking-up with printed side in places the printed surface on the inside of the roll. Remove the spindle. - Page 65 SC-P8500DM/SC-P8500D/SC-P6500D/SC-P6500DE/SC-P6500E/SC-T7700DM/SC-T5700DM/SC-T7700D/SC-T5700D/SC-3700D/SC-T3700DE/SC-T3700E/SC-P8500DL/SC-T7700DL Series User's Guide Basic Operations 3-inch core Remove the rim of the media edge guide from the end. Attach the core adapters to the media edge guides on both sides. Insert the spindle into the roll core. Attach or remove the core adapter according to the core size of the roll paper to be loaded.
- Page 66 SC-P8500DM/SC-P8500D/SC-P6500D/SC-P6500DE/SC-P6500E/SC-T7700DM/SC-T5700DM/SC-T7700D/SC-T5700D/SC-3700D/SC-T3700DE/SC-T3700E/SC-P8500DL/SC-T7700DL Series User's Guide Basic Operations Attach the transparent media edge guide to the Press the pause/resume button, and then use spindle. the take-up direction switch to select either printed side in or printed side out. Attach it so that the gap between the roll core and the media edge guide is approximately 10 mm (0.4 in.).
- Page 67 SC-P8500DM/SC-P8500D/SC-P6500D/SC-P6500DE/SC-P6500E/SC-T7700DM/SC-T5700DM/SC-T7700D/SC-T5700D/SC-3700D/SC-T3700DE/SC-T3700E/SC-P8500DL/SC-T7700DL Series User's Guide Basic Operations Set the paper support to the position shown in Set the paper support to the position shown in the illustration, and then open the flap. the illustration. On the control panel, press OK to feed the paper to the take-up position.
-
Page 68: Removing Method For Auto Take-Up
SC-P8500DM/SC-P8500D/SC-P6500D/SC-P6500DE/SC-P6500E/SC-T7700DM/SC-T5700DM/SC-T7700D/SC-T5700D/SC-3700D/SC-T3700DE/SC-T3700E/SC-P8500DL/SC-T7700DL Series User's Guide Basic Operations Check the take-up direction and attach the end Take-up the cut paper. of the paper to the roll core. Printed side out Raise the spindle lock lever for roll1. Printed side in Remove the spindle. Press and hold Forward on the control panel to feed the roll paper about one revolution of the take-up roll core. - Page 69 SC-P8500DM/SC-P8500D/SC-P6500D/SC-P6500DE/SC-P6500E/SC-T7700DM/SC-T5700DM/SC-T7700D/SC-T5700D/SC-3700D/SC-T3700DE/SC-T3700E/SC-P8500DL/SC-T7700DL Series User's Guide Basic Operations Remove the roll paper that has been taken-up Lower the spindle lock lever. from the spindle. Attach the rim of the media edge guide to the end. Attach the transparent media edge guide to the spindle.
-
Page 70: Basic Printing Methods(Windows)
SC-P8500DM/SC-P8500D/SC-P6500D/SC-P6500DE/SC-P6500E/SC-T7700DM/SC-T5700DM/SC-T7700D/SC-T5700D/SC-3700D/SC-T3700DE/SC-T3700E/SC-P8500DL/SC-T7700DL Series User's Guide Basic Operations Basic Printing Methods Set Page Size. Set the paper size set when creating the print data in the software. (Windows) Set the Paper Size and Reduce/Enlarge according to the loaded paper. Printing is performed from the software that created the data to be printed. - Page 71 SC-P8500DM/SC-P8500D/SC-P6500D/SC-P6500DE/SC-P6500E/SC-T7700DM/SC-T5700DM/SC-T7700D/SC-T5700D/SC-3700D/SC-T3700DE/SC-T3700E/SC-P8500DL/SC-T7700DL Series User's Guide Basic Operations Set the expansion and the amount of Set the print quality. Set Select Target. enlargement as necessary. SC-P Series Select Select Target. Set the Print Mode, Color Mode, and Level as necessary. Note: Depending on the paper, borderless printing may not be supported, in which case you cannot perform borderless printing.
- Page 72 SC-P8500DM/SC-P8500D/SC-P6500D/SC-P6500DE/SC-P6500E/SC-T7700DM/SC-T5700DM/SC-T7700D/SC-T5700D/SC-3700D/SC-T3700DE/SC-T3700E/SC-P8500DL/SC-T7700DL Series User's Guide Basic Operations Screen while printing Check the content of the settings. The settings are reflected in the illustration on The following screen is displayed when you start the right, so check this to make sure everything printing, and the progress bar (the computer's is correct.
-
Page 73: Basic Printing Methods(Mac)
SC-P8500DM/SC-P8500D/SC-P6500D/SC-P6500DE/SC-P6500E/SC-T7700DM/SC-T5700DM/SC-T7700D/SC-T5700D/SC-3700D/SC-T3700DE/SC-T3700E/SC-P8500DL/SC-T7700DL Series User's Guide Basic Operations For Mac OS X v10.6 and v10.5, click the arrow Basic Printing Methods ) on the page settings screen to set the items. (Mac) Turn on the printer, and load the paper. “Loading and Removing the Roll Paper” on page 42 “Loading and Removing Cut Sheets/Poster Board”... - Page 74 SC-P8500DM/SC-P8500D/SC-P6500D/SC-P6500DE/SC-P6500E/SC-T7700DM/SC-T5700DM/SC-T7700D/SC-T5700D/SC-3700D/SC-T3700DE/SC-T3700E/SC-P8500DL/SC-T7700DL Series User's Guide Basic Operations Select Printer Settings from the list, and then Check the content of the settings. check the print paper settings. The settings are reflected in the illustration on When Auto is selected for Roll Switching when the right, so check this to make sure everything the printer driver is opened, the paper type and is correct.
-
Page 75: Printable Area
SC-P8500DM/SC-P8500D/SC-P6500D/SC-P6500DE/SC-P6500E/SC-T7700DM/SC-T5700DM/SC-T7700D/SC-T5700D/SC-3700D/SC-T3700DE/SC-T3700E/SC-P8500DL/SC-T7700DL Series User's Guide Basic Operations ❏ When performing borderless printing for all Printable area edges: A, B, C, Otherwise, the margins depend on the setting value of This section describes the printable areas for the the Top/Bottom Margins in the menu. printer. -
Page 76: Turning Off The Power Using Power Off Timer
SC-P8500DM/SC-P8500D/SC-P6500D/SC-P6500DE/SC-P6500E/SC-T7700DM/SC-T5700DM/SC-T7700D/SC-T5700D/SC-3700D/SC-T3700DE/SC-T3700E/SC-P8500DL/SC-T7700DL Series User's Guide Basic Operations Turning Off the Power Canceling Printing Using Power Off Timer There are a few ways to stop printing operations depending on the situation. The printer offers the following two power management options. When the computer has finished sending data to the printer, you cannot cancel the print job from the ❏... - Page 77 SC-P8500DM/SC-P8500D/SC-P6500D/SC-P6500DE/SC-P6500E/SC-T7700DM/SC-T5700DM/SC-T7700D/SC-T5700D/SC-3700D/SC-T3700DE/SC-T3700E/SC-P8500DL/SC-T7700DL Series User's Guide Basic Operations Canceling from a computer (Mac) Click the printer icon in the Dock. Select the job you want to cancel, and then click Delete. If the job has been sent to the printer, print data is not displayed on the above screen.
-
Page 78: Adobe Postscript Expansion Unit
SC-P8500DM/SC-P8500D/SC-P6500D/SC-P6500DE/SC-P6500E/SC-T7700DM/SC-T5700DM/SC-T7700D/SC-T5700D/SC-3700D/SC-T3700DE/SC-T3700E/SC-P8500DL/SC-T7700DL Series User's Guide ™ ® ® Adobe PostScript Expansion Unit ® ® Adobe PostScript If the print data is too complicated to process. ™ Expansion Unit If this occurs, try lowering the PDF rendering level in Printer Settings - PS Settings. (Only when printing PDF files) ™... -
Page 79: Using The Ssd Unit (Optional)
SC-P8500DM/SC-P8500D/SC-P6500D/SC-P6500DE/SC-P6500E/SC-T7700DM/SC-T5700DM/SC-T7700D/SC-T5700D/SC-3700D/SC-T3700DE/SC-T3700E/SC-P8500DL/SC-T7700DL Series User's Guide Using the SSD Unit (Optional) Using the SSD Unit Type Explanation Shared Shared Anyone can store and (Optional) Storage Storage (Fixed) use documents. You cannot change the Folder Name or set a password. Also, you By connecting the optional SSD Unit, you can store cannot delete the Storage space. -
Page 80: Creating A Storage Space
SC-P8500DM/SC-P8500D/SC-P6500D/SC-P6500DE/SC-P6500E/SC-T7700DM/SC-T5700DM/SC-T7700D/SC-T5700D/SC-3700D/SC-T3700DE/SC-T3700E/SC-P8500DL/SC-T7700DL Series User's Guide Using the SSD Unit (Optional) You can now use the SSD Unit. Select Acquire from Printer, and then press Get. If Option Storage: Available is displayed in the Current Printer Information section, you can use the SSD Unit. Creating a Storage Space An administrator or a user can create a shared Storage space. -
Page 81: Saving Data To Storage
Select Save to Storage and Print from Job Click Storage Settings on the printer driver’s Type. Epson Printer Utility screen. Note: Set the save location, and then click OK. Select Save to Storage from Job Type if you want to save the print data to Storage without printing the document. -
Page 82: Using Data Saved To Storage
SC-P8500DM/SC-P8500D/SC-P6500D/SC-P6500DE/SC-P6500E/SC-T7700DM/SC-T5700DM/SC-T7700D/SC-T5700D/SC-3700D/SC-T3700DE/SC-T3700E/SC-P8500DL/SC-T7700DL Series User's Guide Using the SSD Unit (Optional) Managing Storage Select the type of data you want to save, and then select a file. Spaces and Documents Select the Advanced tab, and then select File Storing. Searching for Storage Spaces Set File Storing to On. -
Page 83: Deleting A Storage Space
SC-P8500DM/SC-P8500D/SC-P6500D/SC-P6500DE/SC-P6500E/SC-T7700DM/SC-T5700DM/SC-T7700D/SC-T5700D/SC-3700D/SC-T3700DE/SC-T3700E/SC-P8500DL/SC-T7700DL Series User's Guide Using the SSD Unit (Optional) The administrator or user can change the storage Select General Settings - Storage Settings - period or set it to indefinite. However, users can only Shared Folder Access Control - Operation change this setting when Menu - General Settings - Authority. -
Page 84: Various Printing Methods
SC-P8500DM/SC-P8500D/SC-P6500D/SC-P6500DE/SC-P6500E/SC-T7700DM/SC-T5700DM/SC-T7700D/SC-T5700D/SC-3700D/SC-T3700DE/SC-T3700E/SC-P8500DL/SC-T7700DL Series User's Guide Various Printing Methods ❏ Fit to Output Size Various Printing Automatically enlarges or reduces the image size to fit the paper size. Methods Enlargements and Horizontal and Vertical Banners Fitting Documents to the Width of the Roll Paper The printer driver can enlarge or reduce documents for different paper sizes. -
Page 85: Choosing A Print Size
SC-P8500DM/SC-P8500D/SC-P6500D/SC-P6500DE/SC-P6500E/SC-T7700DM/SC-T5700DM/SC-T7700D/SC-T5700D/SC-3700D/SC-T3700DE/SC-T3700E/SC-P8500DL/SC-T7700DL Series User's Guide Various Printing Methods Select Settings - Fit to Roll Paper Width. Select Fit to Roll Paper Width, and then select whether to fit the short side of the document to the roll paper width or fit the long side to the roll paper width. -
Page 86: Fitting Documents To The Output Size
SC-P8500DM/SC-P8500D/SC-P6500D/SC-P6500DE/SC-P6500E/SC-T7700DM/SC-T5700DM/SC-T7700D/SC-T5700D/SC-3700D/SC-T3700DE/SC-T3700E/SC-P8500DL/SC-T7700DL Series User's Guide Various Printing Methods Select Settings - Specify Size. Select Specify Size, and then select a size specification method to set the size. Set a value directly or click the arrows to the right of the scale box to set the value. Check other settings, and then start printing. - Page 87 SC-P8500DM/SC-P8500D/SC-P6500D/SC-P6500DE/SC-P6500E/SC-T7700DM/SC-T5700DM/SC-T7700D/SC-T5700D/SC-3700D/SC-T3700DE/SC-T3700E/SC-P8500DL/SC-T7700DL Series User's Guide Various Printing Methods Select Settings - Fit to Output Size. Note: You can also print according to the output size by selecting Scale to fit paper size in the Paper Handling section on the print screen. Select the paper size for printing.
-
Page 88: Printing At Non-Standard Sizes
SC-P8500DM/SC-P8500D/SC-P6500D/SC-P6500DE/SC-P6500E/SC-T7700DM/SC-T5700DM/SC-T7700D/SC-T5700D/SC-3700D/SC-T3700DE/SC-T3700E/SC-P8500DL/SC-T7700DL Series User's Guide Various Printing Methods Settings in Windows Printing at Non-Standard Sizes Display the printer driver's Printer Settings screen, and then click Custom Paper Size... “Basic Printing Methods(Windows)” on Before printing at non-standard sizes, including page 70 vertical or horizontal banners and documents with equal sides, save the desired paper size in the printer driver. - Page 89 SC-P8500DM/SC-P8500D/SC-P6500D/SC-P6500DE/SC-P6500E/SC-T7700DM/SC-T5700DM/SC-T7700D/SC-T5700D/SC-3700D/SC-T3700DE/SC-T3700E/SC-P8500DL/SC-T7700DL Series User's Guide Various Printing Methods Enter values in Width and Height for the Note: Paper Size, enter the margins, and then click ❏ To change the paper size you saved, select the paper size name from the list on the left. The ranges of page sizes and margin sizes that ❏...
-
Page 90: Printing Cad Drawings
SC-P8500DM/SC-P8500D/SC-P6500D/SC-P6500DE/SC-P6500E/SC-T7700DM/SC-T5700DM/SC-T7700D/SC-T5700D/SC-3700D/SC-T3700DE/SC-T3700E/SC-P8500DL/SC-T7700DL Series User's Guide Various Printing Methods SC-T Series Printing CAD Drawings Select Select Target in Print Quality, and then select CAD/Line Drawing - Black, CAD/Line This printer supports HP-GL/2 and HP RTL used for Drawing - Color, or CAD/Line Drawing - plotter printing. -
Page 91: Printing Using Hp-Gl/2 And Hp Rtl Emulation
Switching Between Roll 1 and For a list of applications that have been tested, visit Roll 2 According to the Paper the Epson website at https://www.epson.com. Type If you frequently use the printer as described in the Important:... - Page 92 SC-P8500DM/SC-P8500D/SC-P6500D/SC-P6500DE/SC-P6500E/SC-T7700DM/SC-T5700DM/SC-T7700D/SC-T5700D/SC-3700D/SC-T3700DE/SC-T3700E/SC-P8500DL/SC-T7700DL Series User's Guide Various Printing Methods Usage example Select the paper type you want to print on in Media Category - Paper Type. When using different paper types for different purposes, such as printing drawings for internal verification on plain paper and printing drawings for presentations or client submission on color printing paper.
-
Page 93: Switching Between Roll 1 And Roll 2 According To The
SC-P8500DM/SC-P8500D/SC-P6500D/SC-P6500DE/SC-P6500E/SC-T7700DM/SC-T5700DM/SC-T7700D/SC-T5700D/SC-3700D/SC-T3700DE/SC-T3700E/SC-P8500DL/SC-T7700DL Series User's Guide Various Printing Methods Usage example Make sure that Auto is displayed for Roll Switching. When printing drawings at various sizes, such as A0, If Auto is not displayed, click it and select A1, A2, and A3, by automatically switching to the roll Auto. -
Page 94: Start Printing From Roll With Least Amount
SC-P8500DM/SC-P8500D/SC-P6500D/SC-P6500DE/SC-P6500E/SC-T7700DM/SC-T5700DM/SC-T7700D/SC-T5700D/SC-3700D/SC-T3700DE/SC-T3700E/SC-P8500DL/SC-T7700DL Series User's Guide Various Printing Methods For the Page Size, set the paper size set in the Make sure that Auto is displayed for Roll software. Switching. In this example, we will select A1 594 x 841 If Auto is not displayed, click it and select Auto. - Page 95 SC-P8500DM/SC-P8500D/SC-P6500D/SC-P6500DE/SC-P6500E/SC-T7700DM/SC-T5700DM/SC-T7700D/SC-T5700D/SC-3700D/SC-T3700DE/SC-T3700E/SC-P8500DL/SC-T7700DL Series User's Guide Various Printing Methods Settings on Windows Select Remaining Amount Priority. Select General Settings - Printer Settings - Note: Paper Source Settings - Roll Paper Setup - ❏ Select Data Length Priority to prevent the Roll Switching - Auto - Paper Length from the roll paper from being switched during printer’s control panel.
-
Page 96: Borderless Printing
The sections which are beyond the paper edges are not printed; therefore, “Epson Special Media Table” on page 220 resulting in borderless printing. Use settings such as Page Setup in the applications “Supported Commercially Available Paper” on to set the size of the image data as follows. -
Page 97: About Roll Paper Cutting
SC-P8500DM/SC-P8500D/SC-P6500D/SC-P6500DE/SC-P6500E/SC-T7700DM/SC-T5700DM/SC-T7700D/SC-T5700D/SC-3700D/SC-T3700DE/SC-T3700E/SC-P8500DL/SC-T7700DL Series User's Guide Various Printing Methods About Roll Paper Cutting When performing borderless printing on roll paper, you can specify whether to perform left and right borderless printing or all edges borderless printing, and how to cut the paper in the printer driver's Advanced - Roll Paper Option. -
Page 98: Setting Procedures For Printing
SC-P8500DM/SC-P8500D/SC-P6500D/SC-P6500DE/SC-P6500E/SC-T7700DM/SC-T5700DM/SC-T7700D/SC-T5700D/SC-3700D/SC-T3700DE/SC-T3700E/SC-P8500DL/SC-T7700DL Series User's Guide Various Printing Methods Select Borderless, and then Amount of Setting Procedures for Printing Enlargement to set the amount of enlargement. Settings in Windows Display the printer driver's Printer Settings screen, and then set the same paper size as the data's paper size in Page Size. -
Page 99: Correct Color And Print
: 3 mm for left and 5 mm for right Settings checkbox. (the image shifts 1 mm to the right) ❏ EPSON Standard (sRGB) Optimizes the sRGB space and corrects the color. Standard : 3 mm left and right ❏ Adobe RGB : 1.5 mm left and right... - Page 100 SC-P8500DM/SC-P8500D/SC-P6500D/SC-P6500DE/SC-P6500E/SC-T7700DM/SC-T5700DM/SC-T7700D/SC-T5700D/SC-3700D/SC-T3700DE/SC-T3700E/SC-P8500DL/SC-T7700DL Series User's Guide Various Printing Methods When you select EPSON Standard (sRGB), Business Graphics, or Line Drawing Settings in Color Mode, Setting example for Adobe Photoshop CS5 the Settings button is displayed. Open the Print dialog box. Select Color Management and then Clicking the Settings button allows you to perform Document.
- Page 101 Printer Manages Colors. Note: Adobe Photoshop CS3 or later EPSON Color Controls will not be available in Adobe Photoshop Elements 6 or later the following applications if Step 1 is omitted. Adobe Photoshop Lightroom 1 or later ❏...
-
Page 102: N-Up/Poster
SC-P8500DM/SC-P8500D/SC-P6500D/SC-P6500DE/SC-P6500E/SC-T7700DM/SC-T5700DM/SC-T7700D/SC-T5700D/SC-3700D/SC-T3700DE/SC-T3700E/SC-P8500DL/SC-T7700DL Series User's Guide Various Printing Methods N-up/Poster Select Printer Settings from the list, and then select Advanced Settings in Mode Settings. You can print multiple pages of data on a single sheet, Select a color mode method in Color Mode. or print a single page across multiple sheets. -
Page 103: Folded Double-Side (Windows Only)
SC-P8500DM/SC-P8500D/SC-P6500D/SC-P6500DE/SC-P6500E/SC-T7700DM/SC-T5700DM/SC-T7700D/SC-T5700D/SC-3700D/SC-T3700DE/SC-T3700E/SC-P8500DL/SC-T7700DL Series User's Guide Various Printing Methods • Poster (Windows Only) Set Binding Edge and Binding Margin in the Folded Double-Side Setting dialog box. A single page can be printed across multiple sheets. The sheets can then be joined together to form large posters (up to 16 times the original size). -
Page 104: Poster (Windows Only)
SC-P8500DM/SC-P8500D/SC-P6500D/SC-P6500DE/SC-P6500E/SC-T7700DM/SC-T5700DM/SC-T7700D/SC-T5700D/SC-3700D/SC-T3700DE/SC-T3700E/SC-P8500DL/SC-T7700DL Series User's Guide Various Printing Methods Settings in Windows Settings in Mac Display the Layout tab of the printer driver, and Display the Print dialog box, select Layout then select Page Layout. Select N-up and click from the list, and specify the number of pages the Settings button. - Page 105 SC-P8500DM/SC-P8500D/SC-P6500D/SC-P6500DE/SC-P6500E/SC-T7700DM/SC-T5700DM/SC-T7700D/SC-T5700D/SC-3700D/SC-T3700DE/SC-T3700E/SC-P8500DL/SC-T7700DL Series User's Guide Various Printing Methods When with margins is selected: Set Number of panels in the Poster dialog box. Clear Borderless Poster Print. Select whether to print the poster with or Note: without borders. Regarding the size after joining together: When borderless is selected: When Borderless Poster Print is cleared, the Print Cutting Guides items are displayed.
- Page 106 SC-P8500DM/SC-P8500D/SC-P6500D/SC-P6500DE/SC-P6500E/SC-T7700DM/SC-T5700DM/SC-T7700D/SC-T5700D/SC-3700D/SC-T3700DE/SC-T3700E/SC-P8500DL/SC-T7700DL Series User's Guide Various Printing Methods Ready the two top sheets and trim the excess Note: from the left sheet by cutting along the line If the output is in color, the join guides will be in blue joining the two join guides (the centers of the X and the cut guides in red;...
- Page 107 SC-P8500DM/SC-P8500D/SC-P6500D/SC-P6500DE/SC-P6500E/SC-T7700DM/SC-T5700DM/SC-T7700D/SC-T5700D/SC-3700D/SC-T3700DE/SC-T3700E/SC-P8500DL/SC-T7700DL Series User's Guide Various Printing Methods With the two sheets overlapping, trim the Trim the bottom from the upper sheets by excess by cutting along the line joining the two cutting along the line joining the two guides cut guides (the lines to the left of the X marks). (the lines above the X marks).
- Page 108 SC-P8500DM/SC-P8500D/SC-P6500D/SC-P6500DE/SC-P6500E/SC-T7700DM/SC-T5700DM/SC-T7700D/SC-T5700D/SC-3700D/SC-T3700DE/SC-T3700E/SC-P8500DL/SC-T7700DL Series User's Guide Various Printing Methods With the two sheets overlapping, trim the Join the upper and lower sheets together. excess by cutting along the line joining the two Use an adhesive tape to stick the backs of the cut guides (the lines above the X marks).
-
Page 109: Poster Layout(Windows Only)
SC-P8500DM/SC-P8500D/SC-P6500D/SC-P6500DE/SC-P6500E/SC-T7700DM/SC-T5700DM/SC-T7700D/SC-T5700D/SC-3700D/SC-T3700DE/SC-T3700E/SC-P8500DL/SC-T7700DL Series User's Guide Various Printing Methods Poster Layout After joining all the sheets, trim off the borders by cutting along the cut guides (outside the X (Windows only) marks). The poster layout function allows you to arrange multiple items of print data created with different applications on a sheet of paper and print them all at once. -
Page 110: Setting Procedures For Printing
SC-P8500DM/SC-P8500D/SC-P6500D/SC-P6500DE/SC-P6500E/SC-T7700DM/SC-T5700DM/SC-T7700D/SC-T5700D/SC-3700D/SC-T3700DE/SC-T3700E/SC-P8500DL/SC-T7700DL Series User's Guide Various Printing Methods For details on each function, see the help on the Setting Procedures for Printing Layout Manager screen. Open the file you want to print in your application. Select Layout Manager on the printer driver’s Printer Settings screen, and then in Paper Size set the page size created by the application. -
Page 111: Using Epson Smart Panel (Except For Models That Do Not Support Wireless Lan)
SC-P8500DM/SC-P8500D/SC-P6500D/SC-P6500DE/SC-P6500E/SC-T7700DM/SC-T5700DM/SC-T7700D/SC-T5700D/SC-3700D/SC-T3700DE/SC-T3700E/SC-P8500DL/SC-T7700DL Series User's Guide Various Printing Methods Saving If it is not already installed, install Epson Smart Panel. On the Layout Manager screen, click the File “Introducing the Software” on page 26 menu - Save As... Connect the smart device to the same Wi-Fi Enter the file name, select the location, and network as the printer. -
Page 112: Printing Over The Web (Upload Printing)
® ❏ PDF (Models without the Adobe PostScript ™ expansion unit can only print data created using the scan function provided by Epson inkjet printers.) Upload and Print Procedure Note: You need the optional SSD Unit to print multiple copies. Install the SSD Unit and create a Storage Load the paper into the printer. -
Page 113: Printing Files In A Shared Folder (Folder Printing)
® ❏ PDF (Models without the Adobe PostScript ™ expansion unit can only print data created using the scan function provided by Epson inkjet printers.) Preparing a Shared Folder Note: If the Print tab does not appear, contact your system administrator. -
Page 114: Print From Folder Procedure
Select 1 file to print. print data created using the scan function provided by Epson inkjet printers.) Select B&W or Color. USB flash memories formatted in FAT and exFAT file Using advanced settings such as enlarging or systems can be used. - Page 115 SC-P8500DM/SC-P8500D/SC-P6500D/SC-P6500DE/SC-P6500E/SC-T7700DM/SC-T5700DM/SC-T7700D/SC-T5700D/SC-3700D/SC-T3700DE/SC-T3700E/SC-P8500DL/SC-T7700DL Series User's Guide Various Printing Methods Note: Note: ❏ Files in formats other than JPEG, TIFF, or PDF are not displayed on the printer's screen. ❏ Any characters in the folder or file names that cannot be displayed by the printer is displayed as "?".
-
Page 116: Color Management Printing
SC-P8500DM/SC-P8500D/SC-P6500D/SC-P6500DE/SC-P6500E/SC-T7700DM/SC-T5700DM/SC-T7700D/SC-T5700D/SC-3700D/SC-T3700DE/SC-T3700E/SC-P8500DL/SC-T7700DL Series User's Guide Color Management Printing Color Management Print Color Management Settings Printing You can perform color management printing using this printer's printer driver in the following two ways. About Color Choose the best method according to the application Management you are using, the operating system environment, the aim of the print out, and so on. -
Page 117: Setting Profiles
SC-P8500DM/SC-P8500D/SC-P6500D/SC-P6500DE/SC-P6500E/SC-T7700DM/SC-T5700DM/SC-T7700D/SC-T5700D/SC-3700D/SC-T3700DE/SC-T3700E/SC-P8500DL/SC-T7700DL Series User's Guide Color Management Printing Setting color Setting profiles management with Settings for the input profile, printer profile, and intent (matching method) vary between three types of applications color management printing since their color management engines are used differently. This is because color management usage differs between the Print using applications with a color management engines. -
Page 118: Setting Color Management With The Printer Driver
SC-P8500DM/SC-P8500D/SC-P6500D/SC-P6500DE/SC-P6500E/SC-T7700DM/SC-T5700DM/SC-T7700D/SC-T5700D/SC-3700D/SC-T3700DE/SC-T3700E/SC-P8500DL/SC-T7700DL Series User's Guide Color Management Printing Setting Color Set color management to off. For Windows Management with the Clear the Simple Settings checkbox in Print Printer Driver Quality on the Printer Settings screen, and then select No Color Management. Color Management Printing by Host ICM (Windows) Use image data in which an input profile has been... -
Page 119: Color Management Printing By Colorsync
“Basic Printing Methods(Mac)” on page 73 Select ICM Mode in Printer Color Adjustment. See the printer driver help for more details. When you select genuine Epson paper in Media Type on the Printer Settings screen, the printer profile corresponding to the paper is automatically specified and displayed in the Printer Profile Description column. -
Page 120: Color Management Printing By Driver Icm(Windows Only)
SC-P8500DM/SC-P8500D/SC-P6500D/SC-P6500DE/SC-P6500E/SC-T7700DM/SC-T5700DM/SC-T7700D/SC-T5700D/SC-3700D/SC-T3700DE/SC-T3700E/SC-P8500DL/SC-T7700DL Series User's Guide Color Management Printing then specifies a different profile and intent for Select Color Matching from the list, and then each of the three areas. click ColorSync. When using applications featuring a color management function Make the settings for color processing using the application before making printer driver settings. - Page 121 SC-P8500DM/SC-P8500D/SC-P6500D/SC-P6500DE/SC-P6500E/SC-T7700DM/SC-T5700DM/SC-T7700D/SC-T5700D/SC-3700D/SC-T3700DE/SC-T3700E/SC-P8500DL/SC-T7700DL Series User's Guide Color Management Printing Select Color Management and then Document. From ICM Mode on the ICM screen, select Select Printer Manages Colors as the Color Handling Driver ICM (Basic) or Driver ICM setting, and then click Print. (Advanced).
-
Page 122: Using The Printer Driver(Windows)
SC-P8500DM/SC-P8500D/SC-P6500D/SC-P6500DE/SC-P6500E/SC-T7700DM/SC-T5700DM/SC-T7700D/SC-T5700D/SC-3700D/SC-T3700DE/SC-T3700E/SC-P8500DL/SC-T7700DL Series User's Guide Using the Printer Driver(Windows) Right-click your printer icon, and click Using the Printer Printing preferences. Driver (Windows) Displaying the Settings Screen The printer driver setting screen is displayed. You can access the printer driver in the following ways: ❏... -
Page 123: Displaying Help
SC-P8500DM/SC-P8500D/SC-P6500D/SC-P6500DE/SC-P6500E/SC-T7700DM/SC-T5700DM/SC-T7700D/SC-T5700D/SC-3700D/SC-T3700DE/SC-T3700E/SC-P8500DL/SC-T7700DL Series User's Guide Using the Printer Driver(Windows) Displaying Help Right-click on the item you want to check and display You can access the printer driver help in the following Right-click the item, and then click Help. ways: ❏ Click Help Note: In Windows XP, click on the title bar, and then click... -
Page 124: Customizing The Printer Driver
SC-P8500DM/SC-P8500D/SC-P6500D/SC-P6500DE/SC-P6500E/SC-T7700DM/SC-T5700DM/SC-T7700D/SC-T5700D/SC-3700D/SC-T3700DE/SC-T3700E/SC-P8500DL/SC-T7700DL Series User's Guide Using the Printer Driver(Windows) Customizing the Printer When you enter a name in Name and click Save, the settings are saved in List. Driver You can save the settings or change the display items as you prefer. Saving various settings as your Select Settings You can save all printer driver settings as a Select... -
Page 125: Summary Of The Utility Tab
You can perform the following maintenance functions menu and perform maintenance functions. from the printer driver's Utility tab. EPSON Status Monitor 3 starts when the printer name is clicked from the displayed menu. Print Queue You can display the list of all waiting jobs. -
Page 126: Using The Printer Driver(Mac)
SC-P8500DM/SC-P8500D/SC-P6500D/SC-P6500DE/SC-P6500E/SC-T7700DM/SC-T5700DM/SC-T7700D/SC-T5700D/SC-3700D/SC-T3700DE/SC-T3700E/SC-P8500DL/SC-T7700DL Series User's Guide Using the Printer Driver(Mac) Saving Presets Using the Printer Driver Set each item for Paper Size and Print Settings to the values you want to save as a preset. (Mac) Select Paper Configuration from the list and set the ink density according to the paper being used. -
Page 127: Deleting Presets
Click Show Presets... in Presets on the Print screen. You can perform maintenance functions such as nozzle checks and print head cleaning from Epson Printer Utility 4. This utility is installed automatically when you install the printer driver. Starting Epson Printer Utility 4 Select the settings you want to delete, click Delete, and then click OK. - Page 128 SC-P8500DM/SC-P8500D/SC-P6500D/SC-P6500DE/SC-P6500E/SC-T7700DM/SC-T5700DM/SC-T7700D/SC-T5700D/SC-3700D/SC-T3700DE/SC-T3700E/SC-P8500DL/SC-T7700DL Series User's Guide Using the Printer Driver(Mac) Print Head Cleaning If you see banding or gaps in the print outs, perform head cleaning. Cleans the surface of the print head to improve the print quality. “Print Head Cleaning” on page 173...
-
Page 129: Copy
SC-P8500DM/SC-P8500D/SC-P6500D/SC-P6500DE/SC-P6500E/SC-T7700DM/SC-T5700DM/SC-T7700D/SC-T5700D/SC-3700D/SC-T3700DE/SC-T3700E/SC-P8500DL/SC-T7700DL Series User's Guide Copy (SC-P8500DM Series/SC-T7700DM Series/SC-T5700DM Series Only) Copy (SC-P8500DM Print Quality With Skew Without Skew Correction Correction Series/SC-T7700DM Draft 5494 mm Series/SC-T5700DM Scan TIFF: Monochrome binary (B&W) Series Only) Output With Skew Without Skew resolution Correction Correction Placing Documents in the 600 dpi 2749 mm... -
Page 130: Documents That Cannot Be Loaded
SC-P8500DM/SC-P8500D/SC-P6500D/SC-P6500DE/SC-P6500E/SC-T7700DM/SC-T5700DM/SC-T7700D/SC-T5700D/SC-3700D/SC-T3700DE/SC-T3700E/SC-P8500DL/SC-T7700DL Series User's Guide Copy (SC-P8500DM Series/SC-T7700DM Series/SC-T5700DM Series Only) ❏ Film When loading documents that are thin, that are easily torn, or ❏ Blueprint that you do not want to damage ❏ Actual printing stock ❏ Carrier sheet Use the optional carrier sheet for thin documents and documents that you do not want to damage. - Page 131 SC-P8500DM/SC-P8500D/SC-P6500D/SC-P6500DE/SC-P6500E/SC-T7700DM/SC-T5700DM/SC-T7700D/SC-T5700D/SC-3700D/SC-T3700DE/SC-T3700E/SC-P8500DL/SC-T7700DL Series User's Guide Copy (SC-P8500DM Series/SC-T7700DM Series/SC-T5700DM Series Only) ❏ Documents with fragile surfaces and/or materials Important: (collages, newspapers, rice paper, oil pastel drawings, etc.) Notes on Using the Carrier Sheet When scanning using a carrier sheet, the paper ❏...
-
Page 132: Procedure For Copying
SC-P8500DM/SC-P8500D/SC-P6500D/SC-P6500DE/SC-P6500E/SC-T7700DM/SC-T5700DM/SC-T7700D/SC-T5700D/SC-3700D/SC-T3700DE/SC-T3700E/SC-P8500DL/SC-T7700DL Series User's Guide Copy (SC-P8500DM Series/SC-T7700DM Series/SC-T5700DM Series Only) When using a carrier sheet, align the right edge Procedure for Copying of the document with the position shown in the figure. Important: ❏ If the original tends to curl, load the original after straightening the curl. - Page 133 SC-P8500DM/SC-P8500D/SC-P6500D/SC-P6500DE/SC-P6500E/SC-T7700DM/SC-T5700DM/SC-T7700D/SC-T5700D/SC-3700D/SC-T3700DE/SC-T3700E/SC-P8500DL/SC-T7700DL Series User's Guide Copy (SC-P8500DM Series/SC-T7700DM Series/SC-T5700DM Series Only) In Basic Settings, do the settings for Color, Print Quality, Density, and Reduce/Enlarge. If you are doing detailed settings, such as Original Type, do the settings from Advanced. If you are using the optional carrier sheet, you must do the following settings in Advanced.
-
Page 134: Scan
Touch, in order, Add Entry - Add Contact - computer. Install "Document Capture Pro" or Network Folder/FTP. "Document Capture" and "Epson Scan 2" on your computer. The Add Entry screen appears. See the Administrator's Guide for more details on how to make settings in "Document Capture Pro". -
Page 135: Procedure For Scanning
SC-P8500DM/SC-P8500D/SC-P6500D/SC-P6500DE/SC-P6500E/SC-T7700DM/SC-T5700DM/SC-T7700D/SC-T5700D/SC-3700D/SC-T3700DE/SC-T3700E/SC-P8500DL/SC-T7700DL Series User's Guide Scan (SC-P8500DM Series/SC-T7700DM Series/SC-T5700DM Series Only) ❏ Index Word: Use to search your contacts (up Press Scan on the Home screen, and then select to 30 characters). the location. ❏ Communication Mode: Select SMB. The scanner slot opens automatically. If it does not open, place your hand in the position ❏... -
Page 136: Saving Scanned Images To Your Computer
SC-P8500DM/SC-P8500D/SC-P6500D/SC-P6500DE/SC-P6500E/SC-T7700DM/SC-T5700DM/SC-T7700D/SC-T5700D/SC-3700D/SC-T3700DE/SC-T3700E/SC-P8500DL/SC-T7700DL Series User's Guide Scan (SC-P8500DM Series/SC-T7700DM Series/SC-T5700DM Series Only) With the side to be scanned facing up, insert Press the Store button to start scanning. the document into the scanner slot. Important: Do not press down on the scanner cover or place anything on top of it while scanning. - Page 137 SC-P8500DM/SC-P8500D/SC-P6500D/SC-P6500DE/SC-P6500E/SC-T7700DM/SC-T5700DM/SC-T7700D/SC-T5700D/SC-3700D/SC-T3700DE/SC-T3700E/SC-P8500DL/SC-T7700DL Series User's Guide Scan (SC-P8500DM Series/SC-T7700DM Series/SC-T5700DM Series Only) Press Scan - To Computer on the Home screen. Select the computer on which "Document Capture Pro" is installed. The scanner slot opens. Scan the original. “Procedure for Scanning” on page 135...
-
Page 138: Menu List
SC-P8500DM/SC-P8500D/SC-P6500D/SC-P6500DE/SC-P6500E/SC-T7700DM/SC-T5700DM/SC-T7700D/SC-T5700D/SC-3700D/SC-T3700DE/SC-T3700E/SC-P8500DL/SC-T7700DL Series User's Guide Menu List Menu List Paper Setting Item Setting/Additional Explanation Roll 1 (Known as Roll Paper on the SC-P6500E Series/SC-T3700E Series) Remove Roll paper is ejected. After the paper has been ejected, information on how to remove the roll paper is displayed. - Page 139 SC-P8500DM/SC-P8500D/SC-P6500D/SC-P6500DE/SC-P6500E/SC-T7700DM/SC-T5700DM/SC-T7700D/SC-T5700D/SC-3700D/SC-T3700DE/SC-T3700E/SC-P8500DL/SC-T7700DL Series User's Guide Menu List Item Setting/Additional Explanation Print Adjustments Automatic Adjustment Standard Automatically performs Paper Feed Adjust and Ruled Line Alignment. Details Select this if you are not satisfied with the adjustments made by Automatic Adjustment - Standard, or if you want to perform Automatic Adjustment to match your printing needs.
- Page 140 SC-P8500DM/SC-P8500D/SC-P6500D/SC-P6500DE/SC-P6500E/SC-T7700DM/SC-T5700DM/SC-T7700D/SC-T5700D/SC-3700D/SC-T3700DE/SC-T3700E/SC-P8500DL/SC-T7700DL Series User's Guide Menu List Item Setting/Additional Explanation Advanced Paper Settings Confirm ICC profile The ICC profile name is displayed when using paper with custom paper settings. (Except for models without the Adobe PS3 Expansion Unit) Confirm Color Density The ink density is displayed when using paper with custom paper settings.
- Page 141 SC-P8500DM/SC-P8500D/SC-P6500D/SC-P6500DE/SC-P6500E/SC-T7700DM/SC-T5700DM/SC-T7700D/SC-T5700D/SC-3700D/SC-T3700DE/SC-T3700E/SC-P8500DL/SC-T7700DL Series User's Guide Menu List Item Setting/Additional Explanation Roll 2 (except for the SC-P6500E Series/SC-T3700E Series) Remove Roll paper is ejected. After the paper has been ejected, information on how to remove the roll paper is displayed. Feed/Cut Paper Press Cut to cut the paper.
- Page 142 SC-P8500DM/SC-P8500D/SC-P6500D/SC-P6500DE/SC-P6500E/SC-T7700DM/SC-T5700DM/SC-T7700D/SC-T5700D/SC-3700D/SC-T3700DE/SC-T3700E/SC-P8500DL/SC-T7700DL Series User's Guide Menu List Item Setting/Additional Explanation Advanced Paper Settings Confirm ICC profile The ICC profile name is displayed when using paper with custom paper settings. (Except for models without the Adobe PS3 Expansion Unit) Confirm Color Density The ink density is displayed when using paper with custom paper settings.
- Page 143 SC-P8500DM/SC-P8500D/SC-P6500D/SC-P6500DE/SC-P6500E/SC-T7700DM/SC-T5700DM/SC-T7700D/SC-T5700D/SC-3700D/SC-T3700DE/SC-T3700E/SC-P8500DL/SC-T7700DL Series User's Guide Menu List Item Setting/Additional Explanation Cut Sheet Remove Ejects cut sheets. After the paper has been ejected, information on how to remove the cut sheets is displayed. Print Adjustments Automatic Adjustment Standard Automatically performs Paper Feed Adjust and Ruled Line Alignment. Details Select this if you are not satisfied with the adjustments made by Automatic Adjustment - Standard, or if you want to perform Automatic Adjustment to...
- Page 144 SC-P8500DM/SC-P8500D/SC-P6500D/SC-P6500DE/SC-P6500E/SC-T7700DM/SC-T5700DM/SC-T7700D/SC-T5700D/SC-3700D/SC-T3700DE/SC-T3700E/SC-P8500DL/SC-T7700DL Series User's Guide Menu List Item Setting/Additional Explanation Advanced Paper Settings Confirm ICC profile The ICC profile name is displayed when using paper with custom paper settings. (Except for models without the Adobe PS3 Expansion Unit) Confirm Color Density The ink density is displayed when using paper with custom paper settings.
- Page 145 SC-P8500DM/SC-P8500D/SC-P6500D/SC-P6500DE/SC-P6500E/SC-T7700DM/SC-T5700DM/SC-T7700D/SC-T5700D/SC-3700D/SC-T3700DE/SC-T3700E/SC-P8500DL/SC-T7700DL Series User's Guide Menu List Item Setting/Additional Explanation Poster Board Remove Poster board is ejected. After the media has been ejected, information on how to remove the cut sheets or poster board is displayed. Print Adjustments Paper Feed Adjust Manual Quality First, Length Accuracy First Select the following when banding (horizontal banding, tint unevenness, or...
- Page 146 SC-P8500DM/SC-P8500D/SC-P6500D/SC-P6500DE/SC-P6500E/SC-T7700DM/SC-T5700DM/SC-T7700D/SC-T5700D/SC-3700D/SC-T3700DE/SC-T3700E/SC-P8500DL/SC-T7700DL Series User's Guide Menu List Item Setting/Additional Explanation Advanced Paper Settings Confirm ICC profile The ICC profile name is displayed when using paper with custom paper settings. (Except for models without the Adobe PS3 Expansion Unit) Confirm Color Density The ink density is displayed when using paper with custom paper settings.
-
Page 147: General Settings
Select this setting to turn the printer off after a specified period of time when all ports including the LINE port are disconnected. This feature may not be available depending on your region. See the following website for the specified period of time. https://www.epson.eu/energy-consumption Circuit Breaker Interlock Startup On, Off Date/Time Settings... - Page 148 SC-P8500DM/SC-P8500D/SC-P6500D/SC-P6500DE/SC-P6500E/SC-T7700DM/SC-T5700DM/SC-T7700D/SC-T5700D/SC-3700D/SC-T3700DE/SC-T3700E/SC-P8500DL/SC-T7700DL Series User's Guide Menu List Item Setting/Additional Explanation Print Screen Professional, Simple Edit Home Add Icon, Delete Icon, Move Icon, Reset Icon Display (SC-P8500DM Series/SC-T7700DM Series/ SC-T5700DM Series) Operation Time Out On, Off Keyboard QWERTY, AZERTY, QWERTZ Length Unit m, ft / in Default Screen(Job/Status) Job Status, Log, Printer Status...
- Page 149 SC-P8500DM/SC-P8500D/SC-P6500D/SC-P6500DE/SC-P6500E/SC-T7700DM/SC-T5700DM/SC-T7700D/SC-T5700D/SC-3700D/SC-T3700DE/SC-T3700E/SC-P8500DL/SC-T7700DL Series User's Guide Menu List Item Setting/Additional Explanation Printer Settings Paper Source Settings Roll Paper Setup Auto Loading On, Off When this is set to On, paper is fed automatically after the paper has been loaded. When this is set to Off, paper is not fed automatically. Feed the paper manually.
- Page 150 SC-P8500DM/SC-P8500D/SC-P6500D/SC-P6500DE/SC-P6500E/SC-T7700DM/SC-T5700DM/SC-T7700D/SC-T5700D/SC-3700D/SC-T3700DE/SC-T3700E/SC-P8500DL/SC-T7700DL Series User's Guide Menu List Item Setting/Additional Explanation Print Job Priority Same Roll, Queued Order (except for the SC-P6500E Series/ Displayed when the SSD Unit is installed. SC-T3700E Series) When Same Roll is selected, priority is given to printing jobs that are suitable for the roll paper being fed.
- Page 151 SC-P8500DM/SC-P8500D/SC-P6500D/SC-P6500DE/SC-P6500E/SC-T7700DM/SC-T5700DM/SC-T7700D/SC-T5700D/SC-3700D/SC-T3700DE/SC-T3700E/SC-P8500DL/SC-T7700DL Series User's Guide Menu List Item Setting/Additional Explanation Advanced Paper Settings Confirm ICC profile The ICC profile name is displayed when using paper with custom paper (Except for models without the settings. Adobe PS3 Expansion Unit) Confirm Color Density The ink density is displayed when using paper with custom paper settings.
- Page 152 SC-P8500DM/SC-P8500D/SC-P6500D/SC-P6500DE/SC-P6500E/SC-T7700DM/SC-T5700DM/SC-T7700D/SC-T5700D/SC-3700D/SC-T3700DE/SC-T3700E/SC-P8500DL/SC-T7700DL Series User's Guide Menu List Item Setting/Additional Explanation Printing Language Auto, HP-GL/2, PS (except for models without the Adobe PS3 Expansion Unit) Network Auto, HP-GL/2, PS (except for models without the Adobe PS3 Expansion Unit) Universal Print Settings Paper Source Roll(Auto), Roll 1 (known as Roll on the SC-P6500E Series/SC-T3700E Series), Roll 2, Cut Sheet, Poster Board Print Quality...
- Page 153 SC-P8500DM/SC-P8500D/SC-P6500D/SC-P6500DE/SC-P6500E/SC-T7700DM/SC-T5700DM/SC-T7700D/SC-T5700D/SC-3700D/SC-T3700DE/SC-T3700E/SC-P8500DL/SC-T7700DL Series User's Guide Menu List Item Setting/Additional Explanation PS Menu (Except for models without the Adobe PS3 Expansion Unit) Version Displays the PostScript/PDF version. CMYK Simulation You can select the CMYK ink color you want to simulate when reproducing CMYK ink colors for an offset printer.
- Page 154 SC-P8500DM/SC-P8500D/SC-P6500D/SC-P6500DE/SC-P6500E/SC-T7700DM/SC-T5700DM/SC-T7700D/SC-T5700D/SC-3700D/SC-T3700DE/SC-T3700E/SC-P8500DL/SC-T7700DL Series User's Guide Menu List Item Setting/Additional Explanation Reduce Edge Blurriness On, Off Set to On to reduce edge blurring in image outlines, text, and ruled lines. Memory Device Interface Enable, Disable Thick Paper On, Off Bidirectional On, Off Set to On to make the print head print while moving left and right.
- Page 155 SC-P8500DM/SC-P8500D/SC-P6500D/SC-P6500DE/SC-P6500E/SC-T7700DM/SC-T5700DM/SC-T7700D/SC-T5700D/SC-3700D/SC-T3700DE/SC-T3700E/SC-P8500DL/SC-T7700DL Series User's Guide Menu List Item Setting/Additional Explanation Network Settings Wi-Fi Setup Allows you to select the Wi-Fi connection method. Connect via Wi-Fi Wi-Fi Setup Wizard, Push Button Setup(WPS), Others (PIN Code Setup, Wi-Fi Auto Connect, Disable Wi-Fi) Disable Wi-Fi Allows you to disable Wi-Fi when it is not being used.
- Page 156 SC-P8500DM/SC-P8500D/SC-P6500D/SC-P6500DE/SC-P6500E/SC-T7700DM/SC-T5700DM/SC-T7700D/SC-T5700D/SC-3700D/SC-T3700DE/SC-T3700E/SC-P8500DL/SC-T7700DL Series User's Guide Menu List Item Setting/Additional Explanation Wired LAN/Wi-Fi Status Displays the network connection status and IP address. Wi-Fi Direct Status Displays the connection name (SSID) and password. Email Server Status Displays information on the email server settings. (SC-P8500DM Series/SC-T7700DM Ser- ies/SC-T5700DM Series only) Print Status Sheet...
- Page 157 SC-P8500DM/SC-P8500D/SC-P6500D/SC-P6500DE/SC-P6500E/SC-T7700DM/SC-T5700DM/SC-T7700D/SC-T5700D/SC-3700D/SC-T3700DE/SC-T3700E/SC-P8500DL/SC-T7700DL Series User's Guide Menu List Item Setting/Additional Explanation Scan Settings (SC-P8500DM Series/SC-T7700DM Series/SC-T5700DM Series only) Confirm Recipient Off, On Document Capture Pro Settings Operation Mode Client Mode, Server Mode Server Address You can set the server address. Group Settings You can set up for groups.
- Page 158 SC-P8500DM/SC-P8500D/SC-P6500D/SC-P6500DE/SC-P6500E/SC-T7700DM/SC-T5700DM/SC-T7700D/SC-T5700D/SC-3700D/SC-T3700DE/SC-T3700E/SC-P8500DL/SC-T7700DL Series User's Guide Menu List Item Setting/Additional Explanation Storage Settings (Displayed when the SSD Unit is connected.) Shared Folder Access Control Access Allowed, Not Allowed Operation Authority User, Administrator Only Automatic Delete Setting Authority User, Administrator Only Shared Folder File Management Automatic File Deletion Off, On Period Until Deletion...
- Page 159 SC-P8500DM/SC-P8500D/SC-P6500D/SC-P6500DE/SC-P6500E/SC-T7700DM/SC-T5700DM/SC-T7700D/SC-T5700D/SC-3700D/SC-T3700DE/SC-T3700E/SC-P8500DL/SC-T7700DL Series User's Guide Menu List Item Setting/Additional Explanation Security Settings Restrictions Job Log Access Off, On Access to Register/Delete Contacts Access to Recent of Scan to Email Off, On Access to Show Sent History of Scan Off, On to Email Access to Language Off, On Access to Thick Paper...
-
Page 160: Supply Status
SC-P8500DM/SC-P8500D/SC-P6500D/SC-P6500DE/SC-P6500E/SC-T7700DM/SC-T5700DM/SC-T7700D/SC-T5700D/SC-3700D/SC-T3700DE/SC-T3700E/SC-P8500DL/SC-T7700DL Series User's Guide Menu List Supply Status Displays the amount of ink remaining in the ink cartridges or the model number and amount of free space in the maintenance boxes. is displayed when the amount of ink remaining in the ink cartridges or the amount of free space in the maintenance boxes is running low. -
Page 161: Maintenance
SC-P8500DM/SC-P8500D/SC-P6500D/SC-P6500DE/SC-P6500E/SC-T7700DM/SC-T5700DM/SC-T7700D/SC-T5700D/SC-3700D/SC-T3700DE/SC-T3700E/SC-P8500DL/SC-T7700DL Series User's Guide Menu List Maintenance Item Setting/Additional Explanation Print Head Nozzle Check Select the paper feed method to print the nozzle check pattern. See the following for details on the nozzle check pattern. “Print Head Nozzle Check” on page 172 Print Head Cleaning Cleans the selected color. -
Page 162: Printer Status/Print
SC-P8500DM/SC-P8500D/SC-P6500D/SC-P6500DE/SC-P6500E/SC-T7700DM/SC-T5700DM/SC-T7700D/SC-T5700D/SC-3700D/SC-T3700DE/SC-T3700E/SC-P8500DL/SC-T7700DL Series User's Guide Menu List Printer Status/Print Item Setting/Additional Explanation Print Status Sheet Prints a Configuration Status Sheet. Firmware Version Displays the Printer, Adobe PS3 Expansion Unit (except for models without the Adobe PS3 Expansion Unit), and the Firmware Version. Optional storage unit Displays the connection status of the SSD Unit. -
Page 163: User Settings (Except For The Sc-P8500Dm Series/Sc-T7700Dm Series/Sc-T5700Dm Series)
You can select the Paper Source, Color Mode, Print Quality and so on when printing from the folder. Authentication Device Status Displays the Authentication Device Status. Epson Open Platform Information Displays the Epson Open Platform version and product key. Copy (SC-P8500DM Series/SC-T7700DM Series/ SC-T5700DM Series Only) Item Setting/Additional Explanation... -
Page 164: Scan (Sc-P8500Dm Series/Sc-T7700Dm Series/Sc-T5700Dm Series Only)
SC-P8500DM/SC-P8500D/SC-P6500D/SC-P6500DE/SC-P6500E/SC-T7700DM/SC-T5700DM/SC-T7700D/SC-T5700D/SC-3700D/SC-T3700DE/SC-T3700E/SC-P8500DL/SC-T7700DL Series User's Guide Menu List Item Setting/Additional Explanation Copies Set the number of copies you want to print. Color Mode Black/White, Color Print Quality Draft, Speed, Fine, High Quality, Max Quality Density -4 - 4 Paper Source Roll(Auto), Roll 1, Roll 2, Cut Sheet, Poster Board Reduce/Enlarge You can select the ratio from Auto Fit Page, Custom Size, Actual Size, or Specified Size. - Page 165 SC-P8500DM/SC-P8500D/SC-P6500D/SC-P6500DE/SC-P6500E/SC-T7700DM/SC-T5700DM/SC-T7700D/SC-T5700D/SC-3700D/SC-T3700DE/SC-T3700E/SC-P8500DL/SC-T7700DL Series User's Guide Menu List Item Setting/Additional Explanation Destination You can set the communication mode, storage location, and so on. Scan Settings Color Mode Black/White, Color File format You can set the File Format, Compression Ratio, and PDF Settings. Resolution 200dpi, 300dpi, 400dpi, 600dpi Scan Size...
- Page 166 SC-P8500DM/SC-P8500D/SC-P6500D/SC-P6500DE/SC-P6500E/SC-T7700DM/SC-T5700DM/SC-T7700D/SC-T5700D/SC-3700D/SC-T3700DE/SC-T3700E/SC-P8500DL/SC-T7700DL Series User's Guide Menu List Item Setting/Additional Explanation Computer You can save scanned data to a specified computer. Memory Device Basic Settings Color Mode Black/White, Color File format You can set the File Format, Compression Ratio, and PDF Settings. Resolution 200dpi, 300dpi, 400dpi, 600dpi Scan Size...
-
Page 167: Memory Device
You can set the storage space in which to save data printed from a memory device. This is available when the optional SSD Unit is connected. PDF (Displayed when the Adobe PS3 Expansion Unit is enabled.) Epson Scanned PDF (Displayed when the Adobe PS3 Expansion Unit is enabled.) - Page 168 SC-P8500DM/SC-P8500D/SC-P6500D/SC-P6500DE/SC-P6500E/SC-T7700DM/SC-T5700DM/SC-T7700D/SC-T5700D/SC-3700D/SC-T3700DE/SC-T3700E/SC-P8500DL/SC-T7700DL Series User's Guide Menu List Item Setting/Additional Explanation Display order You can set the display order. Basic Settings Paper Source Roll(Auto), Roll 1, Roll 2, Cut Sheet, Poster Board Color Mode Black/White, Color Advanced Print Quality Draft, Speed, Fine, High Quality, Max Quality Page Margins option Clip By Margins, Oversize, Borderless Bidirectional...
- Page 169 SC-P8500DM/SC-P8500D/SC-P6500D/SC-P6500DE/SC-P6500E/SC-T7700DM/SC-T5700DM/SC-T7700D/SC-T5700D/SC-3700D/SC-T3700DE/SC-T3700E/SC-P8500DL/SC-T7700DL Series User's Guide Menu List Item Setting/Additional Explanation Display order You can set the display order. Basic Settings Paper Source Roll(Auto), Roll 1, Roll 2, Cut Sheet, Poster Board Color Mode Black/White, Color Advanced Print Quality Draft, Speed, Fine, High Quality, Max Quality Page Margins option Clip By Margins, Oversize, Borderless Bidirectional...
-
Page 170: Network Folder
SC-P8500DM/SC-P8500D/SC-P6500D/SC-P6500DE/SC-P6500E/SC-T7700DM/SC-T5700DM/SC-T7700D/SC-T5700D/SC-3700D/SC-T3700DE/SC-T3700E/SC-P8500DL/SC-T7700DL Series User's Guide Menu List Item Setting/Additional Explanation Display order You can set the display order. Basic Settings Paper Source Roll(Auto), Roll 1, Roll 2, Cut Sheet, Poster Board Color Mode Black/White, Color Advanced Print Quality Draft, Speed, Fine, High Quality, Max Quality Page Margins option Clip By Margins, Oversize Bidirectional... -
Page 171: Storage (Only When An Ssd Unit Is Installed)
SC-P8500DM/SC-P8500D/SC-P6500D/SC-P6500DE/SC-P6500E/SC-T7700DM/SC-T5700DM/SC-T7700D/SC-T5700D/SC-3700D/SC-T3700DE/SC-T3700E/SC-P8500DL/SC-T7700DL Series User's Guide Menu List Item Setting/Additional Explanation Except for HP-GL/2 Page Margins option Clip By Margins, Oversize, Borderless Select Target Poster(Photo)/Perspective (SC-P Series only), Poster/Document (SC-T Series only), GIS, CAD/Line Drawing, Off (No Color Management) CMYK Simulation You can select the CMYK ink color you want to simulate when reproducing CMYK ink colors for an offset printer. -
Page 172: Maintenance
SC-P8500DM/SC-P8500D/SC-P6500D/SC-P6500DE/SC-P6500E/SC-T7700DM/SC-T5700DM/SC-T7700D/SC-T5700D/SC-3700D/SC-T3700DE/SC-T3700E/SC-P8500DL/SC-T7700DL Series User's Guide Maintenance “Print Head Nozzle Check” on page 172 Maintenance Print Head Cleaning Use this if you notice faint or missing areas in the Print Head Maintenance prints. Cleans the surface of the print head to improve the print quality. -
Page 173: Print Head Cleaning
Use Epson Printer Utility 4 for Mac. When cleaning all nozzles, ink is consumed from all colors. “Epson Printer Utility 4 Functions” on page 127 Even if you are using only black inks for black and white printing, color inks are also consumed. - Page 174 When left for some time, the clogged ink may dissolve. on the control panel. If the nozzles are still clogged, contact your dealer or Select the nozzle arrays for Power Cleaning. Epson Support. Select the color pairs with faint or missing segments in the check pattern. From the printer Press the Z button to start Power Cleaning.
-
Page 175: Paper Feed Adjust
Auto We normally recommend using this method as it rarely causes any problems and is easy to “Using Epson Printer Utility 4” on page 127 execute. It takes about 9 to 35 minutes to complete the adjustments. The time required varies depending on the status of the printer. -
Page 176: Ruled Line Alignment
SC-P8500DM/SC-P8500D/SC-P6500D/SC-P6500DE/SC-P6500E/SC-T7700DM/SC-T5700DM/SC-T7700D/SC-T5700D/SC-3700D/SC-T3700DE/SC-T3700E/SC-P8500DL/SC-T7700DL Series User's Guide Maintenance Precautions when performing Ruled Select the paper feed adjustment that best suits your needs and intended usage. Line Alignment If you select manual adjustment, follow the Adjustments are made depending on the paper on-screen instructions to make adjustments. loaded in the printer. -
Page 177: Replacing Consumables
You can use the same procedure to replace all ink cartridges. Important: Epson recommends the use of genuine Epson ink cartridges. Epson cannot guarantee the quality or reliability of non-genuine ink. The use of non-genuine ink may cause damage that is not covered by Epson’s warranties, and under certain... - Page 178 SC-P8500DM/SC-P8500D/SC-P6500D/SC-P6500DE/SC-P6500E/SC-T7700DM/SC-T5700DM/SC-T7700D/SC-T5700D/SC-3700D/SC-T3700DE/SC-T3700E/SC-P8500DL/SC-T7700DL Series User's Guide Maintenance Remove the new ink cartridge from the bag. Open the ink cartridge cover. Important: Do not touch the parts shown in the illustration. Place your finger into the gap and remove the ink cartridge. Shake the ink cartridge for 10 seconds 30 times horizontally in approximately 10 cm movements as shown in the illustration.
-
Page 179: Replacing Ink Supply Units (Sc-P8500Dl Series/Sc-T7700Dl Series Only)
“Ink Supply Units (SC-P8500DL Series/SC- T7700DL Series)” on page 217 Important: Epson recommends the use of genuine Epson ink supply units. Epson cannot guarantee the quality or reliability of non-genuine ink. The use of non-genuine ink may cause damage that is not covered by Epson’s warranties, and under certain... -
Page 180: Replacing The Maintenance Box And Borderless Maintenance Box
SC-P8500DM/SC-P8500D/SC-P6500D/SC-P6500DE/SC-P6500E/SC-T7700DM/SC-T5700DM/SC-T7700D/SC-T5700D/SC-3700D/SC-T3700DE/SC-T3700E/SC-P8500DL/SC-T7700DL Series User's Guide Maintenance Do not touch the parts shown in the Check the color and then insert the ink tray; illustration. push the ink tray firmly all the way in. Place the ink supply unit into the tray. Important: Install ink trays in all of the slots. - Page 181 SC-P8500DM/SC-P8500D/SC-P6500D/SC-P6500DE/SC-P6500E/SC-T7700DM/SC-T5700DM/SC-T7700D/SC-T5700D/SC-3700D/SC-T3700DE/SC-T3700E/SC-P8500DL/SC-T7700DL Series User's Guide Maintenance Replacing the Maintenance Box Pull out the Maintenance Box. Important: Do not replace the Maintenance Box while printing. Failure to observe this precaution could cause ink to leak. Prepare a new Maintenance Box and the clear bag included.
- Page 182 SC-P8500DM/SC-P8500D/SC-P6500D/SC-P6500DE/SC-P6500E/SC-T7700DM/SC-T5700DM/SC-T7700D/SC-T5700D/SC-3700D/SC-T3700DE/SC-T3700E/SC-P8500DL/SC-T7700DL Series User's Guide Maintenance Close the maintenance box cover. Set the paper support to the position shown in the illustration, and then open the flap. Replacing the Borderless Maintenance Box Follow the steps below to replace the Borderless Maintenance Box (maintenance box for borderless printing).
- Page 183 SC-P8500DM/SC-P8500D/SC-P6500D/SC-P6500DE/SC-P6500E/SC-T7700DM/SC-T5700DM/SC-T7700D/SC-T5700D/SC-3700D/SC-T3700DE/SC-T3700E/SC-P8500DL/SC-T7700DL Series User's Guide Maintenance Set the paper support to the position shown in Place the used Borderless Maintenance Box in the illustration. the clear bag included. Important: Do not tilt the Borderless Maintenance Box until the bag's press seal has been firmly closed.
-
Page 184: Replacing The Auto Cutter Blade
SC-P8500DM/SC-P8500D/SC-P6500D/SC-P6500DE/SC-P6500E/SC-T7700DM/SC-T5700DM/SC-T7700D/SC-T5700D/SC-3700D/SC-T3700DE/SC-T3700E/SC-P8500DL/SC-T7700DL Series User's Guide Maintenance Set the paper support to the position shown in Use a cross-head screwdriver to replace the auto cutter the illustration, and then close the flap. blade. Make sure you have a cross-head screwdriver with you before replacing the cutter. Important: Take care not to damage the cutter blade. - Page 185 SC-P8500DM/SC-P8500D/SC-P6500D/SC-P6500DE/SC-P6500E/SC-T7700DM/SC-T5700DM/SC-T7700D/SC-T5700D/SC-3700D/SC-T3700DE/SC-T3700E/SC-P8500DL/SC-T7700DL Series User's Guide Maintenance Remove the old auto cutter blade from the Close the maintenance cover. printer. After replacing the cutter, press OK. When the control panel returns to the screen displayed before you started this procedure, remove the auto cutter blade protector that has dropped inside the maintenance cover.
-
Page 186: Cleaning The Printer
SC-P8500DM/SC-P8500D/SC-P6500D/SC-P6500DE/SC-P6500E/SC-T7700DM/SC-T5700DM/SC-T7700D/SC-T5700D/SC-3700D/SC-T3700DE/SC-T3700E/SC-P8500DL/SC-T7700DL Series User's Guide Maintenance Cleaning the Printer Important: Failure to remove dust and particles of paper from the platen could result in clogged nozzles or To keep your printer in optimum operating condition, damage to the print head. clean it regularly (about once a month). Cleaning the outside Cleaning the roller Follow the steps below to clean the roller by feeding... - Page 187 SC-P8500DM/SC-P8500D/SC-P6500D/SC-P6500DE/SC-P6500E/SC-T7700DM/SC-T5700DM/SC-T7700D/SC-T5700D/SC-3700D/SC-T3700DE/SC-T3700E/SC-P8500DL/SC-T7700DL Series User's Guide Maintenance If any paper particles (that looks like white powder) accumulates on the platen, use something like a cocktail stick to push it in. Note: The part shown in the following illustration gets dirty easily, so be sure to wipe it thoroughly. The reverse side of the printed paper is soiled, use a cleaning stick to wipe the area shown below from the back to the front.
-
Page 188: Problem Solver
Paper setting in the printer driver paper and then use the control panel. is different from paper You can also use Epson Media Installer to change paper information for paper that has information registered in the not been loaded. printer. Change paper setting However, you may not be able to change the paper information depending on the from the application or the driver. -
Page 189: When An Error Message And Error Code Are Displayed
A printer part needs to be replaced. A part used in the printer is nearing the end of its service life. Contact Epson Support. For details, see Contact your dealer or Epson Support and tell them the maintenance request your documentation. code. -
Page 190: Troubleshooting
SC-P8500DM/SC-P8500D/SC-P6500D/SC-P6500DE/SC-P6500E/SC-T7700DM/SC-T5700DM/SC-T7700D/SC-T5700D/SC-3700D/SC-T3700DE/SC-T3700E/SC-P8500DL/SC-T7700DL Series User's Guide Problem Solver Troubleshooting Does the printer port setting match the printer connection port? Check the printer port. You cannot print (because the Click the Port tab in the printer Properties dialog printer does not work) and check the option selected for Print to the following port(s). - Page 191 SC-P8500DM/SC-P8500D/SC-P6500D/SC-P6500DE/SC-P6500E/SC-T7700DM/SC-T5700DM/SC-T7700D/SC-T5700D/SC-3700D/SC-T3700DE/SC-T3700E/SC-P8500DL/SC-T7700DL Series User's Guide Problem Solver Is the USB hub recognized correctly? Are you using a wired LAN connection with a device that supports IEEE802.3az (Power Make sure the USB hub is recognized correctly on Saving Ethernet)? the computer. If the computer correctly detects the USB hub, disconnect all USB hubs from the When using a wired LAN connection with a device computer and connect the printer directly to the...
-
Page 192: The Printer Sounds Like It Is Printing, But Nothing Prints
Are you using the Adobe PostScript The "Driver Version" shown on the test page is the expansion unit? version number of the Windows internal driver. This ™ differs from the Epson printer driver version that you ® ® Printing using the Adobe PostScript installed. -
Page 193: The Prints Are Not What You Expected
This printer is developed for use with Epson ink cartridges/ink supply units. If you use non-Epson ink The printer adjusts the internal motor. Wait for a cartridges, printouts may be faint, or the color of the while without turning off the printer. - Page 194 SC-P8500DM/SC-P8500D/SC-P6500D/SC-P6500DE/SC-P6500E/SC-T7700DM/SC-T5700DM/SC-T7700D/SC-T5700D/SC-3700D/SC-T3700DE/SC-T3700E/SC-P8500DL/SC-T7700DL Series User's Guide Problem Solver Are you printing on poster board? Are you printing at High Speed on commercially available paper? Depending on the type of poster board, print quality may decline due to curves in the paper. If you have selected Custom Paper from Paper Type Support the edges of the paper during printing to and the colors are uneven in your printouts, try the keep the paper horizontal.
- Page 195 SC-P8500DM/SC-P8500D/SC-P6500D/SC-P6500DE/SC-P6500E/SC-T7700DM/SC-T5700DM/SC-T7700D/SC-T5700D/SC-3700D/SC-T3700DE/SC-T3700E/SC-P8500DL/SC-T7700DL Series User's Guide Problem Solver In Quality Options from the printer driver, Are the settings for Top Margin too short? set Paper Edge Quality to Add Top Margin If the values set for Top Margin in the Paper menu or Optimize Media Edge Print Quality.
- Page 196 SC-P8500DM/SC-P8500D/SC-P6500D/SC-P6500DE/SC-P6500E/SC-T7700DM/SC-T5700DM/SC-T7700D/SC-T5700D/SC-3700D/SC-T3700DE/SC-T3700E/SC-P8500DL/SC-T7700DL Series User's Guide Problem Solver Is the paper wavy or curled? Is the print head scuffing the left or right edges of the paper? If the paper becomes wavy or warped due to changes in temperature or humidity, the paper may Depending on the paper itself as well as the be scuffed.
- Page 197 SC-P8500DM/SC-P8500D/SC-P6500D/SC-P6500DE/SC-P6500E/SC-T7700DM/SC-T5700DM/SC-T7700D/SC-T5700D/SC-3700D/SC-T3700DE/SC-T3700E/SC-P8500DL/SC-T7700DL Series User's Guide Problem Solver Use the cleaning stick to remove any ink, fluff, Important: or trash. ❏ Never touch any parts or circuit boards other than those that need to be cleaned. Doing so may cause the printer to malfunction or print quality to decline.
- Page 198 SC-P8500DM/SC-P8500D/SC-P6500D/SC-P6500DE/SC-P6500E/SC-T7700DM/SC-T5700DM/SC-T7700D/SC-T5700D/SC-3700D/SC-T3700DE/SC-T3700E/SC-P8500DL/SC-T7700DL Series User's Guide Problem Solver Clean the edges of the print head with a Open the printer cover. cleaning stick. Remove the part shown in the figure. Close the rear maintenance cover. Use a new cleaning stick to wipe any dirt off the Close the port cover.
- Page 199 SC-P8500DM/SC-P8500D/SC-P6500D/SC-P6500DE/SC-P6500E/SC-T7700DM/SC-T5700DM/SC-T7700D/SC-T5700D/SC-3700D/SC-T3700DE/SC-T3700E/SC-P8500DL/SC-T7700DL Series User's Guide Problem Solver (5) Hold the cleaning stick so that it is vertical, and wipe the guides of all of the capping stations. (2) Hold the cleaning stick so that it is vertical, and wipe the inner areas of all of the capping stations.
- Page 200 SC-P8500DM/SC-P8500D/SC-P6500D/SC-P6500DE/SC-P6500E/SC-T7700DM/SC-T5700DM/SC-T7700D/SC-T5700D/SC-3700D/SC-T3700DE/SC-T3700E/SC-P8500DL/SC-T7700DL Series User's Guide Problem Solver Use a new cleaning stick to wipe any dirt off the wiper. Use a new cleaning stick to wipe any dirt off the suction caps. (1) Hold the cleaning stick so that it is vertical, (1) Wipe around the wiper on the front.
- Page 201 The paper is wrinkled. Are you using the printer at normal room temperature? Epson special media should be used at normal room temperature (temperature: 15 to 25˚C, humidity: 40 to 60%). For information about paper such as thin paper from other manufacturers that requires...
- Page 202 SC-P8500DM/SC-P8500D/SC-P6500D/SC-P6500DE/SC-P6500E/SC-T7700DM/SC-T5700DM/SC-T7700D/SC-T5700D/SC-3700D/SC-T3700DE/SC-T3700E/SC-P8500DL/SC-T7700DL Series User's Guide Problem Solver The reverse side of the printed paper Dry the paper after printing is soiled. Drying the paper after printing may help to reduce wrinkles in the paper. Select ON for Paper Size Check in the Rolling out the paper and stretching it can also Settings menu improve any wrinkles in the paper.
-
Page 203: Feeding Or Ejecting Problems
Is the paper damp? Do not use paper that is damp. Also, Epson special Are you using paper that supports media should be left in the bag until you intend to borderless printing? use it. - Page 204 Are you using the printer at normal room paper manually. temperature? “Feeding Roll Paper Manually” on page 63 Epson special media should be used at normal room ❏ If roll marks remain even after manual feeding, temperature (temperature: 15 to 25˚C, humidity: 40 feed the paper manually until you hear the to 60%).
- Page 205 SC-P8500DM/SC-P8500D/SC-P6500D/SC-P6500DE/SC-P6500E/SC-T7700DM/SC-T5700DM/SC-T7700D/SC-T5700D/SC-3700D/SC-T3700DE/SC-T3700E/SC-P8500DL/SC-T7700DL Series User's Guide Problem Solver Cut the paper at the position shown in the If the print head is over the media, move it illustration. away from the jam. Roll 1/Roll Important: Roll 2 Other than when you are clearing paper jams, do not touch the print head.
- Page 206 SC-P8500DM/SC-P8500D/SC-P6500D/SC-P6500DE/SC-P6500E/SC-T7700DM/SC-T5700DM/SC-T7700D/SC-T5700D/SC-3700D/SC-T3700DE/SC-T3700E/SC-P8500DL/SC-T7700DL Series User's Guide Problem Solver If there is any paper left inside the printer, open If the print head is over the media, move it the rear cover and remove the paper. away from the jam. Turn the printer off and then back on. Important: Other than when you are clearing paper Reload the paper and resume printing.
-
Page 207: Others
SC-P8500DM/SC-P8500D/SC-P6500D/SC-P6500DE/SC-P6500E/SC-T7700DM/SC-T5700DM/SC-T7700D/SC-T5700D/SC-3700D/SC-T3700DE/SC-T3700E/SC-P8500DL/SC-T7700DL Series User's Guide Problem Solver Original is jammed (SC-P8500DM Remove the jammed original. Series/SC-T7700DM Series/ SC-T5700DM Series only) To remove a jammed original, follow the steps. Caution: When opening and closing the scanner cover, keep your hands away from the joint between the cover and the printer. - Page 208 Should you forget the administrator password, quality may decline. contact your dealer or Epson Support. When you turn on the printer, capping is performed automatically after a few minutes. Head cleaning is performed...
-
Page 209: Copying Or Scanning Problems (Sc-P8500Dm Series/Sc-T7700Dm Series/Sc-T5700Dm Series Only)
SC-P8500DM/SC-P8500D/SC-P6500D/SC-P6500DE/SC-P6500E/SC-T7700DM/SC-T5700DM/SC-T7700D/SC-T5700D/SC-3700D/SC-T3700DE/SC-T3700E/SC-P8500DL/SC-T7700DL Series User's Guide Problem Solver Open the scanner cover. Copying or Scanning Problems (SC-P8500DM Series/ SC-T7700DM Series/ SC-T5700DM Series Only) Lines Appear on Scanned or Copied Documents Follow the steps below to clean the inside of the scanner. Dust or dirt that is stuck to the scanner's glass surface or the white board may cause unwanted lines Use the clean side of a soft cloth to carefully or marks on copy results and scanned images. - Page 210 SC-P8500DM/SC-P8500D/SC-P6500D/SC-P6500DE/SC-P6500E/SC-T7700DM/SC-T5700DM/SC-T7700D/SC-T5700D/SC-3700D/SC-T3700DE/SC-T3700E/SC-P8500DL/SC-T7700DL Series User's Guide Problem Solver After you have finished cleaning, close the You may be using an original that cannot be scanner cover. placed. See the following for details on originals that cannot Important: be placed. Close the scanner cover right after you have “Documents That Cannot Be Loaded”...
- Page 211 SC-P8500DM/SC-P8500D/SC-P6500D/SC-P6500DE/SC-P6500E/SC-T7700DM/SC-T5700DM/SC-T7700D/SC-T5700D/SC-3700D/SC-T3700DE/SC-T3700E/SC-P8500DL/SC-T7700DL Series User's Guide Problem Solver Color of Original (Background Color) Is the original curled? Remains in Scanned Image or If the original is curled, smooth out the original and Shadows of Wrinkles Appear in place it flat. Then scan the original. Scanned Image Try Image Stitching Adjustment.
- Page 212 SC-P8500DM/SC-P8500D/SC-P6500D/SC-P6500DE/SC-P6500E/SC-T7700DM/SC-T5700DM/SC-T7700D/SC-T5700D/SC-3700D/SC-T3700DE/SC-T3700E/SC-P8500DL/SC-T7700DL Series User's Guide Problem Solver Touch General Settings - Scan Settings - Scan Either touch - or + to show the intended Options - Document Feed Adjustment. adjustment values or touch the adjustment entry area to enter the adjustment values using The adjustment value settings screen appears.
- Page 213 SC-P8500DM/SC-P8500D/SC-P6500D/SC-P6500DE/SC-P6500E/SC-T7700DM/SC-T5700DM/SC-T7700D/SC-T5700D/SC-3700D/SC-T3700DE/SC-T3700E/SC-P8500DL/SC-T7700DL Series User's Guide Problem Solver If the scanner slot comes off, open the scanner cover and then install the scanner slot. The scanner slot is easier to install if it is inserted from the left.
-
Page 214: Appendix
Epson recommends the use of genuine Epson ink cartridges. Epson cannot guarantee the quality or reliability of non-genuine ink. The use of non-genuine ink may cause damage that is not covered by Epson’s warranties, and under certain circumstances, may cause erratic printer behavior. - Page 215 SC-P8500DM/SC-P8500D/SC-P6500D/SC-P6500DE/SC-P6500E/SC-T7700DM/SC-T5700DM/SC-T7700D/SC-T5700D/SC-3700D/SC-T3700DE/SC-T3700E/SC-P8500DL/SC-T7700DL Series User's Guide Appendix SC-T7700DM/SC-T7700D/SC-T7760DM/SC-T7760D/SC-T5700DM/SC-T5700D/SC-T5760DM/SC-T5760D/ SC-T3700D/SC-T3760D/SC-T3700DE/SC-T3760DE/SC-T3700E/SC-T3760E Part number Color Name 700ml 350ml Photo Black T50M1 T50U1 Cyan T50M2 T50U2 Magenta T50M3 T50U3 Yellow T50M4 T50U4 Matte Black T50M8 T50U8 T50MF T50UF SC-P8540D/SC-P6540D/SC-P6540DE/SC-P6540E Part number Color Name 700ml 350ml 110ml Photo Black T48Q1 T48X1...
- Page 216 SC-P8500DM/SC-P8500D/SC-P6500D/SC-P6500DE/SC-P6500E/SC-T7700DM/SC-T5700DM/SC-T7700D/SC-T5700D/SC-3700D/SC-T3700DE/SC-T3700E/SC-P8500DL/SC-T7700DL Series User's Guide Appendix SC-P8530DM/SC-P8530D/SC-P6530D/SC-P6530DE/SC-P6530E Part number Color Name 700ml 350ml 110ml Photo Black T48R1 T48Y1 T49G1 Cyan T48R2 T48Y2 T49G2 Magenta T48R3 T48Y3 T49G3 Yellow T48R4 T48Y4 T49G4 Matte Black T48R8 T48Y8 T49G8 Gray T48RE T48YE T49GE *1 May not be available depending on the specifications. SC-T7730DM/SC-T7730D/SC-T5730DM/SC-T5730D/SC-T3730D/SC-T3730DE/SC-T3730E Part number Color Name...
-
Page 217: Ink Supply Units (Sc-P8500Dl Series/Sc-T7700Dl Series)
Ink Supply Units (SC-P8500DL Series/SC-T7700DL Series) Epson recommends the use of genuine Epson ink supply units. Epson cannot guarantee the quality or reliability of nongenuine ink. The use of non-genuine ink may cause damage that is not covered by Epson’s warranties, and under certain circumstances, may cause erratic printer behavior. - Page 218 SC-P8500DM/SC-P8500D/SC-P6500D/SC-P6500DE/SC-P6500E/SC-T7700DM/SC-T5700DM/SC-T7700D/SC-T5700D/SC-3700D/SC-T3700DE/SC-T3700E/SC-P8500DL/SC-T7700DL Series User's Guide Appendix Part number Color Name 1600ml T53A9 SC-P8540DL Part number Color Name 1600ml Photo Black T53H1 Cyan T53H2 Magenta T53H3 Yellow T53H4 Matte Black T53H8 Gray T53H7 SC-T7740DL Part number Color Name 1600ml Photo Black T53C1 Cyan T53C2 Magenta...
-
Page 219: Others
SC-P8500DM/SC-P8500D/SC-P6500D/SC-P6500DE/SC-P6500E/SC-T7700DM/SC-T5700DM/SC-T7700D/SC-T5700D/SC-3700D/SC-T3700DE/SC-T3700E/SC-P8500DL/SC-T7700DL Series User's Guide Appendix SC-T7730DL Part number Color Name 1600ml Photo Black T53D1 Cyan T53D2 Magenta T53D3 Yellow T53D4 Matte Black T53D8 T53D9 Others Product Part number Explanation Maintenance Box C13S210115 Maintenance box for waste ink. This is displayed as Maintenance Box1 on the control panel. -
Page 220: Supported Media
We recommend you use the following Epson special media for high-quality printing results. Note: For information about the media types and appropriate settings for printing on paper other than Epson special media or when using raster image processing (RIP) software, see the documentation supplied with the paper, or contact the dealer of the paper or the manufacturer of the RIP. - Page 221 SC-P8500DM/SC-P8500D/SC-P6500D/SC-P6500DE/SC-P6500E/SC-T7700DM/SC-T5700DM/SC-T7700D/SC-T5700D/SC-3700D/SC-T3700DE/SC-T3700E/SC-P8500DL/SC-T7700DL Series User's Guide Appendix ICC Profile Epson_XXX_PremiumLusterPhotoPaper260.icc Paper Width 406mm/16 inches 610mm/24 inches 914mm/36 inches 1118mm/44 inches Premium Semimatte Photo Paper(260) Target Models All models Roll core size 3 inches Paper Type (printer driver) Premium Semimatte Photo Paper(260) ICC Profile Epson_XXX_PremiumSemimattePhotoPaper260.icc Paper Width 406mm/16 inches...
- Page 222 SC-P8500DM/SC-P8500D/SC-P6500D/SC-P6500DE/SC-P6500E/SC-T7700DM/SC-T5700DM/SC-T7700D/SC-T5700D/SC-3700D/SC-T3700DE/SC-T3700E/SC-P8500DL/SC-T7700DL Series User's Guide Appendix Paper Type (printer driver) Premium Semigloss Photo Paper(170) ICC Profile Epson_XXX_PremiumSemiglossPhotoPaper170.icc Paper Width 420mm(A2) 594mm(A1) 610mm/24 inches 728mm(B1) 914mm/36 inches 1118mm/44 inches Baryta Target Models SC-P Series Roll core size 2 inches Paper Type (printer driver) Baryta ICC Profile Epson_XXX_Baryta.icc...
- Page 223 SC-P8500DM/SC-P8500D/SC-P6500D/SC-P6500DE/SC-P6500E/SC-T7700DM/SC-T5700DM/SC-T7700D/SC-T5700D/SC-3700D/SC-T3700DE/SC-T3700E/SC-P8500DL/SC-T7700DL Series User's Guide Appendix Fine Art Matte Target Models SC-P Series Roll core size 2 inches Paper Type (printer driver) Fine Art Matte ICC Profile Epson_XXX_FineArtMatte.icc Paper Width 420mm(A2) 594mm(A1) 610mm/24 inches 728mm(B1) 914mm/36 inches 1118mm/44 inches Canvas Matte Target Models All models Roll core size...
- Page 224 SC-P8500DM/SC-P8500D/SC-P6500D/SC-P6500DE/SC-P6500E/SC-T7700DM/SC-T5700DM/SC-T7700D/SC-T5700D/SC-3700D/SC-T3700DE/SC-T3700E/SC-P8500DL/SC-T7700DL Series User's Guide Appendix Paper Width 594mm(A1) 610mm/24 inches 728mm(B1) 914mm/36 inches 1118mm/44 inches Enhanced Matte Paper Target Models All models Roll core size 2 inches Paper Type (printer driver) Enhanced Matte Paper ICC Profile Epson_XXX_EnhancedMattePaper.icc Paper Width A3+/SuperB US-C Singleweight Matte Paper Target Models...
- Page 225 SC-P8500DM/SC-P8500D/SC-P6500D/SC-P6500DE/SC-P6500E/SC-T7700DM/SC-T5700DM/SC-T7700D/SC-T5700D/SC-3700D/SC-T3700DE/SC-T3700E/SC-P8500DL/SC-T7700DL Series User's Guide Appendix Paper Width 11 inches 420mm(A2) 18 inches 22 inches 594mm(A1) 610mm/24 inches 30 inches 841mm(A0) 34 inches 914mm/36 inches 42 inches Plain Paper Thick Target Models All models Roll core size 2 inches Paper Type (printer driver) Plain Paper Thick ICC Profile Epson_XXX_PlainPaperThick.icc...
- Page 226 SC-P8500DM/SC-P8500D/SC-P6500D/SC-P6500DE/SC-P6500E/SC-T7700DM/SC-T5700DM/SC-T7700D/SC-T5700D/SC-3700D/SC-T3700DE/SC-T3700E/SC-P8500DL/SC-T7700DL Series User's Guide Appendix Heavy Weight Polyester Banner Target Models All models Roll core size 2 inches Paper Type (printer driver) Heavy Weight Polyester Banner ICC Profile Epson_XXX_MCPMCloth.icc Paper Width 610mm/24 inches 914mm/36 inches 1118mm/44 inches Enhanced Synthetic Paper Target Models All models Roll core size...
- Page 227 SC-P8500DM/SC-P8500D/SC-P6500D/SC-P6500DE/SC-P6500E/SC-T7700DM/SC-T5700DM/SC-T7700D/SC-T5700D/SC-3700D/SC-T3700DE/SC-T3700E/SC-P8500DL/SC-T7700DL Series User's Guide Appendix Roll core size 2 inches Paper Type (printer driver) Backlight Film Roll PK ICC Profile Epson_XXX_BacklightFilm_PK_BK.icc Paper Width 610mm/24 inches 914mm/36 inches 1118mm/44 inches Backlight Film Roll Target Models All models Roll core size 2 inches Paper Type (printer driver) Backlight Film Roll MK ICC Profile...
- Page 228 SC-P8500DM/SC-P8500D/SC-P6500D/SC-P6500DE/SC-P6500E/SC-T7700DM/SC-T5700DM/SC-T7700D/SC-T5700D/SC-3700D/SC-T3700DE/SC-T3700E/SC-P8500DL/SC-T7700DL Series User's Guide Appendix Paper Size A3+/SuperB US-C Premium Luster Photo Paper Target Models All models Paper Type (printer driver) Premium Luster Photo Paper ICC Profile Epson_XXX_PremiumLusterPhotoPaper.icc Paper Size US-C Velvet Fine Art Paper Target Models All models Paper Type (printer driver) Velvet Fine Art Paper ICC Profile Epson_XXX_VelvetFineArtPaper.icc...
-
Page 229: Supported Commercially Available Paper
❏ Although plain paper and recycled paper manufactured by other companies can be loaded and fed in the printer as long as they meet the following specifications, Epson cannot guarantee the print quality. ❏ Although other paper types manufactured by other companies can be loaded in the printer as long as they meet the following specifications, Epson cannot guarantee the paper feeding and print quality. -
Page 230: Supported Paper Widths
SC-P8500DM/SC-P8500D/SC-P6500D/SC-P6500DE/SC-P6500E/SC-T7700DM/SC-T5700DM/SC-T7700D/SC-T5700D/SC-3700D/SC-T3700DE/SC-T3700E/SC-P8500DL/SC-T7700DL Series User's Guide Appendix Paper Thickness 0.07mm to 0.8mm Cut sheet/Poster board Supported paper sizes vary depending on the model you are using. Paper Width 182 mm (B5 width) to 1,118 mm (44 inches) Paper Length 220 mm to 1600 mm Paper Thickness 0.07 mm to 0.8 mm (0.8 mm to 1.5 mm for poster board) Supported Paper Widths... -
Page 231: Before Printing On Commercially Available
SC-P8500DM/SC-P8500D/SC-P6500D/SC-P6500DE/SC-P6500E/SC-T7700DM/SC-T5700DM/SC-T7700D/SC-T5700D/SC-3700D/SC-T3700DE/SC-T3700E/SC-P8500DL/SC-T7700DL Series User's Guide Appendix Paper Width (Size) 44 inch models 36 inch models 24 inch models Inches Supporte Borderles Supporte Borderles Supporte Borderles s Printing s Printing s Printing 22inch 559mm Supported Supported Supported JIS B2/B3 515mm Supported Supported Supported Supported Supported... - Page 232 SC-P8500DM/SC-P8500D/SC-P6500D/SC-P6500DE/SC-P6500E/SC-T7700DM/SC-T5700DM/SC-T7700D/SC-T5700D/SC-3700D/SC-T3700DE/SC-T3700E/SC-P8500DL/SC-T7700DL Series User's Guide Appendix When using paper such as baryta, matte fine art paper, matte canvas, satin canvas, or non-Epson media (commercially available paper), make the paper configuration according to the characteristics of the paper (Custom paper) before printing. Printing without making configuring may cause wrinkles, rubbing, uneven colors, and so on.
-
Page 233: Moving Or Transporting The Printer
SC-P8500DM/SC-P8500D/SC-P6500D/SC-P6500DE/SC-P6500E/SC-T7700DM/SC-T5700DM/SC-T7700D/SC-T5700D/SC-3700D/SC-T3700DE/SC-T3700E/SC-P8500DL/SC-T7700DL Series User's Guide Appendix Make custom paper settings on the Moving or Transporting control panel the Printer Select General Settings - Printer Settings - Custom Paper Setting on the control panel. This section describes how to move or transport the printer. -
Page 234: Moving To Another Location In The Same Building
SC-P8500DM/SC-P8500D/SC-P6500D/SC-P6500DE/SC-P6500E/SC-T7700DM/SC-T5700DM/SC-T7700D/SC-T5700D/SC-3700D/SC-T3700DE/SC-T3700E/SC-P8500DL/SC-T7700DL Series User's Guide Appendix Caution: Important: ❏ The printer is heavy and should not be carried The print head may be damaged if the by one person. When you pack or move the environmental temperature falls to -10 ˚C or printer, use four or more people when carrying lower. -
Page 235: Transporting The Printer
❏ Do not connect the power cable to a power strip or multi plug. An electric shock or fire could occur. Connect the power cable directly to an outlet for domestic use. Transporting the Printer Before transporting the printer, contact your dealer or Epson Support. -
Page 236: If The Environment Indoors Or During Transportation Drops To -10 ˚C Or Lower
SC-P8500DM/SC-P8500D/SC-P6500D/SC-P6500DE/SC-P6500E/SC-T7700DM/SC-T5700DM/SC-T7700D/SC-T5700D/SC-3700D/SC-T3700DE/SC-T3700E/SC-P8500DL/SC-T7700DL Series User's Guide Appendix If the Environment Indoors or Important: During Transportation Drops to If a message is displayed indicating that you need a new XXX ink cartridge when you resume using the -10 ˚C or Lower printer, prepare an ink cartridge of the color displayed in the XXX section before the next time The print head may be damaged if the environmental you use the printer. -
Page 237: System Requirements
Appendix System Requirements Software for this printer can be used in the following environments. (As of August, 2022) Supported OS and other elements may change. For the latest information, see the Epson Web site. Printer Driver Windows Operating system Windows 11 x 64 Windows 10 / Windows 10 x64 Windows 8.1 / Windows 8.1 x64... - Page 238 SC-P8500DM/SC-P8500D/SC-P6500D/SC-P6500DE/SC-P6500E/SC-T7700DM/SC-T5700DM/SC-T7700D/SC-T5700D/SC-3700D/SC-T3700DE/SC-T3700E/SC-P8500DL/SC-T7700DL Series User's Guide Appendix Display resolution WXGA+ (1280×800) or better USB, Ethernet, or Wi-Fi Connection method with the printer *A wireless LAN connection is not available for models in the SC-T5700D Series that do not have Wi-Fi. For details on the connection methods (interface specifications), see the following.
-
Page 239: Web Config
SC-P8500DM/SC-P8500D/SC-P6500D/SC-P6500DE/SC-P6500E/SC-T7700DM/SC-T5700DM/SC-T7700D/SC-T5700D/SC-3700D/SC-T3700DE/SC-T3700E/SC-P8500DL/SC-T7700DL Series User's Guide Appendix Web Config Web Config is an application that runs in a web browser on a computer or smart device connected to the same network as the printer. U Administrator's Guide Supported Browsers Microsoft Edge, Internet Explorer 8 or later, Firefox , Chrome , Safari *1 Use the latest version. -
Page 240: Specifications Table (Except For The Sc- P8500Dl Series/Sc-T7700Dl Series)
SC-P8500DM/SC-P8500D/SC-P6500D/SC-P6500DE/SC-P6500E/SC-T7700DM/SC-T5700DM/SC-T7700D/SC-T5700D/SC-3700D/SC-T3700DE/SC-T3700E/SC-P8500DL/SC-T7700DL Series User's Guide Appendix Specifications Table Printer Specifications (Except for the Operating SC-P8500D Series/ Approx. 70W SC-P8500DL Series/ SC-T7700D Series SC-T7700DL Series) SC-P8500DM Ser- Approx. 90W ies/SC-T7700DM Series/SC-T5700DM Series Printer Specifications SC-T5700D Series Approx. 80W Printing method On-demand inkjet method SC-P6500D Series/ Approx. - Page 241 SC-P8500DM/SC-P8500D/SC-P6500D/SC-P6500DE/SC-P6500E/SC-T7700DM/SC-T5700DM/SC-T7700D/SC-T5700D/SC-3700D/SC-T3700DE/SC-T3700E/SC-P8500DL/SC-T7700DL Series User's Guide Appendix Printer Specifications Printer Specifications Temperature and humidity range for operating (the SC-P8500D Series/ Approx. 155 kg range shown by diagonal lines is recommended) SC-T7700D Series SC-P8500DM Series/ Approx. 166 kg SC-T7700DM Series SC-T5700D Series Approx. 137 kg SC-T5700DM Series Approx.
- Page 242 SC-P8500DM/SC-P8500D/SC-P6500D/SC-P6500DE/SC-P6500E/SC-T7700DM/SC-T5700DM/SC-T7700D/SC-T5700D/SC-3700D/SC-T3700DE/SC-T3700E/SC-P8500DL/SC-T7700DL Series User's Guide Appendix Interface Specifications Scanner Specifications Standards Output resolution 200, 300, 400, 600 dpi SC-P8500D/ IEEE802.11b/g/n Tone SC-P6500D/ ❏ SC-P6500DE/ Color 30 bit input (10 bit input for SC-P6500E each RGB color) SC-T7700D/ ❏ 24 bit output (8 bit output SC-T5700D/ for each RGB color) SC-T3700D/...
-
Page 243: Specifications Table (Sc-P8500Dl Series/Sc- T7700Dl Series Only)
SC-P8500DM/SC-P8500D/SC-P6500D/SC-P6500DE/SC-P6500E/SC-T7700DM/SC-T5700DM/SC-T7700D/SC-T5700D/SC-3700D/SC-T3700DE/SC-T3700E/SC-P8500DL/SC-T7700DL Series User's Guide Appendix Interface Specifications Important: ❏ We recommend that you remove and shake Security Standards/ SSL/TLS (HTTPS Server/Client, Protocols IPPS) the installed ink cartridges once every six IEEE802.1X months to ensure good print quality. IPsec/IP Filtering ❏ The ink freezes if left at below -20 ˚C for a SMTPS (STARTTLS, SSL/TLS) SNMPv3 long time. - Page 244 SC-P8500DM/SC-P8500D/SC-P6500D/SC-P6500DE/SC-P6500E/SC-T7700DM/SC-T5700DM/SC-T7700D/SC-T5700D/SC-3700D/SC-T3700DE/SC-T3700E/SC-P8500DL/SC-T7700DL Series User's Guide Appendix With the paper basket open Printer Specifications Not including the ink supply unit Temperature Operating 10 to 35˚C (15 to 25˚C is recommended) Important: In storage (Before -20 to 60 ˚C (Within 120 hours at Use the printer at an altitude of 2000 m or less.
- Page 245 Equipment (or its transmit For users in Zambia antenna) that is installed outdoors is subject to licensing. See the following website to check the information for ZICTA Type Approval. https://support.epson.net/zicta/...
- Page 246 SC-P8500DM/SC-P8500D/SC-P6500D/SC-P6500DE/SC-P6500E/SC-T7700DM/SC-T5700DM/SC-T7700D/SC-T5700D/SC-3700D/SC-T3700DE/SC-T3700E/SC-P8500DL/SC-T7700DL Series User's Guide Appendix For users in Malaysia Frequency Band: 2400-2483.5 MHz...
-
Page 247: Where To Get Help
Epson support services for troubleshooting information in your product assistance. If Epson support for your area is not listed documentation. If you have a Web browser and can below, contact the dealer where you purchased your connect to the Internet, access the site at: product. -
Page 248: Help For Users In Europe
Epson Helpdesk call 800-GO-EPSON (800-463-7766). Or you can purchase online at http://www.epsonstore.com (U.S. Epson Helpdesk is provided as a final backup to make sales) or http://www.epson.ca (Canadian sales). sure our clients have access to advice. Operators on the Helpdesk can aid you in installing, configuring and operating your Epson product. -
Page 249: Help For Users In Singapore
The more information you ❏ Product usage questions or problems prepare, the faster we can help solve the problem. This information includes your Epson product ❏ Enquiries on repair service and warranty documentation, type of computer, operating system, application programs, and any information you feel is required. -
Page 250: Help For Users In Hong Kong
(Infoline) Phone: 603-56288222 Internet Home Page Epson Hong Kong has established a local home page ❏ Enquiries on repair services & warranty, product in both Chinese and English on the Internet to usage and technical support (Techline) provide users with the following information:... -
Page 251: Help For Users In The Philippines
(9AM - 6PM) Prefix local STD code Help for Users in the Philippines To obtain technical support as well as other after sales services, users are welcome to contact the Epson Philippines Corporation at the telephone and fax numbers and e-mail address below:...
Need help?
Do you have a question about the SureColor SC-P8500DM Series and is the answer not in the manual?
Questions and answers