Table of Contents
Advertisement
Quick Links
Advertisement
Table of Contents

Subscribe to Our Youtube Channel
Related Manuals for Gaggia Milano SUP 052


Summary of Contents for Gaggia Milano SUP 052
- Page 1 ENGLISH GAGGIA ACCADEMIA RI9781 (SUP 052) RI9782 (SUP 052) Operating instructions...
- Page 2 Control panel Beverages menu Ristretto Melange Frothed milk Hot milk Espresso Cappuccino Espresso lungo Flat white Green tea Coffee Café au lait Black tea Hot water Americano Caffèlatte Caffè Cortado Cappuccino XL Macchiatone Latte macchiato...
- Page 3 14 15...
- Page 4 Dishwasher safe components Milk carafe disassembly...
- Page 5 Congratulations on your purchase of Gaggia Accademia! This easy-to-use machine guarantees excellent results every day. Thanks to the intuitive interface, you can choose among 19 beverages, customise them and save them to the 4 available profiles, where they can be instantly brought up whenever you want.
-
Page 6: Table Of Contents
English Contents Machine overview (fig.B/C) ....................................................................................................................................................................................Control panel and display ........................................................................................................................................................................................Control panel overview (fig. A) ..............................................................................................Main display icons (fig. A) ....................................................................................................Touch screen / knob operation ..............................................................................................Machine installation ............................................................................................................................................................................................................First use ........................................................................................................................... Manual rinse cycle ............................................................................................................ - Page 7 English Error code key ..............................................................................................................................................................................................................................Troubleshooting ........................................................................................................................................................................................................................GAGGIA accessories ........................................................................................................................................................................................................Technical specifications ..............................................................................................................................................................................................
-
Page 8: Machine Overview (Fig.b/C)
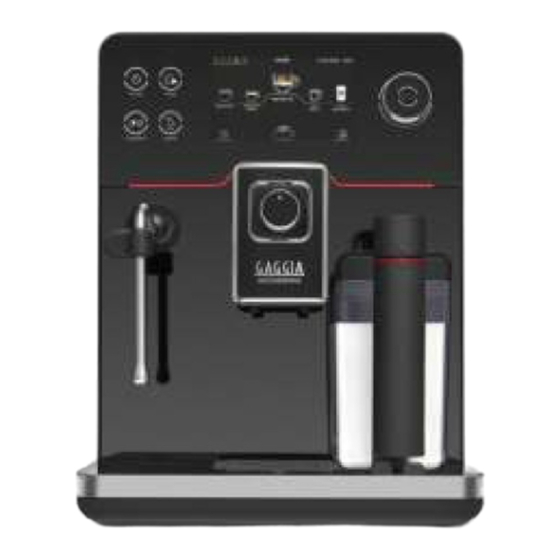
English Machine overview (fig.B/C) Water tank lid Coffee bean container lid Water tank inner lid Cup warmer Water tank Service door Pre-ground coffee compartment Service door opening button Control panel Internal drip tray Steam wand Brew group Steam wand handle Coffee pucks container Steam wand nozzle Milk container... -
Page 9: Control Panel And Display
English Control panel and display This coffee machine features an easy-to-use, intuitive display. Please see below for an in-depth explanation. Control panel overview (fig. A) All functions of the machine can be selected via simple gestures such as Touch screen touching or dragging the functions for navigation. -
Page 10: Touch Screen / Knob Operation
English Touch screen / knob operation All display functions can be used via the touch screen. You can however operate some functions via the knob. When the knob can be used, the LED lights around it will be steady on. Note: in the instruction manual the symbol will be used to indicate that both knob and touch screen can be used for that function. -
Page 11: Manual Rinse Cycle
English The historical Gaggia logo will be displayed. Then, the machine will go in stand-by mode. Press the ON/OFF button to start the machine. ON/OFF Insert the coffee dispensing spout as shown in the figure. Follow the directions on the display, until the first installation is complete. Note: to obtain a tastier coffee, we recommend that you initially prepare 5 cups of coffee for the machine to make a self-adjustment setting. -
Page 12: Measuring The Water Hardness
English Measuring the water hardness Upon machine commissioning, you will need to set the water hardness value. Take out the water hardness measuring strip from the machine box. Follow the steps shown on the display during installation phase. In case you want to change water hardness settings later, press the CLEAN/SET button, then select SETTINGS... - Page 13 English Remove the INTENZA+ water filter from water. Set the machine according to the measured water hardness (see the "Measuring water hardness" chapter) and the letters found on the filter base: A = soft water – 1 or 2 small squares B = hard water (standard) –...
-
Page 14: Demo Mode (If Any)
DEMO mode is a function that shows the main characteristics of the machine, disabling its normal operation. You can activate this function by clicking on the icon on the Gaggia Milano screen and exit at any time by clicking on the DEMO exit icon. - Page 15 English The cortado is an Argentinian beverage, consisting of an espresso shot with 40 ml a small quantity of milk. It is usually served in a small glass and is popular in Cortado Spain, Portugal, and Latin America. 30 ml Macchiatone is born in Venice.
-
Page 16: Adjusting The Dispensing Spout
English Adjusting the coffee dispensing spout The coffee dispensing spout can be adjusted depending on the cup used. If you wish to try a traditional Italian espresso with a delicious layer of natural crema on top, we suggest you to set the dispensing spout height close enough to the cup. - Page 17 English Press the release buttons to remove the lid. Pour the milk into the carafe. The milk level must be between the minimum (MIN) and the maximum (MAX) sign on the carafe. Place the lid back making sure that the carafe dispensing spout is in central position to ensure a perfect dosing.
-
Page 18: On The Fly" Function
English "On the fly" function The "ON THE FLY" function allows you to change beverage quantities in real time, while brewing. By moving the slider showing the preset level to reach while brewing, you can change the amount to be dispensed. Note: as you move the slider, the preset level will be indicated by a white dot. - Page 19 English Once the desired beverage has been placed on the pedestal, press the START/STOP button to start brewing. Note: you can also dispense by clicking on the desired beverage icon without placing it on the pedestal, then pressing the START/STOP button.
-
Page 20: Milk-Based Beverage Brewing
English Milk-based beverage brewing Tip: to enjoy a hotter beverage, preheat the cups by putting them onto the cup warmer. Tip: to ensure a perfect result, we recommend using cold whole milk (at abt. 5°C) with a protein content of at least 3% and a fat content of at least 3.5%. The proteins will make the air be incorporated into the foam, while the fats will make it thick and firm. -
Page 21: Latte Art Frothing Using The Steam Wand
English Latte Art frothing using the steam wand With the steam wand and a little practice, you can obtain a sweet and creamy micro-foam that is ideal for a perfect Latte Art. Tip: before proceeding with the milk foaming, purge the steam wand for a few seconds by pressing the PURGE button to eliminate any possible condensation. -
Page 22: Tea Brewing
English Tea brewing Warning: when brewing starts, the steam wand may spray steam and hot water jets. 1 Put some loose tea into a tea strainer or put directly a tea bag into a cup. 2 Place the cup under the steam wand. 3 Press the HOME button, scroll and select your TEA by placing it on the... -
Page 23: Espresso Plus System
English 3 Once you have placed the beverage on the pedestal, press the START/STOP button to start brewing. Note: you can interrupt the brewing at any time by pressing the START/STOP START/STOP button or change the quantity using the "ON THE FLY" function. If you wish to customise the water quantity before brewing, refer to the “Beverage customisation”... -
Page 24: Beverage Customisation
English Adjust the coffee grinding with the machine in operation, by pressing and turning the knob left- or rightwards of one notch at a time. You can select from 8 different grinding settings. The smaller the notch value, the stronger and richer the coffee. Note: - Coarse grind: lighter taste, suitable for dark roasted coffee blends (4-8);... -
Page 25: Beverage Settings
English Beverage settings Press HOME button and select your beverage, by clicking on it. All the settings that can be adjusted and/or selected are displayed on the screen. Based on the type of beverage you want, you can adjust and/or select: coffee, milk and/or water quantities;... - Page 26 English Pre-ground coffee Click on icon to open the function, select icon to activate the pre- ground coffee. PRE-GROUND COFFEE Note: this function only allows brewing one coffee at a time. Pre-brewing A longer or shorter pre-brewing can enhance the taste of coffee, depending on the type of coffee blend used.
-
Page 27: Profiles
English Renaming the beverage By clicking on the icon you can change the name of the beverage and then save it in your profile. The same beverage can be saved several times in the same profile (Ex: espresso A, espresso B, strong espresso, etc). The keyboard has multiple screens to enable special characters input. -
Page 28: Add Or Delete A Beverage
English Add or delete a beverage Press icon. The beverage list will be displayed. Scroll beverages and select the one you want to save in your profile. If you want to customise it, go to the "Beverage settings" chapter. Click on the icon to save the beverage. -
Page 29: Machine Settings
English Machine settings By pressing the CLEAN/SET button and SETTINGS icon on the display, you can reset or modify some machine parameters such as: Language Date and time Unit of measurement Button sound Start screen Cup warmer and timer Eco mode Reset to factory settings Beverage counter Water hardness... - Page 30 English Units By selecting UNITS: you can set the measurement units to “ml” or “oz”. Button sound By selecting the BUTTON SOUND: you can turn the button sound on or off. Start Screen By selecting START SCREEN: you can set your profile as your startup screen. After pressing on START SCREEN, select and confirm with icon the desired profile.
- Page 31 English Eco mode The ECO MODE function enables energy saving. If activated, the machine sets automatically as follows: Cup warmer is OFF; Buttons lighting is OFF; Button sound is OFF; Stand-by time is set to 15 mins; Screen brightness (if not touched) is low. Reset to factory settings The machine can be set back to the factory setting.
-
Page 32: Cleaning And Maintenance
English Cleaning and maintenance Regular cleaning and maintenance keep the machine in top condition and ensure consistently great coffee, constant brewing flow, and an excellent milk foam. Refer to the following table to know when and how removable parts of the machine need to be cleaned. -
Page 33: Milk Carafe Cleaning
English Part description When to clean How to clean Pre-ground coffee Weekly Clean the upper part using the handle of a spoon, compartment/coffee as shown below. outlet duct Milk carafe cleaning Steam hygiene By closing the carafe dispensing spout, the machine automatically sanitises. The milk can be kept inside the carafe. -
Page 34: Cleaning The Steam Wand
English Cleaning the carafe parts under fresh water The milk carafe should be cleaned after disassembling all parts and be washed under fresh water, by following the steps below. symbol (fig. 01). Turn the carafe dispensing spout clockwise up to the Press the release buttons to remove the lid (fig. -
Page 35: Cleaning The Brew Group
English Cleaning the brew group Warning: never put the brew group in the dishwasher and never use dishwashing detergents, since these can damage the brew group and alter the coffee taste. Removing the brew group Turn off the machine and disconnect the power cord. Press the button on the left side of the machine and open the service door. -
Page 36: Cleaning The Brew Group With Suitable Pads To Remove Oily Coffee Residues
English Thoroughly rinse the brew group using lukewarm water. Carefully wash the upper filter. Let the brew group dry in the air. Note: do not dry the brew group using cloths to prevent that any fibres penetrate inside. Cleaning the brew group with coffee cleaning tablets Warning: use only Gaggia tablets for removing oily coffee residue. -
Page 37: Lubricating The Brew Group
English Make sure that the yellow locking hook of the brew group is in the correct position. To position the hook correctly, push it upwards to the highest possible position. If the hook is still in a lower position, this means that it has not been correctly positioned. -
Page 38: Descaling
English Apply a thin layer of lubricant to the guides on both sides (see figure). Reinsert the brew group (see the "Reinserting the brew group" chapter). Note: the lubricant tube can be used numerous times. Descaling Descaling procedure Descaling should be done whenever necessary. Use only the Gaggia descaling solution designed to guarantee high quality performance of the machine. - Page 39 English Fill the milk carafe halfway with water and insert it into the machine. Follow the instructions shown on the display to launch the descaling procedure. This procedure takes about 25 minutes and consists of a descaling cycle and a rinse cycle, performed with dispensing at regular intervals. Once the descaling cycle has finished, rinse the water tank, the carafe and the water circuit as per the displayed instructions.
-
Page 40: Error Code Key
English Error code key The list below reports the error codes that the display can show, their meanings and how to solve the problem. If the indicated solutions are ineffective because the display continues to show the error code icon and the machine does not return to normal operation, or if other error codes are displayed, you must contact an authorized service center or distributors in your country. -
Page 41: Troubleshooting
English Troubleshooting This chapter outlines the most common problems you may encounter while using the machine. If you are unable to solve the problem using the information provided below, visit the FAQ sections on www.gaggia.com or www.gaggia.it or contact either the Customer Service Centre or the local distributors in your country. Problem Cause Solution... - Page 42 English Problem Cause Solution The brew group cannot The brew group is not in the correct The brew group has not been positioned be inserted. position. correctly before being placed back. Ensure that the lever is in contact with the base of the brew group and that the hook of the brew group is in its correct position.
- Page 43 English Problem Cause Solution The milk does not froth. The milk dispensing spout is dirty Clean the carafe according to the "Accurate or the carafe has not been inserted cleaning of the milk carafe under running correctly, or the milk carafe has not water"...
-
Page 44: Gaggia Accessories
English GAGGIA accessories Coffee and machine accessories can be ordered in the authorised centres in Italy or dealers in your country. INTENZA+ water filter Descaler Coffee oil remover pads Milk circuit cleaner (Philips) Coffee range - available in beans and powder: 100% Arabica / Intense / Decaffeinated Technical specifications Nominal voltage - Power rating - See data plate inside the service... - Page 45 S.p.a. reserves the right to make any necessary modification. GAGGIA GAGGIA S.p.A. Sede Amministrativa/Administrative Office Via Torretta, 240 40041 Gaggio Montano - Bologna - Italia +39 0534 771111 www.gaggia.it www.gaggia.com...
Need help?
Do you have a question about the SUP 052 and is the answer not in the manual?
Questions and answers