Advertisement
Maxso
Instructions For Use
M200 High Speed Collection
Table of Contents
• Before You Begin
• Safety Information
• Technical Specifications
• Assembly & Removal
WARNING!
(Risk of injury)
(To prevent damage)
Intended Use
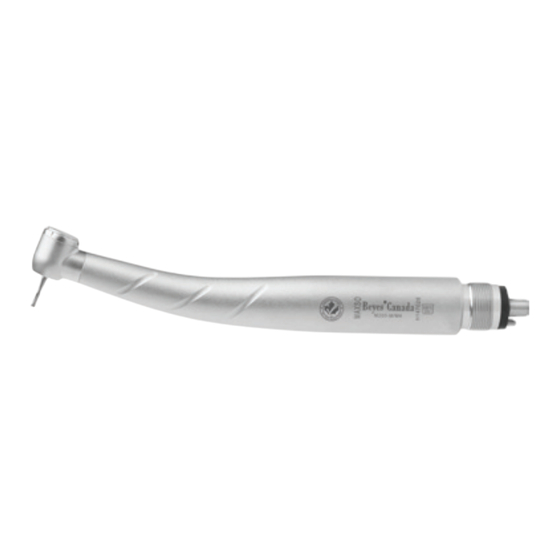
Maxso Dental Handpiece, models Maxso-M/Maxso-S are intended to be used for
removing carious material, reducing hard tooth structure, cavity preparation, finishing
tooth preparations and restorations and polishing teeth.
Before You Begin
Please read this Manual prior to using your Maxso Highspeed Handpiece. The use of
this product is only intended for use by trained dental personnel. We recommend that
you retainthis manual for future reference.
Safety Information
• High speed handpieces should be sterilized after each patient to prevent any
transmission of infective organisms.
• Suitable hygienic measures must be taken to prevent cross contamination between
patients, operators and other personnel.
• Only operate this highspeed handpiece when the bur is properly inserted in the chuck.
Do not attempt to extend the length of the bur by improper positioning in the chuck.
Technical Specifications
Rotary instruments
Idle mode speed
Coolant supply volume
Water setting range
Chip air setting range
Return air pressure
Operating pressure
Air consumption
Chip air consumption at 2 bar
Power/Torque
Assembly & Removal
This handpiece should only be used on dental delivery systems that provide filtered
and regulated air and water. Filtration of 25 microns is recommended.
Fig.1
Non-Swivel Handpiece (Fig.1)
Connection: M4= 4 hole, B2 = 2 hole
1. Insert the non-swivel handpiece into the tubing
2. Firmly screw the tubing nut of the handpiece tubing by hand in a clockwise
3. Unscrew the tubing nut of the handpiece tubing by hand in a counterclockwise for
removal
Swivel Handpiece
Ez-Swivel QD Coupling (Fig.2)
Connection: M4= 4 hole, B2 = 2 hole
1. Ensure QD coupling is firmly attached to the handpiece
tubing
2. Align QD coupling into handpiece and push together by
pulling back the security ring
3. Ensure handpiece is firmly attached to coupling (Note: the
security ring must return to original position)
4. Remove QD coupling by pulling back the security ring
Ez-Swivel PD Coupling
Connection: M4= 4 hole, B2 = 2 hole
1. Ensure PD coupling is firmly attached to the handpiece
tubing
2. Align PD coupling into handpiece and push together
3. Ensure handpiece is firmly attached to coupling
4. Pull the retention sleeve of the PD coupling back and
remove the turbine handpiece by pulling in an axial direction
Other Approved Manufacturer's Couplings
Connection: Refer to original manufacturer's instruction for use. (Do NOT use
unapproved couplings)
1. Attach the turbine handpiece to the Kavo
and Star
coupling as described by the coupling manufacturer
®
2. Check that the connection to the coupling is secure.
3. Remove the Kavo
described by the coupling manufacturer.
Water & Air Adjustment
Coolant Water: Adjust the water volume at the delivery unit to obtain a satisfactory spray
mist.
Air Pressure: The operating pressure Must be 2.62 bar to 2.90 bar, and recommendation
is 2.76 bar. It is highly recommended that the operating pressure initially be set using a
handpiece pressure gauge due to the pressure loss caused by the handpiece tubing
material and length.
Warning: Do not exceed 3.52 bar operating pressure as this will shorten turbine life
and may cause additional damage to the handpiece.
Handpiece Operation
Use standard length concentric diamond and carbide burs with 1.59mm nominal diameter
friction grip shanks designed for high speed handpieces.
Use only burs with hardened tempered steel shanks. Before use, verify concentric rotation
by operating handpiece outside the or alcavity in a safe place.
Warning: Do not use burs that produce excessive noise or do not run concentrically. Do
not use burs that are modified, eccentrically designed, or have bent or 'soft' (nonheat
treated) shanks.
Friction Grip Bur Specifications
For application details and operating data of the different rotary instruments please refer
to the information provided by the manufacturer.The push button autochuck turbines have
the following bur requirements:
Use only instruments whose shanks comply with the requirements of ISO 1797-1.
• Shank diameter of 1.59—1.60mm
• Overall length up to max. 25mm
• Overall length up to max. 21mm (mini)
• Working diameter up to max. 2.1mm (ISO 021)
Instruments that differ from the specified data must not be used.
Otherwise the mechanism of the clamping system could be damaged.
®
ATTENTION!
EN ISO 1797-1:1995 (0mm)
(NL/min)
(NL/min)
(Fig. 2.1)
, NSK
, W&H
and Star
®
®
®
Do not assemble/remove during operation!
Dia. Amm
Controler/Racer max.25mm
Fig.3 Bur Specifications
• Friction Grip Bur Specifications
• Bur Insertion & Removal
• Cleaning & Lubrication
• Warranty
General
explanations,
without risk to
persons or objects
Standard Head (S)
1.6-0.01
(rpm)
350,000-360,000
(ml/min)
>50
(bar)
0.7-2
(bar)
1.5-3
(bar)
<0.5
(bar)
2.62-2.90
30-45
>1.5
(watt)
21
(Fig. 2.2)
, NSK
, W&H
®
®
coupling as
®
Mini max. 21mm
Thermal washer
disinfectable
up to the stated
Mini Head (M)
1.6-0.01
380,000-410,000
>50
0.7-2
1.5-3
<0.5
2.62-2.90
30-45
>1.5
19
Security Ring
Fig.2
Fig. 2.1
®
Dia. 1.59 ●1.60mm
Sterilizable
temperature
Kavo
R
NSK
R
W&H
R
Star
R
Fig. 2.2
Advertisement
Table of Contents

Summary of Contents for BEYES Maxso High Speed M200
- Page 1 Maxso ® Instructions For Use M200 High Speed Collection Table of Contents • Before You Begin • Friction Grip Bur Specifications • Safety Information • Bur Insertion & Removal • Technical Specifications • Cleaning & Lubrication • Assembly & Removal •...
- Page 2 Beyes shall under no circumstances be liable for incidental or consequential damages or damage due to improper use or maintenance. This Warranty is subject to the following conditions: Beyes will, without charge repair or replace (at Beyes sole discretion) any defective part/s covered in this warranty.If the conditions are met, the defective item must be returned to an authorized Beyes service center or distributor.


Need help?
Do you have a question about the Maxso High Speed M200 and is the answer not in the manual?
Questions and answers