Table of Contents
Advertisement
Quick Links
Advertisement
Table of Contents

Related Manuals for OpenEye OE-C1016T2-S


Summary of Contents for OpenEye OE-C1016T2-S
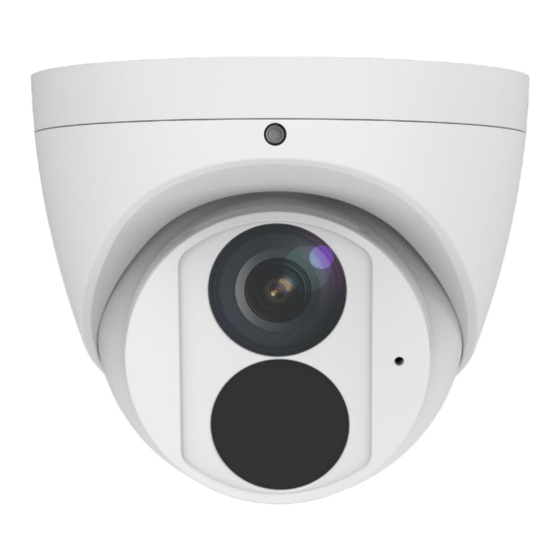
- Page 1 2MP OUTDOOR IP TURRET OE-C1016T2-S USER MANUAL...
- Page 2 The information in this publication is provided “as is” without warranty of any kind. The entire risk arising out of the use of this information remains with recipient. In no event shall OPENEYE be liable for any direct, consequential, incidental, special, punitive, or other damages whatsoever (including without...
- Page 3 Important Safeguards Read Instructions Read all of the safety and operating instructions before using the product. Retain Instructions Save these instructions for future reference. Attachments / Accessories Do not use attachments or accessories unless recommended by the appliance manufacturer as they may cause hazards, damage product and void warranty. Installation Do not place or mount this product in or on an unstable or improperly supported location.
- Page 4 Installation and Storage Do not install the camera in areas of extreme temperatures in excess of the allowable range; install the camera in areas with temperatures within the camera’s operating temperature, including the following: -22°F ~ 140°F (-30° ~ 60 °C) Avoid installing in humid or dusty places.
- Page 5 Warning DANGEROUS HIGH VOLTAGES ARE PRESENT INSIDE THE ENCLOSURE. DO NOT OPEN THE CABINET. REFER SERVICING TO QUALIFIED PERSONNEL ONLY. Caution C A U T I O N RISK OF ELECTRIC SHOCK DO NOT OPEN CAUTION: TO REDUCE THE RISK OF ELECTRIC SHOCK, DO NOT REMOVE COVER (OR BACK).
-
Page 6: Table Of Contents
Table of Contents Introduction ......................... 8 Overview ................................8 Product Features ..........................8 Getting Started ......................9 Box Contents ..............................9 Camera Overview ............................10 Camera Dimensions ........................... 10 Connections ............................10 Power Connection ............................11 Resetting the Camera ........................... 11 MicroSD Card Slot ............................ - Page 7 User ............................... 48 Network Security ..........................49 Watermark ............................50 Maintenance ............................50 Time ..............................50 Maintenance ............................51 Log ................................ 53 37746AC...
-
Page 8: Introduction
Introduction OVERVIEW The OE-C1016T2-S is a 2MP, compact IP mini turret camera equipped with person, vehicle, and line crossing detection analytics. The 2.8mm fixed lens, true WDR, and true day/night functionality combine with real-time event notifications to provide actionable, high-definition video. The low-maintenance turret housing and compact size make it well-suited for installation in high-traffic areas as well as areas that are difficult to access. -
Page 9: Getting Started
BOX CONTENTS Before proceeding, please confirm that the box contains the items listed here. Please contact your dealer for assistance if any item is missing or has defects. OE-C1016T2-S Turret Camera Self-tapping crews and Plastic Anchors x 3 Mounting Template... -
Page 10: Camera Overview
CAMERA OVERVIEW CAMERA DIMENSIONS CONNECTIONS RJ-45 For connector and PoE connections Power (12vDC)* Power connection *12vDC power input port should be plugged when not in use. -
Page 11: Power Connection
Note OpenEye recommends against using more than one power source at a time. Do not use a PoE power source when providing the camera with 12vDC power. If using Power over Ethernet (PoE), make sure Power Sourcing Equipment (PSE) is in use in the network. -
Page 12: Network Camera Manager
Network Camera Manager OpenEye Network Camera Manager (NCM) is a software tool that allows you to quickly and easily connect and configure your OpenEye IP Cameras. This software allows you to apply the camera password, assign IP addresses, configure video settings, and update firmware on multiple cameras at once. -
Page 13: Username And Password
Username: admin The admin user password can be set using the following methods: 1. OpenEye recorders running Apex 2.6 or newer will automatically set a new unique password when added in setup, if a new password has not already been set. -
Page 14: Live View
Live View The camera displays a live view using the MJPEG stream for setup purposes. Setup – Go to the Setup tab to access the camera menus Logout – Log out the current user... -
Page 15: Setup & Configuration
SETUP & CONFIGURATION BASIC CAMERA SETTINGS Basic Info The Basic Info tab displays the product model, network, MAC address, and firmware and hardware versions for the connected camera, along with the current camera Status. The nested Image, Video, Network, and Time tabs are shortcuts to the more advanced menu options further down the Setup list. -
Page 16: Network Settings
NETWORK SETTINGS Network The Network tab allows you to configure the connected camera network settings. DHCP IP Address The default static IP address of the camera is 192.168.51.2, and the default subnet mask is 255.255.255.0. DHCP is turned on by default. If a DHCP server is used in the network, the IP address of your camera may be assigned dynamically. -
Page 17: Port
Port HTTP Port – Configure your relevant port number. Note If the HTTP port number has been occupied already, a “Port conflicts” message will display. Ports 23, 81, 82, 85, 3260, and 49152 are occupied by default. HTTPS Port – The default HTTPS Port is 443; setting range: 1024 ~65535. RTSP Port –... -
Page 18: Ddns
DDNS 1. Enable DDNS Service. 2. Select a DDNS Type. 3. Enter Server Address, Domain Name, Username and Password. 4. Save... -
Page 19: Ftp
General Use FTP (file transfer protocol) to upload snapshots from network cameras to a specified server. To configure FTP: 1. Set the Server IP address and Port No. for the FTP server, Username and Password used to upload images to the FTP server, select Upload Images, Overwrite Storage and set Overwrite At(image) (threshold for overwriting images). - Page 20 Smart Use Smart FTP (file transfer protocol) to upload snapshots captured in smart motion events. To configure Smart FTP: 1. Set the Server IP address and Port No. for the FTP server, Username and Password used to upload images to the FTP server. 2.
- Page 21 Video Use Smart FTP (file transfer protocol) to upload video from network cameras to a specified server. 1. Set the Server IP address and Port No. for the FTP server, Username and Password used to upload images to the FTP server. 2.
-
Page 22: Email
Email The camera can send an e-mail via Simple Mail Transfer Protocol (SMTP) when a variety of events occur. Two sets of SMTP accounts can be configured. Each set includes SMTP Server, Account Name, Password and E-mail Address settings. For SMTP server, contact your network service provider for more specific information. -
Page 23: Streaming Settings
STREAMING SETTINGS Video The video settings menu configures the camera’s video settings, including Resolution, Frame Rate, Bit Rate, and the Image Quality. To configure camera streams: Use the dropdown menus to configure the Video Compression, Resolution, Frame Rate, Bitrate Type, Smart Encoding, and GOP. - Page 24 I-Frame Interval / GOP – The Group of Pictures setting allows you to modify the frame structure of the video stream. This setting changes the frequency of the I-frames that occur within the stream of P- frames. Increasing this number increases the number of P-frames between each I-frame, decreasing the file size of the stream, but increasing the risk of video decoding errors.
-
Page 25: Stream Urls / Rtsp
Stream URLs / RTSP It is possible to connect to OpenEye IP cameras using third party software like VLC media player. To connect some types of software will need to know the stream URL. All OpenEye IP cameras can deliver two RTSP streams. -
Page 26: Snapshot
Snapshot The Snapshot tab is used to configure the settings for timed or continual snapshots. To configure Snapshots: 1. Use the dropdowns to select the desired Resolution, Snapshot Interval, and the Number of Snapshots. 2. If you desire Scheduled Snapshots, select Schedule Snapshot Mode, and designate snapshot times. -
Page 27: Audio
Audio The Audio tab allows you to configure the audio encoding settings for your camera. To configure Audio setup: 1. Configure the Audio settings as desired. 2. Save Parameter Description Audio Input No audio data will be encoded when Off is selected. Access Mode Line/Mic Input Volume... -
Page 28: Region Of Interest (Roi)
Region of Interest (ROI) When Region of Interest (ROI) is enabled, the system ensures the image quality for the ROI first if the bit rate is insufficient. To enable ROI: 1. Click on the Area box. 2. Arrange the ROI square as desired in the camera image. Click and drag to move the square and use the corner markers to expand the square. -
Page 29: Media Stream
Media Stream You can display the established media streams from a camera. You can also set the camera to transmit code streams by the UDP or TCP protocol to a specified IP address and port number. Note Changes to the media stream will take effect after the camera has been restarted. To configure media streams: 1. -
Page 30: Picture Settings
PICTURE SETTINGS Image The Image tab allows you to configure the setting for the camera image as seen in Live View. When adjusting your image settings, the changes will be saved automatically and will display in the camera image preview window. Image Enhancement Use the sliding scales to adjust the Image settings or set a numeric value in the value box. - Page 31 Exposure By default, the Exposure Mode is set to Automatic. Other options include Custom, Indoor 50hz, Indoor 60hz, and Manual. Using Custom or Manual allows you to manually configure the shutter and gain control. Parameter Description 1. Automatic: The camera automatically adjusts exposure according to the environment.
- Page 32 9. Center-Weighted Average Metering: Measure light mainly in the central part of images. 10. Evaluative Metering: Measure light in the customized area of images. 11. Face Metering: Adjust image quality in poor lighting conditions by controlling the brightness of captured face in Face scene. Note: You can set this parameter only when Exposure Mode is not set to Manual.
- Page 33 13. Global Mode: The camera adjusts IR illumination and exposure to achieve balanced image effects. Some areas might be overexposed if you select this option. This option is recommended if monitored range and image brightness are your first priority. 14. Overexposure Restrain: The camera adjusts IR illumination and exposure to avoid Control Mode regional overexposure.
- Page 34 Advanced Defog – Adjust the clarity of images captured in fog or haze conditions. 16. Use the Defog dropdown menu to turn Defog On or Off. 17. Slide the Defog Intensity bar to the desired position (1 is the minimum intensity and 9 is the maximum intensity).
-
Page 35: On-Screen Display
On-Screen Display Up to 4 on-screen displays (OSD) can be configured for the camera image. To add an On-Screen Display: 1. Select the position and content of the OSD. a. Position: Click the desired box in the Live View area. After the cursor shape is changed, click and hold the button to move the box to the desired position. -
Page 36: Privacy Mask
Privacy Mask Add a privacy mask to your camera image to hide desired areas from view. To add a privacy mask: 1. Click Add. 2. Click and drag the newly generated mask square to the desired location on the camera image. Arrange and resize the mask as needed. -
Page 37: Analytics
ANALYTICS Intrusion Detection Rule Settings 1. Check Intrusion Detection to enable. 2. In the Detection Rule area, click to add a new detection area. To delete a detection area, click 3. Drag the borders of the box to set the intended position and range. 4. - Page 38 Trigger Actions 1. Check the boxes to choose the actions that are triggered when a person or vehicle is detected. 2. Save Item Description With Send E-mail selected, the camera will automatically send snapshots to the specified E-mail addresses when a person or vehicle is detected. Send Email Note: Make sure you have completed E-Mail Recipient configuration before using this...
- Page 39 Plan 1. Click Armed or Unarmed and click the schedule to set when enabled Trigger Actions are effective. 2. Click Edit. 3. Set the start and end times during which Trigger Actions are effective. The time periods cannot overlap. The camera reports alarms during the specified period(s) only. 4.
-
Page 40: Line Crossing Detection
Line Crossing Detection Rule Settings 1. Check Line Crossing Detection to enable. 2. In the Detection Rule area, click to add a new detection area. To delete a detection area, click 3. Drag the line to set the intended position. 4. - Page 41 Trigger Actions 1. Check the boxes to choose the actions that are triggered when a person or vehicle is detected. 2. Save Item Description With Send E-mail selected, the camera will automatically send snapshots to the specified E-mail addresses when a person or vehicle is detected. Send Email Note: Make sure you have completed E-Mail Recipient configuration before using this...
- Page 42 Plan 1. Click Armed or Unarmed and click the schedule to set when enabled Trigger Actions are effective. 2. Click Edit. 3. Set the start and end times during which Trigger Actions are effective. The time periods cannot overlap. The camera reports alarms during the specified period(s) only. 4.
-
Page 43: Event Settings
EVENT SETTINGS Alarms Motion Detection Rule Settings - Motion detection is used to detect motion in a specified area during a period of time. The use of motion detection requires setting a detection area, detection sensitivity, object size, and history. When these requirements are met, the motion detection alarm will activate. - Page 44 Trigger Actions 1. Check the boxes to choose the actions that are triggered when a person or vehicle is detected. 2. Save Item Description With Upload to FTP selected, the camera will automatically upload snapshots to the specified FTP server when an alarm is triggered. Upload to FTP Note: Make sure you have completed FTP and Snapshot before using this function.
- Page 45 Plan 1. Click Armed or Unarmed and click the schedule to set when enabled Trigger Actions are effective. 2. Click Edit. 3. Set the start and end times during which Trigger Actions are effective. The time periods cannot overlap. The camera reports alarms during the specified period(s) only. 4.
-
Page 46: Storage Settings
STORAGE SETTINGS Storage OpenEye IP cameras include an integrated microSD™ card (Memory Card) slot that can be used to record video or images. The card slot is compatible with a microSD™ card up to 512GB. Note Formatting the microSD card causes the camera to restart... -
Page 47: Snapshot Download
Snapshot Download Use Export Images to download snapshots taken by the camera. Refresh the list to update Photo List or Delete to delete images from the selected folder. Recording Download Recording download page allows you to search a selected date range for video and snapshots recorded to the microSD card. -
Page 48: Security Settings
SECURITY SETTINGS User There are two types of users: Administrator – referred to as “admin” in this manual. The default name of the administrator is admin, which cannot be modified. Admin has full permission and can manage all users and devices. -
Page 49: Network Security
Network Security You can use the Network Security tab to set a secure channel for data transmission. To configure Network Security: 1. Enable HTTPS by selecting On. 2. Save Export Certificate Click Export to download a .crt file of your security certificate. RTSP and HTTP Authentication Use the Authentication dropdown menus to select the appropriate mode, and then click Save. -
Page 50: Watermark
Watermark Use the Video Watermark to encrypt the camera image and protect the video from being deleted or modified. 1. Select On to enable watermark, and input Watermark Content. 2. Save MAINTENANCE Time By default, the time setting Sync Mode will be set to Sync with NTP Server. Manually Setting or Synchronizing the System Time 1. -
Page 51: Maintenance
Maintenance Software Upgrade To update your camera software, click Browse, select the software file, click Open, and then click Upgrade. Note The software file must be a .zip file. Device Restart This will restart your camera. Config Management To import configurations that you have backed up, click Browse, select the configuration file, and then click Import. - Page 52 Network Diagnosis Configure a diagnostic capture of the camera network to export. 1. Select a NIC from the dropdown. 2. Select All for all IP Addresses and Ports, Specify to enter a specific Address or Port, or Filter to exclude specific IP Addresses and Ports. 3.
-
Page 53: Log
The camera’s log displays a searchable list of changes made to the system. 1. Set a Time range. 2. Narrow search by selecting a Main Type. 3. Click Query. 4. Export to download the result. 37746AC... - Page 54 All rights reserved. No part of this publication may be reproduced by any means without written permission from OpenEye. The information in this publication is believed to be accurate in all respects. However, OpenEye cannot assume responsibility for any consequences resulting from the use thereof.
Need help?
Do you have a question about the OE-C1016T2-S and is the answer not in the manual?
Questions and answers