Table of Contents
Advertisement
Quick Links
TRANSLATION OF THE ORIGINAL VERSION
Operating Manual
Slot Drilling and Mortising Machine
WOODPECKER LBM1-200
E-Mail:
LBM1-200
Machine Type:
WOOD
HOKUBEMA Maschinenbau GmbH
Graf-Stauffenberg-Kaserne, Binger Str. 28 | Halle 120
DE 72488 Sigmaringen | Tel. +49 07571 755-0
info@ichbinwoodpecker.de
PECKER
| Web:
https://www.ichbinwoodpecker.de
Advertisement
Table of Contents
Troubleshooting

Subscribe to Our Youtube Channel
Related Manuals for Woodpecker LBM1-200


Summary of Contents for Woodpecker LBM1-200
- Page 1 TRANSLATION OF THE ORIGINAL VERSION Operating Manual Slot Drilling and Mortising Machine WOODPECKER LBM1-200 LBM1-200 Machine Type: WOOD PECKER HOKUBEMA Maschinenbau GmbH Graf-Stauffenberg-Kaserne, Binger Str. 28 | Halle 120 DE 72488 Sigmaringen | Tel. +49 07571 755-0 E-Mail: info@ichbinwoodpecker.de | Web:...
- Page 2 Space for notes: BA_WP_LBM1-200_EN_02-23.docx...
- Page 3 HOKUBEMA Maschinenbau GmbH Graf-Stauffenberg-Kaserne Binger Straße 28 | Halle 120 DE 72488 Sigmaringen Tel.: +49 (0)7571-755-0 Fax: +49 (0)7571-755-222 Handover Certificate Machine type: Machine no.: Construction year: Customer address (location of the machine): Name: Street: Postcode/City: Phone: Fax: E-mail: Warranty: On the basis of our Terms and Conditions of Sale, Delivery and Payment of the respective current status, we assume a warranty of 12 months, calculated from the day of delivery, for material defects and defects of title in connection with the delivery for the above-mentioned machine.
- Page 4 Space for notes: BA_WP_LBM1-200_EN_02-23.docx...
- Page 5 HOKUBEMA Maschinenbau GmbH Graf-Stauffenberg-Kaserne Binger Straße 28 | Halle 120 DE 72488 Sigmaringen Tel.: +49 (0)7571-755-0 Fax: +49 (0)7571-755-222 Handover Certificate Machine type: Machine no.: Construction year: Customer address (location of the machine): Name: Street: Postcode/City: Phone: Fax: E-mail: Warranty: On the basis of our Terms and Conditions of Sale, Delivery and Payment of the respective current status, we assume a warranty of 12 months, calculated from the day of delivery, for material defects and defects of title in connection with the delivery for the above-mentioned machine.
-
Page 6: Table Of Contents
Table of Contents Liability and Warranty ............................ 9 Introduction ..............................10 Legal Notice ................................10 Figures .................................. 10 Symbols ................................ 10 General Symbols ..............................10 Symbols in Safety Instructions ..........................11 General ................................. 12 Structure ................................12 Standard Equipment ............................. 12 Options and Accessories ............................ - Page 7 Emission Levels ..............................24 6.2.1 Noise Information ................................24 6.2.2 Noise Emission Values ..............................24 Workplace Requirements ............................. 24 Installation and Connection.......................... 25 Check Delivery Conditions ............................ 25 Transport to the Installation Site .......................... 25 Machine Installation ............................. 25 Temporary Storage ............................... 26 Lashing in a Transport Vehicle ..........................
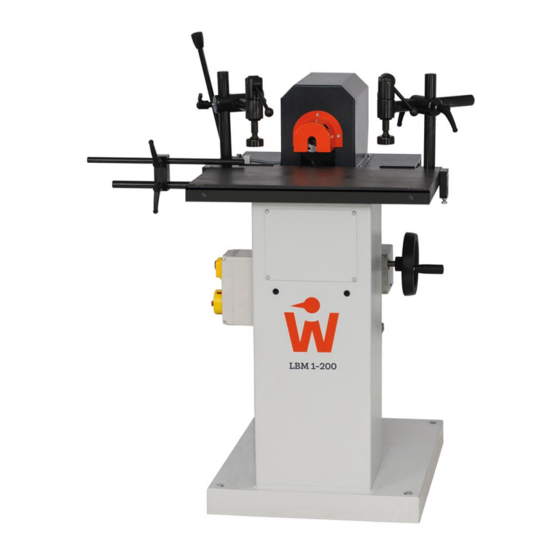
- Page 8 EU - Declaration of Conformity ..........................41 List of Figures Figure 1: Typical application ”mortising” ......................10 Figure 2: LBM1-200 ............................... 12 Figure 3: Name plate ............................. 23 Figure 4: Working area ............................24 Figure 5: Transport pallet ............................25 Figure 6: Main switch housing..........................
-
Page 9: Liability And Warranty
Liability and Warranty When purchasing a machine or additional component (hereinafter referred to as “machine”), the General Terms and Conditions of Sale and Delivery of HOKUBEMA Maschinenbau GmbH generally apply. These are provided to the purchaser or operator at the latest when the contract is concluded. ... -
Page 10: Introduction
Legal Notice WOODPECKER is a brand of Hokubema Maschinenbau GmbH. All contents of these operating instructions are subject to the rights of use and copyright of HOKUBEMA Maschinenbau GmbH. Any reproduction, modification, further use and publication in other electronic or printed media, as well as their online publication, requires the prior written consent of HOKUBEMA Maschinenbau GmbH. -
Page 11: Symbols In Safety Instructions
Symbols in Safety Instructions Symbol Safety Instruction General danger symbol, which requires the highest attention! Failure to observe may result in damage to the equipment, serious injury or even death. Warning of possible danger from forklift traffic! Non-observance may result in life-threatening injuries. Warning indicates a possible hazard under suspended loads! Non-observance may result in life-threatening injuries. -
Page 12: General
General The solidly constructed and high quality WOODPECKER slot drilling and mortising machine type LBM1-200 enables precise mortising and is equally suitable for use in joineries, workshops, training centres as well as in the do-it-yourself sector. The machine is equipped with a cross-support that can be moved in longitudinal and transverse direction. -
Page 13: Purpose Of The Slot Drilling And Mortising Machine
Purpose of the Slot Drilling and Mortising Machine The WOODPECKER LBM1-200 slot drilling and mortising machine is used exclusively for drilling holes and mor- tises up to Ø 20 mm in solid wood and wood-like board materials. Metallic materials as well as materials and woods containing metal parts must not be machined with the slot drilling machine. -
Page 14: Accident Prevention
Accident Prevention • To avoid accidents, the following rules must be observed for operation: • Prevent unauthorized persons from gaining access to the machine. • Keep unauthorized persons away from the danger areas. • Repeatedly inform present other persons about existing residual risks (refer to section 5.1.3). •... -
Page 15: Safety
5.1.1 Application Area and Intended Use • The slot drilling and mortising machine WOODPECKER LBM1-200 is used exclusively for drilling holes and mortises up to Ø 20 mm in solid wood and wood-like board materials. • Metallic materials or wood containing metal parts must not be machined with the slot drilling and mortising machine! •... -
Page 16: Residual Risks
5.1.3 Residual Risks The machine is built according to the latest state of the art and the recognised safety rules. Nevertheless, the use of the machine may cause danger to life and limb of the user or third parties or damage to the machine and other equipment. -
Page 17: Observe The Environmental Protection Regulations
5.1.4 Observe the Environmental Protection Regulations During all work with the machine, the environmental protection regulations, obligations and laws for waste avoidance and proper recycling and/or disposal applicable at the place of use must be observed. This applies in particular to installation, repair and maintenance work involving substances that could pollute the groundwater (e.g. -
Page 18: Safety Instructions For Specific Phases Of Operation
Safety Instructions for Specific Phases of Operation Defects and damage to the machine are to be reported immediately after detection. Any mode of operation that compromises safety is prohibited! Sufficient lighting around the machine must be ensured (at least 500 Lux)! 5.2.1 Permitted Operations Only the following operations are permitted with the slot drilling and mortising machine: ✓... -
Page 19: Normal Operation
5.2.4 Normal Operation Protective devices: Take measures to ensure that the machine can only be operated in a safe and functional condition. Only operate the machine when all guards and safety-related devices such as detachable guards, sound insulation etc. are present and in working order. Always work with all available protection devices! Workpiece check: Before machining, inspect the workpiece for foreign inclusions, knots, twists, objects and other irregularities. -
Page 20: Special Work Within The Scope Of Maintenance Work As Well As Troubleshooting In The Workflow
5.2.5 Special work within the Scope of Maintenance Work as well as Troubleshooting in the Workflow Observe maintenance and inspection activities prescribed in the operating manual! These activities, as well as all other repair work, may only be carried out by qualified personnel! For all work concerning operation, production adjustment, conversion or setting of the machine and its safety-related equipment as well as maintenance and repair, observe switch-on and switch-off procedures according to the operating manual and instructions for maintenance work! -
Page 21: Construction-Related Safety Equipment
Construction-related Safety Equipment • The drill spindle is protected by a fixed guard. An integrated clamping opening ensures permanent access for tool change with the spanner. • The eccentric clamping devices supplied as well as the mitre fence ensure optimum fixing of the workpiece on the table top. -
Page 22: Hazardous Areas
Hazardous Areas Due to their design, slot drilling and mortising machines can be used for a wide range of tasks. Exact right-angled holes or the precise slotting of grooves can be precisely realised. With regard to occupational safety, the main hazards are the mostly freely rotating drilling bit and inadequate clamping of the workpiece on the table top. -
Page 23: Machine Data
Machine Data Technical Specifications Machine type WOODPECKER LBM1-200 Weight: max. 245 mm Drilling length: max. 205 mm Height setting: 150 mm via handwheel and scale Westcott drill chuck: 0 - 20 mm clamping capacity Table height: 870 mm Table top size:... -
Page 24: Emission Levels
Emission Levels 6.2.1 Noise Information The values given are emission levels and therefore do not necessarily represent safe workplace values. Alt- hough there is a correlation between emission and immission levels, it cannot be reliably deduced whether ad- ditional precautionary measures are necessary or not. Factors that may affect the current immission level at the workplace include the duration of exposure, the na- ture of the workspace, other noise sources, etc., e.g. -
Page 25: Installation And Connection
Installation and Connection Check Delivery Conditions Check the consignment for completeness and possible transport damage. In case of transport damage, please keep the packaging and inform the shipping company and the manufacturer immediately! Later complaints can- not be accepted. Transport to the Installation Site The machine is delivered on a transport pallet and is bolted to the pallet floor. -
Page 26: Temporary Storage
Temporary Storage If the machine is not put into operation immediately after delivery, it must be stored carefully in a protected place. Carefully cover the entire machine so that neither dust nor moisture can penetrate. The bare, non-surface-treated parts are provided with a preservative. This must be checked regularly for effec- tiveness and renewed if necessary. -
Page 27: Electrical Connection
Electrical Connection The connection must be carried out by an authorized electrician in accordance with the valid local EVU, VDE and EN regulations! Turn main switch to “” before connecting. Please observe the specified nominal voltage 400 VAC / 50 Hz (3 phases / N / PE)! The supply cable is inserted through the cable gland on the underside of the main switch housing. -
Page 28: Components And Controls
Components and Controls Figure 7: Components and controls Description Description Main switch (lockable) Drive motor housing Switching unit drilling spindle ON/OFF Drilling length limitation (rear) Mitre fence Drilling depth limitation (lateral) Stop rod for serial production Holder for stop rod (4) Movement handle for the drill unit Handwheel + scale for height setting Eccentric clamping device... -
Page 29: Mounting And Preparation
Mounting and Preparation Mounting work may only be carried out by trained specialist personnel. Before the machine can be put into operation, the supplied components must be mounted, which (depending on the type of transport) have not yet been attached to the machine. The procedure is described in detail in the following sections. -
Page 30: Fitting The Mitre Fence
10.4 Fitting the Mitre Fence • If not yet fitted at the state of delivery, the sup- port rail (T) for the mitre fence must be screwed to the table top. For this purpose, there are three threaded holes (M) on the front side. •... -
Page 31: Adjustment And Operation
Adjustment and Operation 12.1 Clamping and Replacing a Drilling Bit With the Westcott drill chuck installed in the slot drilling machine, drilling bits with a diameter of 0 to 20 mm can be clamped. For this purpose, the guard does not have to be removed. •... -
Page 32: Operating The Mitre Fence
12.4 Operating the Mitre Fence First mount the mitre fence to the front of the machine table (see section 10.4). • To move the complete fence transversely to any po- sition, open the clamping lever (K) on the underside. Then tighten the lever (K) again. -
Page 33: Tilting The Drilling Unit
12.7 Tilting the Drilling Unit The drilling unit of the machine can be adjusted to any angle within the range ± 45°. Increased risk of injury from tipping when nuts (M) are loosened due to the heavy weight of the drilling unit! Hold the drilling unit firmly with the tilting lever (H) as soon as the nuts are loosened and use only the tilting lever (H) for the setting. -
Page 34: Mortising
12.9 Mortising The drilling of a mortise is carried out according to the sequence shown in Figure 21: Figure 21: Mortising sequence Figure 22: Drilling out a mortise 1. After the pre-settings (see 12.2) a hole is drilled into the workpiece to the set depth at the start and end position (see distance “D”) of the two drill length stops (M) shown in ... -
Page 35: Dowel Indexing Device (Option)
Dowel Indexing Device (Option) 13.1 Fitting the Dowel Indexing Device Figure 23: Fitting the dowel indexing device Figure 24: Mounting holes on the rear • Fit the mounting bracket (W) of the indexing barrel (D) into the threaded holes on the drill table using the Allen screws (S) supplied (see ... -
Page 36: Troubleshooting
Troubleshooting Proceed systematically when searching for the cause of a malfunction. If you are unable to find the fault or to remedy the malfunction, contact our customer service department (phone number: 0049 7571 / 755 - 0). Before you call us, please follow these steps: •... -
Page 37: Maintenance And Inspection
Maintenance and Inspection Before carrying out any maintenance and inspection work, chapter 5 “Safety” must be read carefully and observed! Breakdowns caused by inadequate or improper maintenance can result in very high repair costs and long ma- chine downtimes. Regular maintenance is therefore essential. Switch off the machine during all maintenance and repair work and secure it against being switched on again unexpectedly! Lock the main switch with a padlock! Due to the different operating conditions, it is not possible to determine in advance how often a wear check,... -
Page 38: Checking The Safety Labels
15.3 Checking the Safety Labels • Check regularly that all safety labels on the machine are present and in good legible condition. • The safety labels must be completely present and always clearly legible. This applies especially to the safety instructions. 15.4 Readjusting the Guide Play of the Cross-support The play between the guide rods and the guide rollers of the cross-support can become misaligned when the machine is used for a long time. -
Page 39: Options And Accessories
Article Description Art. No. Motor with two speeds 2.4 kW / 3.3 PS, instead of standard motor LBM1-200-002 Dowel Indexing Device engageable, available pitches 16 / 22 / 25 / 32 mm LBM1-200-003 6-piece mortising bit Ø 6, 8, 10, 12, 14, 16 mm,... -
Page 40: Disassembly And Scrapping
Disassembly and Scrapping When dismantling and scrapping the machine, the current EU regulations or the respective regulations and laws of the country of operation, which are prescribed for proper dismantling and disposal, must be observed. The aim is to dismantle the machine and its various materials and components properly, to recycle all possible parts and to dispose of non-recyclable components in the most environmentally friendly way. -
Page 41: Eu - Declaration Of Conformity
+49 (0) 7571 / 755 - 222 hereby declares that the manufactured machine WOOD PECKER SLOT DRILLING & MORTISING MACHINE TYP LBM1-200 Machine-No.: ......Year of manufacture: ..... in the version provided complies with the following directives: - Machinery Directive 2006/42/EG - EMC Directive 2014/30/EU Mr.
Need help?
Do you have a question about the LBM1-200 and is the answer not in the manual?
Questions and answers