Table of Contents
Advertisement
Advertisement
Table of Contents

Related Manuals for Woodpecker Endo Smart


Summary of Contents for Woodpecker Endo Smart
- Page 1 Endo Smart Endo Motor INSTRUCTION MANUAL...
-
Page 2: Table Of Contents
Contents 1 Product introduction ................1 2 Installation ..................... 5 3 Function and operation of product ............7 4 Operation instruction ................8 5 Troubleshooting .................. 1 3 6 Cleaning and Sterilization ..............1 4 7 Storage, maintenance and transportation ........... 1 8 8 Environmental protection .............. -
Page 3: Product Introduction
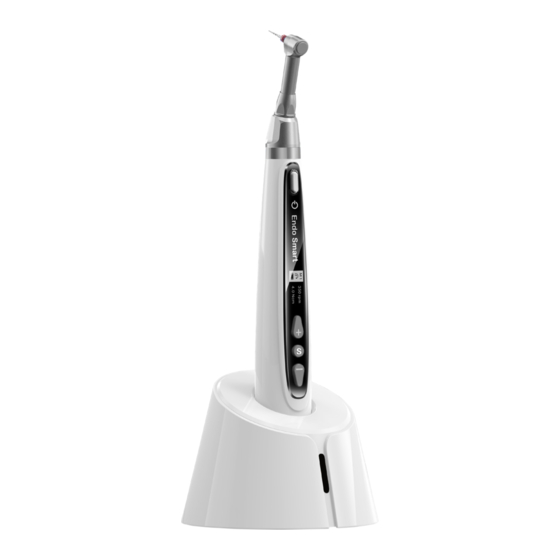
Ultrasurgery, Endo Motor, etc. 1 Product introduction 1.1 Product description Endo Smart is mainly used in Endodontic treatment. During root canal preparation procedure, it is used to mold and clean the root canal. Features: a) Adopt real-time feedback technology and dynamic torque control, effectively preventing needle breakage. - Page 4 1.4 Performance and composition The device is composed of charging base, handpiece, contra-angle, and power adapter, etc. The version of software is displayed on the OLED screen when starting 1.5 Contraindication Patients with implanted pacemakers (or other electrical equipment) who are warned not to use household appliances such as electric razors, hair dryers, etc.
- Page 5 operation. 1.6.2 This device should be operated by professional and qualified dentist in qualified hospital or clinic. 1.6.3 Do not directly or indirectly place this device near heat source. Operate and store this device in reliable environment. 1.6.4 This device requires special precautions regarding electromagnetic compatibility (EMC) and must be in strict accordance with the EMC information for installation and use.
- Page 6 specifications of file manufacturer. 1.6.15 The Continuous Rotation Mode matches continuous rotating files; the Reciprocating Motion Mode matches reciprocating files (i.e. WAVE ONE); the Reverse Rotation Mode is adopted to pick the continuous rotating files out while the file accidentally gets stuck in the root canal.
-
Page 7: Installation
Output: DC5V/1A 1.8.3 Torque: 0.6Ncm-5.0Ncm(6mNm ~ 50mNm) 1.8.4 Rotate speed: 100rpm~1000rpm 1.9 Environment parameters 1.9.1 Environment temperature: +5℃ ~ +40℃ 1.9.2 Relative humidity: 30% ~ 75% 1.9.3 Atmospheric pressure: 70kPa ~ 106kPa 2 Installation 2.1 Basic accessories of product Motor handpiece Contra-angle Charging base Lubricator... - Page 8 (Model: CA001) 2.2.2 Before the first use and after treatments, please clean and disinfect contra-angle with disinfectant of neutral PH value. After disinfection, lubricate it with specific cleaning oil. Finally, sterilize it under high temperature and high pressure (134℃, 2.0bar ~ 2.3bar (0.20MPa ~ 0.23MPa)).
-
Page 9: Function And Operation Of Product
2.4 Installation and removal of file 2.4.1 Installation of file Before starting the device, plug the file into the hole of contra-angle head. While plugging, slightly screw the file with one hand, and press the push cover of contra-angle with another hand. Warnings After plugging the file into contra-angle, let go the hand on push cover to assure that the file cannot be taken out. -
Page 10: Operation Instruction
a) Customized program sequence number 1-9, totally 9 programs. b) Operation mode c) Battery consumption d) Set speed e ) Set torque 4 Operation instruction 4.1 Starting and Stopping 4.1.1 Starting and stopping of handpiece a) Under the power off state of handpiece, press “ON/OFF” key, and then the handpiece will enter Standby mode. - Page 11 In setting interface, it will automatically back to Standby interface after 5s without operation. Press “ON/OFF” key to directly enter operating interface. a) Speed setting In the Speed Setting Interface, press “+” to increase speed, press “-” to decrease speed, and long press to fast increase or fast decrease speed. b) Torque setting In the Torque Setting Interface, press “+”...
- Page 12 appear. Five more seconds later, it will switch to Standby Interface. 4.5 Power-off In Standby Interface, the handpiece would automatically shut down after 3 minutes without any button-pressing operation. The handpiece will also automatically shut down while it is put into the charging base. In Standby Interface, long press setting key “S”, and then long press Adjusting key “+”, finally the device will automatically shut down 2s later.
- Page 13 Rotation Mode. And the file would return to normal continuous rotation mode when the load is below the preset torque value again. a) Clockwise rotation Load value is lower than preset torque value b) Counterclockwise rotation Load value is higher than preset torque value c) Clockwise rotation Load value is lower than preset torque value again Note...
- Page 14 the handpiece is normally charged. After the handpiece is fully charged, those three yellow LED lights would be on. Cautions The front of the handpiece must be inserted in the same direction as the front of the charging base. Otherwise it may cause charging failure as a result of induction failure.
-
Page 15: Troubleshooting
5 Troubleshooting Failure Possible cause Solutions There is continuous beep The continuous beep Stop the handpiece and sounds after starting the sound is indicating that the change the operating handpiece. handpiece is under reverse mode to Continuous rotation state. Rotation Mode. Contra-angle calibration Calibration failure caused Clean the contra-angle,... -
Page 16: Cleaning And Sterilization
Failure Possible cause Solutions The time of endurance Battery capacity Please contact becomes shorter after becomes smaller. local distributor or charging. manufacturer. The continuously Incorrect specification Choose Reverse rotating file is stuck at setting. Rotation Mode, start the root canal. Too high load torque of the handpiece, and take file. - Page 17 approved by VAH/DGHM-listing, CE marking, FDA and Health Canada. 6.2.9 To sterilize the endodontic files, refer to the manufacturer's instructions for use. 6.2.10 The contra-angle needs to be lubricated after cleaning but before sterilization. 6.3 Step-by-Step Procedure Operation Operating Mode Warning Preparation Remove the contra-...
- Page 18 Automated Put the contra-angle - Avoid any contact between Cleaning into the washer the contra-angle and any with washer- disinfector (Ao value instruments, kits, supports or disinfector >3000 or, at least 5 container. min at 90°C/194°F) - Follow instructions and observe concentrations given by the manufacturer (see also general recommendations).
- Page 19 Sterilization Steam sterilization - Use only autoclaves that are at 134°C, 2.0bar- matching the requirements of 2.3bar(0.20Mpa- EN 13060, EN 285. 0.23MPa), for 4 - Use a validated sterilization minutes. procedure according to ISO 17665. - Respect the maintenance procedure of the autoclave device given by the manufacturer.
-
Page 20: Storage, Maintenance And Transportation
7 Storage, maintenance and transportation 7.1 Storage 7.1.1 This equipment should be stored in a room where the relative humidity is 10% ~ 93%, atmospheric pressure is 70kPa to106kPa, and the temperature is -20°C ~ +55°C. 7.1.2 Avoid the storage in a too hot condition. High temperature will shorten the life of electronic components, damage battery, reshape or melt some plastic. -
Page 21: Symbol Instruction
card, we will repair this equipment free of charge if there are quality problems. Please refer to the warranty card for the warranty period. 10 Symbol instruction CE marked product serial number Date of manufacture Manufacturer Ty p e B F a p p l i e d Class Ⅱ... -
Page 22: Emc-Declaration Of Comformity
Guidance and manufacturer’s declaration - electromagnetic emissions The model Endo Smart is intended for use in the electromagnetic environment specified below. The customer or the user of the model Endo Smart should assure that it is used in such an environment. - Page 23 Guidance & Declaration — electromagnetic immunity The model Endo Smart is intended for use in the electromagnetic environment specified below. The customer or the user of the model Endo Smart should assure that It is used in such an environment.
- Page 24 Guidance & Declaration - Electromagnetic immunity The model Endo Smart is intended for use in.the electromagnetic environment specified below. The customer or the user of the models Endo Smart should assure that it is used in such an environment. Immunity test IEC 60601...
- Page 25 Conducted RF 3 Vrms Portable and mobile RF lEC 61000-4-6 150 kHz to 80 communications equipment Conducted RF 3V/m should be used no closer to lEC 61000-4-6 6 Vrms any part of the models Endo Radiated RF Smart, including cables, than the lEC 61000-4-3 frequency recommended separation distance...
- Page 26 To assess the electromagnetic environment due to fixed RF transmitters, an electromagnetic site survey should be considered. If the measured field strength in the location in which the model Endo Smart is used exceeds the applicable RF compliance level above, the model Endo Smart should be observed to verify normal operation.
- Page 27 For transmitters rated at a maximum output power not listed above, the recommended separation distance d in meters (m) can be estimated using the equation applicable to the frequency of the transmitter, where P is the maximum output power rating of the transmitter in watts (W) accordable to the transmitter manufacturer.
- Page 28 ZMN/WI-09-429 V1.3 - 20181102...
Need help?
Do you have a question about the Endo Smart and is the answer not in the manual?
Questions and answers