
Subscribe to Our Youtube Channel
Related Manuals for Toro TEMPUS-AG-4G


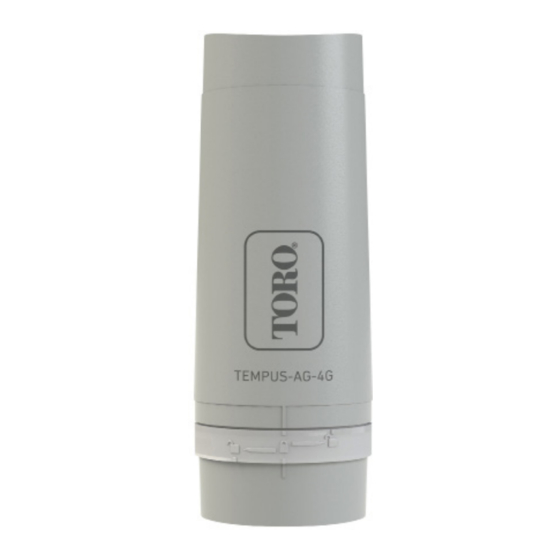
Summary of Contents for Toro TEMPUS-AG-4G
- Page 1 TEMPUS-AG-4G Base Station 4G-LoRa Gateway TEMPUS-AG-4G Base Station 4G-LoRa Gateway USER’S GUIDE...
-
Page 2: Specification
Once the SIM card has been actived, the TEMPUS-AG-4G will be operational and will be able to connect to the MyToroTempusAG platform. RECOMMENDATION During the first installation or if a long time has passed without having had a charge / discharge cycle, it is necessary to charge the TEMPUS-AG-4G battery, turned off, for 24 hours with 230 VAC power supply. -
Page 3: Installation
• Remove the upper and lower part of the TEMPUS-AG-4G by rotating them. • Insert the SIM card (If not already inserted) During the first installation it is necessary to charge the TEMPUS-AG-4G, turned off, for 24 hours with 230 VAC power supply. -
Page 4: Battery Connection
• Connect the 230Vac input of the transformer to the electrical network, protecting it with a 2A disconnecting circuit breaker. • Connect the 24Vdc output of the transformer to the TEMPUS-AG-4G per NEC installation guidelines with suitable sheathed cable / flexible cord applicable for the intended application and water tight conduit and fittings. - Page 5 1.3 Reassembly the TEMPUS-AG-4G • Adjust the length of the cable by pulling on it. • Fit the parts together by applying strong pressure and lock the 2 parts. • Adjust the cable. • Tighten the anti-traction. Close the TEMPUS-AG-4G...
-
Page 6: Create An Account
3. Once found, download the MyToroTempus App 4. Once installed, activate the Bluetooth® of your smartphone or tablet. CREATE AN ACCOUNT To use TEMPUS-AG-4G, you need to create a MyToroTempus account Launch MyToroTempus app from your smartphone and/or tablet. 2. Select the "Registration" button. -
Page 7: Led Status
• Red LED flashing twice: Hour alarm: The TEMPUS-AG-4G is out of date. If your product is connected to the MyToroTempusAG platform, the time update will be automatic. Otherwise connect to the TEMPUS-AG-4G from the MyToroTempus application and verify that the message "Synchronization OK" is displayed. -
Page 8: Pairing Devices
You must first have associated your TEMPUS-AG device with your account in MyToroTempus application before proceeding with the association of the device on your TEMPUS-AG-4G gateway. Refer to the user manual to associate it and then perform the following steps. -
Page 9: Test Connection
If the association of the devices is carried out before the final installation of the TEMPUS-AG-4G, this connection test can be used to validate the positioning of the latter by going to temporarily install the TEMPUS-AG-4G in its intended location then by going to position a device in each of the valve box to verify the good communication with the TEMPUS-AG-4G. -
Page 10: Radio Communication
LoRa COMMUNICATION PERIODICITY AND BATTERY STATUS ON TEMPUS-AG-4G Internet 220-240VAC Power supply or Solar panel 220-240VAC Power supply or Solar panel The LoRa radio Communication of the TEMPUS 3G/4G AG 4G gateway is corresponding to always activated. the subscription 24 communications... -
Page 11: Pole Mounting
• Prepare the 2 gateway supports with the 2 collars. • First fix the bracket on the pole. • Then fix the 2 TEMPUS-AG-4G supports on the pole with the 2 collars. • Do not fully tighten the collars to permit the positioning of the TEMPUS-AG-4G. -
Page 12: Solar Panel Connection
REFER TO THE INSTRUCTIONS PROVIDED IN THE BOX OF BINDINGS Solar Panel Connection During the first installation, before connecting the solar panel, it is necessary to charge the TEMPUS-AG-4G battery, ✔ turned off, for 24 hours with 230 VAC power supply. -
Page 13: Declaration Of Conformity
DECLARATION OF CONFORMITY The Toro Company (Toro AG), 1588 N. Marshall Avenue, El Cajon, CA, 92020-1523, USA declare that TEMPUS-AG-4G conform(s) to the following directives, standards and/or other normative documents: Safety standard IEC 62368-1 (2014) IEC 60950-22 (2016) EMC standards : ETSI/EN 301 489-1 v2.2.3... - Page 14 TEMPUS AG Controller CT 1-2-4-6 Stations TEMPUS-AG-CT Controller 1-2-4-6 Stations USER’S GUIDE...
-
Page 15: Specification
3. Once found, download the MyToroTempus App 4. Once installed, activate the Bluetooth® of your smartphone or tablet. CREATE AN ACCOUNT To use TEMPUS-AG-4G / CT / MS, you need to create your MyToroTempus account. Launch MyToroTempus app from your smartphone and/or tablet. - Page 16 TEMPUS-AG-4G/WF. We also advise to associate all your TEMPUS-AG Controller near the TEMPUS-AG-4G/WF before installing them in the valve boxes. 1. On the MyToroTempus mobile App, select your TEMPUS-AG-4G/WF, and enter pairing mode on the Information screen. (You must be connected via Bluetooth) 2.
- Page 17 Step 5 SET SENSOR Warning, by default there are no sensor configured. The TEMPUS-AG-CT has a + S - sensor input on which you can connect a rain sensor or a flow meter/water meter or pressure switch after cutting the blue wire. Once the sensor is connected, it is necessary to configure it in the application.
- Page 18 No, they are not lost, it is automatically saved. DECLARATION OF CONFORMITY The Toro Company (Toro AG), 1588 N. Marshall Avenue, El Cajon, CA, 92020-1523, USA declare that TEMPUS-AG-CT conform(s) to the following directives, standards and/or other normative documents: 172376-764709-B: FCC CFR 47 Part 15, Subpart B Transmissions HBCS Report # EMC_15028_2 Rev1: LoRa module 915- 927.5MHz The manufacturer declaration 10 Oct 2022, states that LoRa frequencies in use are: 920.2, 920.4,...
- Page 19 This device complies with FCC and ISED RF radiation exposure limits set forth for general population.This device must be installed to provide a separation distance of at least 20cm from all persons and must not be co-located or operating in conjunction with any other antenna or transmitter. TEMPUS-AG-CT ©2023 The Toro Company Toro Australia 53 Howards Road, Beverley, SA, 5009...
-
Page 20: Sensor Inputs
TEMPUS-AG-MS 1-4 Sensor inputs TEMPUS-AG-MS Multi sensor device 1-4 Inputs USER’S GUIDE... - Page 21 3. Once found, download the MyToroTempus App 4. Once installed, activate the Bluetooth® of your smartphone or tablet. CREATE AN ACCOUNT To use TEMPUS-AG-4G / CT / MS, you need to create your MyToroTempus account. Launch MyToroTempus app from your smartphone and/or tablet.
-
Page 22: Sensor Installation
We also advise to associate all your Tempus AG device near the TEMPUS-AG-4G/WF before installing them. 1. On the MyToroTempus mobile App, select your TEMPUS-AG-4G/WF and enter pairing mode on the Information screen. (You must be connected via Bluetooth) 2. - Page 23 WIRING Data 3,5V Temperature sensor input. PT100 Standard (not present in MS-1 model) Configurable acquisition inputs (3 inputs for MS-4 model, 1 input for MS-1 Note: The Tempus-AG-MS-1 has only 1 configurable acquisition input model) (three-wire entry) and it doesn't have temperature sensor input (two-wire •...
- Page 24 DECLARATION OF CONFORMITY The Toro Company (Toro AG), 1588 N. Marshall Avenue, El Cajon, CA, 92020-1523, USA declare that TEMPUS-AG-CT conform(s) to the following directives, standards and/or other normative documents: FCC CFR 47 Part 15, Subpart B Transmissions HBCS Report # EMC_15028_2 Rev1: LoRa module. The manufacturer declaration 10 Oct 2022, states that LoRa frequencies in use are: 920.2, 920.4, 920.6MHz; RF...
- Page 25 This device complies with FCC and ISED RF radiation exposure limits set forth for general population.This device must be installed to provide a separation distance of at least 20cm from all persons and must not be co-located or operating in conjunction with any other antenna or transmitter. TEMPUS-AG-MS ©2023 The Toro Company Toro Australia 53 Howards Road, Beverley, SA, 5009...
- Page 26 TEMPUS-AG-MV 1 Station TEMPUS-AG-MV Main valve or pump controller USER’S GUIDE...
- Page 27 It allows to manage a main valve or a pump (via a pump relay). It also offers a water meter input which can control the water flow from the same agriculture controllers network TEMPUS-AG-MV and transmit the information remotely through a TEMPUS-AG-4G / WF.
- Page 28 Step 1 APP DOWNLOAD 1. On your smartphone or tablet, go to the «App Store» or to the «Play Store». Developer 2. Search for «The Toro Company» in the search bar. The Toro Company 3. Once found, download the MyToroTempus App 4.
- Page 29 TEMPUS-AG-4G/WF. We also advise to associate all your TEMPUS-AG Controller near the TEMPUS-AG-4G/WF before installing them in the valve boxes. 1. On the MyToroTempus mobile App, select your TEMPUS-AG-4G/WF, and enter pairing mode on the Information screen. (You must be connected via Bluetooth) 2.
- Page 30 Rain sensor Pressure switch (AON = All or Nothing) +S- C P 1 +S- C P 1 Jumper wire Jumper wire Vanne 1 Valve 1 Vanne 1 Valve 1 Rain sensor Valve common wire Pressure switch Valve common wire Water meter +S- C P 1 Connect your + S - input to a water meter equipped with Jumper wire...
- Page 31 No, they are not lost, it is automatically saved. DECLARATION OF CONFORMITY The Toro Company (Toro AG), 1588 N. Marshall Avenue, El Cajon, CA, 92020-1523, USA declare that TEMPUS-AG-CT conform(s) to the following directives, standards and/or other normative documents: 172376-764709-B: FCC CFR 47 Part 15, Subpart B Transmissions HBCS Report # EMC_15028_2 Rev1: LoRa module 915- 927.5MHz The manufacturer declaration 10 Oct 2022, states that LoRa frequencies in use are: 920.2, 920.4,...
- Page 32 Operation is subject to the following two conditions : (1) this device may not cause interference, and (2) This device must accept any interference, including interference that may cause undesired operation of the device. TEMPUS-AG-MV ©2023 The Toro Company Toro Australia 53 Howards Road, Beverley, SA, 5009...
- Page 33 TEMPUS-AG-PR TEMPUS-AG-PR Pressure Sensor device 1 Input USER’S GUIDE...
- Page 34 3. Once found, download the MyToroTempus App 4. Once installed, activate the Bluetooth® of your smartphone or tablet. CREATE AN ACCOUNT To use TEMPUS-AG-4G / CT / MS, you need to create your MyToroTempus account. Launch MyToroTempus app from your smartphone and/or tablet.
- Page 35 We also advise to associate all your Tempus AG device near the TEMPUS-AG-4G/WF before installing them. 1. On the MyToroTempus mobile App, select your TEMPUS-AG-4G/WF and enter pairing mode on the Information screen. (You must be connected via Bluetooth) 2.
- Page 36 A A N N C C I I E E N N C C A A P P T T E E U U R R D D E E P P R R E E S S S S I I O O N N DECLARATION OF CONFORMITY The Toro Company (Toro AG), 1588 N. Marshall Avenue, El Cajon, CA, 92020-1523, USA declare that TEMPUS-AG-CT conform(s) to the following directives, standards L’ancien système permettant le contrôle de la pression est un manomètre à aiguille (voir photo ci‐...
- Page 37 This device complies with FCC and ISED RF radiation exposure limits set forth for general population.This device must be installed to provide a separation distance of at least 20cm from all persons and must not be co-located or operating in conjunction with any other antenna or transmitter. TEMPUS-AG-PR ©2023 The Toro Company Toro Australia 53 Howards Road, Beverley, SA, 5009...
Need help?
Do you have a question about the TEMPUS-AG-4G and is the answer not in the manual?
Questions and answers