Miele DGC 5080 XL Operating Instructions Manual
Steam combi oven
Hide thumbs
Also See for DGC 5080 XL:
- User instructions (64 pages) ,
- Installation instructions manual (36 pages)
Table of Contents

Related Manuals for Miele DGC 5080 XL


Summary of Contents for Miele DGC 5080 XL
- Page 1 Operating instructions Steam combi oven DGC 5080 XL en - GB To avoid the risk of accidents or damage to the appliance it is essential to read these instructions before it is installed and used for the first time. M.-Nr. 09 150 140...
-
Page 3: Table Of Contents
Contents Warning and safety instructions ........6 Caring for the environment . - Page 4 Miele{home ........
- Page 5 Miele{home ........
-
Page 6: Warning And Safety Instructions
Any other usage is not supported by the manufacturer and could be dangerous. Miele cannot be held liable for damage resulting from incorrect or improper use or operation of the appliance. This appliance is not intended for outdoor use. - Page 7 Warning and safety instructions Safety with children Technical safety Activate the system lock to ensure Before installation, check the steam that children cannot switch on the combi oven for visible signs of damage. appliance inadvertently. Do not install and use a damaged appliance.
- Page 8 If the connection cable is damaged, it must be replaced by a suitably qualified electrician with a special connection cable of type H 05 V V-F (pvc insulated), available from the Miele Spare Parts Department.
- Page 9 Warning and safety instructions Correct use When putting cooking containers into the steam combi oven or taking For added protection, it is advisable them out, take care not to spill the to use heat-resistant pot holders or contents. Avoid contact with hot steam, gloves when using the appliance.
- Page 10 Therefore, when cooking or reheating food such as poultry, it is particularly Accessories important that the food is completely Only use the Miele food probe cooked through. If in doubt, select a supplied with this appliance. If a longer cooking or reheating time.
-
Page 11: Caring For The Environment
Caring for the environment Disposal of the packing Disposing of your old material appliance The transport and protective packing Electrical and electronic appliances has been selected from materials which often contain materials which, if are environmentally friendly for handled or disposed of incorrectly, disposal, and should be recycled. -
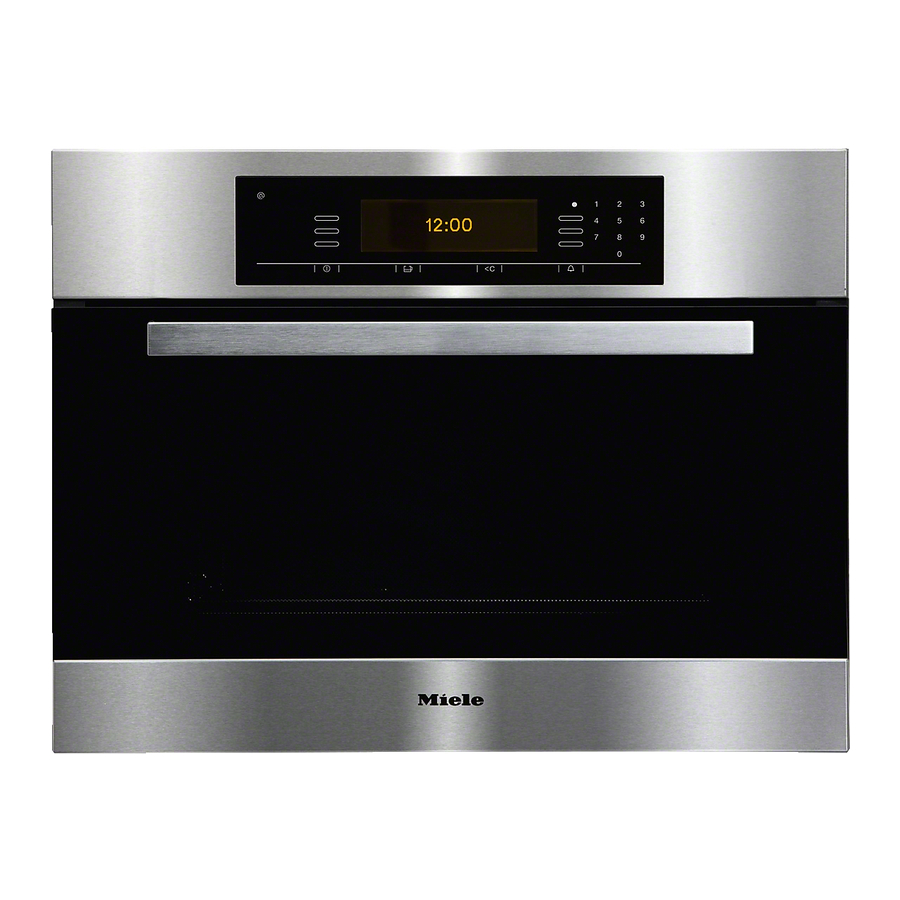
Page 12: Guide To The Appliance
Guide to the appliance Front view... - Page 13 Guide to the appliance a Control panel b Steam outlet c Door seal d Moisture sensor e Temperature sensor f Top heat / grill element g Receiver for the wireless food probe h Side runners with 3 shelf levels i Oven interior lighting j Drip channel k Drain l Grease filter...
-
Page 14: Accessories Supplied
Guide to the appliance Accessories supplied The accessories supplied with your appliance as well as a range of optional ones are available to order from Miele (see "Optional accessories"). DGGL 20 1 perforated container Gross capacity 2.4 litres / Usable capacity 1.8 litres... - Page 15 Guide to the appliance Food probe For precise cooking The food probe monitors the core temperature of the meat Descaling tablets For descaling the appliance...
-
Page 16: Display / Sensor Controls
Guide to the appliance Display / Sensor controls The appliance is operated via the display a and the electronic sensors b - g next to and below the display. These react to finger contact. An audible tone will sound each time a sensor is touched. You can adjust the volume in the Settings menu (see "Settings / Volume"). -
Page 17: Display
Guide to the appliance Display The following symbols will appear in the display in addition to the text: Symbol Meaning ß Appears beside an option or a prompt, e.g. "Continue" and is allocated to a sensor. You select the option you want by pressing the sensor beside the dot. A maximum of 3 options can be shown in the display. -
Page 18: Description Of The Functions
Description of the functions Control panel The water container, condensate container and food probe are located behind the control panel. The sensor is used to open and close the panel. It is fitted with a spring protection. If while opening or closing the panel encounters an obstruction then the process will be stopped. -
Page 19: Food Probe
Description of the functions Food probe The food probe measures the core temperature of the food. Using the food probe enables the cooking process to be monitored simply and reliably. Please refer to the separate "User instructions" booklet supplied with the oven for information on how to use the food probe. -
Page 20: Noises
Description of the functions Noises You can hear a humming sound when the appliance is switched on, during operation or after the appliance has been switched off. This sound does not indicate a malfunction or fault with the appliance. It occurs when water is being pumped in or out of the appliance. -
Page 21: Keeping Warm
Description of the functions Keeping warm with steam programmes If the steam combi oven is not switched off at the end of a cooking programme, the keeping warm function will activate automatically. The food will be kept warm at a temperature of 70 °C for a maximum of 15 minutes. -
Page 22: Before Using For The First Time
Before using for the first time Setting up the appliance for using for the first time The appliance will switch on automatically when it is connected to the electricity supply. A welcome screen will appear in the display and you will then be requested to select some basic settings which are needed to set up the appliance for using for the first time. - Page 23 After you have confirmed your selection with "OK", the display will show messages to tell you that: – your appliance is set up ready to take the Miele|home system. – your appliance has been successfully set up to use it for the first time.
-
Page 24: Cleaning For The First Time
Before using for the first time Please stick the extra data plate for the appliance supplied with this documentation in the space provided in the "After sales service, data plate" section of this booklet. A function test is carried out on the appliance at the factory. -
Page 25: Setting The Correct Boiling Point For Water
Before using for the first time Setting the correct boiling point for water Now run the Steam cooking / Universal (100 °C) programme for 15 minutes. Proceed as described in "Brief operating instructions". This procedure sets the correct boiling point for water for the altitude in your area and also flushes out the waterways. -
Page 26: Functions
Functions Please refer to the "User instructions" and "Automatic programmes" booklet supplied with your appliance for more information on the following functions as well as tips on how to use your steam combi oven. Recommended Temperature Function / Menu temperature range Combination mode Fan plus... - Page 27 Functions Recommended Temperature Function / Menu temperature range Bottom heat °C 190 °C 100 - 225 °F 375 °F 210 - 437 Use this setting towards the end of baking to brown the base of a cake, quiche or pizza. Full grill °C 225 °C 150 - 225...
- Page 28 Functions Recommended Temperature Function / Menu temperature range Defrost °C 60 °C 50 - 60 °F 140 °F 120 - 140 For the gentle defrosting of frozen food. Cake plus °C 150 °C 30 - 225 °F 302 °F 85 - 437 For cake mixtures Lighting Maintenance...
-
Page 29: Brief Operating Instructions
Brief operating instructions Before each cooking programme ensure that the filter in the bottom of the cooking compartment is fitted correctly. Otherwise coarse soiling could get into the drainage system and cause a blockage. Filling the water container Make sure you do not touch the appliance door handle while the panel is opening or closing. -
Page 30: Setting A Cooking Duration
Brief operating instructions Setting a cooking duration ^ Enter the duration with either + / - or the numerical keypad and confirm with "OK". If you are using the numerical keypad to enter the duration, you must enter both the hour and the minutes if the duration is more than 59 minutes. -
Page 31: After Use
Brief operating instructions After use ^ Remove and empty the water container and condensate container. Push them upwards slightly as you take them out of the appliance. ^ After each use, clean and dry the whole appliance as described in "Cleaning and care". Make sure the appliance is completely dry before closing the door. -
Page 32: Operation
Operation During operation Interrupting operation Operation is interrupted as soon as the door is opened. The heating will be switched off and the cooking duration remains stored in memory. Functions using steam: Steam will escape when the door is opened. Step back from the steam combi oven and wait until the steam has dissipated. -
Page 33: Saving Settings
Operation Saving settings You can save the settings for a cooking programme while it is in progress, so that you can call it up again from the User programmes menu at a later date. ^ Select "Change". ^ Touch one of the sensors next to the arrows until "Save as" appears. -
Page 34: Steam Cooking - Universal / Defrost
Operation Steam cooking - Universal / Defrost ^ Fill the water container with fresh tap water and push it into the appliance. ^ Place the food in the appliance. ^ Switch on the appliance. ^ Select the function you want. ^ Either confirm the recommended temperature with "OK"... -
Page 35: Combination Mode
Operation Combination mode The combination mode works by combining dry heat and steam. You can combine up to six cooking stages in a combination mode programme. You can set the temperature, moisture level and duration or core temperature for each cooking stage. - Page 36 Operation Cooking stage 2 ^ Select the function you want. ^ Set the temperature and confirm with "Continue". ^ Set the moisture level and confirm with "Continue". ^ Select "Duration" or "Set the core temperature". ^ Set the duration or core temperature and confirm with "Continue".
-
Page 37: Fan Plus / Conventional Heat / Top Heat / Bottom Heat / Grill / Fan Grill / Intensive Bake / Cake Plus
Operation Fan plus / Conventional heat / Top heat / Bottom heat / Grill / Fan grill / Intensive bake / Cake plus The grease filter on the back wall must be removed for baking. Exception: fit the grease filter in the back wall when baking open deep fresh fruit flans, e.g. -
Page 38: Menu Cooking (Cooking Whole Meals)
Operation Menu cooking (cooking whole meals) You can select up to three ingredients, e.g. fish, rice and vegetables. The steam combi oven uses cooking duration for its calculations so the food with the longest cooking duration must be placed in the oven first. The Menu cooking programme uses steam only which means that meat, for example, will not be browned. -
Page 39: Reheating
Operation After you have confirmed "Start menu cooking" the display will tell you which food to place in the oven. At the end of the heating-up phase, the display will remind you to place it in the oven. When the time for the next food type to be placed in the oven is reached, the display will show the food type. -
Page 40: User Programmes
Operation User programmes You can save up to 25 cooking programmes each with a maximum of 6 cooking stages under names of your choice in the User programmes menu. All the functions listed under "User programmes" can be combined with one another. If you have not yet created any user programmes, the display will only show the functions. - Page 41 Operation Create ^ Select "User programmes". ^ Select "Create". ^ Select the function you want. ^ Enter the settings as normal and confirm with "Continue". A summary will appear in the display. You can add a further cooking stage or after confirming "Continue" you can save the user programme.
-
Page 42: Additional Functions
Additional functions Start time / Finish You can delay the start of a programme. The appliance then switches on automatically. This is not possible with "Menu cooking" or "Maintenance". With "Start time" you enter the time of day at which you want the programme to start. -
Page 43: Minute Minder
Additional functions Minute minder The minute minder can be used to time any activity in the kitchen, e.g. boiling eggs. You can also use the minute minder when a programme is running, e.g. as a reminder to stir a dish or add seasoning etc. -
Page 44: Lighting
Additional functions Lighting You can set the lighting to stay on when the appliance is not being operated. This is useful for cleaning the appliance, for example. ^ Switch on the appliance with s. ^ Select "Lighting". System lock The system lock prevents the appliance being switched on unintentionally, by children for example. -
Page 45: Settings
Synchronise: If your appliance is fitted with a Miele|home communication module and you have signed it on to the Miele|home system, the time of day in the steam combi oven display will be automatically updated to match the time on the Miele|home system. -
Page 46: Change Main Menu
Settings Change main menu You can change the order in which options appear in the main menu. Up to three options can be placed at the beginning of the main menu (excluding Settings). You can also specify the position at which the option appears in the list. -
Page 47: Keeping Warm
Settings Keeping warm This function can be activated or deactivated. Automatic rinse This function can be activated or deactivated. Recommended temperatures If you frequently change a recommended temperature it may be a good idea to change it permanently. You can change the temperatures within the permitted range. -
Page 48: Safety
This option will only appear if the appliance is fitted with a communication module. Depending on whether your appliance is signed on to the Miele{home system or not, the following will appear in the display: Miele{home Installation The appliance has not been signed on to the Miele{home system. -
Page 49: Showroom Programme
Settings Showroom programme This programme is for dealers who want to demonstrate the appliance without the heater elements working. Do not activate this setting for domestic use! If you select and activate this option by mistake, you can deactivate it as follows: –... -
Page 50: Cleaning And Care
Cleaning and care Miele offer a range of branded cleaning and conditioning products. See “Optional accessories”. Do not use a steam cleaning appliance to clean this appliance. The steam could reach electrical components and cause a short circuit. Disconnect the appliance from the electricity supply and allow it to cool down to a safe temperature before cleaning. -
Page 51: Appliance Front
If this is not done, it might become impossible to remove and could cause the surface to alter or discolour. Clean the front using a damp Miele microfibre E-cloth or with a clean sponge and a solution of hot water and washing-up liquid. -
Page 52: Accessories
The cooking containers are dishwasher safe. Use a little vinegar to remove any bluish discolouration. You could also use the Miele ceramic and stainless steel hob cleaner (see "Optional accessories"). Rinse the containers thoroughly with clean water to remove any residual cleaning agent. -
Page 53: Grease Filter
The drain filter should be washed and dried after every use. Use vinegar to remove discolouration and limescale deposits. You could also use the Miele ceramic and stainless steel hob cleaner (see "Optional accessories"). Rinse the filter thoroughly with clean water after cleaning it to remove any residual cleaning agent. -
Page 54: Oven Interior
Cleaning and care Oven interior The oven interior is made from stainless steel which has been treated with a special type of enamelling called PerfectClean. Please refer to the section on "PerfectClean" for information on cleaning and care. To make cleaning easier you can remove the oven door and side runners. - Page 55 Clean the inside of the door and the door seal after every baking, grilling or roasting programme using a clean, damp Miele E-cloth or a clean sponge and a solution of washing-up liquid and hot water. Wipe dry with a soft cloth.
-
Page 56: Perfectclean
Cleaning and care PerfectClean The oven interior, side runners, universal tray and combi rack have a special PerfectClean enamel surface. The PerfectClean enamel has an iridescent appearance. PerfectClean surfaces have very good anti-stick properties and are easy to clean. However, it is very important to clean the surfaces each time the appliance is used. -
Page 57: Maintenance
Cleaning and care Maintenance Soak Stubborn soiling resulting from roasting can be soaked. ^ Allow the oven interior to cool down. ^ Remove all accessories and fill the water container with fresh tap water. ^ Select "Maintenance". ^ Select "Soak" and follow the instructions in the display. The soaking process takes approx. -
Page 58: Descaling
Cleaning and care Descaling To avoid damaging the appliance, only use Miele descaling tablets to descale it (see "Optional accessories"). Ensure that the descaling agent does not come into contact with the door handle or the metal control panel as this could cause marks. - Page 59 Cleaning and care The descaling process will begin after the last instruction has been confirmed with "OK". It is only possible to cancel the descaling process during the first minute. After that the process cannot be cancelled. Do not switch the appliance off during the descaling process.
-
Page 60: To Remove The Side Runners
Cleaning and care To remove the side runners ^ Remove the runners by first pulling them inwards a and then out from the back b. ^ To refit the runners, reverse the above procedure: first fit them into the back of the oven and then push them in at the sides. - Page 61 Cleaning and care ^ Press the locking clamps on both hinges to release them. Turn the locking clamps as far as they will go until they are at an angle. See illustration. Do not attempt to take the door off the hinge guides when it is in a horizontal position.
- Page 62 Cleaning and care To dismantle the door The door has seals on all sides to protect it. If, however, soiling has built up on the inside surfaces of the glass panes, the door can be dismantled in order to clean in between the panes.
- Page 63 Cleaning and care ^ Lift the inner pane gently and pull it out. ^ Then lift the middle pane gently and pull it out. Be careful not to dislodge the sealing strips when you do this. These sealing strips prevent the pane slipping when it is in its frame.
- Page 64 Cleaning and care ^ Insert the inner pane with the printed text facing downwards. Push the pane in as far as possible. Make sure that you do not dislodge the side seals when you do so. The seal must be positioned correctly to prevent any steam penetrating inside the door.
-
Page 65: Problem Solving Guide
If it still will not switch on, contact a qualified electrician or the Miele Service Department. Demo mode has Deactivate the demo mode been set and the (see "Settings / Showroom appliance does not programme"). - Page 66 Problem solving guide Problem Possible cause Remedy The fan can still be The appliance is fitted with This is not a fault. The fan heard after the a fan which removes steam switches off automatically appliance has been from the oven. The fan after a certain period of switched off.
- Page 67 Problem solving guide Problem Possible cause Remedy A whistling sound When the door is closed, the These noises are quite is heard when the pressure has to equalise, normal. which can cause a whistling appliance is switched on again. sound. This is not a fault. The interior lighting The lamp needs changing.
- Page 68 Problem solving guide Problem Possible cause Remedy F and a number appear in the display. F 10 The suction tube in the Connect it properly and make water container sure it is vertical: – is not fitted correctly – is not positioned vertically F 44 Communication fault...
- Page 69 Problem solving guide Problem Possible cause Remedy F 190 The water inlet valve is This fault can occur if the faulty. control panel is opened or shut during the water intake process. Confirm with "OK" and start operation. If the same message appears again, call the Ser- vice Department.
- Page 70 Problem solving guide Opening the panel by hand To close the panel by hand ^ Carefully open the appliance door. ^ Take hold of the panel at the top and bottom. ^ Carefully push the panel downwards. ^ Take hold of the panel at the top and bottom.
-
Page 71: Optional Accessories
Optional accessories Miele offer a comprehensive range of useful accessories as well as cleaning and conditioning products for your appliance. These can be ordered online at: or from Miele (see back cover for contact details) Cooking containers Perforated and solid cooking containers are available in a variety of sizes. - Page 72 Optional accessories DGGL 4 Perforated cooking container Gross capacity 4.0 litres / Usable capacity 3.1 litres 325 x 265 x 65 mm (W x D x H) DGGL 5 Perforated cooking container Gross capacity 2.5 litres / Usable capacity 2.0 litres 325 x 175 x 65 mm (W x D x H) DGGL 6 Perforated cooking container...
-
Page 73: Miscellaneous
Optional accessories DGGL 20 Perforated cooking container (supplied with the oven) Gross capacity 2.4 litres / Usable capacity 1.8 litres 450 x 190 x 40 mm (W x D x H) DGG 20 Solid cooking container (supplied with the oven) Gross capacity 2.4 litres / Usable capacity 1.8 litres 450 x 190 x 40 mm (W x D x H) DGD 1/3... - Page 74 Optional accessories Gourmet oven dishes Die-cast aluminium casserole dish with anti-stick surface and stainless steel lid. Fits directly into a shelf runner. Also suitable for using on the extended zone of a ceramic hob. Not suitable for use on induction or gas hobs. HUB 5000-M Depth 22 cm, maximum capacity approx.
-
Page 75: Cleaning And Care Products
Optional accessories Miele{home system See "Miele{home", or contact your supplier for more information. Cleaning and care products Miele descaling tablets 6 tablets For descaling the appliance Ceramic and stainless steel hob cleaner 250 ml Removes discolouration from cooking containers. E-cloth (microfibre cloth) -
Page 76: Miele{Home
Miele{home a Communication enabled appliances b Communication module c SuperVision master appliance d Power supply e Miele|home Gateway f (WLAN) Router Possible connections (optional) g PC, Notebook h iPod* or iPhone* i Connection with a domestic bus system display j Possible internet connection... - Page 77 Both of these are supplied with their own installation and operating instructions. Further information Further information about Miele|home, SuperVision and future options can be found on the Miele website and in the operating instructions of the individual Miele|home components, for example, the Miele|home Gateway.
-
Page 78: Electrical Connection
Electrical connection All electrical work should be carried out by a suitably qualified and competent person, in strict accordance with current local and national safety regulations (BS 7671 in the UK). Installation, repairs and other work by unqualified persons could be dangerous. The manufacturer cannot be held liable for unauthorised work. -
Page 79: Connection Cable
A damaged cable must be replaced with a special pvc insulated connection cable of type H 05 VV-F, available from Miele. It must be replaced by a Miele approved service technician. The connection data are quoted on the data plate. -
Page 80: Energy Efficiency Class
Energy efficiency class This appliance is rated energy efficiency class A in accordance with EN 50304. Tests were carried out using "Cake plus". -
Page 81: After Sales Service, Data Plate, Guarantee
Please note that telephone calls may be monitored and recorded to improve our service. When contacting Miele, please quote the model and serial number of your appliance, which are given on the data plate. N.B. A call-out charge will be applied for service visits where the problem could have been resolved as described in these instructions. - Page 84 Alteration rights reserved / 2811 M.-Nr. 09 150 140 / 01...
Need help?
Do you have a question about the DGC 5080 XL and is the answer not in the manual?
Questions and answers