Advertisement
Quick Links
Advertisement

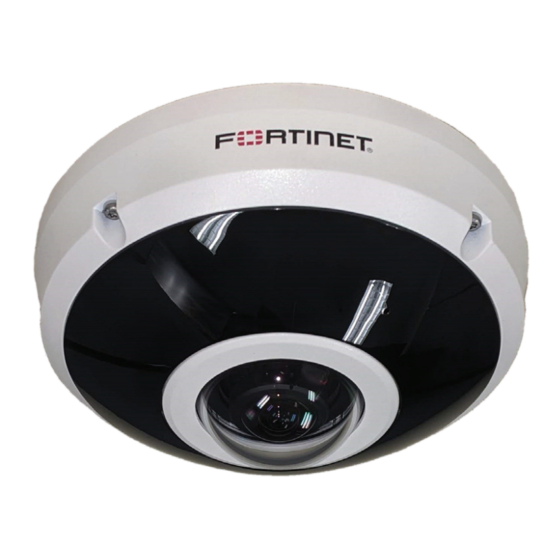
Summary of Contents for Fortinet FortiCam FE120B
- Page 1 FortiCam FE120B QuickStart Guide...
- Page 2 Fortinet. For absolute clarity, any such warranty will be limited to performance in the same ideal conditions as in Fortinet’s internal lab tests. Fortinet disclaims in full any covenants, representations, and guarantees pursuant hereto, whether express or implied.
-
Page 3: Table Of Contents
Table of Contents Package Contents Hardware Overview Hardware Installation Camera Connection Technical Specifications Register for Support Regulatory Notices Cautions and Warnings... -
Page 4: Package Contents
Package Contents • 1x FortiCamera • 1x torx screwdriver • 1x alignment sticker • 4x screws and 4x screw anchors • 1x waterproof grommet and Ethernet connector push tip • 1x replacement dry pack Page 4... -
Page 5: Hardware Overview
Hardware Overview The FortiCam FE120B supports a variety of junction boxes: Junction Boxes Pendant cap FCM-FE120B-PCP 14-11/16 square gang box 4” square and round box 4” octagon box 1” single gang box Cantex ¾” type FSE 2 Gang Page 5... -
Page 6: Hardware Installation
Hardware Installation Caution: Caution: Adequate grounding must be provided to the unit and the PoE injector, in compliance with your local electrical code or regulations. Note: Note: Avoid exposure to direct sunlight for outdoor installation for better image quality and longer service life. Important: Important: Only remove the protective wrap from the camera lens when the entire installation process is completed to avoid damage. - Page 7 Press the tabs on the side of the camera to separate the camera from the mounting plate. Mount the mounting plate using the included screws and plugs. Page 7...
- Page 8 Open the small hole in the grommet by pulling off the center tip. Remove the protective cap from the Ethernet cable and use the Ethernet connector push tip to push the Ethernet cable through the grommet, making sure the grommet membrane is folded outwards. Page 8...
- Page 9 Fit the grommet tightly into the camera body and connect the network cable. Replace the desiccant bag. Page 9...
- Page 10 Snap the camera onto the mounting plate. 10. Attach the camera’s cover and then fasten with the four provided screws. Page 10...
- Page 11 11. Remove the protective covering from the lens after installation. For more mounting options, such as pendant cap mounting for the FCM-FE120B-PCP, see the FE120B Mounting Guide. Page 11...
-
Page 12: Camera Connection
PoE switch. The camera gets its IP address from the DHCP server automatically. Go to the FortiRecorder web UI to configure the discovered camera. For details, see the FortiRecorder Administration Guide on http://docs.fortinet.com. To reset the camera to factory default To reset the camera to factory default Remove the camera cover. -
Page 13: Technical Specifications
Technical Specifications Camera Format Fisheye, Indoor/Outdoor, Vandal Sensor Type 12 Megapixel, 1/2.3” Progressive CMOS Iris F2.0, Fixed Focal Length f = 1.22mm View Angle Ceiling Mount: 360°; Wall Mount: 180°; Table Mount: 360° Minimum Illumination 0.01 Lux (Color)@F1.4, 0.005 Lux (B/W)@F2 Wide Dynamic Range Shutter WDR (>120dB) Network Interface... - Page 14 Image Resolution 30fps @ 2944x2944 (WDR off ) 20fps @ 2944x2944 (WDR on) 1920x1920 1024x1024 Local dewarp: Wall 30fps@ 2048x768 1280x480 Ceiling/table 30fps@ 2944x736 1920x480 Mounting Wall, Ceiling, Table, Pole, Drop tube, Junction box Dimensions Height x Width x Length 2.7 x 5.9 x 5.9’’...
-
Page 15: Register For Support
Register for Support Register your Fortinet product to receive: • Technical support • New product features • Protection from new threats Vous devez enregistrer le produit pour recevoir: • Support technique • Nouvelles fonctionnalitées du produit • Protection contre de nouvelles menaces La reistrazione ti permette di usufruire di: •... -
Page 16: Regulatory Notices
Regulatory Notices Federal Communication Commission (FCC) – USA This device complies with Part 15 of FCC Rules. Operation is subject to the following two conditions: (1) this device may not cause harmful interference, and (2) this device must accept any interference received; including interference that may cause undesired operation. This equipment has been tested and found to comply with the limits for a Class A digital device, pursuant to Part 15 of the FCC Rules. -
Page 17: Cautions And Warnings
Cautions and Warnings Environmental Specifications Refer to specific Product Model Data Sheet for Environmental Specifications (Operating Temperature, Storage Temperature, Humidity, and Altitude). Référez à la Fiche Technique de ce produit pour les caractéristiques environnementales (Température de fonctionnement, température de stockage, humidité et l’altitude). Safety Caution: This equipment is to be used in a Network Environment 0 per IECTR 62101.


Need help?
Do you have a question about the FortiCam FE120B and is the answer not in the manual?
Questions and answers