Table of Contents
Advertisement
Quick Links
Lemon 020-T
Lemon 030-T
Digital
Terrestrial Receiver
Lemon 020-T
Lemon 030-T
Manual
Detailed Table of Contents
1. Safety Precautions
2. Control elements and connections
3. Remote Control
4. Connecting and operating the receiver
5. Graphical User Interface (Menus)
6. Trouble-shooting
Technical data
Index (A-Z)
2
3
4
6
7
15
27
28
30
Advertisement
Table of Contents

Related Manuals for Lemon 020-T


Summary of Contents for Lemon 020-T
- Page 1 Lemon 020-T Lemon 030-T Manual Digital Detailed Table of Contents Terrestrial Receiver 1. Safety Precautions 2. Control elements and connections 3. Remote Control Lemon 020-T 4. Connecting and operating the receiver Lemon 030-T 5. Graphical User Interface (Menus) 6. Trouble-shooting...
-
Page 2: Table Of Contents
Table of Contents 1. Safety Precautions ......................2. Control elements and connections ................3. Remote Control ......................4. Connecting and operating the receiver ............... 4.1 Connections ..........................4.2 On/Off switch ........................... 4.3 Programme selection ......................4.4 Volume control/Mute switch ....................4.5 TV/Radio operation ........................ -
Page 3: Safety Precautions
1. Safety Precautions This set-top box has been manufactured in accordance with international safety standards. For your own safety, you should read the notes on safety precautions carefully, and take note of them, before operating your new receiver. For your own safety, please be sure to follow these safety precautions: Mains power supply: Connect the unit only to a mains power supply that has the following characteristics: 90-260 V AC, 50-60 Hz Connection to the TV set and video recorder: Here, too, the receiver must be disconnected from the... -
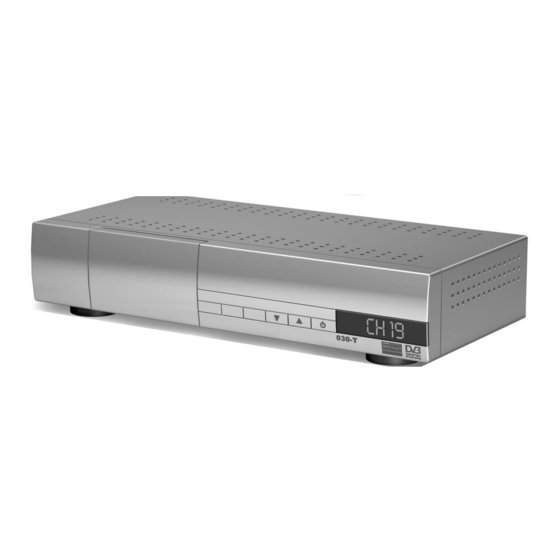
Page 4: Control Elements And Connections
2. Control elements and connections View of the front panel Lemon 020-T Lemon 030-T Control elements on the front panel Programme down key Decreases the programme counter Programme up key Increases the programme counter On/Off switch Switches the receiver on or off... - Page 5 View of the rear panel Lemon 020-T Lemon 030-T DESIGNED AND DEVELOPED IN CE Made in PRC 11 12 Connections on the rear panel VCR Scart Facility for connecting a video recorder TV Scart For connection to TV set Audio outputs (L/R)
-
Page 6: Remote Control
3. Remote Control Function keys on the remote control unit The keys on the remote control can be divided into groups: -Function keys that directly control a specific function (these keys have a double functionality according to the situation) - Navigation keys - Numeric keys 0-9 Mute On/Off (Standby) -
Page 7: Connecting And Operating The Receiver
4. Connecting and operating the receiver 4.1 Connections Your digital receiver provides a multitude of possible connections to other appliances. Here we list the most important options available. 4.1.1 Connection to the terrestrial antenna The digital receiver is connected directly to a terrestrial antenna on the ANTENNA IN connector (see page 4, connections on the rear panel item 8). -
Page 8: On/Off Switch
4.2 On/Off switch Press the On/Off key (Standby), on the remote control. The receiver is now ready for operation. Now switch on your TV set, if it is not already switched on, and set it to an “AV“ programme slot (“EXT“,”AV“, “External Source“, or similar). When you have completed connecting the digital receiver to the terrestrial antenna and the TV set, as well as to the video recorder and hi-fi system where applicable, you can now proceed to switch it on for the first time. -
Page 9: Volume Control/Mute Switch
4.4 Volume control/ Mute switch The sound volume can be adjusted either using the remote control of your TV set, or the remote control of your receiver (in the latter case, use the left/right Menu directional keys). Use the “Mute“ key to switch off the sound temporarily. Press the key again to return to the same sound level as set before. - Page 10 4.6.1 Switching between various audio channels (Soundtracks) Select the ”Soundtrack” list after pressing the “Audio - Subtitles A/B“ key. Use the Up/Down Select Language directional keys to select a specific audio channel, and confirm by pressing the “OK/Menu“ key. Audio Subtitle Press “Exit“...
-
Page 11: Zapping
4.7 Zapping Various options exist to facilitate quick switching between programmes: Menu a) Fast zapping using the directional keys Up/Down: Press the directional Up key to select the next higher programme in the programme list, or the directional key Down to select the next lower programme in the list. b) Direct selection using the numeric keys: As soon as a numeric key has been pressed, a small display field appears on screen, which will display the selected channel number. -
Page 12: Programme Lists
4.9 Programme lists In order to help you find your way around the several hundred TV and radio programmes available, the programmes found during a Channel Search are stored in memory, and organized as Programme Lists, with separate lists for TV and radio programmes. In order to view these lists, press either the “TV“... -
Page 13: Teletext/Videotext
4.10 Teletext/Videotext The teletext or videotext feature familiar from analogue TV programmes is also broadcast on many digital TV programmes. The digital receiver is equipped to decode the teletext/video text signal internally, and to display it on the TV screen. Press the ”Teletext“... -
Page 14: Calling Up The Main Menu
4.11 Calling up the Main Menu 17:00 9-4-02 M a i n M e n u M a i n M e n u The receiver can now be individually configured, using the on-screen menu display. Installation / Setup Press the ”OK/Menu“ key on the remote control. The Sleep Timer Main Menu will be displayed. -
Page 15: Graphical User Interface (Menus)
5. Graphical User Interface ( Menus) The various on-screen displays available are described in detail in this chapter. The actual on-screen displays generated by your receiver may differ slightly from those shown here, as continuous updates of the software may alter the appearance or even the structure of the displays. - Page 16 5.1.2 Audio/Video Settings Audio / Video Settings Scart connectors: Depending on the type of TV Scart Screen Video/Audio Test Picture appliance connected, you can determine the type size of signal to be fed to the Scart connectors marked CVBS 4 : 3 Video ”TV“.
- Page 17 5.1.4 Channel Search 17:00 9-4-02 Channel Search Channel Search New digital TV and radio programmes are added sometimes, or existing programmes change their frequency. If you wish to receive these programmes, A u t o T u n e you must allocate them to specific programme slots in M a n u a l T u n e the programme list, and store them in memory.
- Page 18 5.1.5 System information 17:00 9-4-02 System Information In the last category of the Installation/Setup display System Information you will find detailed technical information relating to the programme currently being viewed, as well as to T u n e r I n f o r m a t i o n the hardware and software of the receiver.
-
Page 19: Parental Lock Function
5.2 Parental Lock function 17:00 9-4-02 Parental Lock Parental Lock Not all TV and radio programmes are suitable for listeners or viewers of all age groups. The receiver therefore provides an active parental control (lock) Activate PIN Code function, allowing you to block specific menu settings or individual channels by means of a four-digit security Change PIN Code code (PIN or Personal Identification Number). - Page 20 5.2.3 Blocking individual channels 17:00 As soon as a PIN code has been activated in the 9-4-02 Parental Lock Parental Lock “Parental lock“ display, it is automatically possible to also block access to individual programmes. In the Disable PIN Code display “Parental lock“...
-
Page 21: Sleep-Timer
5.3 Sleep-Timer 17:00 9-4-02 M a i n M e n u You can use the Sleep timer to specify a time (e.g. at M a i n M e n u night) at which the receiver is to switch over into standby mode. -
Page 22: Creating A List Of Personal Favourite Programmes
5.4 Creating a list of personal favourite Choose List programmes List Name Many viewers prefer to use the huge list of TV and radio programmes found in an automatic channel search in Main TV list a particular order, or to use the list only selectively. Main Radio list Your receiver provides the facility of creating up to height separate lists of personal favourite programmes. -
Page 23: Sorting Channels
Press the red function key to lock/unlock a channel (Parental lock) Press the yellow function key to move a channel , when the function is activated, follow then the instructions appearing in the Information text field at the bottom of the screen. To move a block, press a second time the yellow function key and follow the instructions. -
Page 24: Electronic Programme Guide (Epg)
5.6 Electronic Programme Guide (EPG) Almost all TV and radio broadcasters utilize the DVB SI (Service Information) data stream to provide programme information relating to their programmes. These can be interpreted by the receiver, and displayed on screen in an internally generated electronic programme guide (EPG). 5.6.1 Current Programme (Now/Next) Each time you switch channels, there is a brief message on screen, displaying the programme... - Page 25 Channel Guide 17:00 EPG: 3set The receiver is able to display the programmes 9-4-02 available on the channel currently selected, indicating the current programme as well as all Start Name Duration following programmes. 10 : 05 Titanic 00:45 11 ; 15 News 00:29 This allows you quickly to obtain an overview of all...
-
Page 26: Reset (Returning To Default Settings)
5.7. Reset (returning to default setting) 17:00 9-4-02 M a i n M e n u M a i n M e n u A reset function is provided to return the receiver to all the default settings programmed at the factory before delivery to the customer. -
Page 27: Trouble-Shooting
Forgot PIN Incorrect code entered Contact your nearest Lemon retailer If it becomes necessary to return the receiver for repairs, please use the original packaging if possible, and return the receiver complete with all accessories. -
Page 28: Technical Data
Technical Data OSD / Languages OSD with guiding menu for installation and information, 3 color variations available, selectable transparency, 8 favorite lists of 100 channels, Parental Control – Delete and Edit function, Now next EPG, 10 Languages: English, French, German, Dutch, Russian, Polish, Turkish, Spanish, Italian, Finnish. - Page 29 CPU & Memory Channels Main Processor 32 Bits host CPU @ 81 MHz Flash Memory 1 Mbyte SDRAM 8 Mbytes Channel Scan Automated for all DVB programs, semi-automated or manual Channel Memories 999 channels, Last Station Memory Remote Control Operating Frequency / Distance 36 kHz, / 10 Meters max Code RC 5 Power Supply...
-
Page 30: Index (A-Z 40)
Index (A-Z) Antenna 7 Audio/Video Settings 16 Audio channels 9 Batteries 6 Blocking individual channels 23 Channel Search 17 Connections 4, 7 Control elements 4 Default Settings 26 Display Settings 14, 15 Display Transparency 15 Electronic Programme Guide (EPG) 24 Favourite programmes 22 Frequency 17, 18, 19 Function keys 6... - Page 31 Radio operation 9 Remote Control 6 Reminder event 24 Reset 26 Safety Precautions 3 Sleep-Timer 22 Software Update 19 Software Version 19 Sorting channels 23 Switch off 8 System Information 18 Technical Data 28 Teletext/Videotext 13 Test image 15 Time/Date 16 Trouble-shooting 27 Tuner 20 TV set 7...
Need help?
Do you have a question about the 020-T and is the answer not in the manual?
Questions and answers