
Related Manuals for Daewoo DAV100A


Summary of Contents for Daewoo DAV100A
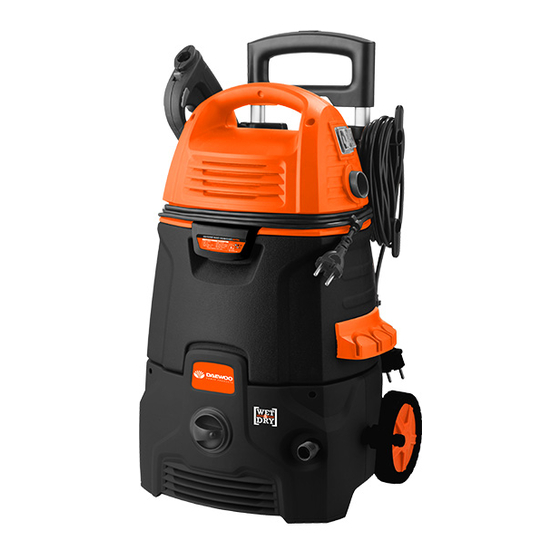
- Page 1 DAV100A High pressure washer USER'S MANUAL www.daewoopowerproducts.com Manufactured under license of Daewoo International Corporation, Korea...
-
Page 2: Table Of Contents
INDEX 1. SAFETY INSTRUCTIONS ........................2 2. SAFETY REGULATION ..........................3 3. SCOPE OF APPLICATION ........................3 4. OPERATION RULES ..........................4 5. MAINTENANCE ............................. 10 6. TECHNICAL CHARACTERISTICS ......................11 7. PROBLEM SOLVING ..........................12 8. CAUTIONS ............................. 13 9. -
Page 3: Safety Instructions
1. SAFETY INSTRUCTIONS Read all instructions before using this appliance and save the operation instruction WARNING: when using this product, basic precaution should always be followed, including the following: 1. Don’t use the appliance without reading the instruction sheet. 2. Risk of injection or injury do not direct discharge stream at persons. 3. -
Page 4: Safety Regulation
2. SAFETY REGULATION 1. Read each contents of the manual before operation: abide this safety regulation to avoid any accident or damage. 2. Check to make sure that the cleaner’s voltage conforms to that of the power source (220-240VAC), and bearing current intensity of the transmission line is not less than 10A. According to this regulation, the protective switch must be installed. -
Page 5: Operation Rules
UNIDERECTIONAL VALVE SPRAY GUN PLUNGER OUTLET VALVE SINGLE PHASE SERIES MOTOR ADJUST OVERFLOW SAFETY VALVE INLET VALVE WORKING PRINCIPLE 2. Structural characteristics 2.1 As the sing-phase series motor chosen to directly drive the 3-cylinder axial plunger pump by the gear, the cleaner is compact in structure, small in size, artistic in appearance and reliable in operation. ... - Page 6 AC220-240V FIRSTLY INSTALL BIG WHEELS 先将大滚轮装上 Figure 1 1.6 Insert the wheel cap into the big wheel by pointing the hook of wheel cap at the hole of wheel. (see figure 2 and 3) Figure 2...
- Page 7 POINTING THE HOOK OF WHEEL CAP AT THE SLOT OF BIG WHEEL 轮盖钩子对上滚轮沟槽 Figure 3 1.7 Revolve the inlet male connector into the inlet hose, and tighten! Figure 4 1.8 Insert the holster into the accessory stand after machine steady. AC220-240V Figure 5...
- Page 8 2. OPERATION 2.1 Spray units connect: Push the lance into the trigger grip handle and twist it to secure it as shown in figures 2. TWIST PUSH Figure 6 2.2 Insert quick connector of high pressure hose into lance, lock the latch, and wear the high pressure sheath.
- Page 9 2.2 Insert pump-end connector of high pressure hose into aluminum exit and fasten the nut. Figure 9 RUNING WATER INSERT INTO THE ALUMINUM CONNECTOR 2.4 Turn the water supply on, making sure that the tap is fully open. See figure 5 WARNING: The temperature of the incoming water must not exceed 40°C.
- Page 10 English 3.2 The lance has an adjustable nozzle to allow you to vary the width of the spray. To adjust the width of the spray, move the nozzle as shown in figure 4. Figure 11 TWIST WIDE SPRAY TWIST TIGHT BEAM 3.3 Insert the detergent hose into the detergent connector to the place.
-
Page 11: Maintenance
3.5 During the cleaning, the distance between the nozzle and the object surface to be cleaned should not be too far, normally not more than 30cm, as the impulsive force decreases with the increase of the distance. *. You should hold the gun trigger firmly during the cleaning. *. -
Page 12: Technical Characteristics
6. TECHNICAL CHARACTERISTICS HIGH PRESSURE WASHER Voltage/Frequency: 230V ~ 50 Hz Power: 1700 W Rated pressure: 9 mPa Max pressure: 13 mPa Rated flow: 300 L/h Max flow: 400 L/h Pressure hose: 5 m Cable length: 5 m VACUUM CLEANER Power: 700 W Vacuum tank capacity: 10 L Vacuum hose: 1.2 m... -
Page 13: Problem Solving
7. PROBLEM SOLVING Problem Causes Solution 1. No power or condition in 1. Check the power source Appliance doesn’t the socket is not good. and the socket to see if the work. 2. The connector cable is plug connected. damaged. 2. -
Page 14: Cautions
VACUUM 8. CAUTIONS Please don’t use the vacuum cleaner to absorb cement, gypsum powder, wall powder and other fine granules, otherwise it is possible to arouse the filter of the vacuum cleaner being blocked, the motor being burnt and other defects; in case the above-mentioned fine granules are excessively absorbed, please clean the filter timely. -
Page 15: Names Of Components
9. NAMES OF COMPONENTS POWER CORD & PLUG HANDLE SWITCH HOSE VACUUN PORT FLAT ABSORBING TUBE CAR NOZZLE DUSTING BRUSH LOCKING CATCH BUCKET BODY... -
Page 16: Assembling Of Components
10. ASSEMBLING OF COMPONENTS Connection of hose with vacuum cleaner • Grasp the hose and insert it into the vacuum port or blow port of the vacuum cleaner with force, so as to ensure a firm connection • If you want to take the hose off, it is necessary to hold the handle of the vacuum cleaner with one hand,then houd the hose with another one to pull it out. -
Page 17: Operation Method
Table of Component Configuration for Different Work Modes Configuration Filter Hose Flat Dusting absorbing Nozzle Brush Work mode Dry type carpet and √ √ √ √ floor dust absorbing Dry type furniture dust √ √ √ √ absorbing Absorbing √ √... -
Page 18: Cleaning And Replacing Components
Wet absorbing • Before absorbing accumulated water or pools of water, configure the vacuum cleaner in wet absorbing status in conformity to the Table of Component Configuration. (It is possible to assemble the flat absor- bing tube in conformity to requirements) •... -
Page 19: Problems Solving
14. PROBLEMS SOLVING • Before entrusting a repair department with the repair, please check the following points first. Possible causes Removal methods Motor Check the power plug to see if it is firmly ert the plug in the socket again. refuses inserted in the socket. -
Page 20: Technical Parameters And Circuit Diagram
15. TECHNICAL PARAMETERS AND CIRCUIT DIAGRAM Technical Parameters Kind of power supply Single phase AC Rated input power 700 W power supply (According to 110 - 220 V Rated voltage Maximum vacuum degree 16 KPa each country standars) 50 - 60 Hz Rated power Noise 90 dB (A) -
Page 21: Warranty
WARRANTY CARD Product model Date of sale Company Serial number Client's signature Username The product is in good conditions and fully complete. Read and agree the terms of the warranty. GUARANTEE The warranty period starts from the date of sale of the products and covers 1 year for all power products. During the warranty period, free failures caused due to the use of poor-quality materials in the production and manufacturer workmanship admitted fault are removed. - Page 22 Manufactured under license of Daewoo International Corporation, Korea...
Need help?
Do you have a question about the DAV100A and is the answer not in the manual?
Questions and answers