Table of Contents
Advertisement
Quick Links
Advertisement
Table of Contents

Related Manuals for Target TGT-CU8-002


Summary of Contents for Target TGT-CU8-002
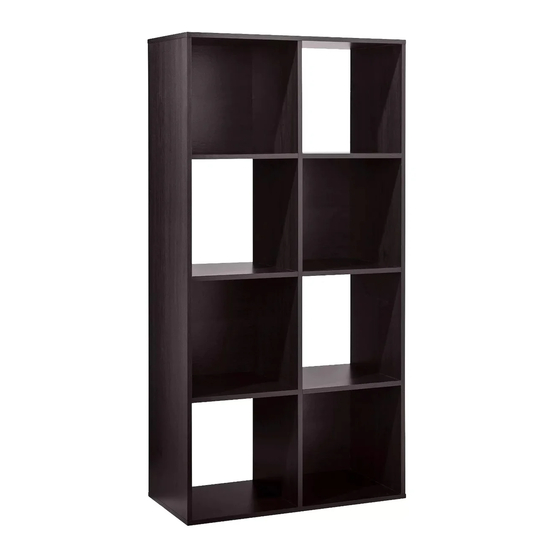
- Page 1 # 002 - 11 - 0589 (WHITE) style # TGT - CU8 - 001. dpci # 002 - 11 - 0616 (ESPRESSO) assembly instructions © 2018 Target. The Bullseye Design is a trademark of Target Brands, Inc. All rights reserved.
-
Page 2: Before You Begin
Good luck—though we’re confident you won’t need it. before you begin Check for damaged or missing parts. Call 1-855-698-4846(Target 855 - MYTGTHOME) to order missing supplies. Use the carton as a working surface to prevent product damage during assembly. - Page 3 hardware (H4) x 18 (H1) x 6 (H2) x 12 (H5) x 48 (H3) x 18 assembly screw nail long dowel 6 x 60 mm. short dowel 6 x 30 mm. screw cover #DIRECTRA NO.5 x 38 (H7) x 1 (H6) x 1 (H8) x 1 wall screw L-bracket screw...
-
Page 4: Exploded Diagram
Exploded diagram ITEM DESCRIPTION DESCRIPTION side panel ฺ B top/bottom panel horizontal divider vertical divider back panel Optional Assembly... -
Page 5: Safety Precautions
safety precautions warning This unit contains small parts which could be a choking hazard for small children. Children should be under adult supervision at all times or serious injury could occur. Always unload unit prior to moving the unit. The weight of personal belongings can cause the unit to become unstable and either tip or collapse. Serious bodily injury and/or damage to personal belongings may occur. -
Page 6: Helpful Hints
helpful hints We recommend you protect your work surface during assembly to prevent scratching or damage to table tops, wood floors, etc. finished edge unfinished edge Unfinished edges are shaded in gray. It is important to understand how finished edges go together. Take a moment to lay out all the wood pieces and note the finished and unfinished (raw wood) edges. -
Page 7: Installing L-Bracket
installing L-bracket There are several "key points" to L-bracket installation. Please review the drawings and comments at right as well as the assembly steps provided. Wall Install short end against wall/wall stud. stud; long end against unit. All units must be fastened to the wall. Short Always mount L-bracket to a wall-stud. - Page 8 Step 1. Insert dowel into vertical dividers. (D) shot dowel 6 x 30 mm. shot dowel 6 x 30 mm. long dowel 6 x 60 mm. long dowel 6 x 60 mm. (H1) x 6 (H2) x 6 (H4) x 3 long dowel 6 x 60 mm.
- Page 9 step 2. Place horizontal divider (C) over vertical dividers(D) long dowel 6 x 60 mm. Place horizontal divider (C) over vertical dividers(D). The long dowel should go through all the holes on horizontal dividers (C)
- Page 10 step 3. Insert dowel into vertical dividers. (D) shot dowel 6 x 30 mm. (H2) x 6 short dowel 6 x 30 mm. Insert six shot dowels (H2) into vertical dividers. (D) Place three vertical dividers (D) onto horizontal divider (C)
- Page 11 step 4. Assembly top/bottom shelf (H4) x 3 assembly screw #DIRECTRA NO.5 x 38 Align dowels to holes in underside of top panel (B), and place into position. Secure top vertical dividers with three screws (H4) through top/bottom shelf (B)
- Page 12 step 5. Assembly side panel (H4) x 12 assembly screw #DIRECTRA NO.5 x 38 1. Attach other side panel (A) with 12 screws (H4) as shown.
- Page 13 step 6. Secure unit inplace and assemble back panel (H5) x 48 (H3) x 18 nail screw cover Lay unit so finished (front) edges face down (unfinished edges will face up). Push screw covers (H3) onto all screw heads. Position the back panels (E) in a staggered patten as shown. Nail (H5) the back panels (E) into place, being careful to not angle the nails.
- Page 14 step 7. Install the L-bracket Optional vertical mounting: Single unit only; can not stack. wall stud top panel top panel wall stud (H7) x 1 (H8) x 1 wall screw (H6) x 1 Stacking - horizontal mounting only! L-bracket screw #6 x1.1/2"...
- Page 15 weight capacity/care instructions warning This unit has been designed for the weight shown. Exceeding this recommended weight could result in excessive "sagging" of the top or shelves. Extreme overloading can cause failure of the unit and possible injury. Care Instructions: Dust with a clean, lint-free dry cloth.
- Page 16 ©...
Need help?
Do you have a question about the TGT-CU8-002 and is the answer not in the manual?
Questions and answers